The Voracious Resurgence | |
| Prime Weapons • Ultimate Weapons • Ultimate Augments • Abjurations iL119 • JSE Necks • Divergence Augments • Escutcheons | |
| Reforged Armor Artifact: +1 • iL109 • iL119/+2/+3 Relic: +1/+2 • iL109 • iL119/+2/+3 Empyrean: +1/+2 • iL109 • iL119/+2/+3 |
Guides • Crafting • Trusts • Apex Monsters |
Category:Ambuscade: Difference between revisions
FaeQueenCory (talk | contribs) |
|||
| (47 intermediate revisions by 7 users not shown) | |||
| Line 1: | Line 1: | ||
{{disambiguation|Ambuscade Rewards}} |
|||
{{Category Page Header |
{{Category Page Header |
||
|Image=Ambuscade.jpg |
|Image=Ambuscade.jpg |
||
| Line 8: | Line 9: | ||
Ambuscade has a variety of difficulty levels, so everyone from seasoned veterans to those just starting out should find a challenge equal to their needs. With [[:Category:Ambuscade Rewards|varying rewards]] to match.<br /> |
Ambuscade has a variety of difficulty levels, so everyone from seasoned veterans to those just starting out should find a challenge equal to their needs. With [[:Category:Ambuscade Rewards|varying rewards]] to match.<br /> |
||
Those wishing to tackle the strongest foes are advised to select “Very Difficult” and be prepared for a valiant struggle! |
Those wishing to tackle the strongest foes are advised to select “Very Difficult” and be prepared for a valiant struggle!<br /> |
||
Latent effects from [[Legion Rewards]] denoted with "[[Legion]]:" are active in Ambuscade.<sup>[http://www.playonline.com/ff11us/polnews/news25715.shtml]</sup> |
|||
}} |
}} |
||
==Getting Started== |
==Getting Started== |
||
| Line 61: | Line 64: | ||
<div style="width 100%; max-width: 1200px; text-align: center;">[[File:15165.jpg| |
<div style="width 100%; max-width: 1200px; text-align: center;">[[File:15165.jpg|525px|link=:Category:Ambuscade#Intense_Ambuscade.28Primer_Volume_One.29]]</div> |
||
==Battle Information== |
==Battle Information== |
||
| Line 159: | Line 162: | ||
===Intense Ambuscade <small>([[Ambuscade Primer Volume One|Vol. One]])</small>=== |
===Intense Ambuscade <small>([[Ambuscade Primer Volume One|Vol. One]])</small>=== |
||
{{:Ambuscade_Archive |
|||
{{Ambuscade Monthly Battle |
|||
|transcludesection=Antica <!-- Change the relevant Beastman type here to change to the correct month's type --> |
|||
|Volume=1 |
|||
|Month=April |
|||
|Year=2019 |
|||
|Family=Meeble |
|||
|Boss=[[Bozzetto Breadwinner]] |
|||
|Boss Job=MNK |
|||
|VD Mobs= |
|||
|VD Notes= |
|||
|D Mobs= |
|||
|D Notes= |
|||
|N Mobs= |
|||
|N Notes= |
|||
|E Mobs= |
|||
|E Notes= |
|||
|VE Mobs= |
|||
|VE Notes=No Housemaker; no Urchins |
|||
|Boss Notes= |
|||
*Summons 1-4 '''Bozzetto Urchins''' throughout the fight. |
|||
:*'''Bozzetto Urchins''' roam the arena invisible, any Warble move summons them to appear and fight. |
|||
:*Urchins may be slept with Lullaby, but wake up every time the '''Breadwinner''' uses a Warble move. |
|||
:*Urchins will use Hundred Fists and Souleater. |
|||
:*Urchins are strong, but have low HP. |
|||
::*A good couple of weapon skills or a skillchain should be enough to take one out. |
|||
*If {{color|wind|silenced}}, the Breadwinner's range on any '''Warble''' will be reduced, thus calling in less, if any Urchins at all. |
|||
:*A WHM or GEO with [[Magic Accuracy Food|magic accuracy food]]/equipment is suggested for landing {{color|wind|silence}}. |
|||
'''Uses the following moves''': |
|||
*'''{{icon|SP}} Hundred Fists''': Used once at 50% health. Lasts 45 seconds. |
|||
:*'''Gale Spikes''': Become active during Hundred Fists. Reflects damage dealt and inflicts a potent Slow effect on any player who physically strikes the Breadwinner. The Slow effect is strong enough to overwite Haste II. |
|||
*'''Thrashing Assault''': {{physical}} 4-hit damage and Defense Down. Absorbed by 4 shadows. |
|||
*'''Drill Claw''': {{physical}} Damage, Max HP Down (-75%), and Max TP Down. |
|||
*'''Fire Meeble Warble''': AoE {{fire}} {{magical}} Damage, {{color|fire|Plague}} (-50 MP and -300 TP/tic), and {{color|fire|Burn}} (-50 HP/tic). |
|||
*'''Blizzard Meeble Warble''': AoE {{ice}} {{magical}} Damage, {{color|ice|Paralysis}}, and {{color|ice|Frost}} (-50 HP/tic). |
|||
*'''Aero Meeble Warble''': AoE {{wind}} {{magical}} Damage, {{color|wind|Silence}}, and {{color|wind|Choke}} (-50 HP/tic). |
|||
*'''Stone Meeble Warble''': AoE {{earth}} {{magical}} Damage, {{color|earth|Petrification}}, and {{color|earth|Rasp}} (-50 HP/tic). |
|||
*'''Thunder Meeble Warble''': AoE {{thunder}} {{magical}}, Stunning them and inflicting Shock (-50 HP/tic). |
|||
*'''Water Meeble Warble''': AoE {{water}} {{magical}} Damage, {{color|water|poison}}, and {{color|water|Drown}} (-50 HP/tic). |
|||
:*Any [[Barspell]] of the corresponding element will negate the damage and status effects of the Warbles. |
|||
|Notes= |
|||
*At some point in the battle, '''Bozetto Housemaker''' will run out from it's corner/edge, TP move the party, and run back (usually well below 50% on '''Bozzetto Breadwinner''') |
|||
:*Uses '''Earthshaker''', which deals 1000 damage per player hit by it (this includes pets, trusts, and luopans). |
|||
::*Ignores Damage Mitigation. Has a significant charge time so possible for everyone to escape its AoE. Also has an additional effect of paralyze (very potent). |
|||
:*Once the Housemaker comes out, it will continue to run back in at semi-regular intervals to use the same move. Speculated to be triggered based on time elapsed. {{Verification}} |
|||
:*'''Bozzetto Housemaker''' will always target whoever has the most "hate" from casting AoE Barspells. Have one person be dedicated to using Barspells on the party (best if done by support job using /WHM and not the main healer). Make sure to have someone else use Paralyna on this person because the paralyze effect is very potent. |
|||
*'''Bozzetto Urchins''' may be slept, but will wake up every time any ''Warble'' is used by the '''Bozzetto Breadwinner'''. |
|||
|Very Difficult Strat= |
|||
WHM/SCH, BRD, GEO (Idris), RUN/SAM, DDx2 |
|||
*BRD Buffs, depending on what they have, honor and advancing march, mad x2. |
|||
*GEO uses Frailty and torpor depending on the DDs acc. Better to go with fury and two mads than torpor and min x1. Entrust wilt. |
|||
*RUN tanks and DDs, save battuta for the fisting. |
|||
:*If your RUN is not putting out damage then you should likely do D instead of VD. |
|||
:*A buffed and geared [[Epeolatry]] RUN should have little trouble doing 20k+ Resolutions. |
|||
*DDs fight. SCing is cool, but it is also fine to just go nuts and not care. |
|||
*WHM or GEO should keep the mob {{color|green|silenced}}. This is important to limit any adds. |
|||
** Esuna or more conveniently Yagrush the debuffs off. |
|||
*The WHM needs to run if/when the Housekeeper runs at them. Damage from it's TP move is 1k per player in range. |
|||
**The target can't outrange it, but you can prevent it from hitting anyone else. |
|||
*Fight with well geared players should take ~4-6 minutes. |
|||
|Difficult Strat= |
|||
WHM/RDM, BRD/WHM, GEO/WHM, PLD/WAR, DD X2 |
|||
* BRD uses Nightingale/Troubadour: March, Minuet X2, Madrigal for melees and Ballad X3 for mages at the start of the battle |
|||
** Once the battle begins, BRD's duty switches to Barspell duty. |
|||
** When Housekeeper comes, BRD runs away from the group. |
|||
* WHM should use Afflatus Misery and Esuna if Warble happens to land. Erase to remove HP-down from Drill Claw |
|||
* GEO should help w/ Erase and cures after GEO spells are done. Paralyna on BRD after Earthshaker? goes off. Good M.Acc set needed to silence the Breadwinner. |
|||
* Fight near the starting location; everyone should be in range of barspells. |
|||
* Only one person should focus on barspells so that your party knows who the Housekeeper will target. |
|||
* If Urchins pop, kill them fast; BRD should obviously sleep them. |
|||
* Sub-duties for BRD and GEO can be swapped if one person happens to be more capable of catching the Warble move better than the other. |
|||
|Normal Strat= |
|||
|Easy Strat= |
|||
|Very Easy Strat= |
|||
|Key Item Locations= |
|||
*Elshimo Uplands → Den of Rancor → HP#1 Worms are through the gate, up the hill, and mixed in amongst the Tonberry. |
|||
*Home Point to Adoulin, and use the Waypoint to "Go to an Enigmatic Device" → Cirdas Caverns. Once you warp in, the right fork in the road leads to 5 worms. |
|||
*Home Point to a Survival Guide, such as Northern San'd Oria #1 (E) or Ru'Lude Gardens #2 (M) and take it to Gustaberg → Zeruhn Mines. Turn the corner left, and walk to the worms. |
|||
*Escha - Zi'Tah #3, run NE towards (G-8), worms turn from too weak to incredibly easy prey. |
|||
}} |
}} |
||
===Ambuscade ([[Ambuscade Primer Volume Two|Vol. Two]])=== |
===Ambuscade ([[Ambuscade Primer Volume Two|Vol. Two]])=== |
||
{{:Ambuscade_Archive |
|||
{{Ambuscade Monthly Battle |
|||
|transcludesection=Slime<!-- Change the relevant monster type here to change to the correct month's type; check the archive in case the wrong template shows up as duplicated enemy types are named by their family (e.g. instead of "dragons" it's "wyrm" "wyvern" or (Dark) "dragon") If it is a new fight, a new section needs to be made in the archive.--> |
|||
|Volume=2 |
|||
|Month=April |
|||
|Year=2019 |
|||
|Family=Bugard |
|||
|Boss= |
|||
|Boss Job= |
|||
|VD Mobs= |
|||
|VD Notes= |
|||
|D Mobs= |
|||
|D Notes= |
|||
|N Mobs= |
|||
|N Notes= |
|||
|E Mobs= |
|||
|E Notes= |
|||
|VE Mobs= |
|||
|VE Notes= |
|||
|Boss Notes= |
|||
Uses the following TP Moves: |
|||
Casts the following spells: |
|||
|Notes= |
|||
|Very Difficult Strat= |
|||
|Difficult Strat= |
|||
|Normal Strat= |
|||
|Easy Strat= |
|||
|Very Easy Strat= |
|||
|Key Item Locations= |
|||
* |
|||
}} |
}} |
||
===Previous Battles=== |
|||
Old battlefield information is stored on the '''[[Ambuscade Archive]]''' page. |
|||
== Rewards == |
== Rewards == |
||
| Line 398: | Line 282: | ||
Speaking with [[Gorpa-Masorpa]] and listening to the message from Abdhaljs will allow you to exchange an [[File:A. Voucher- Weapon icon.png{{!}}23px{{!}}link=]] [[Ambuscade Voucher: Weapon]] for a weapon of your choice or the grip.<br />Each stage is then upgraded as follows:<br /> |
Speaking with [[Gorpa-Masorpa]] and listening to the message from Abdhaljs will allow you to exchange an [[File:A. Voucher- Weapon icon.png{{!}}23px{{!}}link=]] [[Ambuscade Voucher: Weapon]] for a weapon of your choice or the grip.<br />Each stage is then upgraded as follows:<br /> |
||
[[ |
[[File:Abdhaljs Nugget icon.png{{!}}23px{{!}}link=Abdhaljs Nugget]] [[Abdhaljs Nugget]] x5 (3,750 Total Hallmarks / 12,500 Total Gallantry)<br /> |
||
[[ |
[[File:Abdhaljs Gem icon.png{{!}}23px{{!}}link=Abdhaljs Gem]] [[Abdhaljs Gem]] x5 (5,000 Total Hallmarks / 17,500 Total Gallantry)<br /> |
||
[[ |
[[File:Abdhaljs Anima icon.png{{!}}23px{{!}}link=Abdhaljs Anima]] [[Abdhaljs Anima]] x5 (7,500 Total Hallmarks / 22,500 Total Gallantry)<br /> |
||
[[ |
[[File:Abdhaljs Matter icon.png{{!}}23px{{!}}link=Abdhaljs Matter]] [[Abdhaljs Matter]] x5 (10,000 Total Hallmarks / 27,500 Total Gallantry) and '''one of any nonAmbuscade''' [[:Category:Pulse_Panoplia#Weapons|Pulse Weapon<sup>'''‡'''</sup>]] |
||
* For a single base Tokko to Final Form weapon, total required points: '''26,250 Hallmarks''' ''or'' '''80,000 Gallantry''' |
* For a single base Tokko to Final Form weapon, total required points: '''26,250 Hallmarks''' ''or'' '''80,000 Gallantry''' |
||
** An additional 5,000 Hallmarks or 10,000 Gallantry is needed in addition to above totals if the Tokko weapon was not obtained from the free [[File:A. Voucher- Weapon icon.png{{!}}23px{{!}}link=]] [[Ambuscade Voucher: Weapon]] from the Total Hallmarks Rewards list. |
** An additional 5,000 Hallmarks or 10,000 Gallantry is needed in addition to above totals if the Tokko weapon was not obtained from the free [[File:A. Voucher- Weapon icon.png{{!}}23px{{!}}link=]] [[Ambuscade Voucher: Weapon]] from the Total Hallmarks Rewards list. |
||
| Line 410: | Line 294: | ||
{{!}}- |
{{!}}- |
||
{{!}} style="text-align: center;" {{!}} Hand to Hand |
{{!}} style="text-align: center;" {{!}} Hand to Hand |
||
{{!}} {{imgpop|[[ |
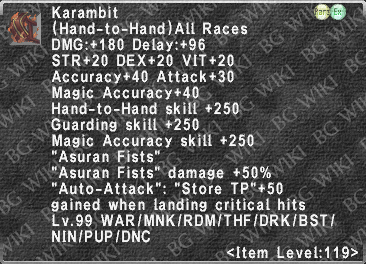
{{!}} {{imgpop|[[File:Tokko Knuckles icon.png{{!}}24px{{!}}link=]] [[Tokko Knuckles]]|Tokko Knuckles description.png|link=Tokko Knuckles}} |
||
{{!}} style="text-align: center;" rowspan=14 {{!}} [[ |
{{!}} style="text-align: center;" rowspan=14 {{!}} [[File:Abdhaljs Nugget x5.png|link=Abdhaljs Nugget]] |
||
{{!}} {{imgpop|[[ |
{{!}} {{imgpop|[[File:Ajja Knuckles icon.png{{!}}24px{{!}}link=]] [[Ajja Knuckles]]|Ajja Knuckles description.png|link=Ajja Knuckles}} |
||
{{!}} style="text-align: center;" rowspan=14 {{!}} [[ |
{{!}} style="text-align: center;" rowspan=14 {{!}} [[File:Abdhaljs Gem x5.png|link=Abdhaljs Gem]] |
||
{{!}} {{imgpop|[[ |
{{!}} {{imgpop|[[File:Eletta Knuckles icon.png{{!}}24px{{!}}link=]] [[Eletta Knuckles]]|Eletta Knuckles description.png|link=Eletta Knuckles}} |
||
{{!}} style="text-align: center;" rowspan=14 {{!}} [[ |
{{!}} style="text-align: center;" rowspan=14 {{!}} [[File:Abdhaljs Anima x5.png|link=Abdhaljs Anima]] |
||
{{!}} {{imgpop|[[ |
{{!}} {{imgpop|[[File:Kaja Knuckles icon.png{{!}}24px{{!}}link=]] [[Kaja Knuckles]]|Kaja Knuckles description.png|link=Kaja Knuckles}} |
||
{{!}} style="text-align: center;" rowspan=14 {{!}} [[ |
{{!}} style="text-align: center;" rowspan=14 {{!}} [[File:Abdhaljs Matter x5.png|link=Abdhaljs Matter]]<br />➕<br />[[:Category:Pulse_Panoplia#Weapons|1 Pulse Weapon<sup>'''‡'''</sup>]] |
||
{{!}} {{imgpop|[[ |
{{!}} {{imgpop|[[File:Karambit icon.png{{!}}24px{{!}}link=]] [[Karambit]]|Karambit description.png|link=Karambit}} |
||
{{!}}- |
{{!}}- |
||
{{!}} style="text-align: center;" {{!}} Dagger |
{{!}} style="text-align: center;" {{!}} Dagger |
||
{{!}} {{imgpop|[[ |
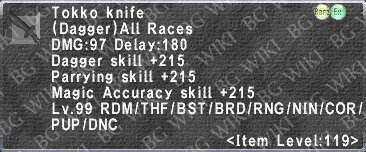
{{!}} {{imgpop|[[File:Tokko Knife icon.png{{!}}24px{{!}}link=]] [[Tokko Knife]]|Tokko Knife description.png|link=Tokko Knife}} |
||
{{!}} {{imgpop|[[ |
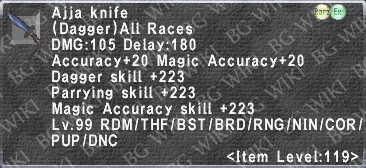
{{!}} {{imgpop|[[File:Ajja Knife icon.png{{!}}24px{{!}}link=]] [[Ajja Knife]]|Ajja Knife description.png|link=Ajja Knife}} |
||
{{!}} {{imgpop|[[ |
{{!}} {{imgpop|[[File:Eletta Knife icon.png{{!}}24px{{!}}link=]] [[Eletta Knife]]|Eletta Knife description.png|link=Eletta Knife}} |
||
{{!}} {{imgpop|[[ |
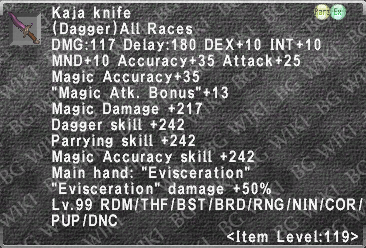
{{!}} {{imgpop|[[File:Kaja Knife icon.png{{!}}24px{{!}}link=]] [[Kaja Knife]]|Kaja Knife description.png|link=Kaja Knife}} |
||
{{!}} {{imgpop|[[ |
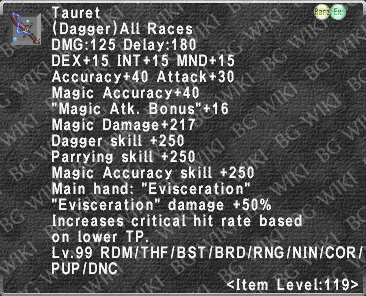
{{!}} {{imgpop|[[File:Tauret icon.png{{!}}24px{{!}}link=]] [[Tauret]]|Tauret description.png|link=Tauret}} |
||
{{!}}- |
{{!}}- |
||
{{!}} style="text-align: center;" {{!}} Sword |
{{!}} style="text-align: center;" {{!}} Sword |
||
{{!}} {{imgpop|[[ |
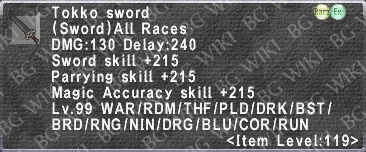
{{!}} {{imgpop|[[File:Tokko Sword icon.png{{!}}24px{{!}}link=]] [[Tokko Sword]]|Tokko Sword description.png|link=Tokko Sword}} |
||
{{!}} {{imgpop|[[ |
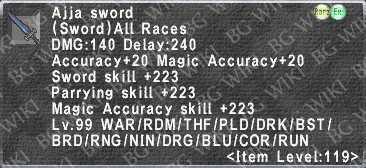
{{!}} {{imgpop|[[File:Ajja Sword icon.png{{!}}24px{{!}}link=]] [[Ajja Sword]]|Ajja Sword description.png|link=Ajja Sword}} |
||
{{!}} {{imgpop|[[ |
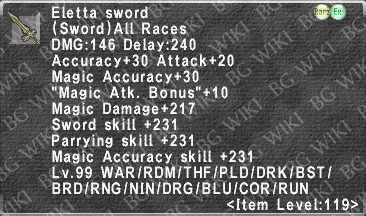
{{!}} {{imgpop|[[File:Eletta Sword icon.png{{!}}24px{{!}}link=]] [[Eletta Sword]]|Eletta Sword description.png|link=Eletta Sword}} |
||
{{!}} {{imgpop|[[ |
{{!}} {{imgpop|[[File:Kaja Sword icon.png{{!}}24px{{!}}link=]] [[Kaja Sword]]|Kaja Sword description.png|link=Kaja Sword}} |
||
{{!}} {{imgpop|[[ |
{{!}} {{imgpop|[[File:Naegling icon.png{{!}}24px{{!}}link=]] [[Naegling]]|Naegling description.png|link=Naegling}} |
||
{{!}}- |
{{!}}- |
||
{{!}} style="text-align: center;" {{!}} Great Sword |
{{!}} style="text-align: center;" {{!}} Great Sword |
||
{{!}} {{imgpop|[[ |
{{!}} {{imgpop|[[File:Tokko Claymore icon.png{{!}}24px{{!}}link=]] [[Tokko Claymore]]|Tokko Claymore description.png|link=Tokko Claymore}} |
||
{{!}} {{imgpop|[[ |
{{!}} {{imgpop|[[File:Ajja Claymore icon.png{{!}}24px{{!}}link=]] [[Ajja Claymore]]|Ajja Claymore description.png|link=Ajja Claymore}} |
||
{{!}} {{imgpop|[[ |
{{!}} {{imgpop|[[File:Eletta Claymore icon.png{{!}}24px{{!}}link=]] [[Eletta Claymore]]|Eletta Claymore description.png|link=Eletta Claymore}} |
||
{{!}} {{imgpop|[[ |
{{!}} {{imgpop|[[File:Kaja Claymore icon.png{{!}}24px{{!}}link=]] [[Kaja Claymore]]|Kaja Claymore description.png|link=Kaja Claymore}} |
||
{{!}} {{imgpop|[[ |
{{!}} {{imgpop|[[File:Nandaka icon.png{{!}}24px{{!}}link=]] [[Nandaka]]|Nandaka description.png|link=Nandaka}} |
||
{{!}}- |
{{!}}- |
||
{{!}} style="text-align: center;" {{!}} Axe |
{{!}} style="text-align: center;" {{!}} Axe |
||
{{!}} {{imgpop|[[ |
{{!}} {{imgpop|[[File:Tokko Axe icon.png{{!}}24px{{!}}link=]] [[Tokko Axe]]|Tokko Axe description.png|link=Tokko Axe}} |
||
{{!}} {{imgpop|[[ |
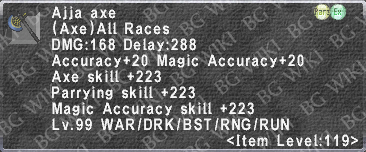
{{!}} {{imgpop|[[File:Ajja Axe icon.png{{!}}24px{{!}}link=]] [[Ajja Axe]]|Ajja Axe description.png|link=Ajja Axe}} |
||
{{!}} {{imgpop|[[ |
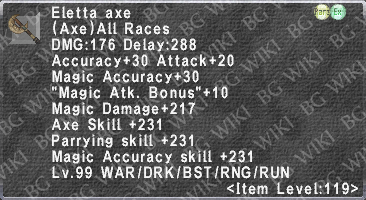
{{!}} {{imgpop|[[File:Eletta Axe icon.png{{!}}24px{{!}}link=]] [[Eletta Axe]]|Eletta Axe description.png|link=Eletta Axe}} |
||
{{!}} {{imgpop|[[ |
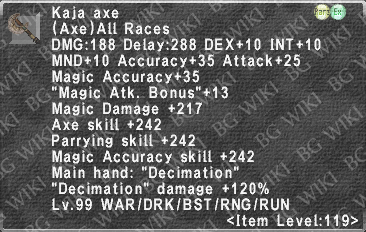
{{!}} {{imgpop|[[File:Kaja Axe icon.png{{!}}24px{{!}}link=]] [[Kaja Axe]]|Kaja Axe description.png|link=Kaja Axe}} |
||
{{!}} {{imgpop|[[ |
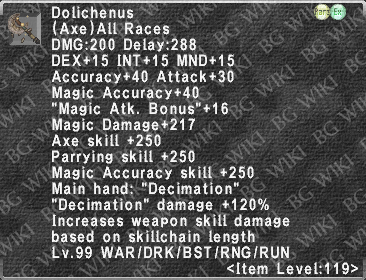
{{!}} {{imgpop|[[File:Dolichenus icon.png{{!}}24px{{!}}link=]] [[Dolichenus]]|Dolichenus description.png|link=Dolichenus}} |
||
{{!}}- |
{{!}}- |
||
{{!}} style="text-align: center;" {{!}} Great Axe |
{{!}} style="text-align: center;" {{!}} Great Axe |
||
{{!}} {{imgpop|[[ |
{{!}} {{imgpop|[[File:Tokko Chopper icon.png{{!}}24px{{!}}link=]] [[Tokko Chopper]]|Tokko Chopper description.png|link=Tokko Chopper}} |
||
{{!}} {{imgpop|[[ |
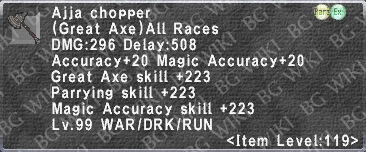
{{!}} {{imgpop|[[File:Ajja Chopper icon.png{{!}}24px{{!}}link=]] [[Ajja Chopper]]|Ajja Chopper description.png|link=Ajja Chopper}} |
||
{{!}} {{imgpop|[[ |
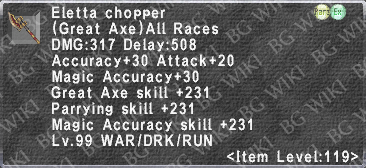
{{!}} {{imgpop|[[File:Eletta Chopper icon.png{{!}}24px{{!}}link=]] [[Eletta Chopper]]|Eletta Chopper description.png|link=Eletta Chopper}} |
||
{{!}} {{imgpop|[[ |
{{!}} {{imgpop|[[File:Kaja Chopper icon.png{{!}}24px{{!}}link=]] [[Kaja Chopper]]|Kaja Chopper description.png|link=Kaja Chopper}} |
||
{{!}} {{imgpop|[[ |
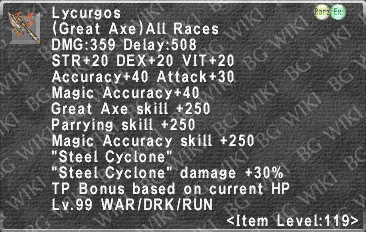
{{!}} {{imgpop|[[File:Lycurgos icon.png{{!}}24px{{!}}link=]] [[Lycurgos]]|Lycurgos description.png|link=Lycurgos}} |
||
{{!}}- |
{{!}}- |
||
{{!}} style="text-align: center;" {{!}} Scythe |
{{!}} style="text-align: center;" {{!}} Scythe |
||
{{!}} {{imgpop|[[ |
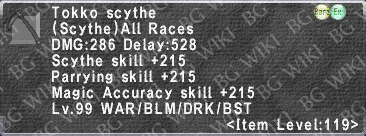
{{!}} {{imgpop|[[File:Tokko Scythe icon.png{{!}}24px{{!}}link=]] [[Tokko Scythe]]|Tokko Scythe description.png|link=Tokko Scythe}} |
||
{{!}} {{imgpop|[[ |
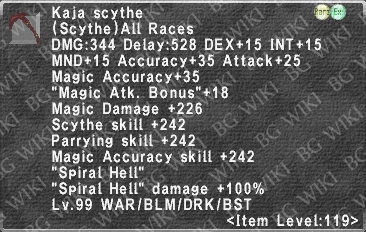
{{!}} {{imgpop|[[File:Ajja Scythe icon.png{{!}}24px{{!}}link=]] [[Ajja Scythe]]|Ajja Scythe description.png|link=Ajja Scythe}} |
||
{{!}} {{imgpop|[[ |
{{!}} {{imgpop|[[File:Eletta Scythe icon.png{{!}}24px{{!}}link=]] [[Eletta Scythe]]|Eletta Scythe description.png|link=Eletta Scythe}} |
||
{{!}} {{imgpop|[[ |
{{!}} {{imgpop|[[File:Kaja Scythe icon.png{{!}}24px{{!}}link=]] [[Kaja Scythe]]|Kaja Scythe description.png|link=Kaja Scythe}} |
||
{{!}} {{imgpop|[[ |
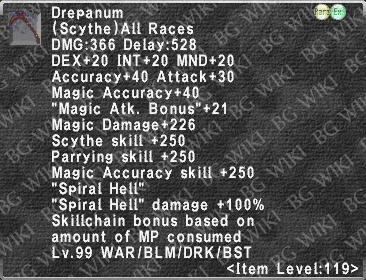
{{!}} {{imgpop|[[File:Drepanum icon.png{{!}}24px{{!}}link=]] [[Drepanum]]|Drepanum description.png|link=Drepanum}} |
||
{{!}}- |
{{!}}- |
||
{{!}} style="text-align: center;" {{!}} Polearm |
{{!}} style="text-align: center;" {{!}} Polearm |
||
{{!}} {{imgpop|[[ |
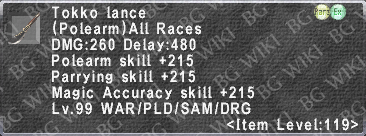
{{!}} {{imgpop|[[File:Tokko Lance icon.png{{!}}24px{{!}}link=]] [[Tokko Lance]]|Tokko Lance description.png|link=Tokko Lance}} |
||
{{!}} {{imgpop|[[ |
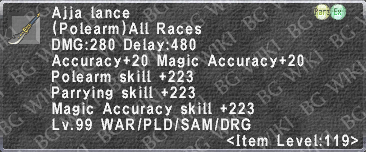
{{!}} {{imgpop|[[File:Ajja Lance icon.png{{!}}24px{{!}}link=]] [[Ajja Lance]]|Ajja Lance description.png|link=Ajja Lance}} |
||
{{!}} {{imgpop|[[ |
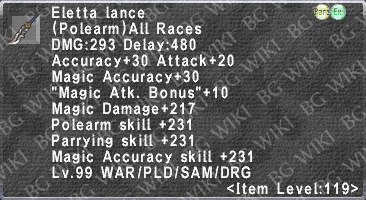
{{!}} {{imgpop|[[File:Eletta Lance icon.png{{!}}24px{{!}}link=]] [[Eletta Lance]]|Eletta Lance description.png|link=Eletta Lance}} |
||
{{!}} {{imgpop|[[ |
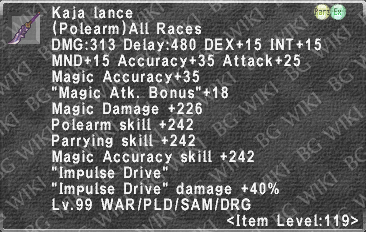
{{!}} {{imgpop|[[File:Kaja Lance icon.png{{!}}24px{{!}}link=]] [[Kaja Lance]]|Kaja Lance description.png|link=Kaja Lance}} |
||
{{!}} {{imgpop|[[ |
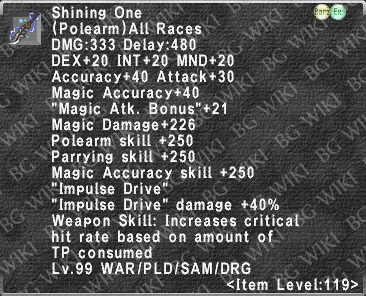
{{!}} {{imgpop|[[File:Shining One icon.png{{!}}24px{{!}}link=]] [[Shining One]]|Shining One description.png|link=Shining One}} |
||
{{!}}- |
{{!}}- |
||
{{!}} style="text-align: center;" {{!}} Katana |
{{!}} style="text-align: center;" {{!}} Katana |
||
{{!}} {{imgpop|[[ |
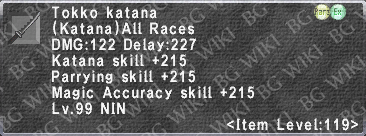
{{!}} {{imgpop|[[File:Tokko Katana icon.png{{!}}24px{{!}}link=]] [[Tokko Katana]]|Tokko Katana description.png|link=Tokko Katana}} |
||
{{!}} {{imgpop|[[ |
{{!}} {{imgpop|[[File:Ajja Katana icon.png{{!}}24px{{!}}link=]] [[Ajja Katana]]|Ajja Katana description.png|link=Ajja Katana}} |
||
{{!}} {{imgpop|[[ |
{{!}} {{imgpop|[[File:Eletta Katana icon.png{{!}}24px{{!}}link=]] [[Eletta Katana]]|Eletta Katana description.png|link=Eletta Katana}} |
||
{{!}} {{imgpop|[[ |
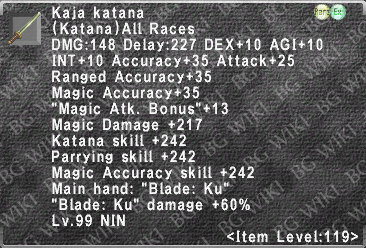
{{!}} {{imgpop|[[File:Kaja Katana icon.png{{!}}24px{{!}}link=]] [[Kaja Katana]]|Kaja Katana description.png|link=Kaja Katana}} |
||
{{!}} {{imgpop|[[ |
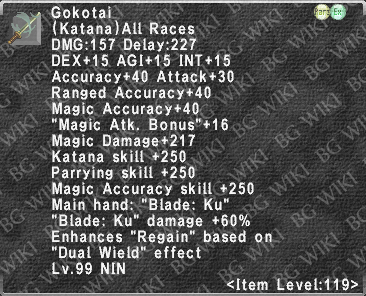
{{!}} {{imgpop|[[File:Gokotai icon.png{{!}}24px{{!}}link=]] [[Gokotai]]|Gokotai description.png|link=Gokotai}} |
||
{{!}}- |
{{!}}- |
||
{{!}} style="text-align: center;" {{!}} Great Katana |
{{!}} style="text-align: center;" {{!}} Great Katana |
||
{{!}} {{imgpop|[[ |
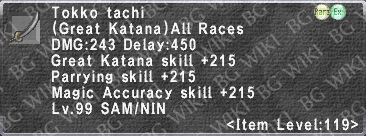
{{!}} {{imgpop|[[File:Tokko Tachi icon.png{{!}}24px{{!}}link=]] [[Tokko Tachi]]|Tokko Tachi description.png|link=Tokko Tachi}} |
||
{{!}} {{imgpop|[[ |
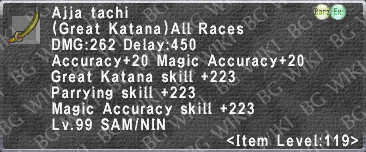
{{!}} {{imgpop|[[File:Ajja Tachi icon.png{{!}}24px{{!}}link=]] [[Ajja Tachi]]|Ajja Tachi description.png|link=Ajja Tachi}} |
||
{{!}} {{imgpop|[[ |
{{!}} {{imgpop|[[File:Eletta Tachi icon.png{{!}}24px{{!}}link=]] [[Eletta Tachi]]|Eletta Tachi description.png|link=Eletta Tachi}} |
||
{{!}} {{imgpop|[[ |
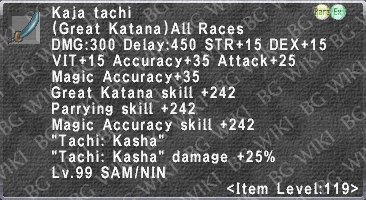
{{!}} {{imgpop|[[File:Kaja Tachi icon.png{{!}}24px{{!}}link=]] [[Kaja Tachi]]|Kaja Tachi description.png|link=Kaja Tachi}} |
||
{{!}} {{imgpop|[[ |
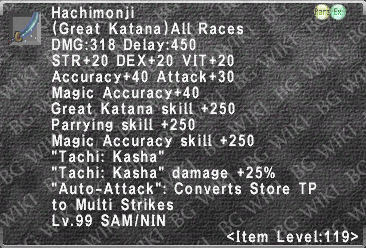
{{!}} {{imgpop|[[File:Hachimonji icon.png{{!}}24px{{!}}link=]] [[Hachimonji]]|Hachimonji description.png|link=Hachimonji}} |
||
{{!}}- |
{{!}}- |
||
{{!}} style="text-align: center;" {{!}} Club |
{{!}} style="text-align: center;" {{!}} Club |
||
{{!}} {{imgpop|[[ |
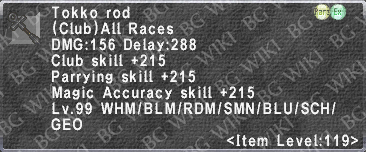
{{!}} {{imgpop|[[File:Tokko Rod icon.png{{!}}24px{{!}}link=]] [[Tokko Rod]]|Tokko Rod description.png|link=Tokko Rod}} |
||
{{!}} {{imgpop|[[ |
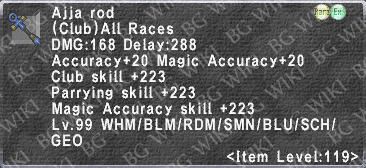
{{!}} {{imgpop|[[File:Ajja Rod icon.png{{!}}24px{{!}}link=]] [[Ajja Rod]]|Ajja Rod description.png|link=Ajja Rod}} |
||
{{!}} {{imgpop|[[ |
{{!}} {{imgpop|[[File:Eletta Rod icon.png{{!}}24px{{!}}link=]] [[Eletta Rod]]|Eletta Rod description.png|link=Eletta Rod}} |
||
{{!}} {{imgpop|[[ |
{{!}} {{imgpop|[[File:Kaja Rod icon.png{{!}}24px{{!}}link=]] [[Kaja Rod]]|Kaja Rod description.png|link=Kaja Rod}} |
||
{{!}} {{imgpop|[[ |
{{!}} {{imgpop|[[File:Maxentius icon.png{{!}}24px{{!}}link=]] [[Maxentius]]|Maxentius description.png|link=Maxentius}} |
||
{{!}}- |
{{!}}- |
||
{{!}} style="text-align: center;" {{!}} Staff |
{{!}} style="text-align: center;" {{!}} Staff |
||
{{!}} {{imgpop|[[ |
{{!}} {{imgpop|[[File:Tokko Staff icon.png{{!}}24px{{!}}link=]] [[Tokko Staff]]|Tokko Staff description.png|link=Tokko Staff}} |
||
{{!}} {{imgpop|[[ |
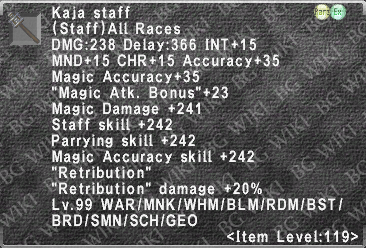
{{!}} {{imgpop|[[File:Ajja Staff icon.png{{!}}24px{{!}}link=]] [[Ajja Staff]]|Ajja Staff description.png|link=Ajja Staff}} |
||
{{!}} {{imgpop|[[ |
{{!}} {{imgpop|[[File:Eletta Staff icon.png{{!}}24px{{!}}link=]] [[Eletta Staff]]|Eletta Staff description.png|link=Eletta Staff}} |
||
{{!}} {{imgpop|[[ |
{{!}} {{imgpop|[[File:Kaja Staff icon.png{{!}}24px{{!}}link=]] [[Kaja Staff]]|Kaja Staff description.png|link=Kaja Staff}} |
||
{{!}} {{imgpop|[[ |
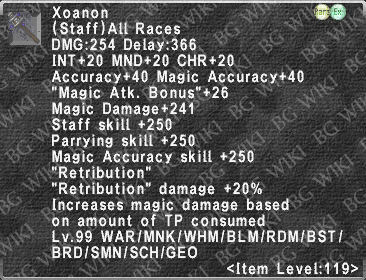
{{!}} {{imgpop|[[File:Xoanon icon.png{{!}}24px{{!}}link=]] [[Xoanon]]|Xoanon description.png|link=Xoanon}} |
||
{{!}}- |
{{!}}- |
||
{{!}} style="text-align: center;" {{!}} Bow |
{{!}} style="text-align: center;" {{!}} Bow |
||
{{!}} {{imgpop|[[ |
{{!}} {{imgpop|[[File:Tokko Bow icon.png{{!}}24px{{!}}link=]] [[Tokko Bow]]|Tokko Bow description.png|link=Tokko Bow}} |
||
{{!}} {{imgpop|[[ |
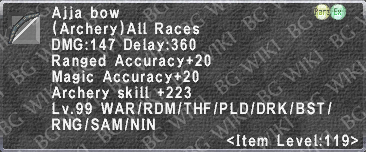
{{!}} {{imgpop|[[File:Ajja Bow icon.png{{!}}24px{{!}}link=]] [[Ajja Bow]]|Ajja Bow description.png|link=Ajja Bow}} |
||
{{!}} {{imgpop|[[ |
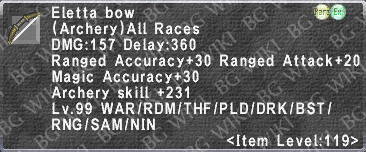
{{!}} {{imgpop|[[File:Eletta Bow icon.png{{!}}24px{{!}}link=]] [[Eletta Bow]]|Eletta Bow description.png|link=Eletta Bow}} |
||
{{!}} {{imgpop|[[ |
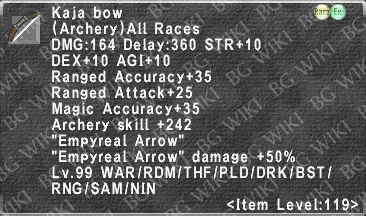
{{!}} {{imgpop|[[File:Kaja Bow icon.png{{!}}24px{{!}}link=]] [[Kaja Bow]]|Kaja Bow description.png|link=Kaja Bow}} |
||
{{!}} {{imgpop|[[ |
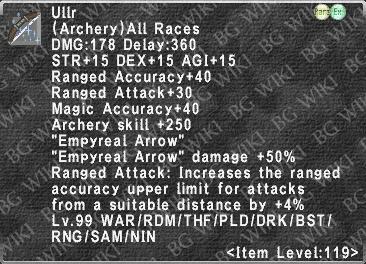
{{!}} {{imgpop|[[File:Ullr icon.png{{!}}24px{{!}}link=]] [[Ullr]]|Ullr description.png|link=Ullr}} |
||
{{!}}- |
{{!}}- |
||
{{!}} style="text-align: center;" {{!}} Grip |
{{!}} style="text-align: center;" {{!}} Grip |
||
{{!}} {{imgpop|[[ |
{{!}} {{imgpop|[[File:Tokko Grip icon.png{{!}}24px{{!}}link=]] [[Tokko Grip]]|Tokko Grip description.png|link=Tokko Grip}} |
||
{{!}} {{imgpop|[[ |
{{!}} {{imgpop|[[File:Ajja Grip icon.png{{!}}24px{{!}}link=]] [[Ajja Grip]]|Ajja Grip description.png|link=Ajja Grip}} |
||
{{!}} {{imgpop|[[ |
{{!}} {{imgpop|[[File:Eletta Grip icon.png{{!}}24px{{!}}link=]] [[Eletta Grip]]|Eletta Grip description.png|link=Eletta Grip}} |
||
{{!}} {{imgpop|[[ |
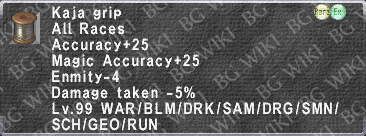
{{!}} {{imgpop|[[File:Kaja Grip icon.png{{!}}24px{{!}}link=]] [[Kaja Grip]]|Kaja Grip description.png|link=Kaja Grip}} |
||
{{!}} {{imgpop|[[ |
{{!}} {{imgpop|[[File:Khonsu icon.png{{!}}24px{{!}}link=]] [[Khonsu]]|Khonsu description.png|link=Khonsu}} |
||
{{!}}} |
{{!}}} |
||
}} |
}} |
||
Revision as of 14:43, 16 January 2020
|
Getting Started
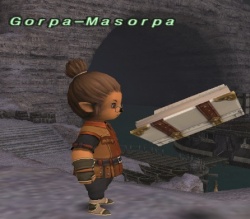
Complete the Stepping into an Ambuscade Records of Eminence objective and speak with Gorpa-Masorpa in Mhaura at (G-9) for an explanation about Ambuscade.
- Players must have completed the First Step Forward Records of Eminence objective in order to undertake Stepping into an Ambuscade.
- Stepping into an Ambuscade can be set from the Tutorial section of the Records of Eminence menu under Basics:
- Quests → Objective List → Tutorial → Basics → Stepping into an Ambuscade
Be in possession of either the Ambuscade Primer Volume One or Volume Two Key Items.
- All party members must be in possession of one of these two Key Items.
Eligibility Requirements
In order to participate, players must satisfy the following:
- Complete either the Ambuscade Primer Volume One or Volume Two objectives in order to obtain the Key Item for the corresponding volume of the primer for the type of battle players wish to complete.
- Players may have only one of each of the Ambuscade Primer Key Items.
- Objective targets vary by month after a version update, opponents are rotated out, and generally not repeated.
- Players may have only one of each of the Ambuscade Primer Key Items.
- The Ambuscade Primer Volume One and Two objectives can be undertaken from the Ambuscade category of the Records of Eminence menu.
Entry and Progression
- Examine the Ambuscade Tome in Mhaura (G-9) and select the type and difficulty level you would like to attempt.
- Only the party leader may register the group.
- The party will be registered so long as the system detects that there are no issues with the layer area or registering party members.
- Players will be unable to register if:
- Any player is not in possession of an Amuscade Primer Volume One or Two Key Item.
- The number of registrants exceeds the maximum of fifty reservations.
- A party member already has a reservation.
- To cancel a reservation:
- A player may cancel their reservation via the ambuscade tome.
- Three minutes has passed from the time the player is notified that their instance is ready.
- The registrant boards a boat.
- The registrant leaves Mhaura in any way.
- To cancel a reservation:
- Players will be unable to register if:
- Adding new party members after registration will not cancel the registration, but the party may only enter with the number of players it registered with.
- A message will display for the party leader when entry is ready.
- As of the July 2016 update[3], automatic entering was added.
- The default setting is "off" and may be changed by having the party lead examine the Ambuscade Tome and selecting the Toggle auto-transport function.
- In line with this, having the auto-transport function off has a notification sound played when it is the party's turn.
- This may be disabled via the sound settings in the Config menu.
- As of the July 2016 update[3], automatic entering was added.
- Examine the ambuscade tome within three minutes to enter.
- The time limit for an Ambuscade is 30 minutes (Earth time).
- Between 1~6 players may participate.
- Trusts may be called after entering Maquette Abdhaljs-Legion.
- The number of alter egos that may be called forth will depend on the number of players initially registered.
- Player HP and MP will be restored to full and any status ailments they are suffering from will be removed upon entry.
- Trusts may be called after entering Maquette Abdhaljs-Legion.
- Key Items will only be lost upon victory.
- Meaning that should a player or group lose, they may reattempt the battlefield without having to reacquire new Key Items.
Upon victory, a special currencies known as Hallmarks and Badges of Gallantry, which may be exchanged for rewards, Experience/Limit Points, and Capacity points will be given to all players.
- Notorious Monsters inside Ambuscade do not drop any treasure directly.
Battle Information
A Word On Enmity
- Enmity functions abnormally in just one way during Ambuscade, and this has entirely to do with enmity gain upon self/party actions.
- Any action (buff, cure, job ability) at any time (before/after pull) taken upon yourself or a party member will gain enmity on all mobs for the person initiating the action.
- Any action before the monsters have been aggroed will receive the minimum level of enmity (1 CE/VE).
- This explains why the mobs often go straight for your WHM upon the pull. Protectra, Shellra, and two Bar-spells equal 24 (6*4) party action enmity events if 6 players are in range.
- Any action before the monsters have been aggroed will receive the minimum level of enmity (1 CE/VE).
- To counter this have your tank use self/party-target enmity actions before the pull, and enmity abilities (Sentinel, Rampart, Pflug, Foil, etc) immediately after the pull.
- The tank should not use their enmity abilities before aggroing the enemies in Ambuscade as they will gain almost no enmity with them before the pull.
- Any action (buff, cure, job ability) at any time (before/after pull) taken upon yourself or a party member will gain enmity on all mobs for the person initiating the action.
Battle Type & Levels
There are two types of Ambuscades you may attempt. Entry into either is determined by which Key Item you possess.
|
| ||||||||||||||||||||||||||||||||||||||||||||||||||||||||||||||
An ![]() Abdhaljs Seal will triple the amount of hallmarks and gallantry you receive from a successful Ambuscade.
Abdhaljs Seal will triple the amount of hallmarks and gallantry you receive from a successful Ambuscade.
Intense Ambuscade (Vol. One)
| Volume 1, April 2024, Antica | ||||||||||||||||||
|---|---|---|---|---|---|---|---|---|---|---|---|---|---|---|---|---|---|---|
Notes:
Bozzetto Consul:
Sabotender Dulce:
Bozzetto Stalwart
Bozzetto Hunter
Bozzetto Magister
Bozzetto Stalker
Bozzetto Valiant
Setups and Strategies: Very Difficult:
Difficult:
Easy:
Very Easy:
Key Item Suggestions:
|
Ambuscade (Vol. Two)
| Volume 2, April 2024, Slime | ||||||||||||||||||
|---|---|---|---|---|---|---|---|---|---|---|---|---|---|---|---|---|---|---|
Notes: Setups and Strategies:
|
Previous Battles
Old battlefield information is stored on the Ambuscade Archive page.
Rewards
See Ambuscade Rewards for specific item and equipment rewards.
Hallmarks
Hallmarks are the primary currency of Ambuscade. They can be used to purchase items from Gorpa-Masorpa.
There are two types of rewards available. Those received in exchange for Hallmarks and those received for total amount of hallmarks accumulated.
- Hallmarks are not expended upon receiving items from the list of rewards for total amount of hallmarks accumulated.
- The types of items available vary with the content of that month’s Ambuscade.
- Your total number of hallmarks will reset back to 0 after each month's version update.
- Hallmarks and Badges of Gallantry are reset upon the next month's version update being implemented (usually set to happen from around the 3rd to the 10th of a month).[4]
Gallantry
Badges of Gallantry are the secondary currency of Ambuscade. They can be used to purchase items from Gorpa-Masorpa, and are only given to those who participate in Ambuscade with other players.
- Like Hallmarks, your Badges of Gallantry will reset back to 0 after each month's version update.
- Hallmarks and Badges of Gallantry are reset upon the next month's version update being implemented (usually set to happen from around the 3rd to the 10th of a month).[5]
Monthly Adventurer Campaigns
There is one type of campaign that may run any given month.
Ambuscade Point Bonus Campaign
- When this Monthly Adventurer Campaign is active, hallmarks and badges of gallantry will yield double the normal amount once per day when participating in each Ambuscade difficulty level.
- This bonus will reset at Japanese Midnight Earth time and stacks with the effects of Abdhaljs Seals to yield a total of four times the normal amount.
- Unclear on whether a mistranslation. Currently observed value with Campaign active and Seal used is 5 times the normal amount.
- This bonus will reset at Japanese Midnight Earth time and stacks with the effects of Abdhaljs Seals to yield a total of four times the normal amount.
Ambuscade Gallantry Campaign
- When this Monthly Adventurer Campaign is active, the number of Badges of Gallantry earned from Normal and Intense Ambuscades will be doubled once per Earth day.
- This bonus will reset at Japanese Midnight Earth time and stacks with the effects of Abdhaljs Seals.
JSE Cape Augmentation
Job-specific Back equipment obtained with a ![]() Ambuscade Voucher: Back can be augmented by trading them along with certain items to Gorpa-Masorpa.
Ambuscade Voucher: Back can be augmented by trading them along with certain items to Gorpa-Masorpa.
- See the
 JSE capes page for augment information for the Job Specific Capes.
To augment a cape:
- Trade the item to Gorpa-Masorpa along with either an Abdhaljs Thread, Abdhaljs Dust, Abdhaljs Sap, Abdhaljs Dye or an Abdhaljs Resin.
- Select the desired attribute, and confirm your choice. After the initial trade, you can max out that path on your next trade if you also trade enough materials.
- Augments may be changed by repeating the above steps.
- Changing the augment path will not return any items used up to that point.
- However, when using an
 Abdhaljs Needle to change the augment, the current potency is maintained.
- However, when using an
- Further trading an augmented item with items corresponding to the attribute initially selected will increase the strength of the augmentation.
- For maximum strength augments the following are all required per cape:
 Abdhaljs Thread x20,
  Abdhaljs Dust x20,
  Abdhaljs Sap x10,
  Abdhaljs Dye x10,
  Abdhaljs Resin x5
Armor Upgrade
To upgrade Salvage Armor Variant Ambuscade Armor trade either the NQ or +1 variant and the requisite ![]() Abdhaljs Metals to Gorpa-Masorpa:
Abdhaljs Metals to Gorpa-Masorpa:
| Base Armor | Armor Piece +1 | Armor Piece +2 | ||
|---|---|---|---|---|
To upgrade Limbus and Nyzul Armor Variant Ambuscade Armor trade either the NQ or +1 variant and the requisite ![]() Abdhaljs Fibers to Gorpa-Masorpa:
Abdhaljs Fibers to Gorpa-Masorpa:
| Base Armor | Armor Piece +1 | Armor Piece +2 | ||
|---|---|---|---|---|
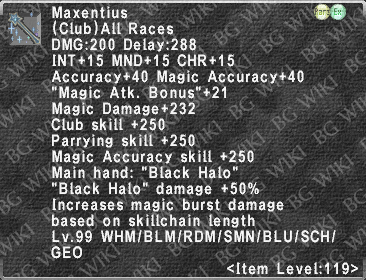
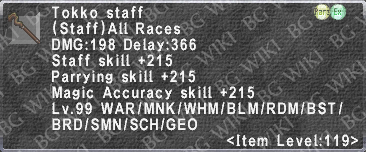
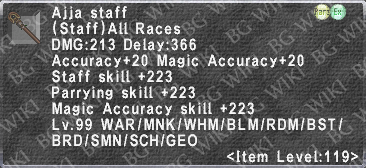
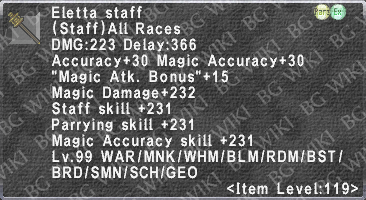
Ambuscade Weapons
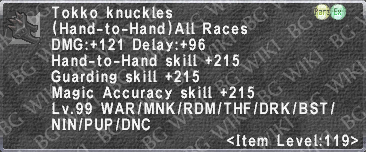
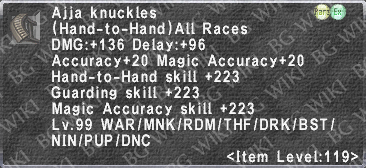
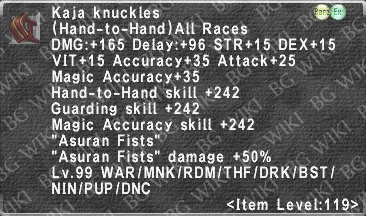
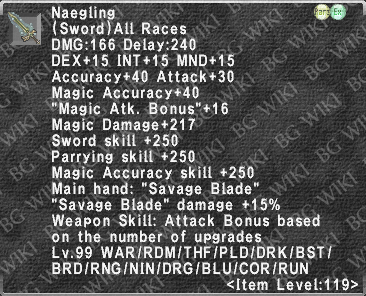
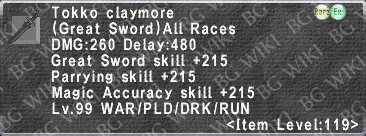
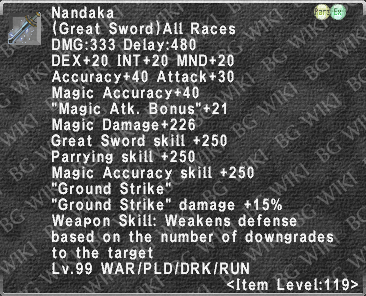
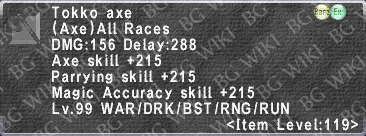
Speaking with Gorpa-Masorpa and listening to the message from Abdhaljs will allow you to exchange an ![]() Ambuscade Voucher: Weapon for a weapon of your choice or the grip.
Ambuscade Voucher: Weapon for a weapon of your choice or the grip.
Each stage is then upgraded as follows:
![]() Abdhaljs Nugget x5 (3,750 Total Hallmarks / 12,500 Total Gallantry)
Abdhaljs Nugget x5 (3,750 Total Hallmarks / 12,500 Total Gallantry)
![]() Abdhaljs Gem x5 (5,000 Total Hallmarks / 17,500 Total Gallantry)
Abdhaljs Gem x5 (5,000 Total Hallmarks / 17,500 Total Gallantry)
![]() Abdhaljs Anima x5 (7,500 Total Hallmarks / 22,500 Total Gallantry)
Abdhaljs Anima x5 (7,500 Total Hallmarks / 22,500 Total Gallantry)
![]() Abdhaljs Matter x5 (10,000 Total Hallmarks / 27,500 Total Gallantry) and one of any nonAmbuscade Pulse Weapon‡
Abdhaljs Matter x5 (10,000 Total Hallmarks / 27,500 Total Gallantry) and one of any nonAmbuscade Pulse Weapon‡
- For a single base Tokko to Final Form weapon, total required points: 26,250 Hallmarks or 80,000 Gallantry
- An additional 5,000 Hallmarks or 10,000 Gallantry is needed in addition to above totals if the Tokko weapon was not obtained from the free
 Ambuscade Voucher: Weapon from the Total Hallmarks Rewards list.
- An additional 5,000 Hallmarks or 10,000 Gallantry is needed in addition to above totals if the Tokko weapon was not obtained from the free
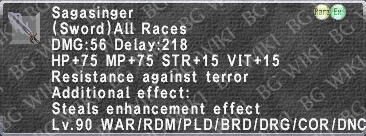
- ‡ Eligible Pulse Weapons: Sagasinger
 / Murasamemaru
 / Tenkomaru
 / Himthige
 / Aytanri
 / Adflictio
 / Girru
 / Gusterion
 / Dukkha
 / Ephemeron
 / Coruscanti
 / Asteria
 / Borealis
 / Ikarigiri
 / Delphinius
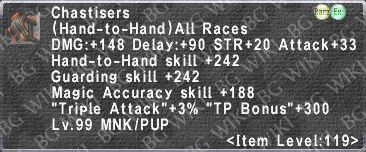
 / Chastisers
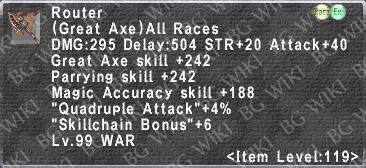
 / Router
 / Annealed Lance
Pages in category "Ambuscade"
The following 27 pages are in this category, out of 27 total.
B
- Bozzetto Berserker
- Bozzetto Brawler
- Bozzetto Conjurer
- Bozzetto Crusader
- Bozzetto Devout
- Bozzetto Duelist
- Bozzetto Elementalist
- Bozzetto Erudite
- Bozzetto High Vicar
- Bozzetto Lancer
- Bozzetto Lyricist
- Bozzetto Moraingist
- Bozzetto Protector
- Bozzetto Pugilist
- Bozzetto Reaver
- Bozzetto Shinobi
- Bozzetto Stormbringer
- Bozzetto Swordsman
- Bozzetto Tamer
- Bozzetto Warlock

