The Voracious Resurgence | |
| Prime Weapons • Ultimate Weapons • Ultimate Augments • Abjurations iL119 • JSE Necks • Divergence Augments • Escutcheons | |
| Reforged Armor Artifact: +1 • iL109 • iL119/+2/+3 Relic: +1/+2 • iL109 • iL119/+2/+3 Empyrean: +1/+2 • iL109 • iL119/+2/+3 |
Guides • Crafting • Trusts • Apex Monsters |
Category:Dynamis - Divergence
From FFXI Wiki
|
|
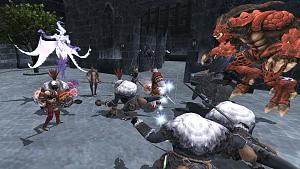
Dynamis - Divergence, introduced in the November 10th 2017 update [1], Content Level 139 versions of original Dynamis areas. |
Entry Requirements
- Level 95 or higher.
- Have completed the mission A Rhapsody for the Ages.
- Be in possession of the permanent Key Item Dynamis - Tavnazia sliver.
- Obtained by defeating at least one of the Dynamis - Tavnazia bosses:
 Diabolos Heart, Diamond, Spade, or Club.
- Obtained by defeating at least one of the Dynamis - Tavnazia bosses:
- Purchase the permanent Key Item Empty hourglass from the goblin Aurix via the ??? in Ru'Lude Gardens (G-8) (near the AH) by trading a single
 100 Byne Bill,
  M. Silverpiece, or
  L. Jadeshell to the ???.
- This only needs to be done once.
- A player may enter once every 60 hours (Earth Time). The 60 hour lockout begins the minute the player is entered into Dynamis-Divergence when the Key Item Empty hourglass is exhausted.
- Aurix is able to tell when the player may reenter again when selecting to "Ask about time limits with Dynamis (D)" when talking to him.
- You may also check the exact time you are able to reenter by clicking the entrance to Dynamis-San d'Oria [D] at Southern San d'Oria K-10.
- To enter a zone, interact with the corresponding Enigmatic Footprints.
- Parties must be between 3 and 18 players.
- Every party member must have the Empty hourglass key item.
- Trusts may be called in individual parties. It is possible to have up to 3 separate parties in Dynamis-Divergence with trusts.
- Parties must be between 3 and 18 players.
Time Limit
- The initial time limit is 60 minutes (Earth time) and may be extended up to 120 minutes.
- The zone's mid-boss grants a 30 minute time extension when defeated. There is another 30 minute time extension, but there is no known information on how to obtain it.
- There is a possibility that the 2nd 30 min time extension has not yet been implemented due to a recent post by the SQUARE ENIX development team but this is mere speculation.

- There is a possibility that the 2nd 30 min time extension has not yet been implemented due to a recent post by the SQUARE ENIX development team but this is mere speculation.
- Players may leave at any time before time expires by using the
 Black Hourglass temporary item received upon zoning in.
Currencies
- Currency may be traded, bazaared, or sold on the auction house (under misc 3.).
- Between 1 and 4 cards may drop per monster.
- Treasure Hunter affects this drop rate.
- Cards may also be stolen from enemies using the Thief job ability, Steal.
- Shard and Void items required for reforging relic armor 119 to the +2/3 variants have a rare chance of dropping from a monster of the associated job.
- However, Aurix will allow you to exchange rusted and black cards for them.
- Unlike cards, which may be bought from other players, Shards and Void items may not be purchased or traded for.
- However, Aurix will allow you to exchange rusted and black cards for them.
Aurix Currency Exchange 100 Rusted I. Cards
→
1 Beastmen's Medal
100 Black. I. Cards
→
1 Kindred's Medal
3 Beastmen's Medals→
1 Armor Shard (feet or hands) 3 Kindred's Medal→
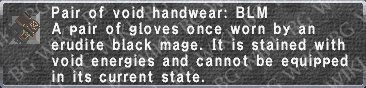
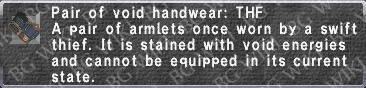
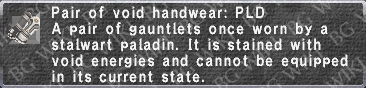
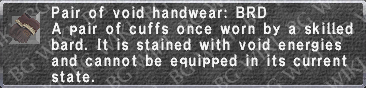
1 Void Armor Wear (feet or hands) 2 Shards required for upgrading Reforged Relic Armor +2
3 Shards required for upgrading Reforged Relic Armor +33 Voids required for upgrading Reforged Relic Armor +3
- Aurix will only begin dealing with +2 and +3 Relic 119 upgrades after you have visited Dynamis - Divergence at least once.
- You must visit the corresponding zone for Dynamis - Divergence with the job you wish to unlock upgrading of the specific piece of armor for Relic +2.
- You must defeat the corresponding zone's mid-boss with the job you wish to unlock upgrading of the specific piece of armor for Relic +3.
Basics
- There exists party/alliance hate. When the a party member stands too close to the puller, everyone is on the hate-list.
- Enemies are either true sight or true sound based on their typical family aggression.
- Orcs are true sight, but do not aggro by sound while Quadav are true sound, but do not aggro by sight.
- Any summoned pets (SMN, DRG, or BST) will immediately disappear once their master is defeated.
Statues
- All statues are true sight and link with each other, but may be deaggroed by running far enough away while all other monsters will not deaggro, likely tracking by scent.
- Each statue has a fixed spawn number which can vary between as low as 1 and up to as many as 6.
- Statues have different color eyes which determine the following (buffs are dependent upon the zone):
- Blue Eye Statues:
 only: Statue and Orcs spawned will have a high resistance to
  physical damage but low resistance to
  magical damage.
 only: Statue and Quadavs spawned will have a high resistance to
  based physical/magical attacks and spells (
 /
/  /
/  / ) but low resistance to
  based physical/magical attacks and spells (,
  ,
,  ,
,  )
)
- Green Eye Statues:
- only: Statue and Orcs spawned will have a high resistance to magical damage but low resistance to physical damage.
- only: Statue and Quadavs spawned will have a high resistance to based physical/magical attacks and spells (, , , ) but low resistance to based physical/magical attacks and spells (, , , )
- Red Eye Statues:
- only: Spawns higher level Orc NMs. These NMs will have access to their unique family special move, Orcish Counterstance.
- only: Spawns higher level Quadav NMs. These NMs will have access to their unique family special move, Wrath of Gu'Dha.
- Colorless Eye Statues:
- All zones: Takes the place of any random green or blue colored eye statue in the zone. It seems only one may be up at any given time in the entire zone.
- When aggroed, the Goblin NM Aurix will spawn in addition to the respective zone beastmen mobs. When this statue is defeated and if "Aurix" runs away, another random remaining statue is picked to be the new placeholder in which "Aurix" will spawn again.
- This process stops after "Aurix" is defeated. Since there are 2 "Aurix"s in the zone, 1 pre-boss kill and 1 post-boss kill, this process works in the same manner for each instance.
- If Aurix is not damaged and left alone, he will run away over time. It seems to be 2-3 minutes before he runs away.
- So the general rule of thumb is he will either run away when he reaches a certain percentage of hp or amount of time that has elapsed, whichever comes first.
- If Aurix runs away and spawns from another colorless eye statue, he will have whatever HP he had previously from the last despawn.
- So the general rule of thumb is he will either run away when he reaches a certain percentage of hp or amount of time that has elapsed, whichever comes first.
- Note that colored eye statues shift between colors and have a period where they have no colored eyes. These statues do not count as colorless eye statues. Colorless eye statues remain colorless and never shift colors.
- When aggroed, the Goblin NM Aurix will spawn in addition to the respective zone beastmen mobs. When this statue is defeated and if "Aurix" runs away, another random remaining statue is picked to be the new placeholder in which "Aurix" will spawn again.
- All zones: Takes the place of any random green or blue colored eye statue in the zone. It seems only one may be up at any given time in the entire zone.
- Blue Eye Statues:
- After the zone mid-boss is defeated, all previous enemies and statues in the zone will despawn.
- New statues will appear in their place, which will spawn stronger enemies and NMs of a different title.
- These enemies will be the same job variants as the ones before them.
- These are significantly stronger than their normal counterparts with higher defense, attack, and HP.
- New statues will appear in their place, which will spawn stronger enemies and NMs of a different title.
Dynamis - San d'Oria [D]
| |
| Entrance: | Southern San d'Oria (K-10) (HP #2) |
| Reforge Items: | Footshard and Voidfoot |
| Mid-Boss: | Overseer's Tombstone |
| Boss: | Halphas |
|
| ||||||||||||||||||||||||||||||||||||||||||||||||||||||||||||||||||||||||||||||||||||||||||||||||||||||||||


Dynamis - Bastok [D]
| |
| Entrance: | Bastok Mines (I-9) (HP #1) |
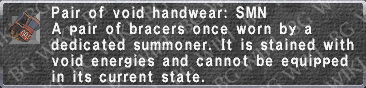
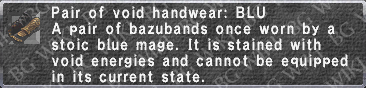
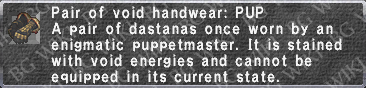
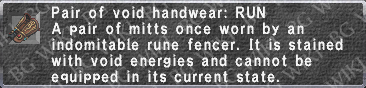
| Reforge Items: | Handshard and Voidhand |
| Mid-Boss: | Mu'Sha Effigy |
| Boss: | Ka'Rho Fearsinger |
|
|
|||||||||||||||||||||||||||||||||||||||||||||||||||||||||||||||||||||||||||||||||||||||||||||||||||||||||||


Subcategories
This category has the following 10 subcategories, out of 10 total.
Pages in category "Dynamis - Divergence"
The following 41 pages are in this category, out of 41 total.
