The Voracious Resurgence | |
| Prime Weapons • Ultimate Weapons • Ultimate Augments • Abjurations iL119 • JSE Necks • Divergence Augments • Escutcheons | |
| Reforged Armor Artifact: +1 • iL109 • iL119/+2/+3 Relic: +1/+2 • iL109 • iL119/+2/+3 Empyrean: +1/+2 • iL109 • iL119/+2/+3 |
Guides • Crafting • Trusts • Apex Monsters |
Category:High-Tier Mission Battlefields: Difference between revisions
(→Battlefields: who doesn't like stars) |
|||
| Line 71: | Line 71: | ||
! width=15% nowrap | Armor |
! width=15% nowrap | Armor |
||
|- |
|- |
||
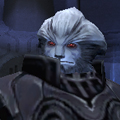
| align="center" | ''' |
| align="center" | '''★Ark Angels (1)''' |
||
[[File:AA-HM.jpg|frame|center|[[Ark Angel HM]]]] |
[[File:AA-HM.jpg|frame|center|[[Ark Angel HM]]]] |
||
| |
| |
||
| Line 101: | Line 101: | ||
*:;[[Manabyss Pigaches]] |
*:;[[Manabyss Pigaches]] |
||
|- |
|- |
||
| align="center" | ''' |
| align="center" | '''★Ark Angels (2)''' |
||
[[File:AA-TT.jpg|frame|center|[[Ark Angel TT]]]] |
[[File:AA-TT.jpg|frame|center|[[Ark Angel TT]]]] |
||
| |
| |
||
| Line 131: | Line 131: | ||
*:;[[Fravashi Mantle]] |
*:;[[Fravashi Mantle]] |
||
|- |
|- |
||
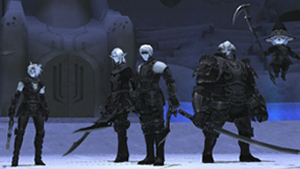
| align="center" | ''' |
| align="center" | '''★Ark Angels (3)''' |
||
[[File:AA-MR.jpg|frame|center|[[Ark Angel MR]]]] |
[[File:AA-MR.jpg|frame|center|[[Ark Angel MR]]]] |
||
| |
| |
||
| Line 161: | Line 161: | ||
*:;[[Sekhmet Corset]] |
*:;[[Sekhmet Corset]] |
||
|- |
|- |
||
| align="center" | ''' |
| align="center" | '''★Ark Angels (4)''' |
||
[[File:AA-EV.jpg|frame|center|[[Ark Angel EV]]]] |
[[File:AA-EV.jpg|frame|center|[[Ark Angel EV]]]] |
||
| |
| |
||
| Line 191: | Line 191: | ||
*:;[[Dynasty Mitts]] |
*:;[[Dynasty Mitts]] |
||
|- |
|- |
||
| align="center" | ''' |
| align="center" | '''★Ark Angels (5)''' |
||
[[File:AA-GK.jpg|frame|center|[[Ark Angel GK]]]] |
[[File:AA-GK.jpg|frame|center|[[Ark Angel GK]]]] |
||
| |
| |
||
| Line 221: | Line 221: | ||
*:;[[Daihanshi Habaki]] |
*:;[[Daihanshi Habaki]] |
||
|- |
|- |
||
| align="center" | ''' |
| align="center" | '''★Divine Might''' |
||
[[File:DM.jpg|frame|center|[[Divine Might II]]]] |
[[File:DM.jpg|frame|center|[[Divine Might II]]]] |
||
| |
| |
||
| Line 262: | Line 262: | ||
*::;(MR Only) |
*::;(MR Only) |
||
|- |
|- |
||
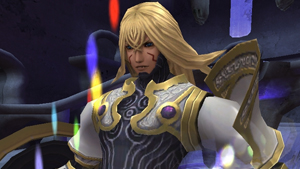
| align="center" | ''' |
| align="center" | '''★Return to Delkfutt’s Tower''' |
||
[[File:DT.jpg|frame|center|[[Kam'lanaut]]]] |
[[File:DT.jpg|frame|center|[[Kam'lanaut]]]] |
||
| |
| |
||
| Line 292: | Line 292: | ||
*:;[[Mes'yohi Slacks]] |
*:;[[Mes'yohi Slacks]] |
||
|- |
|- |
||
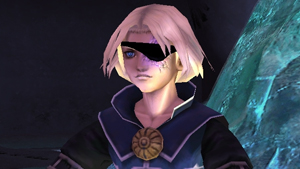
| align="center" | ''' |
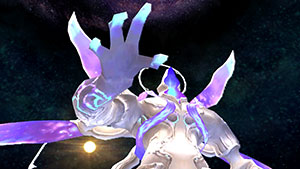
| align="center" | '''★The Celestial Nexus''' |
||
[[File:CN.jpg|frame|center|[[Eald'narche]]]] |
[[File:CN.jpg|frame|center|[[Eald'narche]]]] |
||
| |
| |
||
| Line 326: | Line 326: | ||
*:;[[Vanir Boots]] |
*:;[[Vanir Boots]] |
||
|- |
|- |
||
| align="center" | ''' |
| align="center" | '''★The Shadow Lord Battle''' |
||
[[File:shadowlordb.jpg|frame|center|[[Shadow Lord]]]] |
[[File:shadowlordb.jpg|frame|center|[[Shadow Lord]]]] |
||
| |
| |
||
| Line 366: | Line 366: | ||
! width=15% nowrap | Armor |
! width=15% nowrap | Armor |
||
|- |
|- |
||
| align="center" | ''' |
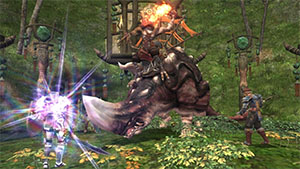
| align="center" | '''★The Savage''' |
||
[[File:ouryub.jpg|frame|center|[[Ouryu]]]] |
[[File:ouryub.jpg|frame|center|[[Ouryu]]]] |
||
| |
| |
||
| Line 401: | Line 401: | ||
*:;[[Domesticator's Earring]] |
*:;[[Domesticator's Earring]] |
||
|- |
|- |
||
| align="center" | ''' |
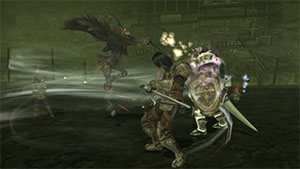
| align="center" | '''★The Warrior's Path''' |
||
[[File:tenzenb.jpg|frame|center|[[Tenzen]]]] |
[[File:tenzenb.jpg|frame|center|[[Tenzen]]]] |
||
| |
| |
||
| Line 435: | Line 435: | ||
*:;[[Mizukage-no-Kubikazari]] |
*:;[[Mizukage-no-Kubikazari]] |
||
|- |
|- |
||
| align="center" | ''' |
| align="center" | '''★Head Wind''' |
||
[[File:headwindb.jpg|frame|center|[[Shikaree X]], [[Shikaree Y]], and [[Shikaree Z]]]] |
[[File:headwindb.jpg|frame|center|[[Shikaree X]], [[Shikaree Y]], and [[Shikaree Z]]]] |
||
| |
| |
||
| Line 463: | Line 463: | ||
*:;[[Durgai Leggings]] |
*:;[[Durgai Leggings]] |
||
|- |
|- |
||
| align="center" | ''' |
| align="center" | '''★One to be Feared''' |
||
[[File:onetobefearedb.jpg|frame|center|[[Proto-Omega]] and [[Proto-Ultima]]]] |
[[File:onetobefearedb.jpg|frame|center|[[Proto-Omega]] and [[Proto-Ultima]]]] |
||
| |
| |
||
| Line 494: | Line 494: | ||
|- |
|- |
||
|- |
|- |
||
| align="center" | ''' |
| align="center" | '''★Dawn''' |
||
[[File:dawnb.jpg|frame|center|[[Promathia]]]] |
[[File:dawnb.jpg|frame|center|[[Promathia]]]] |
||
| |
| |
||
| Line 536: | Line 536: | ||
! width=15% nowrap | Armor |
! width=15% nowrap | Armor |
||
|- |
|- |
||
| align="center" | ''' |
| align="center" | '''★Puppet in Peril''' |
||
[[File:puppetperil.jpg|frame|center|[[Lancelord Gaheel Ja]]]] |
[[File:puppetperil.jpg|frame|center|[[Lancelord Gaheel Ja]]]] |
||
| |
| |
||
| Line 568: | Line 568: | ||
*:;[[Pratik Earring]] |
*:;[[Pratik Earring]] |
||
|- |
|- |
||
| align="center" | ''' |
| align="center" | '''★Legacy of the Lost''' |
||
[[File:legacylost.jpg|frame|center|[[Gessho (monster)|Gessho]]]] |
[[File:legacylost.jpg|frame|center|[[Gessho (monster)|Gessho]]]] |
||
| |
| |
||
| Line 613: | Line 613: | ||
! width=15% nowrap | Armor |
! width=15% nowrap | Armor |
||
|- |
|- |
||
| align="center" | ''' |
| align="center" | '''★Trial by Wind''' |
||
[[File:Garuda Prime.jpg|frame|center|[[Garuda Prime]]]] |
[[File:Garuda Prime.jpg|frame|center|[[Garuda Prime]]]] |
||
| |
| |
||
| Line 641: | Line 641: | ||
*:;[[Ostro Greaves]] |
*:;[[Ostro Greaves]] |
||
|- |
|- |
||
| align="center" | ''' |
| align="center" | '''★Trial by Lightning''' |
||
[[File:Ramuh Prime.jpg|frame|center|[[Ramuh Prime]]]] |
[[File:Ramuh Prime.jpg|frame|center|[[Ramuh Prime]]]] |
||
| |
| |
||
| Line 669: | Line 669: | ||
*:;[[Brontes Cuisses]] |
*:;[[Brontes Cuisses]] |
||
|- |
|- |
||
| align="center" | ''' |
| align="center" | '''★Trial by Earth''' |
||
[[File:Titan Prime.jpg|frame|center|[[Titan Prime]]]] |
[[File:Titan Prime.jpg|frame|center|[[Titan Prime]]]] |
||
| |
| |
||
| Line 697: | Line 697: | ||
*:;[[Plumose Sachet]] |
*:;[[Plumose Sachet]] |
||
|- |
|- |
||
| align="center" | ''' |
| align="center" | '''★Trial by Fire''' |
||
[[File:Ifrit Prime.jpg|frame|center|[[Ifrit Prime]]]] |
[[File:Ifrit Prime.jpg|frame|center|[[Ifrit Prime]]]] |
||
| |
| |
||
| Line 725: | Line 725: | ||
*:;[[Immolation Grip]] |
*:;[[Immolation Grip]] |
||
|- |
|- |
||
| align="center" | ''' |
| align="center" | '''★Trial by Water''' |
||
[[File:Leviathan Prime.jpg|frame|center|[[Leviathan Prime]]]] |
[[File:Leviathan Prime.jpg|frame|center|[[Leviathan Prime]]]] |
||
| |
| |
||
| Line 753: | Line 753: | ||
*:;[[Neritic Earring]] |
*:;[[Neritic Earring]] |
||
|- |
|- |
||
| align="center" | ''' |
| align="center" | '''★Trial by Ice''' |
||
[[File:Shiva Prime.jpg|frame|center|[[Shiva Prime]]]] |
[[File:Shiva Prime.jpg|frame|center|[[Shiva Prime]]]] |
||
| |
| |
||
| Line 781: | Line 781: | ||
*:;[[Floestone]] |
*:;[[Floestone]] |
||
|- |
|- |
||
| align="center" | ''' |
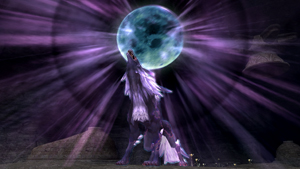
| align="center" | '''★The Moonlit Path''' |
||
[[File:Fenrir Prime HL.jpg|frame|center|[[Fenrir Prime]]]] |
[[File:Fenrir Prime HL.jpg|frame|center|[[Fenrir Prime]]]] |
||
| |
| |
||
| Line 809: | Line 809: | ||
*:;[[Lupine Cape]] |
*:;[[Lupine Cape]] |
||
|- |
|- |
||
| align="center" | ''' |
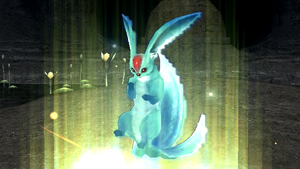
| align="center" | '''★Waking the Beast''' |
||
[[File:Carbuncle Prime HL.jpg|frame|center|[[Carbuncle Prime]]]] |
[[File:Carbuncle Prime HL.jpg|frame|center|[[Carbuncle Prime]]]] |
||
| |
| |
||
| Line 837: | Line 837: | ||
*:;[[Diamantaire Sollerets]] |
*:;[[Diamantaire Sollerets]] |
||
|- |
|- |
||
| align="center" | ''' |
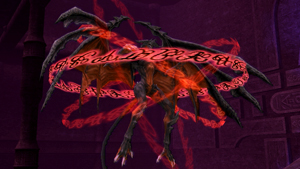
| align="center" | '''★Waking Dreams''' |
||
[[File:Diabolos Prime.jpg|frame|center|[[Diabolos Prime]]]] |
[[File:Diabolos Prime.jpg|frame|center|[[Diabolos Prime]]]] |
||
| |
| |
||
Revision as of 19:34, 7 October 2015
|
|
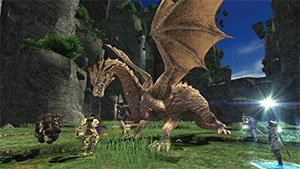
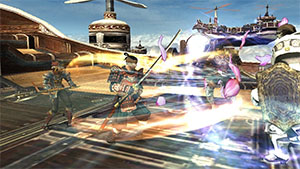
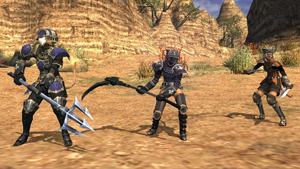
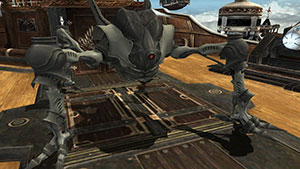
Introduction
In the December 2013 Version Update, High-Tier Mission Battlefields started being introduced. These battlefields bring back nostalgic enemies that have newfound strength to challenge even the most experienced veteran players. In order to challenge these foes, a key item is required by each party member to enter the battlefield. It is highly suggested that you communicate with your party members to verify that everyone has purchased the appropriate key item required for the fight you are entering. There is no warning if a party member is unable to enter the battlefield. If one player forgets to purchase the item, and the other party members enter, the player has a chance to purchase the key item as long as the other party members do not engage.
Key Item Sales
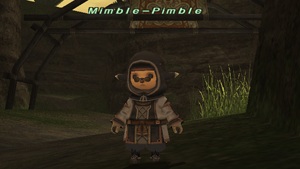
The following three NPCs sell the key items to enter the battlefields, one in each nation. Before you are allowed to buy the key item to enter the high level battlefield, you must meet the following requirements.
- Must be level 95 or higher
- Must have completed the lower level version of the battlefield
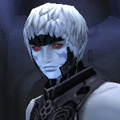
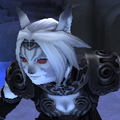
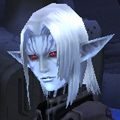
| Trisvain in Northern San d'Oria (J-7) | Raving Opossum in Port Bastok (J-11) | Mimble-Pimble in Port Windurst (L-5) |
Difficulty
Initially, players are only able to choose Very Easy, Easy or Normal difficulties while beginning a fight for the first time. After winning your first battle on these difficulties, you are then able to choose Difficult or Very Difficult the next time you enter the fight. Note that if a fellow party member has already initialized the fight on either of the hardest two difficulties and you have not won the fight yet, the battlefield will still be set to the difficulty chosen by the party member that entered regardless of what you choose.
Rewards
Reforged Artifact +1 seals and Item Level upgrade items for Relic Weapons, Empyrean Weapons, and Mythic Weapons are distributed to each party member's personal inventory. The number of these items that are received is based on the difficulty of the fight. See the table below as an outline for Rem's Tale Chapters and R/E/M Upgrade items (Pluton, Riftborn Boulder, Beitetsu) that distribute into personal inventories upon winning a battlefield. Note that as well as personal distribution, chapters also appear in the party's treasure pool along with unique weapons and equipment. These items can be received by any party member.
| Difficulty | Content Level | Rem's Tale Chapters | R/E/M Upgrade Items |
|---|---|---|---|
| Very Easy | 113 | 1 | 0 |
| Easy | 116 | 1 | 0 |
| Normal | 119 | 2 | 1 |
| Difficult | Over 119 | 3 | 2 |
| Very Difficult | Over 119 | 4 | 2 |
Battlefields
Below is a full list of all High-Tier Mission Battlefields in the game, as well as potential drops from each.
Rise of the Zilart
| Name | Battlefield Entry | Armor Upgrades | Weapons | Armor | |
|---|---|---|---|---|---|
| ★Ark Angels (1) |
|
|
|||
| ★Ark Angels (2) |
|
|
|||
| ★Ark Angels (3) |
|
|
|||
| ★Ark Angels (4) |
|
|
|||
| ★Ark Angels (5) |
|
|
|||
| ★Divine Might |
|
|
| ||
| ★Return to Delkfutt’s Tower |
|
|
|||
| ★The Celestial Nexus |
|
|
|||
| ★The Shadow Lord Battle |
|
|
Chains of Promathia
| Name | Battlefield Entry | Armor Upgrades | Weapons | Armor | |
|---|---|---|---|---|---|
| ★The Savage |
|
|
|||
| ★The Warrior's Path |
|
|
|||
| ★Head Wind |
|
|
|||
| ★One to be Feared |
|
|
|||
| ★Dawn |
|
|
Treasures of Aht Urghan
| Name | Battlefield Entry | Armor Upgrades | Weapons | Armor | |
|---|---|---|---|---|---|
| ★Puppet in Peril |
|
|
|||
| ★Legacy of the Lost |
|
|
Avatar Prime Fights
| Name | Battlefield Entry | Armor Upgrades | Weapons | Armor | |
|---|---|---|---|---|---|
| ★Trial by Wind |
|
|
|||
| ★Trial by Lightning |
|
|
|||
| ★Trial by Earth |
|
|
|||
| ★Trial by Fire |
|
|
|||
| ★Trial by Water |
|
|
|||
| ★Trial by Ice |
|
|
|||
| ★The Moonlit Path |
|
|
|||
| ★Waking the Beast |
|
|
|||
| ★Waking Dreams |
|
|
Subcategories
This category has the following 30 subcategories, out of 30 total.
H
- High-Tier Mission Battlefields/AAEV
- High-Tier Mission Battlefields/AAGK
- High-Tier Mission Battlefields/AAHM
- High-Tier Mission Battlefields/AAMR
- High-Tier Mission Battlefields/AATT
- High-Tier Mission Battlefields/CelestialNexus
- High-Tier Mission Battlefields/ChampionOfTheDawn
- High-Tier Mission Battlefields/Dawn
- High-Tier Mission Battlefields/DivineInterference
- High-Tier Mission Battlefields/DivineMight
- High-Tier Mission Battlefields/HeadWind
- High-Tier Mission Battlefields/LegacyOfTheLost
- High-Tier Mission Battlefields/MaidenOfTheDusk
- High-Tier Mission Battlefields/MoonlitPath
- High-Tier Mission Battlefields/OneToBeFeared
- High-Tier Mission Battlefields/PuppetInPeril
- High-Tier Mission Battlefields/ReturnDelkfutt
- High-Tier Mission Battlefields/ShadowLordBattle
- High-Tier Mission Battlefields/StygianPact
- High-Tier Mission Battlefields/TheSavage
- High-Tier Mission Battlefields/TheWyrmGod
- High-Tier Mission Battlefields/TrialByEarth
- High-Tier Mission Battlefields/TrialByFire
- High-Tier Mission Battlefields/TrialByIce
- High-Tier Mission Battlefields/TrialByLightning
- High-Tier Mission Battlefields/TrialByWater
- High-Tier Mission Battlefields/TrialByWind
- High-Tier Mission Battlefields/WakingDreams
- High-Tier Mission Battlefields/WakingTheBeast
- High-Tier Mission Battlefields/WarriorPath
Pages in category "High-Tier Mission Battlefields"
The following 25 pages are in this category, out of 25 total.


