The Voracious Resurgence | |
| Prime Weapons • Ultimate Weapons • Ultimate Augments • Abjurations iL119 • JSE Necks • Divergence Augments • Escutcheons | |
| Reforged Armor Artifact: +1 • iL109 • iL119/+2/+3 Relic: +1/+2 • iL109 • iL119/+2/+3 Empyrean: +1/+2 • iL109 • iL119/+2/+3 |
Guides • Crafting • Trusts • Apex Monsters |
Category:High-Tier Mission Battlefields: Difference between revisions
FaeQueenCory (talk | contribs) |
|||
| (47 intermediate revisions by 5 users not shown) | |||
| Line 3: | Line 3: | ||
|Float=left |
|Float=left |
||
|Image=HTMBF Header.png |
|Image=HTMBF Header.png |
||
|Image Size= |
|Image Size=425 |
||
|Image Link= |
|Image Link= |
||
|Intro Text='''High-Tier Mission Battlefields''' first began being released in the December 2013 Version Update.<br /> |
|Intro Text='''High-Tier Mission Battlefields''' first began being released in the December 2013 Version Update.<br /> |
||
| Line 14: | Line 14: | ||
The following three NPCs sell the key items to enter the battlefields, one in each nation. Before you are allowed to buy the key item to enter the high level battlefield, you must meet the following requirements. |
The following three NPCs sell the key items to enter the battlefields, one in each nation. Before you are allowed to buy the key item to enter the high level battlefield, you must meet the following requirements. |
||
*Must be level 95 or higher |
*Must be level 95 or higher |
||
*Must have completed the lower level version of the battlefield |
*Must have completed the lower level version of the battlefield |
||
*Divine Might II key item can only be obtained if Ark battles 1-5 have been completed on Normal or Higher. Checking via Accomplishments must read as Conquered or With Honors. Unfinished indicates completion on Very Easy or Easy or not at all. D/A |
|||
**{{color|red|Note}}: '''''More precise requirements can be found on each of the Phantom Gem key item pages.''''' |
|||
{| |
{| |
||
|- |
|- |
||
| Line 28: | Line 31: | ||
Initially, players are only able to choose '''Very Easy''', '''Easy''' or '''Normal''' difficulties while beginning a fight for the first time.<br /> |
Initially, players are only able to choose '''Very Easy''', '''Easy''' or '''Normal''' difficulties while beginning a fight for the first time.<br /> |
||
After winning your first battle on these difficulties, you are then able to choose '''Difficult''' or '''Very Difficult''' the next time you enter the fight. |
After winning your first battle on these difficulties, you are then able to choose '''Difficult''' or '''Very Difficult''' the next time you enter the fight. |
||
*Note that if a fellow party member has already initialized the fight |
*Note that if a fellow party member has already initialized the fight, the battlefield will still be set to the difficulty chosen by the first party member to enter regardless of what you choose. This includes whether or not you have a higher difficulty unlocked or not. |
||
== Rewards == |
== Rewards == |
||
[[:Category:Reforged |
[[:Category:Reforged Armor|Reforged Armor]] [[File:Rem's Tale Ch.1 icon.png|22px|link=]] [[Rem's Tale]] chapters and [[Item Level]] upgrade materials for [[Relic Weapons|'''R'''elic Weapons]] ([[File:Pluton icon.png|22px|link=]] [[Pluton]]s), [[Empyrean Weapons|'''E'''mpyrean Weapons]] ([[File:Riftborn Boulder icon.png|22px|link=]] [[Riftborn Boulder]]s), and [[Mythic Weapons|'''M'''ythic Weapons]] ([[File:Beitetsu icon.png|22px|link=]] [[Beitetsu]]) are distributed to each party member's ''personal'' inventory. |
||
*The number of these items received is based on the difficulty of the fight, see below. |
|||
See the table below as an outline for Rem's Tale Chapters and R/E/M Upgrade items ([[Pluton]], [[Riftborn Boulder]], [[Beitetsu]]) that distribute into personal inventories upon winning a battlefield. |
|||
See the table below as an outline for [[Rem's Tale]] Chapters and R/E/M Upgrade items ([[Pluton]], [[Riftborn Boulder]], [[Beitetsu]]) that distribute into personal inventories upon winning a battlefield. |
|||
*Note that as well as personal distribution, chapters also appear in the party's treasure pool along with unique weapons and equipment. These items can be received by any party member. |
|||
*As well as personal reward distribution, chapters also appear in the party's treasure pool along with unique weapons and equipment. These items can be received by any party member. |
|||
===All battlefields '''''except''''' ★Divine Might=== |
|||
{| class="Standardwide R1-White" text-align: center;" BGCOLOR="#efeeee" width="800px" |
{| class="Standardwide R1-White" text-align: center;" BGCOLOR="#efeeee" width="800px" |
||
|- BGCOLOR="#4b4d4f" |
|- BGCOLOR="#4b4d4f" |
||
| Line 50: | Line 55: | ||
| align="center" | 116 |
| align="center" | 116 |
||
| align="center" | 1 |
| align="center" | 1 |
||
| align="center" | |
| align="center" | 1 |
||
|- |
|- |
||
| align="center" | Normal |
| align="center" | Normal |
||
| Line 69: | Line 74: | ||
|} |
|} |
||
===★Divine Might Only=== |
|||
Furthermore, the drop rates for unique {{Rare}}/{{Ex}} rewards obtained through these battles increase with the BCNM difficulty. |
|||
{| class="Standardwide R1-White" text-align: center;" BGCOLOR="#efeeee" width="800px" |
|||
*At Difficult and Very Difficult an item is guaranteed to drop while at normal the chances are much lower. |
|||
|- BGCOLOR="#4b4d4f" |
|||
**Treasure Hunter will have a noticeable impact on drops for Very Easy - Normal while having no effect for Difficult and Very Difficult. |
|||
! width=25% align="center" | Difficulty |
|||
*Below Normal, drops are significantly rarer. Expect to go through dozens of fights with no rare/ex drops below Normal difficulty, especially without Treasure Hunter. |
|||
! width=25% align="center" | Content Level |
|||
! width=25% align="center" | Rem's Tale Chapters |
|||
! width=25% align="center" | R/E/M Upgrade Items |
|||
|- |
|||
| align="center" | Very Easy |
|||
| align="center" | 113 |
|||
| align="center" | 2 |
|||
| align="center" | 0 |
|||
|- |
|||
| align="center" | Easy |
|||
| align="center" | 116 |
|||
| align="center" | 2 |
|||
| align="center" | 2 |
|||
|- |
|||
| align="center" | Normal |
|||
| align="center" | 119 |
|||
| align="center" | 4 |
|||
| align="center" | 2 |
|||
|- |
|||
| align="center" | Difficult |
|||
| align="center" | Over 119 |
|||
| align="center" | 6 |
|||
| align="center" | 4 |
|||
|- |
|||
| align="center" | Very Difficult |
|||
| align="center" | Over 119 |
|||
| align="center" | 8 |
|||
| align="center" | 4 |
|||
|- |
|||
|} |
|||
===Other Rewards=== |
|||
Drop rates for unique {{Rare}}/{{Ex}} rewards obtained as well as other rewards (E.g. Scrolls and upgrade materials) through these battles increase with the BCNM difficulty setting. |
|||
*At Very Easy, Easy, and Normal difficulties, the drop rate for unique {{Rare}}/{{Ex}} items should be ''very roughly'' around 10% before Treasure Hunter. There is no data to support this drop rate, however. |
|||
*At Difficult and Very Difficult, one item is guaranteed to drop. A second item has a very high probability. |
|||
*[[Treasure Hunter]] will have a noticeable impact on drops for Very Easy, Easy, and Normal while having no effect for Difficult and Very Difficult. |
|||
**Below Normal, drops are significantly rarer. Expect to go through dozens of fights with no rare/ex drops below Normal difficulty, especially without Treasure Hunter. |
|||
*New High-Tier Mission BCNMs do '''not''' follow these rules. {{Rare}}/{{Ex}} drops are not guaranteed on Difficult or Very Difficult. |
|||
:*The following BCNMs are considered "new": '''[[A Stygian Pact II]]''' ([[Odin Prime]]), '''[[Champion of the Dawn II]]''' ([[Cait Sith Prime]]), '''[[Divine Interference II]] ''' ([[Alexander Prime]]), '''[[Maiden of the Dusk II]] ''' ([[Lilith]]). |
|||
===Monthly Adventurer Campaigns=== |
|||
There is one type of campaign that may run any given month. |
|||
{{Category:Adventurer_Campaigns |
|||
|transcludesection=HTMB |
|||
}} |
|||
== Battlefields == |
== Battlefields == |
||
| Line 86: | Line 137: | ||
! width=15% nowrap | Armor |
! width=15% nowrap | Armor |
||
|- style="border-top: 1px solid #efeeee;" |
|- style="border-top: 1px solid #efeeee;" |
||
! colspan="100%" BGCOLOR="# |
! colspan="100%" BGCOLOR="#8C3D0C" cellpadding="0" height=2px| |
||
|- style="border-bottom: 1px solid #ffffff;" |
|||
| align="center" | <span id=ShadowLordBattle>'''★The Shadow Lord Battle'''</span> |
|||
[[File:shadowlordb.jpg|frame|center|link=Shadow Lord|[[Shadow Lord]]]] |
|||
| |
|||
{| style="background: #F9F9F9; border: 1px solid #AAAAAA" width="100%" |
|||
| |
|||
:'''Entry KI''': [[Shadow Lord phantom gem]] |
|||
:'''Merit Cost''': 10 |
|||
::Level Cap: Uncapped |
|||
::Time Limit: 30 Min |
|||
::Max People: 6 |
|||
:'''[[Home Point]]:''' [[Valdeaunia]] > [[Castle Zvahl Keep]] (#1) |
|||
<hr> |
|||
:'''[[:Category:High-Tier_Mission_Battlefields/ShadowLordBattle|Testimonials]]''' |
|||
|} |
|||
| style="border-right: 1px solid #ffffff;" | |
|||
*:;[[Rem's Tale Ch.7]] |
|||
:::[[Reforged Armor|RF]] [[:Category:Body|Body]] Slot Upgrade Material |
|||
*:;All [[:Category:Reforged_Artifact_Armor_+1|AF1 IL 119]] Upgrade Synthesis Materials |
|||
| style="border-right: 1px solid #ffffff;" | |
|||
*:;[[Lightreaver]] |
|||
'''During Collaboration Event:''' |
|||
*:;[[Shadow Lord Tunes]] |
|||
'''[[My Little Shadow Lord]] Event:''' |
|||
*:;[[Shadow Lord Statue]] |
|||
*:;[[Shadow Lord Statue II]] |
|||
*:;[[Shadow Lord Statue III]] |
|||
| |
|||
*:;[[Onimusha-no-Kote]] |
|||
*:;[[Dread Jupon]] |
|||
*:;[[Perdition Slops]] |
|||
*:;[[Trepidity Mantle]] |
|||
|- style="border-bottom: 1px solid #ffffff;" |
|||
| align="center" | <span id=ReturnDelkfutt>'''★Return to Delkfutt's Tower'''</span> |
|||
[[File:DT.jpg|frame|center|link=Kam'lanaut|[[Kam'lanaut]]]] |
|||
| |
|||
{| style="background: #F9F9F9; border: 1px solid #AAAAAA" width="100%" |
|||
| |
|||
:'''Entry KI''': [[Stellar Fulcrum phantom gem]] |
|||
:'''Merit Cost''': 10 |
|||
::Level Cap: Uncapped |
|||
::Time Limit: 30 Min |
|||
::Max People: 6 |
|||
:'''[[Home Point]]:''' [[Qufim]] > [[Upper Delkfutt's Tower]] (#1) |
|||
<hr> |
|||
:'''[[:Category:High-Tier_Mission_Battlefields/ReturnDelkfutt|Testimonials]]''' |
|||
|} |
|||
| style="border-right: 1px solid #ffffff;" | |
|||
*:;[[Rem's Tale Ch.6]] |
|||
:::[[Reforged Armor|RF]] [[:Category:Head|Head]] Slot Upgrade Material |
|||
*:;All [[:Category:Reforged_Artifact_Armor_+1|AF1 IL 119]] Upgrade Synthesis Materials |
|||
*:;[[Wyrm Blood]] |
|||
| style="border-right: 1px solid #ffffff;" | |
|||
*:;[[Mes'yohi Sword]] |
|||
*:;[[Mes'yohi Rod]] |
|||
*:;[[Seraphicaller]] |
|||
*:;[[Divinator]] |
|||
| |
|||
*:;[[Mes'yohi Haubergeon]] |
|||
*:;[[Mes'yohi Slacks]] |
|||
|- style="border-bottom: 1px solid #ffffff;" |
|- style="border-bottom: 1px solid #ffffff;" |
||
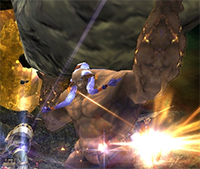
| align="center" | <span id=AAHM>'''★Ark Angels (1)'''</span> |
| align="center" | <span id=AAHM>'''★Ark Angels (1)'''</span> |
||
| Line 285: | Line 409: | ||
*:;[[Gelai Earring]]<br /><sup>''(MR Only)''</sup> |
*:;[[Gelai Earring]]<br /><sup>''(MR Only)''</sup> |
||
|- style="border-bottom: 1px solid #ffffff;" |
|||
| align="center" | <span id=ReturnDelkfutt>'''★Return to Delkfutt's Tower'''</span> |
|||
[[File:DT.jpg|frame|center|link=Kam'lanaut|[[Kam'lanaut]]]] |
|||
| |
|||
{| style="background: #F9F9F9; border: 1px solid #AAAAAA" width="100%" |
|||
| |
|||
:'''Entry KI''': [[Stellar Fulcrum phantom gem]] |
|||
:'''Merit Cost''': 10 |
|||
::Level Cap: Uncapped |
|||
::Time Limit: 30 Min |
|||
::Max People: 6 |
|||
:'''[[Home Point]]:''' [[Qufim]] > [[Upper Delkfutt's Tower]] (#1) |
|||
<hr> |
|||
:'''[[:Category:High-Tier_Mission_Battlefields/ReturnDelkfutt|Testimonials]]''' |
|||
|} |
|||
| style="border-right: 1px solid #ffffff;" | |
|||
*:;[[Rem's Tale Ch.6]] |
|||
:::[[Reforged Armor|RF]] [[:Category:Head|Head]] Slot Upgrade Material |
|||
*:;All [[:Category:Reforged_Artifact_Armor_+1|AF1 IL 119]] Upgrade Synthesis Materials |
|||
*:;[[Wyrm Blood]] |
|||
| style="border-right: 1px solid #ffffff;" | |
|||
*:;[[Mes'yohi Sword]] |
|||
*:;[[Mes'yohi Rod]] |
|||
*:;[[Seraphicaller]] |
|||
*:;[[Divinator]] |
|||
| |
|||
*:;[[Mes'yohi Haubergeon]] |
|||
*:;[[Mes'yohi Slacks]] |
|||
|- style="border-bottom: 1px solid #ffffff;" |
|- style="border-bottom: 1px solid #ffffff;" |
||
| align="center" | <span id=CelestialNexus>'''★The Celestial Nexus'''</span> |
| align="center" | <span id=CelestialNexus>'''★The Celestial Nexus'''</span> |
||
| Line 355: | Line 445: | ||
*:;[[Vanir Boots]] |
*:;[[Vanir Boots]] |
||
|- style="border-bottom: 1px solid #ffffff;" |
|||
| align="center" | <span id=ShadowLordBattle>'''★The Shadow Lord Battle'''</span> |
|||
[[File:shadowlordb.jpg|frame|center|link=Shadow Lord|[[Shadow Lord]]]] |
|||
| |
|||
{| style="background: #F9F9F9; border: 1px solid #AAAAAA" width="100%" |
|||
| |
|||
:'''Entry KI''': [[Shadow Lord phantom gem]] |
|||
:'''Merit Cost''': 10 |
|||
::Level Cap: Uncapped |
|||
::Time Limit: 30 Min |
|||
::Max People: 6 |
|||
:'''[[Home Point]]:''' [[Valdeaunia]] > [[Castle Zvahl Keep]] (#1) |
|||
<hr> |
|||
:'''[[:Category:High-Tier_Mission_Battlefields/ShadowLordBattle|Testimonials]]''' |
|||
|} |
|||
| style="border-right: 1px solid #ffffff;" | |
|||
*:;[[Rem's Tale Ch.7]] |
|||
:::[[Reforged Armor|RF]] [[:Category:Body|Body]] Slot Upgrade Material |
|||
*:;All [[:Category:Reforged_Artifact_Armor_+1|AF1 IL 119]] Upgrade Synthesis Materials |
|||
| style="border-right: 1px solid #ffffff;" | |
|||
*:;[[Lightreaver]] |
|||
'''During Collaboration Event:''' |
|||
*:;[[Shadow Lord Tunes]] |
|||
'''[[My Little Shadow Lord]] Event:''' |
|||
*:;[[Shadow Lord Statue]] |
|||
*:;[[Shadow Lord Statue II]] |
|||
*:;[[Shadow Lord Statue III]] |
|||
| |
|||
*:;[[Onimusha-no-Kote]] |
|||
*:;[[Dread Jupon]] |
|||
*:;[[Perdition Slops]] |
|||
*:;[[Trepidity Mantle]] |
|||
|} |
|} |
||
| Line 406: | Line 457: | ||
! width=15% nowrap | Armor |
! width=15% nowrap | Armor |
||
|- style="border-top: 1px solid #efeeee;" |
|- style="border-top: 1px solid #efeeee;" |
||
! colspan="100%" BGCOLOR="# |
! colspan="100%" BGCOLOR="#B9DDE8" cellpadding="0" height=2px| |
||
|- style="border-bottom: 1px solid #ffffff;" |
|- style="border-bottom: 1px solid #ffffff;" |
||
| align="center" | '''★The Savage''' |
| align="center" | <span id=TheSavage>'''★The Savage'''</span> |
||
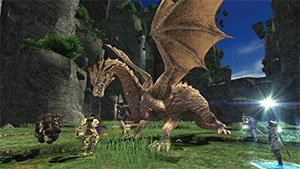
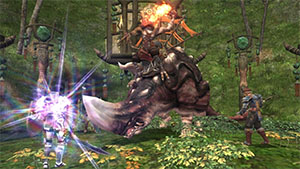
[[File:ouryub.jpg|frame|center|link=Ouryu|[[Ouryu]]]] |
[[File:ouryub.jpg|frame|center|link=Ouryu|[[Ouryu]]]] |
||
| |
| |
||
| Line 419: | Line 470: | ||
::Max People: 6 |
::Max People: 6 |
||
:'''[[Home Point]]:''' [[Tavnazian Archipelago|Tavnazian Arch.]] > [[Riverne - Site B01|Riv. - Site #B01]] (#1) |
:'''[[Home Point]]:''' [[Tavnazian Archipelago|Tavnazian Arch.]] > [[Riverne - Site B01|Riv. - Site #B01]] (#1) |
||
<hr> |
|||
:'''[[:Category:High-Tier_Mission_Battlefields/TheSavage|Testimonials]]''' |
|||
|} |
|} |
||
| style="border-right: 1px solid #ffffff;"| |
| style="border-right: 1px solid #ffffff;"| |
||
| Line 444: | Line 497: | ||
*:;[[Domesticator's Earring]] |
*:;[[Domesticator's Earring]] |
||
|- style="border-bottom: 1px solid #ffffff;" |
|- style="border-bottom: 1px solid #ffffff;" |
||
| align="center" | ''' |
| align="center" | <span id=HeadWind>'''★Head Wind'''</span> |
||
[[File:tenzenb.jpg|frame|center|link=Tenzen|[[Tenzen]]]] |
|||
| |
|||
{| style="background: #F9F9F9; border: 1px solid #AAAAAA" width="100%" |
|||
| |
|||
:'''Entry KI''': [[Warrior's Path phantom gem]] |
|||
:'''Merit Cost''': 10 |
|||
::Level Cap: Uncapped |
|||
::Time Limit: 30 Min |
|||
::Max People: 6 |
|||
:'''[[Home Point]]:''' [[Tavnazia]] > [[Tavnazian Safehold]] (#2) |
|||
|} |
|||
| style="border-right: 1px solid #ffffff;"| |
|||
*:;[[Rem's Tale Ch.9]] |
|||
:::[[Reforged Armor|RF]] [[:Category:Legs|Legs]] Slot Upgrade Material |
|||
*:;All [[:Category:Reforged_Artifact_Armor_+1|AF1 IL 119]] Upgrade Synthesis Materials |
|||
*:;[[Scarletite Ingot]] |
|||
| style="border-right: 1px solid #ffffff;"| |
|||
*:;[[Ginsen]] |
|||
*:;[[Hangaku-no-Yumi]] |
|||
*:;[[Seraphicaller]] |
|||
*:;[[Divinator]] |
|||
| |
|||
*:;[[Sukeroku Hachimaki]] |
|||
*:;[[Battlecast Gaiters]] |
|||
*:;[[Mizukage-no-Kubikazari]] |
|||
|- style="border-bottom: 1px solid #ffffff;" |
|||
| align="center" | '''★Head Wind''' |
|||
[[File:headwindb.jpg|frame|center|link=|[[Shikaree X]], [[Shikaree Y]], and [[Shikaree Z]]]] |
[[File:headwindb.jpg|frame|center|link=|[[Shikaree X]], [[Shikaree Y]], and [[Shikaree Z]]]] |
||
| |
| |
||
| Line 489: | Line 508: | ||
::Max People: 6 |
::Max People: 6 |
||
:'''[[Home Point]]:''' [[Aragoneu]] > [[Attohwa Chasm]] (#1) |
:'''[[Home Point]]:''' [[Aragoneu]] > [[Attohwa Chasm]] (#1) |
||
<hr> |
|||
:'''[[:Category:High-Tier_Mission_Battlefields/HeadWind|Testimonials]]''' |
|||
|} |
|} |
||
| style="border-right: 1px solid #ffffff;"| |
| style="border-right: 1px solid #ffffff;"| |
||
| Line 506: | Line 527: | ||
*:;[[Durgai Leggings]] |
*:;[[Durgai Leggings]] |
||
|- style="border-bottom: 1px solid #ffffff;" |
|- style="border-bottom: 1px solid #ffffff;" |
||
| align="center" | '''★One to be Feared''' |
| align="center" | <span id=OneToBeFeared>'''★One to be Feared'''</span> |
||
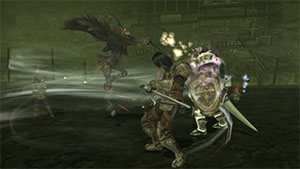
[[File:onetobefearedb.jpg|frame|center|link=|[[Omega]] and [[Ultima]]]] |
[[File:onetobefearedb.jpg|frame|center|link=|[[Omega]] and [[Ultima]]]] |
||
| |
| |
||
| Line 517: | Line 538: | ||
::Max People: 6 |
::Max People: 6 |
||
:'''[[Home Point]]:''' [[Tavnazia]] > [[Tavnazian Safehold]] (#2) |
:'''[[Home Point]]:''' [[Tavnazia]] > [[Tavnazian Safehold]] (#2) |
||
<hr> |
|||
:'''[[:Category:High-Tier_Mission_Battlefields/OneToBeFeared|Testimonials]]''' |
|||
|} |
|} |
||
| style="border-right: 1px solid #ffffff;"| |
| style="border-right: 1px solid #ffffff;"| |
||
| Line 536: | Line 559: | ||
*:;[[Consummation Torque]] |
*:;[[Consummation Torque]] |
||
|- style="border-bottom: 1px solid #ffffff;" |
|- style="border-bottom: 1px solid #ffffff;" |
||
| align="center" | ''' |
| align="center" | <span id=WarriorPath>'''★The Warrior's Path'''</span> |
||
[[File:tenzenb.jpg|frame|center|link=Tenzen|[[Tenzen]]]] |
|||
| |
|||
{| style="background: #F9F9F9; border: 1px solid #AAAAAA" width="100%" |
|||
| |
|||
:'''Entry KI''': [[Warrior's Path phantom gem]] |
|||
:'''Merit Cost''': 10 |
|||
::Level Cap: Uncapped |
|||
::Time Limit: 30 Min |
|||
::Max People: 6 |
|||
:'''[[Home Point]]:''' [[Tavnazia]] > [[Tavnazian Safehold]] (#2) |
|||
<hr> |
|||
:'''[[:Category:High-Tier_Mission_Battlefields/WarriorPath|Testimonials]]''' |
|||
|} |
|||
| style="border-right: 1px solid #ffffff;"| |
|||
*:;[[Rem's Tale Ch.9]] |
|||
:::[[Reforged Armor|RF]] [[:Category:Legs|Legs]] Slot Upgrade Material |
|||
*:;All [[:Category:Reforged_Artifact_Armor_+1|AF1 IL 119]] Upgrade Synthesis Materials |
|||
*:;[[Scarletite Ingot]] |
|||
| style="border-right: 1px solid #ffffff;"| |
|||
*:;[[Ginsen]] |
|||
*:;[[Hangaku-no-Yumi]] |
|||
*:;[[Seraphicaller]] |
|||
*:;[[Divinator]] |
|||
| |
|||
*:;[[Sukeroku Hachimaki]] |
|||
*:;[[Battlecast Gaiters]] |
|||
*:;[[Mizukage-no-Kubikazari]] |
|||
|- style="border-bottom: 1px solid #ffffff;" |
|||
| align="center" | <span id=Dawn>'''★Dawn'''</span> |
|||
[[File:dawnb.jpg|frame|center|link=Promathia|[[Promathia]]]] |
[[File:dawnb.jpg|frame|center|link=Promathia|[[Promathia]]]] |
||
| |
| |
||
| Line 547: | Line 606: | ||
::Max People: 6 |
::Max People: 6 |
||
:'''[[Home Point]]:''' [[Lumoria]] > [[The Garden of Ru'Hmet]] (#1) |
:'''[[Home Point]]:''' [[Lumoria]] > [[The Garden of Ru'Hmet]] (#1) |
||
<hr> |
|||
:'''[[:Category:High-Tier_Mission_Battlefields/Dawn|Testimonials]]''' |
|||
|} |
|} |
||
| style="border-right: 1px solid #ffffff;"| |
| style="border-right: 1px solid #ffffff;"| |
||
| Line 578: | Line 639: | ||
! width=15% nowrap | Armor |
! width=15% nowrap | Armor |
||
|- style="border-top: 1px solid #efeeee;" |
|- style="border-top: 1px solid #efeeee;" |
||
! colspan="100%" BGCOLOR="# |
! colspan="100%" BGCOLOR="#E5C87E" cellpadding="0" height=2px| |
||
|- style="border-bottom: 1px solid #ffffff;" |
|- style="border-bottom: 1px solid #ffffff;" |
||
| align="center" | '''★Puppet in Peril''' |
| align="center" | <span id=PuppetInPeril>'''★Puppet in Peril'''</span> |
||
[[File:puppetperil.jpg|frame|center|link=Lancelord Gaheel Ja|[[Lancelord Gaheel Ja]]]] |
[[File:puppetperil.jpg|frame|center|link=Lancelord Gaheel Ja|[[Lancelord Gaheel Ja]]]] |
||
| |
| |
||
| Line 591: | Line 652: | ||
::Max People: 6 |
::Max People: 6 |
||
:'''[[Home Point]]:''' [[West Aht Urhgan|W. Aht Urhgan]] > [[Bhaflau Thickets]] (#1) |
:'''[[Home Point]]:''' [[West Aht Urhgan|W. Aht Urhgan]] > [[Bhaflau Thickets]] (#1) |
||
<hr> |
|||
:'''[[:Category:High-Tier_Mission_Battlefields/PuppetInPeril|Testimonials]]''' |
|||
|} |
|} |
||
| style="border-right: 1px solid #ffffff;"| |
| style="border-right: 1px solid #ffffff;"| |
||
| Line 612: | Line 675: | ||
*:;[[Pratik Earring]] |
*:;[[Pratik Earring]] |
||
|- style="border-bottom: 1px solid #ffffff;" |
|- style="border-bottom: 1px solid #ffffff;" |
||
| align="center" | '''★Legacy of the Lost''' |
| align="center" | <span id=LegacyOfTheLost>'''★Legacy of the Lost'''</span> |
||
[[File:legacylost.jpg|frame|center|link=Gessho (monster)|[[Gessho (monster)|Gessho]]]] |
[[File:legacylost.jpg|frame|center|link=Gessho (monster)|[[Gessho (monster)|Gessho]]]] |
||
| |
| |
||
| Line 623: | Line 686: | ||
::Max People: 6 |
::Max People: 6 |
||
:'''[[Home Point]]:''' [[Arrapago Islands|Arrapago Is.]] > [[Caedarva Mire]] (#1) |
:'''[[Home Point]]:''' [[Arrapago Islands|Arrapago Is.]] > [[Caedarva Mire]] (#1) |
||
<hr> |
|||
:'''[[:Category:High-Tier_Mission_Battlefields/LegacyOfTheLost|Testimonials]]''' |
|||
|} |
|} |
||
| style="border-right: 1px solid #ffffff;"| |
| style="border-right: 1px solid #ffffff;"| |
||
| Line 645: | Line 710: | ||
*:;[[Tengu-no-Obi]] |
*:;[[Tengu-no-Obi]] |
||
|} |
|||
===Wings of the Goddess=== |
|||
{| class="Standardwide R1-White" text-align: center;" BGCOLOR="#efeeee" width="90%" cellpadding="1" |
|||
|- BGCOLOR="#4b4d4f" |
|||
! width=20% | Name |
|||
! width=30% | Battlefield Entry |
|||
! width=20% nowrap | Armor Upgrades |
|||
! width=15% | Weapons |
|||
! width=15% nowrap | Armor |
|||
|- style="border-top: 1px solid #efeeee;" |
|||
! colspan="100%" BGCOLOR="#E3F9FF" cellpadding="0" height=2px| |
|||
|- style="border-bottom: 1px solid #ffffff;" |
|||
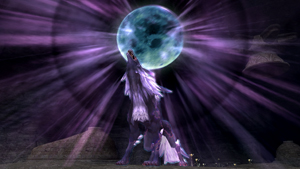
| align="center" | <span id=LadyLilith>'''★Maiden of the Dusk'''</span> |
|||
[[File:LadyLilithHTMB.jpg|frame|center|link=Lilith|[[Lilith]]]] |
|||
| |
|||
{| style="background: #F9F9F9; border: 1px solid #AAAAAA" width="100%" |
|||
| |
|||
:'''Entry KI''': [[Maiden phantom gem]] |
|||
:'''Merit Cost''': 10 |
|||
::Level Cap: Uncapped |
|||
::Time Limit: 30 Min |
|||
::Max People: 6 |
|||
:'''[[Home Point]]:''' [[Zulkheim]] > [[Selbina]] (#1) |
|||
::Enter at '''Vertical Conflux''', (H-7)<hr> |
|||
:'''[[:Category:High-Tier_Mission_Battlefields/MaidenOfTheDusk|Testimonials]]''' |
|||
|} |
|||
| style="border-right: 1px solid #ffffff;"| |
|||
*:;[[Rem's Tale Ch.6]],[[Rem's Tale Ch.7|7]],[[Rem's Tale Ch.8|8]],[[Rem's Tale Ch.9|9]],[[Rem's Tale Ch.10|10]] |
|||
:::[[Reforged Armor|RF]] [[Head]], [[Body]], [[Hands]], [[Legs]], [[Feet]] Upgrade Synthesis Materials |
|||
*:;All [[:Category:Reforged_Artifact_Armor_+1|AF1 IL 119]] Upgrade Synthesis Materials |
|||
| style="border-right: 1px solid #ffffff;"| |
|||
*:;[[Daybreak]] |
|||
*:;[[Malignance Pole]] |
|||
*:;[[Malignance Sword]] |
|||
| |
|||
*:;[[Malignance Chapeau]] |
|||
*:;[[Malignance Tabard]] |
|||
*:;[[Malignance Gloves]] |
|||
*:;[[Malignance Tights]] |
|||
*:;[[Malignance Boots]] |
|||
*:;[[Malignance Earring]] |
|||
|} |
|} |
||
| Line 657: | Line 773: | ||
! width=15% nowrap | Armor |
! width=15% nowrap | Armor |
||
|- style="border-top: 1px solid #efeeee;" |
|- style="border-top: 1px solid #efeeee;" |
||
! colspan="100% |
! colspan="100%" cellpadding="0" height=2px | <div style="{{linear-gradient|left|#000, #ffdddd 15%, #ddffdd 50%, #ddddff 85%, #fff}}"> </div> |
||
|- style="border-bottom: 1px solid #ffffff;" |
|- style="border-bottom: 1px solid #ffffff;" |
||
| align="center" | '''★Trial by Wind''' |
| align="center" | <span id=TrialByWind>'''★Trial by Wind'''</span> |
||
[[File:Garuda Prime.jpg|frame|center|link=Garuda Prime|[[Garuda Prime]]]] |
[[File:Garuda Prime.jpg|frame|center|link=Garuda Prime|[[Garuda Prime]]]] |
||
| |
| |
||
| Line 670: | Line 786: | ||
::Max People: 6 |
::Max People: 6 |
||
:'''[[Home Point]]:''' [[Vollbow]] > [[Cape Teriggan]] (#1) |
:'''[[Home Point]]:''' [[Vollbow]] > [[Cape Teriggan]] (#1) |
||
<hr> |
|||
:'''[[:Category:High-Tier_Mission_Battlefields/TrialByWind|Testimonials]]''' |
|||
|} |
|} |
||
| style="border-right: 1px solid #ffffff;"| |
| style="border-right: 1px solid #ffffff;"| |
||
| Line 687: | Line 805: | ||
*:;[[Ostro Greaves]] |
*:;[[Ostro Greaves]] |
||
|- style="border-bottom: 1px solid #ffffff;" |
|- style="border-bottom: 1px solid #ffffff;" |
||
| align="center" | '''★Trial by Lightning''' |
| align="center" | <span id=TrialByLightning>'''★Trial by Lightning'''</span> |
||
[[File:Ramuh Prime.jpg|frame|center|link=Ramuh Prime|[[Ramuh Prime]]]] |
[[File:Ramuh Prime.jpg|frame|center|link=Ramuh Prime|[[Ramuh Prime]]]] |
||
| |
| |
||
| Line 698: | Line 816: | ||
::Max People: 6 |
::Max People: 6 |
||
:'''[[Home Point]]:''' [[Li'Telor]] > [[The Boyahda Tree]] (#1) |
:'''[[Home Point]]:''' [[Li'Telor]] > [[The Boyahda Tree]] (#1) |
||
<hr> |
|||
:'''[[:Category:High-Tier_Mission_Battlefields/TrialByLightning|Testimonials]]''' |
|||
|} |
|} |
||
| style="border-right: 1px solid #ffffff;"| |
| style="border-right: 1px solid #ffffff;"| |
||
| Line 715: | Line 835: | ||
*:;[[Brontes Cuisses]] |
*:;[[Brontes Cuisses]] |
||
|- style="border-bottom: 1px solid #ffffff;" |
|- style="border-bottom: 1px solid #ffffff;" |
||
| align="center" | '''★Trial by Earth''' |
| align="center" | <span id=TrialByEarth>'''★Trial by Earth'''</span> |
||
[[File:Titan Prime.jpg|frame|center|link=Titan Prime|[[Titan Prime]]]] |
[[File:Titan Prime.jpg|frame|center|link=Titan Prime|[[Titan Prime]]]] |
||
| |
| |
||
| Line 726: | Line 846: | ||
::Max People: 6 |
::Max People: 6 |
||
:'''[[Home Point]]:''' [[Kuzotz]] > [[Quicksand Caves]] (#2) |
:'''[[Home Point]]:''' [[Kuzotz]] > [[Quicksand Caves]] (#2) |
||
<hr> |
|||
:'''[[:Category:High-Tier_Mission_Battlefields/TrialByEarth|Testimonials]]''' |
|||
|} |
|} |
||
| style="border-right: 1px solid #ffffff;"| |
| style="border-right: 1px solid #ffffff;"| |
||
| Line 743: | Line 865: | ||
*:;[[Plumose Sachet]] |
*:;[[Plumose Sachet]] |
||
|- style="border-bottom: 1px solid #ffffff;" |
|- style="border-bottom: 1px solid #ffffff;" |
||
| align="center" | '''★Trial by Fire''' |
| align="center" | <span id=TrialByFire>'''★Trial by Fire'''</span> |
||
[[File:Ifrit Prime.jpg|frame|center|link=Ifrit Prime|[[Ifrit Prime]]]] |
[[File:Ifrit Prime.jpg|frame|center|link=Ifrit Prime|[[Ifrit Prime]]]] |
||
| |
| |
||
| Line 754: | Line 876: | ||
::Max People: 6 |
::Max People: 6 |
||
:'''[[Home Point]]:''' [[Elshimo Uplands|Elshimo Up.]] > [[Ifrit's Cauldron]] (#1) |
:'''[[Home Point]]:''' [[Elshimo Uplands|Elshimo Up.]] > [[Ifrit's Cauldron]] (#1) |
||
<hr> |
|||
:'''[[:Category:High-Tier_Mission_Battlefields/TrialByFire|Testimonials]]''' |
|||
|} |
|} |
||
| style="border-right: 1px solid #ffffff;"| |
| style="border-right: 1px solid #ffffff;"| |
||
| Line 771: | Line 895: | ||
*:;[[Immolation Grip]] |
*:;[[Immolation Grip]] |
||
|- style="border-bottom: 1px solid #ffffff;" |
|- style="border-bottom: 1px solid #ffffff;" |
||
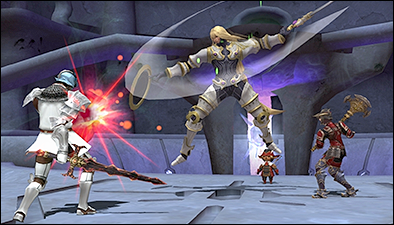
| align="center" | '''★Trial by Water''' |
| align="center" | <span id=TrialByWater>'''★Trial by Water'''</span> |
||
[[File:Leviathan Prime.jpg|frame|center|link=Leviathan Prime|[[Leviathan Prime]]]] |
[[File:Leviathan Prime.jpg|frame|center|link=Leviathan Prime|[[Leviathan Prime]]]] |
||
| |
| |
||
| Line 782: | Line 906: | ||
::Max People: 6 |
::Max People: 6 |
||
:'''[[Home Point]]:''' [[Elshimo Uplands|Elshimo Up.]] > [[Den of Rancor]] (#2) |
:'''[[Home Point]]:''' [[Elshimo Uplands|Elshimo Up.]] > [[Den of Rancor]] (#2) |
||
<hr> |
|||
:'''[[:Category:High-Tier_Mission_Battlefields/TrialByWater|Testimonials]]''' |
|||
|} |
|} |
||
| style="border-right: 1px solid #ffffff;"| |
| style="border-right: 1px solid #ffffff;"| |
||
| Line 799: | Line 925: | ||
*:;[[Neritic Earring]] |
*:;[[Neritic Earring]] |
||
|- style="border-bottom: 1px solid #ffffff;" |
|- style="border-bottom: 1px solid #ffffff;" |
||
| align="center" | '''★Trial by Ice''' |
| align="center" | <span id=TrialByIce>'''★Trial by Ice'''</span> |
||
[[File:Shiva Prime.jpg|frame|center|link=Shiva Prime|[[Shiva Prime]]]] |
[[File:Shiva Prime.jpg|frame|center|link=Shiva Prime|[[Shiva Prime]]]] |
||
| |
| |
||
| Line 810: | Line 936: | ||
::Max People: 6 |
::Max People: 6 |
||
:'''[[Home Point]]:''' [[Fauregandi]] > [[Fei'Yin]] (#2) |
:'''[[Home Point]]:''' [[Fauregandi]] > [[Fei'Yin]] (#2) |
||
<hr> |
|||
:'''[[:Category:High-Tier_Mission_Battlefields/TrialByIce|Testimonials]]''' |
|||
|} |
|} |
||
| style="border-right: 1px solid #ffffff;"| |
| style="border-right: 1px solid #ffffff;"| |
||
| Line 827: | Line 955: | ||
*:;[[Floestone]] |
*:;[[Floestone]] |
||
|- style="border-bottom: 1px solid #ffffff;" |
|- style="border-bottom: 1px solid #ffffff;" |
||
| align="center" | '''★The Moonlit Path''' |
| align="center" | <span id=MoonlitPath>'''★The Moonlit Path'''</span> |
||
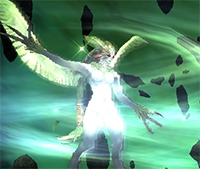
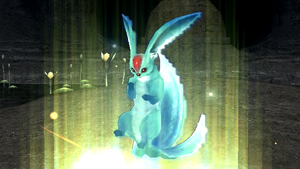
[[File:Fenrir Prime HL.jpg|frame|center|link=Fenrir Prime|[[Fenrir Prime]]]] |
[[File:Fenrir Prime HL.jpg|frame|center|link=Fenrir Prime|[[Fenrir Prime]]]] |
||
| |
| |
||
| Line 838: | Line 966: | ||
::Max People: 6 |
::Max People: 6 |
||
:'''[[Home Point]]:''' [[Sarutabaruta]] > [[Toraimarai Canal]] (#1) |
:'''[[Home Point]]:''' [[Sarutabaruta]] > [[Toraimarai Canal]] (#1) |
||
<hr> |
|||
:'''[[:Category:High-Tier_Mission_Battlefields/MoonlitPath|Testimonials]]''' |
|||
|} |
|} |
||
| style="border-right: 1px solid #ffffff;"| |
| style="border-right: 1px solid #ffffff;"| |
||
| Line 855: | Line 985: | ||
*:;[[Lupine Cape]] |
*:;[[Lupine Cape]] |
||
|- style="border-bottom: 1px solid #ffffff;" |
|- style="border-bottom: 1px solid #ffffff;" |
||
| align="center" | '''★Waking the Beast''' |
| align="center" | <span id=WakingTheBeast>'''★Waking the Beast'''</span> |
||
[[File:Carbuncle Prime HL.jpg|frame|center|link=Carbuncle Prime|[[Carbuncle Prime]]]] |
[[File:Carbuncle Prime HL.jpg|frame|center|link=Carbuncle Prime|[[Carbuncle Prime]]]] |
||
| |
| |
||
| Line 866: | Line 996: | ||
::Max People: 6 |
::Max People: 6 |
||
:'''[[Home Point]]:''' [[Sarutabaruta]] > [[Toraimarai Canal]] (#1) |
:'''[[Home Point]]:''' [[Sarutabaruta]] > [[Toraimarai Canal]] (#1) |
||
<hr> |
|||
:'''[[:Category:High-Tier_Mission_Battlefields/WakingTheBeast|Testimonials]]''' |
|||
|} |
|} |
||
| style="border-right: 1px solid #ffffff;"| |
| style="border-right: 1px solid #ffffff;"| |
||
| Line 883: | Line 1,015: | ||
*:;[[Diamantaire Sollerets]] |
*:;[[Diamantaire Sollerets]] |
||
|- style="border-bottom: 1px solid #ffffff;" |
|- style="border-bottom: 1px solid #ffffff;" |
||
| align="center" | '''★Waking Dreams''' |
| align="center" | <span id=WakingDreams>'''★Waking Dreams'''</span> |
||
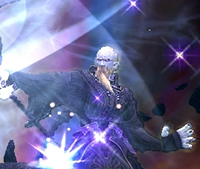
[[File:Diabolos Prime.jpg|frame|center|link=Diabolos Prime|[[Diabolos Prime]]]] |
[[File:Diabolos Prime.jpg|frame|center|link=Diabolos Prime|[[Diabolos Prime]]]] |
||
| |
| |
||
| Line 894: | Line 1,026: | ||
::Max People: 6 |
::Max People: 6 |
||
:'''[[Home Point]]:''' [[Fauregandi]] > [[Pso'Xja]] (#1) |
:'''[[Home Point]]:''' [[Fauregandi]] > [[Pso'Xja]] (#1) |
||
<hr> |
|||
:'''[[:Category:High-Tier_Mission_Battlefields/WakingDreams|Testimonials]]''' |
|||
|} |
|} |
||
| style="border-right: 1px solid #ffffff;"| |
| style="border-right: 1px solid #ffffff;"| |
||
| Line 910: | Line 1,044: | ||
*:;[[Loagaeth Cuffs]] |
*:;[[Loagaeth Cuffs]] |
||
|- style="border-bottom: 1px solid #ffffff;" |
|||
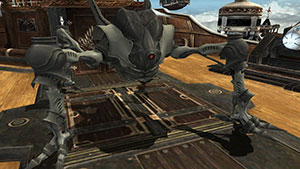
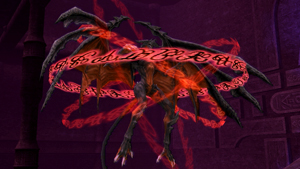
| align="center" | <span id=StygianPact>'''★A Stygian Pact'''</span> |
|||
[[File:Odin Prime.jpg|frame|center|link=Odin Prime|[[Odin Prime]]]] |
|||
| |
|||
{| style="background: #F9F9F9; border: 1px solid #AAAAAA" width="100%" |
|||
| |
|||
:'''Entry KI''': [[Stygian Pact phantom gem]] |
|||
:'''Merit Cost''': 10 |
|||
::Level Cap: Uncapped |
|||
::Time Limit: 30 Min |
|||
::Max People: 6 |
|||
:'''[[Home Point]]:''' [[Zulkheim]] > [[Selbina]] (#1) |
|||
::Enter at '''Vertical Conflux''', (H-7) |
|||
<hr> |
|||
:'''[[:Category:High-Tier_Mission_Battlefields/StygianPact|Testimonials]]''' |
|||
|} |
|||
| style="border-right: 1px solid #ffffff;"| |
|||
*:;[[Rem's Tale Ch.6]],[[Rem's Tale Ch.7|7]],[[Rem's Tale Ch.8|8]],[[Rem's Tale Ch.9|9]],[[Rem's Tale Ch.10|10]] |
|||
:::[[Reforged Armor|RF]] [[Head]], [[Body]], [[Hands]], [[Legs]], [[Feet]] Upgrade Synthesis Materials |
|||
*:;All [[:Category:Reforged_Artifact_Armor_+1|AF1 IL 119]] Upgrade Synthesis Materials |
|||
| style="border-right: 1px solid #ffffff;"| |
|||
*:;[[Geirrothr]] |
|||
*:;[[Zantetsuken]] |
|||
*:;[[Zantetsuken X]] |
|||
| |
|||
*:;[[Hjarrandi Helm]] |
|||
*:;[[Hjarrandi Breastplate]] |
|||
*:;[[Freke Ring]] |
|||
*:;[[Gere Ring]] |
|||
|- style="border-bottom: 1px solid #ffffff;" |
|||
| align="center" | <span id=DivineInterference>'''★Divine Interference'''</span> |
|||
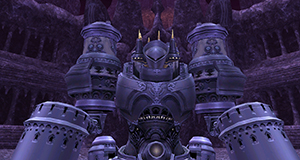
[[File:Alexander Prime.jpg|frame|center|link=Alexander Prime|[[Alexander Prime]]]] |
|||
| |
|||
{| style="background: #F9F9F9; border: 1px solid #AAAAAA" width="100%" |
|||
| |
|||
:'''Entry KI''': [[Divine phantom gem]] |
|||
:'''Merit Cost''': 10 |
|||
::Level Cap: Uncapped |
|||
::Time Limit: 30 Min |
|||
::Max People: 6 |
|||
:'''[[Home Point]]:''' [[Zulkheim]] > [[Selbina]] (#1) |
|||
::Enter at '''Vertical Conflux''', (H-7) |
|||
<hr> |
|||
:'''[[:Category:High-Tier_Mission_Battlefields/DivineInterference|Testimonials]]''' |
|||
|} |
|||
| style="border-right: 1px solid #ffffff;"| |
|||
*:;[[Rem's Tale Ch.6]],[[Rem's Tale Ch.7|7]],[[Rem's Tale Ch.8|8]],[[Rem's Tale Ch.9|9]],[[Rem's Tale Ch.10|10]] |
|||
:::[[Reforged Armor|RF]] [[Head]], [[Body]], [[Hands]], [[Legs]], [[Feet]] Upgrade Synthesis Materials |
|||
*:;All [[:Category:Reforged_Artifact_Armor_+1|AF1 IL 119]] Upgrade Synthesis Materials |
|||
| style="border-right: 1px solid #ffffff;"| |
|||
|
|||
| |
|||
*:;[[Sacro Breastplate]] |
|||
*:;[[Sacro Gorget]] |
|||
*:;[[Sacro Cord]] |
|||
*:;[[Sacro Mantle]] |
|||
*:;[[Sacro Bulwark]] |
|||
|- style="border-bottom: 1px solid #ffffff;" |
|||
| align="center" | <span id=ChampionOfTheDawn>'''★Champion of the Dawn'''</span> |
|||
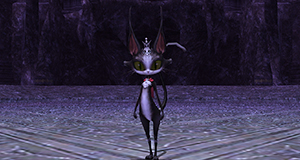
[[File:Cait Sith Prime.jpg|frame|center|link=Cait Sith Prime|[[Cait Sith Prime]]]] |
|||
| |
|||
{| style="background: #F9F9F9; border: 1px solid #AAAAAA" width="100%" |
|||
| |
|||
:'''Entry KI''': [[Champion phantom gem]] |
|||
:'''Merit Cost''': 10 |
|||
::Level Cap: Uncapped |
|||
::Time Limit: 30 Min |
|||
::Max People: 6 |
|||
:'''[[Home Point]]:''' [[Zulkheim]] > [[Selbina]] (#1) |
|||
::Enter at '''Vertical Conflux''', (H-7) |
|||
<hr> |
|||
:'''[[:Category:High-Tier_Mission_Battlefields/ChampionOfTheDawn|Testimonials]]''' |
|||
|} |
|||
| style="border-right: 1px solid #ffffff;"| |
|||
*:;[[Rem's Tale Ch.6]],[[Rem's Tale Ch.7|7]],[[Rem's Tale Ch.8|8]],[[Rem's Tale Ch.9|9]],[[Rem's Tale Ch.10|10]] |
|||
:::[[Reforged Armor|RF]] [[Head]], [[Body]], [[Hands]], [[Legs]], [[Feet]] Upgrade Synthesis Materials |
|||
*:;All [[:Category:Reforged_Artifact_Armor_+1|AF1 IL 119]] Upgrade Synthesis Materials |
|||
| style="border-right: 1px solid #ffffff;"| |
|||
*:;[[Cath Palug Hammer]] |
|||
*:;[[Cath Palug Stone]] |
|||
| |
|||
*:;[[Cath Palug Crown]] |
|||
*:;[[Cath Palug Ring]] |
|||
*:;[[Cath Palug Earring]] |
|||
|} |
|} |
||
Revision as of 22:09, 10 September 2019
|
Key Item Sales
The following three NPCs sell the key items to enter the battlefields, one in each nation. Before you are allowed to buy the key item to enter the high level battlefield, you must meet the following requirements.
- Must be level 95 or higher
- Must have completed the lower level version of the battlefield
- Divine Might II key item can only be obtained if Ark battles 1-5 have been completed on Normal or Higher. Checking via Accomplishments must read as Conquered or With Honors. Unfinished indicates completion on Very Easy or Easy or not at all. D/A
- Note: More precise requirements can be found on each of the Phantom Gem key item pages.
| Trisvain in Northern San d'Oria (J-7)
|
Raving Opossum in Port Bastok (J-11)
|
Mimble-Pimble in Port Windurst (L-5)
|


Difficulty
Initially, players are only able to choose Very Easy, Easy or Normal difficulties while beginning a fight for the first time.
After winning your first battle on these difficulties, you are then able to choose Difficult or Very Difficult the next time you enter the fight.
- Note that if a fellow party member has already initialized the fight, the battlefield will still be set to the difficulty chosen by the first party member to enter regardless of what you choose. This includes whether or not you have a higher difficulty unlocked or not.
Rewards
Reforged Armor ![]() Rem's Tale chapters and Item Level upgrade materials for Relic Weapons (
Rem's Tale chapters and Item Level upgrade materials for Relic Weapons (![]() Plutons), Empyrean Weapons (
Plutons), Empyrean Weapons (![]() Riftborn Boulders), and Mythic Weapons (
Riftborn Boulders), and Mythic Weapons (![]() Beitetsu) are distributed to each party member's personal inventory.
Beitetsu) are distributed to each party member's personal inventory.
- The number of these items received is based on the difficulty of the fight, see below.
See the table below as an outline for Rem's Tale Chapters and R/E/M Upgrade items (Pluton, Riftborn Boulder, Beitetsu) that distribute into personal inventories upon winning a battlefield.
- As well as personal reward distribution, chapters also appear in the party's treasure pool along with unique weapons and equipment. These items can be received by any party member.
All battlefields except ★Divine Might
| Difficulty | Content Level | Rem's Tale Chapters | R/E/M Upgrade Items |
|---|---|---|---|
| Very Easy | 113 | 1 | 0 |
| Easy | 116 | 1 | 1 |
| Normal | 119 | 2 | 1 |
| Difficult | Over 119 | 3 | 2 |
| Very Difficult | Over 119 | 4 | 2 |
★Divine Might Only
| Difficulty | Content Level | Rem's Tale Chapters | R/E/M Upgrade Items |
|---|---|---|---|
| Very Easy | 113 | 2 | 0 |
| Easy | 116 | 2 | 2 |
| Normal | 119 | 4 | 2 |
| Difficult | Over 119 | 6 | 4 |
| Very Difficult | Over 119 | 8 | 4 |
Other Rewards
Drop rates for unique ![]() /
/![]() rewards obtained as well as other rewards (E.g. Scrolls and upgrade materials) through these battles increase with the BCNM difficulty setting.
rewards obtained as well as other rewards (E.g. Scrolls and upgrade materials) through these battles increase with the BCNM difficulty setting.
- At Very Easy, Easy, and Normal difficulties, the drop rate for unique
 /
/ items should be very roughly around 10% before Treasure Hunter. There is no data to support this drop rate, however.
 - At Difficult and Very Difficult, one item is guaranteed to drop. A second item has a very high probability.
- Treasure Hunter will have a noticeable impact on drops for Very Easy, Easy, and Normal while having no effect for Difficult and Very Difficult.
- Below Normal, drops are significantly rarer. Expect to go through dozens of fights with no rare/ex drops below Normal difficulty, especially without Treasure Hunter.
- New High-Tier Mission BCNMs do not follow these rules. / drops are not guaranteed on Difficult or Very Difficult.
- The following BCNMs are considered "new": A Stygian Pact II (Odin Prime), Champion of the Dawn II (Cait Sith Prime), Divine Interference II (Alexander Prime), Maiden of the Dusk II (Lilith).
Monthly Adventurer Campaigns
There is one type of campaign that may run any given month.
High-Tier Mission Battlefield Campaign
- When this Monthly Adventurer Campaign is active, certain ★High-Tier Mission Battlefields drop additional Plutons, Beitetsu, and Riftborn Boulders.
- Affected HTMB include: All individual Ark Angels / Divine Might II / Return to Delkfutt's Tower II / The Celestial Nexus II / The Savage II / The Warrior's Path II / Puppet in Peril II / Legacy of the Lost II / The Shadow Lord Battle II / Head Wind II / One to be Feared II / Dawn II / Trial by Fire II / Trial by Ice II / Trial by Wind II / Trial by Earth II / Trial by Lightning II / Trial by Water II / The Moonlit Path II / Waking the Beast II / Waking Dreams II
- An additional personal drop is added during this campaign, and players have the chance at obtaining the following items after succeeding in certain HTMB:
- Note: Higher quality items will drop more frequently on higher difficulties.
Battlefields
Below is a full list of all High-Tier Mission Battlefields in the game, as well as potential drops from each.
Rise of the Zilart
| Name | Battlefield Entry | Armor Upgrades | Weapons | Armor | |
|---|---|---|---|---|---|
| ★The Shadow Lord Battle |
|
|
During Collaboration Event: My Little Shadow Lord Event: |
||
| ★Return to Delkfutt's Tower |
|
|
|||
| ★Ark Angels (1) |
|
|
|||
| ★Ark Angels (2) |
|
|
|||
| ★Ark Angels (3) |
|
|
|||
| ★Ark Angels (4) |
|
|
|||
| ★Ark Angels (5) |
|
|
|||
| ★Divine Might |
|
|
| ||
| ★The Celestial Nexus |
|
|


Chains of Promathia
| Name | Battlefield Entry | Armor Upgrades | Weapons | Armor | |
|---|---|---|---|---|---|
| ★The Savage |
|
|
|||
★Head Wind
 |
|
|
|||
| ★One to be Feared |
|
|
|||
| ★The Warrior's Path |
|
|
|||
| ★Dawn |
|
|
Treasures of Aht Urghan
| Name | Battlefield Entry | Armor Upgrades | Weapons | Armor | |
|---|---|---|---|---|---|
| ★Puppet in Peril |
|
|
|||
| ★Legacy of the Lost |
|
|
Wings of the Goddess
| Name | Battlefield Entry | Armor Upgrades | Weapons | Armor | |
|---|---|---|---|---|---|
| ★Maiden of the Dusk |
|
|

Avatar Prime Fights
| Name | Battlefield Entry | Armor Upgrades | Weapons | Armor | |
|---|---|---|---|---|---|
| ★Trial by Wind |
|
|
|||
| ★Trial by Lightning |
|
|
|||
| ★Trial by Earth |
|
|
|||
| ★Trial by Fire |
|
|
|||
| ★Trial by Water |
|
|
|||
| ★Trial by Ice |
|
|
|||
| ★The Moonlit Path |
|
|
|||
| ★Waking the Beast |
|
|
|||
| ★Waking Dreams |
|
|
|||
| ★A Stygian Pact |
|
|
|||
| ★Divine Interference |
|
|
|
||
| ★Champion of the Dawn |
|
|


Subcategories
This category has the following 30 subcategories, out of 30 total.
H
- High-Tier Mission Battlefields/AAEV
- High-Tier Mission Battlefields/AAGK
- High-Tier Mission Battlefields/AAHM
- High-Tier Mission Battlefields/AAMR
- High-Tier Mission Battlefields/AATT
- High-Tier Mission Battlefields/CelestialNexus
- High-Tier Mission Battlefields/ChampionOfTheDawn
- High-Tier Mission Battlefields/Dawn
- High-Tier Mission Battlefields/DivineInterference
- High-Tier Mission Battlefields/DivineMight
- High-Tier Mission Battlefields/HeadWind
- High-Tier Mission Battlefields/LegacyOfTheLost
- High-Tier Mission Battlefields/MaidenOfTheDusk
- High-Tier Mission Battlefields/MoonlitPath
- High-Tier Mission Battlefields/OneToBeFeared
- High-Tier Mission Battlefields/PuppetInPeril
- High-Tier Mission Battlefields/ReturnDelkfutt
- High-Tier Mission Battlefields/ShadowLordBattle
- High-Tier Mission Battlefields/StygianPact
- High-Tier Mission Battlefields/TheSavage
- High-Tier Mission Battlefields/TheWyrmGod
- High-Tier Mission Battlefields/TrialByEarth
- High-Tier Mission Battlefields/TrialByFire
- High-Tier Mission Battlefields/TrialByIce
- High-Tier Mission Battlefields/TrialByLightning
- High-Tier Mission Battlefields/TrialByWater
- High-Tier Mission Battlefields/TrialByWind
- High-Tier Mission Battlefields/WakingDreams
- High-Tier Mission Battlefields/WakingTheBeast
- High-Tier Mission Battlefields/WarriorPath
Pages in category "High-Tier Mission Battlefields"
The following 25 pages are in this category, out of 25 total.
