The Voracious Resurgence | |
| Prime Weapons • Ultimate Weapons • Ultimate Augments • Abjurations iL119 • JSE Necks • Divergence Augments • Escutcheons | |
| Reforged Armor Artifact: +1 • iL109 • iL119/+2/+3 Relic: +1/+2 • iL109 • iL119/+2/+3 Empyrean: +1/+2 • iL109 • iL119/+2/+3 |
Guides • Crafting • Trusts • Apex Monsters |
Category:Monstrosity: Difference between revisions
No edit summary |
|||
| (26 intermediate revisions by 12 users not shown) | |||
| Line 1: | Line 1: | ||
{{Disambiguation|Monstrosity (Quest){{!}}Monstrosity (Quest) |
{{Disambiguation|Monstrosity (Quest){{!}}Monstrosity (Quest)|:Category:Monstrosity/Species{{!}}Monstrosity Species}} |
||
{{Category Page Header |
|||
== Requirements == |
|||
|ToC=y |
|||
* Complete the quest [[Monstrosity]] |
|||
|Float=left |
|||
== Key Terms == |
|||
|Image=Monstrosity Header.jpg |
|||
# '''Customization''': The option that enables players to equip "species" and "instincts" (Replaces the "Equipment" option) |
|||
|Image Size=475 |
|||
# '''Type''': A classification of monsters by correlation ''(ex: Beast, Lizards, Plantoids, Birds, Amorphs, etc)'' |
|||
|Image Link= |
|||
# '''Species''': 1) A classification of monsters by model ''(ex: Yellow Crawler model, Red Eruca Model, etc)'' and 2) The costume that determines your job, traits, abilities, and unlock path |
|||
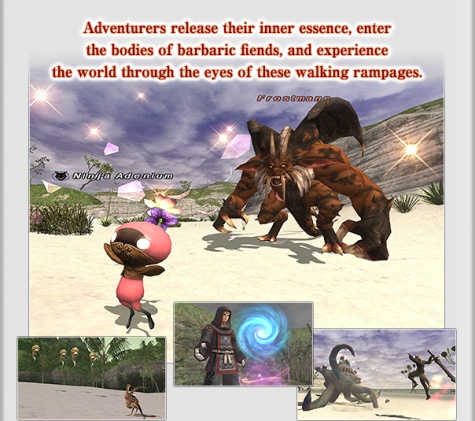
|Intro Text='''Monstrosity''' is content where adventurers can unleash their souls upon the various monsters that roam Vana'diel and take control of their mental faculties, thus becoming a monster themselves. |
|||
# '''Faculties''': The sub-menu option of "customization" that enables players to equip "instincts" |
|||
# '''Instincts''': Stats that players may equip from the "Faculties" menu (Limited by Instinct Points) |
|||
# '''Naming''': The sub-menu of "customization" that enables players to give two descriptive names to their current species ''(ex: Noble Ultraviolet Behemoth)'' |
|||
# '''Monsterskill''': Actions players may execute using the "/monsterskill" command (Similar to weaponskills) |
|||
# '''Monsterabilities''': Actions players may execute using the "/ja" command (Similar to abilities) |
|||
# '''Infamy''': Points accumulated through the acquisition of XP (Infamy gained = [XP Gained/10]) |
|||
# '''Monster Rank''': A rank determined by the total accumulated infamy points |
|||
In future updates, Monstrosity was supposed to be a source of player-versus-player content where adventurers could battle one another in their beastly forms.<br /> |
|||
== Participation == |
|||
However, SE dropped the ball on this, and abuptly forgot about Monstrosity in favor of working on the release of [[Seekers of Adoulin]] and subsequent content since. |
|||
After gaining the key item [[Ring of Supernal Disjunction]] and access to the zone [[Feretory]], players may begin their monster adventures by clicking the [[Odyssean Passage]] and selecting a region/zone for teleportation. |
|||
SE has said Monstrosity is on the "back burner" so a future update is not impossible, however it is unlikely. That being said Monstrosity is still very fun content for players looking for something new to enjoy and relax in. |
|||
}} |
|||
== Getting Started == |
|||
In order to begin a new life as a monster, adventurers must first complete [[Monstrosity (Quest)]] and obtain the Key Item [[Ring of supernal disjunction]]. The quest is offered by the [[Suspicious Hume]] in [[Pashhow Marshlands]] @ (E-12) (Voidwatch warping places you near the NPC). |
|||
== The Feretory == |
|||
Examine an Odyssean Passages located in one of the following areas to be transported to the [[Feretory]] and take the form of a monster. The Feretory is a staging area of sorts where adventurers can prepare themselves for the carnage ahead. |
|||
* Odyssean Passages are located in [[Northern San d'Oria]] (L-8), [[Port Windurst]] (M-4), [[Port Bastok]] (K-12), and [[Pashhow Marshlands]] (E-12). |
|||
* Upon entering the Feretory, you lose all buffs and debuffs, including normally unremovable effects such as Signet, Weakness, and Dedication. Status effects are not reinstated upon leaving Monstrosity. |
|||
** The Medicated effect is not removed. There may be others. |
|||
== Monstrous Preparations == |
|||
Once inside the Feretory, the Equipment menu is replaced with a new "Customization" menu. This menu allows players to adjust aspects of their monster including species, abilities, and name. |
|||
=== Species === |
|||
See: '''[[:Category:Monstrosity/Species|Monstrosity Species]]''' |
|||
The Species menu allows the player to choose a monster to possess. Monster species affects the player's appearance (for instance, Mandragora or Korrigan), job (Includes traits and spells), abilities, and monster correlation. The options are initially limited to Rabbit, Mandragora, and Lizard. Additional monster options can be earned through gaining experience or purchased with [[Infamy]]. |
|||
* Possessing a monster of a different family will reset the amount of experience needed for your next level. Experience will '''not''' reset if you possess a different monster of the same family. |
|||
* As of the August 6 version update, players may possess Beast, Plantoid, Vermin, and Lizard monster types. |
|||
* The maximum level for monsters is 99. The maximum level is also dependent upon the limit break quests a player has completed. |
|||
=== Faculties === |
|||
The Faculties menu is where you equip various "[[Instincts]]" to your monster. Instincts enhance the abilities and attributes of your monster in various ways. At first, the pool of available instincts in limited. Additional Instincts can be earned through leveling up or purchasing with [[Infamy]]. Once an Instinct has been learned, it can equipped to any monster the player possesses. |
|||
Instincts cost a certain number of "Instinct Points" in order to be equipped. Each monster has a limited number of Instinct Points that increases with level and rank. The maximum number of Instincts that can be equipped is 12. |
|||
Achieving NM or HNM status through accumulation of Infamy increases your total number of Instinct Points by 20 and 40, respectively. These bonuses apply regardless of current level. However, this only applies to players doing Monstrosity in one of the three areas that allow player versus monster combat, and only with Belligerency in effect. Removing Belligerency will revert your status back to MON and any Instincts equipped beyond the old cap will be removed. |
|||
=== Naming === |
|||
The Naming menu allows players to add up to two descriptors to the name of their species. |
|||
*The naming convention is <Descriptor #1> <Descriptor #2> <Species Name>. |
|||
=== Infamy === |
|||
[[Infamy]] is the "currency" of Monstrosity. Players earn Infamy at a rate of 10% of the experience they obtain. Infamy may be exchanged for new monster types to possess, new Instincts to learn, or collected to increase in rank. Higher ranks allow players to posses more powerful monsters and Instincts. Player ranks will rise as follows: |
|||
{| style="text-align: center; width:15%; max-width:960px;" border="1" cellpadding="5" cellspacing="0" |
|||
|- BGCOLOR="#a8d0d7" align="center" |
|||
!Infamy |
|||
!Rank |
|||
|- align="left" BGCOLOR="#c6e9ef" |
|||
|0 - 10,000 |
|||
|align="center" BGCOLOR="#eaf2f3"|Mon |
|||
|- align="left" BGCOLOR="#c6e9ef" |
|||
|10,001 - 20,000 |
|||
|align="center" BGCOLOR="#ffffff"|NM |
|||
|- align="left" BGCOLOR="#c6e9ef" |
|||
|20,000+ |
|||
|align="center" BGCOLOR="#eaf2f3"|HNM |
|||
|} |
|||
===Monthly Adventurer Campaigns=== |
|||
There are two type of campaigns that may run any given month. |
|||
{{Category:Adventurer_Campaigns |
|||
|transcludesection=Monstrosity |
|||
}} |
|||
== Area Selection == |
|||
=== Journeying into the Field === |
|||
After finishing their preparations in the [[Feretory]], players can examine the odyssean passage there and select "Stalk prey as a [[monipulator]]," which displays a list of possible areas into which they can foray. |
|||
* Areas the player has yet to visit will not be displayed. |
|||
* Selections also depend on the size of the monster possessed. |
|||
* Monster sizes are categorized by the color of the icon border that displays during species selection. |
|||
=== Field Areas === |
|||
Each field area has a recommended level that displays on the selection menu and helps monipulators avoid biting off more than they can chew. |
|||
* It is still possible to enter areas in which the recommended level is higher than the monipulator's. |
|||
* Recommended levels correspond to the lowest level of monster in the area, and there may be fiends who are much stronger than the recommended level indicates. |
|||
{| style="text-align: center; width:40%; max-width:960px;" border="1" cellpadding="5" cellspacing="0" |
|||
|- BGCOLOR="#a8d0d7" align="center" |
|||
! width="20%" |Recommended Level |
|||
! width="40%" |Region |
|||
! width="40%" |Area |
|||
|- align="center" BGCOLOR="#c6e9ef" |
|||
| rowspan=8 | Lv 1+ |
|||
|align="center" BGCOLOR="#eaf2f3"|Ronfaure |
|||
|align="center" BGCOLOR="#eaf2f3"|[[West Ronfaure]] |
|||
|- |
|||
|align="center" BGCOLOR="#ffffff"|Ronfaure |
|||
|align="center" BGCOLOR="#ffffff"|[[East Ronfaure]] |
|||
|- |
|||
|align="center" BGCOLOR="#eaf2f3"|Gustaberg |
|||
|align="center" BGCOLOR="#eaf2f3"|[[North Gustaberg]] |
|||
|- |
|||
|align="center" BGCOLOR="#ffffff"|Gustaberg |
|||
|align="center" BGCOLOR="#ffffff"|[[South Gustaberg]] |
|||
|- |
|||
|align="center" BGCOLOR="#eaf2f3"|Gustaberg |
|||
|align="center" BGCOLOR="#eaf2f3"|[[Zeruhn Mines]] |
|||
|- |
|||
|align="center" BGCOLOR="#ffffff"|Sarutabaruta |
|||
|align="center" BGCOLOR="#ffffff"|[[West Sarutabaruta]] |
|||
|- |
|||
|align="center" BGCOLOR="#eaf2f3"|Sarutabaruta |
|||
|align="center" BGCOLOR="#eaf2f3"|[[East Sarutabaruta]] |
|||
|- |
|||
|align="center" BGCOLOR="#ffffff"|Sarutabaruta |
|||
|align="center" BGCOLOR="#ffffff"|[[Inner Horutoto Ruins]] |
|||
|- align="center" BGCOLOR="#c6e9ef" |
|||
|rowspan=3 |Lv 2+ |
|||
|align="center" BGCOLOR="#eaf2f3"|Ronfaure |
|||
|align="center" BGCOLOR="#eaf2f3"|[[King Ranperre's Tomb]] |
|||
|- |
|||
|align="center" BGCOLOR="#ffffff"|Gustaberg |
|||
|align="center" BGCOLOR="#ffffff"|[[Palborough Mines]] |
|||
|- |
|||
|align="center" BGCOLOR="#eaf2f3"|Sarutabaruta |
|||
|align="center" BGCOLOR="#eaf2f3"|[[Giddeus]] |
|||
|- align="center" BGCOLOR="#c6e9ef" |
|||
|rowspan=3 |Lv 3+ |
|||
|align="center" BGCOLOR="#ffffff"|Ronfaure |
|||
|align="center" BGCOLOR="#ffffff"|[[Ghelsba Outpost]] |
|||
|- |
|||
|align="center" BGCOLOR="#eaf2f3"|Gustaberg |
|||
|align="center" BGCOLOR="#eaf2f3"|[[Dangruf Wadi]] |
|||
|- |
|||
|align="center" BGCOLOR="#ffffff"|Fauregandi |
|||
|align="center" BGCOLOR="#ffffff"|[[Ranguemont Pass]] |
|||
|- align="center" BGCOLOR="#c6e9ef" |
|||
|Lv 7+ |
|||
|align="center" BGCOLOR="#eaf2f3"|Kolshushu |
|||
|align="center" BGCOLOR="#eaf2f3"|[[Tahrongi Canyon]] |
|||
|- align="center" BGCOLOR="#c6e9ef" |
|||
|rowspan=4 |Lv 8+ |
|||
|align="center" BGCOLOR="#ffffff"|Ronfaure |
|||
|align="center" BGCOLOR="#ffffff"|[[Fort Ghelsba]] |
|||
|- |
|||
|align="center" BGCOLOR="#eaf2f3"|Ronfaure |
|||
|align="center" BGCOLOR="#eaf2f3"|[[Yughott Grotto]] |
|||
|- |
|||
|align="center" BGCOLOR="#ffffff"|Zulkheim |
|||
|align="center" BGCOLOR="#ffffff"|[[Konschtat Highlands]] |
|||
|- |
|||
|align="center" BGCOLOR="#eaf2f3"|Zulkheim |
|||
|align="center" BGCOLOR="#eaf2f3"|[[La Theine Plateau]] |
|||
|- align="center" BGCOLOR="#c6e9ef" |
|||
|Lv 12+ |
|||
|align="center" BGCOLOR="#ffffff"|Zulkheim |
|||
|align="center" BGCOLOR="#ffffff"|[[Valkurm Dunes]] |
|||
|- align="center" BGCOLOR="#c6e9ef" |
|||
|rowspan=7 |Lv 15+ |
|||
|align="center" BGCOLOR="#eaf2f3"|Zulkheim |
|||
|align="center" BGCOLOR="#eaf2f3"|[[Gusgen Mines]] |
|||
|- |
|||
|align="center" BGCOLOR="#ffffff"|Zulkheim |
|||
|align="center" BGCOLOR="#ffffff"|[[Ordelle's Caves]] |
|||
|- |
|||
|align="center" BGCOLOR="#eaf2f3"|Norvallen |
|||
|align="center" BGCOLOR="#eaf2f3"|[[Jugner Forest]] |
|||
|- |
|||
|align="center" BGCOLOR="#ffffff"|Derfland |
|||
|align="center" BGCOLOR="#ffffff"|[[Pashhow Marshlands]] |
|||
|- |
|||
|align="center" BGCOLOR="#eaf2f3"|Kolshushu |
|||
|align="center" BGCOLOR="#eaf2f3"|[[Buburimu Peninsula]] |
|||
|- |
|||
|align="center" BGCOLOR="#ffffff"|Kolshushu |
|||
|align="center" BGCOLOR="#ffffff"|[[Maze of Shakhrami]] |
|||
|- |
|||
|align="center" BGCOLOR="#eaf2f3"|Aragoneu |
|||
|align="center" BGCOLOR="#eaf2f3"|[[Meriphataud Mountains]] |
|||
|- align="center" BGCOLOR="#c6e9ef" |
|||
|Lv 18+ |
|||
|align="center" BGCOLOR="#ffffff"|Aragoneu |
|||
|align="center" BGCOLOR="#ffffff"|[[Castle Oztroja]] |
|||
|- align="center" BGCOLOR="#c6e9ef" |
|||
| rowspan=2 |Lv 20+ |
|||
|align="center" BGCOLOR="#eaf2f3"|Norvallen |
|||
|align="center" BGCOLOR="#eaf2f3"|[[Davoi]] |
|||
|- |
|||
|align="center" BGCOLOR="#ffffff"|Derfland |
|||
|align="center" BGCOLOR="#ffffff"|[[Beadeaux]] |
|||
|- align="center" BGCOLOR="#c6e9ef" |
|||
|Lv 23+ |
|||
|align="center" BGCOLOR="#eaf2f3"|Norvallen |
|||
|align="center" BGCOLOR="#eaf2f3"|[[Batallia Downs]] |
|||
|- align="center" BGCOLOR="#c6e9ef" |
|||
|Lv 24+ |
|||
|align="center" BGCOLOR="#ffffff"|Derfland |
|||
|align="center" BGCOLOR="#ffffff"|[[Rolanberry Fields]] |
|||
|- align="center" BGCOLOR="#c6e9ef" |
|||
| rowspan=2|Lv 25+ |
|||
|align="center" BGCOLOR="#eaf2f3"|Aragoneu |
|||
|align="center" BGCOLOR="#eaf2f3"|[[Sauromugue Champaign]] |
|||
|- |
|||
|align="center" BGCOLOR="#ffffff"|Li'Telor |
|||
|align="center" BGCOLOR="#ffffff"|[[The Sanctuary of Zi'Tah]] |
|||
|- align="center" BGCOLOR="#c6e9ef" |
|||
|Lv 26+ |
|||
|align="center" BGCOLOR="#eaf2f3"|Qufim Island |
|||
|align="center" BGCOLOR="#eaf2f3"|[[Qufim Island]] |
|||
|- align="center" BGCOLOR="#c6e9ef" |
|||
|Lv 30+ |
|||
|align="center" BGCOLOR="#ffffff"|Kuzotz |
|||
|align="center" BGCOLOR="#ffffff"|[[Eastern Altepa Desert]] |
|||
|- align="center" BGCOLOR="#c6e9ef" |
|||
| rowspan=2|Lv 31+ |
|||
|align="center" BGCOLOR="#eaf2f3"|Tavnazian Archipelago |
|||
|align="center" BGCOLOR="#eaf2f3"|[[Lufaise Meadows]] |
|||
|- |
|||
|align="center" BGCOLOR="#ffffff"|Tavnazian Archipelago |
|||
|align="center" BGCOLOR="#ffffff"|[[Misareaux Coast]] |
|||
|- align="center" BGCOLOR="#c6e9ef" |
|||
|Lv 34+ |
|||
|align="center" BGCOLOR="#eaf2f3"|Fauregandi |
|||
|align="center" BGCOLOR="#eaf2f3"|[[Beaucedine Glacier]] |
|||
|- align="center" BGCOLOR="#c6e9ef" |
|||
|Lv 38+ |
|||
|align="center" BGCOLOR="#ffffff"|Fauregandi |
|||
|align="center" BGCOLOR="#ffffff"|[[Fei'Yin]] |
|||
|- align="center" BGCOLOR="#c6e9ef" |
|||
| rowspan=4 |Lv 40+ |
|||
|align="center" BGCOLOR="#eaf2f3"|Norvallen |
|||
|align="center" BGCOLOR="#eaf2f3"|[[The Eldieme Necropolis]] |
|||
|- |
|||
|align="center" BGCOLOR="#ffffff"|Derfland |
|||
|align="center" BGCOLOR="#ffffff"|[[Crawlers' Nest]] |
|||
|- |
|||
|align="center" BGCOLOR="#eaf2f3"|Aragoneu |
|||
|align="center" BGCOLOR="#eaf2f3"|[[Garlaige Citadel]] |
|||
|- |
|||
|align="center" BGCOLOR="#ffffff"|Kuzotz |
|||
|align="center" BGCOLOR="#ffffff"|[[Western Altepa Desert]] |
|||
|- align="center" BGCOLOR="#c6e9ef" |
|||
|Lv 41+ |
|||
|align="center" BGCOLOR="#eaf2f3"|Qufim Island |
|||
|align="center" BGCOLOR="#eaf2f3"|[[Behemoth's Dominion]] |
|||
|- align="center" BGCOLOR="#c6e9ef" |
|||
| rowspan=2 |Lv 42+ |
|||
|align="center" BGCOLOR="#ffffff"|Norvallen |
|||
|align="center" BGCOLOR="#ffffff"|[[Monastic Cavern]] |
|||
|- |
|||
|align="center" BGCOLOR="#eaf2f3"|Valdeaunia |
|||
|align="center" BGCOLOR="#eaf2f3"|[[Xarcabard]] |
|||
|- align="center" BGCOLOR="#c6e9ef" |
|||
|Lv 45+ |
|||
|align="center" BGCOLOR="#ffffff"|Sarutabaruta |
|||
|align="center" BGCOLOR="#ffffff"|[[Toraimarai Canal]] |
|||
|- align="center" BGCOLOR="#c6e9ef" |
|||
| rowspan=2 |Lv 46+ |
|||
|align="center" BGCOLOR="#eaf2f3"|Valdeaunia |
|||
|align="center" BGCOLOR="#eaf2f3"|[[Castle Zvahl Keep]] |
|||
|- |
|||
|align="center" BGCOLOR="#ffffff"|Valdeaunia |
|||
|align="center" BGCOLOR="#ffffff"|[[Castle Zvahl Baileys]] |
|||
|- align="center" BGCOLOR="#c6e9ef" |
|||
| rowspan=4 |Lv 52+ |
|||
|align="center" BGCOLOR="#eaf2f3"|Ronfaure |
|||
|align="center" BGCOLOR="#eaf2f3"|[[Bostaunieux Oubliette]] |
|||
|- |
|||
|align="center" BGCOLOR="#ffffff"|Aragoneu |
|||
|align="center" BGCOLOR="#ffffff"|[[Castle Oztroja]] |
|||
|- |
|||
|align="center" BGCOLOR="#eaf2f3"|Derfland |
|||
|align="center" BGCOLOR="#eaf2f3"|[[Beadeaux]] |
|||
|- |
|||
|align="center" BGCOLOR="#ffffff"|Fauregandi |
|||
|align="center" BGCOLOR="#ffffff"|[[Fei'Yin]] |
|||
|- align="center" BGCOLOR="#c6e9ef" |
|||
| rowspan=3 |Lv 58+ |
|||
|align="center" BGCOLOR="#eaf2f3"|Aragoneu |
|||
|align="center" BGCOLOR="#eaf2f3"|[[Castle Oztroja]] |
|||
|- |
|||
|align="center" BGCOLOR="#ffffff"|Derfland |
|||
|align="center" BGCOLOR="#ffffff"|[[Beadeaux]] |
|||
|- |
|||
|align="center" BGCOLOR="#eaf2f3"|Valdeaunia |
|||
|align="center" BGCOLOR="#eaf2f3"|[[Uleguerand Range]] |
|||
|- align="center" BGCOLOR="#c6e9ef" |
|||
|Lv 61+ |
|||
|align="center" BGCOLOR="#ffffff"|Arrapago Islands |
|||
|align="center" BGCOLOR="#ffffff"|[[Caedarva Mire]] |
|||
|- align="center" BGCOLOR="#c6e9ef" |
|||
|Lv 62+ |
|||
|align="center" BGCOLOR="#eaf2f3"|Vollbow |
|||
|align="center" BGCOLOR="#eaf2f3"|[[Cape Teriggan]] |
|||
|- align="center" BGCOLOR="#c6e9ef" |
|||
|Lv 63+ |
|||
|align="center" BGCOLOR="#ffffff"|West Aht Urhgan |
|||
|align="center" BGCOLOR="#ffffff"|[[Bhaflau Thickets]] |
|||
|- align="center" BGCOLOR="#c6e9ef" |
|||
|Lv 66+ |
|||
|align="center" BGCOLOR="#eaf2f3"|Vollbow |
|||
|align="center" BGCOLOR="#eaf2f3"|[[Valley of Sorrows]] |
|||
|- align="center" BGCOLOR="#c6e9ef" |
|||
|Lv 68+ |
|||
|align="center" BGCOLOR="#ffffff"|Lumoria |
|||
|align="center" BGCOLOR="#ffffff"|[[Al'Taieu]] |
|||
|} |
|||
*When monipulators first enter the field or retry in the same area after being defeated in combat, they will experience "gestation," which bestows the following effects. In addition, monipulators are advised to flee to a safe spot during gestation periods. |
|||
**Undetectable by enemies |
|||
**Invisible |
|||
**Sprint |
|||
**Unable to attack |
|||
* The location at which monipulators spawn after either leaving the Feretory or retrying is randomly determined. |
|||
=== Monipulator Agro === |
|||
Aggressive monsters in the field will still agro players, even when they are in Monipulator form, with one notable exception: |
|||
* Monsters of the family that your Monipulator is strong to will not agro you. Eg. If you are playing a Beast-type mob, then lizard family mobs will not agro you. If you are a plantoid, then Beasts will not agro you, etc. |
|||
== Other Methods for Unlocking Species == |
|||
=== Unlocking Via Infamy Exchange === |
|||
Speak with [[Teyrnon]] in the Feretory to exchange infamy for new instincts and monster species. |
|||
Certain species and instincts must be unlocked by fulfilling requirements, and will be listed only after those requirements are met. |
|||
The infamy cost for job-related Instincts can be reduced by 50% by completing the level 70 Limit Break quest for that job. |
|||
=== Unlocking Via Trading Items === |
|||
Certain subspecies may only be unlocked by trading specific items to the NPC [[Suibhne]] in the Feretory after fulfilling the requisite conditions. |
|||
*Suibhne will inform players as to what items they must procure after they have fulfilled the following conditions, so make sure to speak with him periodically. |
|||
**Can possess the species of the subspecies they wish to unlock. |
|||
**Are of the requisite level to unlock the subspecies. |
|||
*** In the event that a player can unlock multiple subspecies, Suibhne will inform him of one requisite item at random. |
|||
***Any of the requisite items may be traded at any time. There is no reason for it to be the one Suibhne mentioned during a player's last conversation with him. |
|||
== Text Commands == |
|||
*The text command /checkname (/cn) has been introduced. |
|||
**This command enables players to examine the true names of adventurers while they are possessing monsters in Monstrosity. |
|||
***This command functions in the exact same manner as /check when using it on normal adventurers. |
|||
*The text command /monsterskill (/ms) has been introduced. |
|||
**/monsterskill (/ms) "[m.s. name]" "[target name]" |
|||
***You cannot use a job ability that you have not learned, or if the current environment restricts monster ability usage. |
|||
***This command may only be used in Monstrosity. |
|||
[[Category:Other Activities]] |
|||
Revision as of 23:47, 29 September 2020
|
Getting Started
In order to begin a new life as a monster, adventurers must first complete Monstrosity (Quest) and obtain the Key Item Ring of supernal disjunction. The quest is offered by the Suspicious Hume in Pashhow Marshlands @ (E-12) (Voidwatch warping places you near the NPC).
The Feretory
Examine an Odyssean Passages located in one of the following areas to be transported to the Feretory and take the form of a monster. The Feretory is a staging area of sorts where adventurers can prepare themselves for the carnage ahead.
- Odyssean Passages are located in Northern San d'Oria (L-8), Port Windurst (M-4), Port Bastok (K-12), and Pashhow Marshlands (E-12).
- Upon entering the Feretory, you lose all buffs and debuffs, including normally unremovable effects such as Signet, Weakness, and Dedication. Status effects are not reinstated upon leaving Monstrosity.
- The Medicated effect is not removed. There may be others.
Monstrous Preparations
Once inside the Feretory, the Equipment menu is replaced with a new "Customization" menu. This menu allows players to adjust aspects of their monster including species, abilities, and name.
Species
See: Monstrosity Species
The Species menu allows the player to choose a monster to possess. Monster species affects the player's appearance (for instance, Mandragora or Korrigan), job (Includes traits and spells), abilities, and monster correlation. The options are initially limited to Rabbit, Mandragora, and Lizard. Additional monster options can be earned through gaining experience or purchased with Infamy.
- Possessing a monster of a different family will reset the amount of experience needed for your next level. Experience will not reset if you possess a different monster of the same family.
- As of the August 6 version update, players may possess Beast, Plantoid, Vermin, and Lizard monster types.
- The maximum level for monsters is 99. The maximum level is also dependent upon the limit break quests a player has completed.
Faculties
The Faculties menu is where you equip various "Instincts" to your monster. Instincts enhance the abilities and attributes of your monster in various ways. At first, the pool of available instincts in limited. Additional Instincts can be earned through leveling up or purchasing with Infamy. Once an Instinct has been learned, it can equipped to any monster the player possesses.
Instincts cost a certain number of "Instinct Points" in order to be equipped. Each monster has a limited number of Instinct Points that increases with level and rank. The maximum number of Instincts that can be equipped is 12.
Achieving NM or HNM status through accumulation of Infamy increases your total number of Instinct Points by 20 and 40, respectively. These bonuses apply regardless of current level. However, this only applies to players doing Monstrosity in one of the three areas that allow player versus monster combat, and only with Belligerency in effect. Removing Belligerency will revert your status back to MON and any Instincts equipped beyond the old cap will be removed.
Naming
The Naming menu allows players to add up to two descriptors to the name of their species.
- The naming convention is <Descriptor #1> <Descriptor #2> <Species Name>.
Infamy
Infamy is the "currency" of Monstrosity. Players earn Infamy at a rate of 10% of the experience they obtain. Infamy may be exchanged for new monster types to possess, new Instincts to learn, or collected to increase in rank. Higher ranks allow players to posses more powerful monsters and Instincts. Player ranks will rise as follows:
| Infamy | Rank |
|---|---|
| 0 - 10,000 | Mon |
| 10,001 - 20,000 | NM |
| 20,000+ | HNM |
Monthly Adventurer Campaigns
There are two type of campaigns that may run any given month.
Double Monstrosity Bonus Campaign
- When this Monthly Adventurer Campaign is active, all players simply earn double the amount of Experience Points while participating in Monstrosity content.
- The first 11 Monstrosity campaigns were a simple double up gain rate mechanic. After these, they changed the way the campaign worked and it became the chain monstrosity bonus campaign.
Chain Monstrosity Bonus Campaign
- When this Monthly Adventurer Campaign is active, players earn double to triple the normal amount of Experience Points from monsters when they earn a chain kill.
- Depending on the number of chains, Experience Points earned accumulates at double to triple the normal rate.
Chain Monstrosity Bonus Campaign - PLUS!
- When this Monthly Adventurer Campaign is active, the chain bonus campaign described above is in effect. Additionally, items that grant the Dedication effect are also doubled.
- An item that grants Infamy/Experience Points +150% is increased to a bonus of +300%. Additionally, a maximum bonus of 30,000 is increased to 60,000.
Area Selection
Journeying into the Field
After finishing their preparations in the Feretory, players can examine the odyssean passage there and select "Stalk prey as a monipulator," which displays a list of possible areas into which they can foray.
- Areas the player has yet to visit will not be displayed.
- Selections also depend on the size of the monster possessed.
- Monster sizes are categorized by the color of the icon border that displays during species selection.
Field Areas
Each field area has a recommended level that displays on the selection menu and helps monipulators avoid biting off more than they can chew.
- It is still possible to enter areas in which the recommended level is higher than the monipulator's.
- Recommended levels correspond to the lowest level of monster in the area, and there may be fiends who are much stronger than the recommended level indicates.
| Recommended Level | Region | Area |
|---|---|---|
| Lv 1+ | Ronfaure | West Ronfaure |
| Ronfaure | East Ronfaure | |
| Gustaberg | North Gustaberg | |
| Gustaberg | South Gustaberg | |
| Gustaberg | Zeruhn Mines | |
| Sarutabaruta | West Sarutabaruta | |
| Sarutabaruta | East Sarutabaruta | |
| Sarutabaruta | Inner Horutoto Ruins | |
| Lv 2+ | Ronfaure | King Ranperre's Tomb |
| Gustaberg | Palborough Mines | |
| Sarutabaruta | Giddeus | |
| Lv 3+ | Ronfaure | Ghelsba Outpost |
| Gustaberg | Dangruf Wadi | |
| Fauregandi | Ranguemont Pass | |
| Lv 7+ | Kolshushu | Tahrongi Canyon |
| Lv 8+ | Ronfaure | Fort Ghelsba |
| Ronfaure | Yughott Grotto | |
| Zulkheim | Konschtat Highlands | |
| Zulkheim | La Theine Plateau | |
| Lv 12+ | Zulkheim | Valkurm Dunes |
| Lv 15+ | Zulkheim | Gusgen Mines |
| Zulkheim | Ordelle's Caves | |
| Norvallen | Jugner Forest | |
| Derfland | Pashhow Marshlands | |
| Kolshushu | Buburimu Peninsula | |
| Kolshushu | Maze of Shakhrami | |
| Aragoneu | Meriphataud Mountains | |
| Lv 18+ | Aragoneu | Castle Oztroja |
| Lv 20+ | Norvallen | Davoi |
| Derfland | Beadeaux | |
| Lv 23+ | Norvallen | Batallia Downs |
| Lv 24+ | Derfland | Rolanberry Fields |
| Lv 25+ | Aragoneu | Sauromugue Champaign |
| Li'Telor | The Sanctuary of Zi'Tah | |
| Lv 26+ | Qufim Island | Qufim Island |
| Lv 30+ | Kuzotz | Eastern Altepa Desert |
| Lv 31+ | Tavnazian Archipelago | Lufaise Meadows |
| Tavnazian Archipelago | Misareaux Coast | |
| Lv 34+ | Fauregandi | Beaucedine Glacier |
| Lv 38+ | Fauregandi | Fei'Yin |
| Lv 40+ | Norvallen | The Eldieme Necropolis |
| Derfland | Crawlers' Nest | |
| Aragoneu | Garlaige Citadel | |
| Kuzotz | Western Altepa Desert | |
| Lv 41+ | Qufim Island | Behemoth's Dominion |
| Lv 42+ | Norvallen | Monastic Cavern |
| Valdeaunia | Xarcabard | |
| Lv 45+ | Sarutabaruta | Toraimarai Canal |
| Lv 46+ | Valdeaunia | Castle Zvahl Keep |
| Valdeaunia | Castle Zvahl Baileys | |
| Lv 52+ | Ronfaure | Bostaunieux Oubliette |
| Aragoneu | Castle Oztroja | |
| Derfland | Beadeaux | |
| Fauregandi | Fei'Yin | |
| Lv 58+ | Aragoneu | Castle Oztroja |
| Derfland | Beadeaux | |
| Valdeaunia | Uleguerand Range | |
| Lv 61+ | Arrapago Islands | Caedarva Mire |
| Lv 62+ | Vollbow | Cape Teriggan |
| Lv 63+ | West Aht Urhgan | Bhaflau Thickets |
| Lv 66+ | Vollbow | Valley of Sorrows |
| Lv 68+ | Lumoria | Al'Taieu |
- When monipulators first enter the field or retry in the same area after being defeated in combat, they will experience "gestation," which bestows the following effects. In addition, monipulators are advised to flee to a safe spot during gestation periods.
- Undetectable by enemies
- Invisible
- Sprint
- Unable to attack
- The location at which monipulators spawn after either leaving the Feretory or retrying is randomly determined.
Monipulator Agro
Aggressive monsters in the field will still agro players, even when they are in Monipulator form, with one notable exception:
- Monsters of the family that your Monipulator is strong to will not agro you. Eg. If you are playing a Beast-type mob, then lizard family mobs will not agro you. If you are a plantoid, then Beasts will not agro you, etc.
Other Methods for Unlocking Species
Unlocking Via Infamy Exchange
Speak with Teyrnon in the Feretory to exchange infamy for new instincts and monster species.
Certain species and instincts must be unlocked by fulfilling requirements, and will be listed only after those requirements are met.
The infamy cost for job-related Instincts can be reduced by 50% by completing the level 70 Limit Break quest for that job.
Unlocking Via Trading Items
Certain subspecies may only be unlocked by trading specific items to the NPC Suibhne in the Feretory after fulfilling the requisite conditions.
- Suibhne will inform players as to what items they must procure after they have fulfilled the following conditions, so make sure to speak with him periodically.
- Can possess the species of the subspecies they wish to unlock.
- Are of the requisite level to unlock the subspecies.
- In the event that a player can unlock multiple subspecies, Suibhne will inform him of one requisite item at random.
- Any of the requisite items may be traded at any time. There is no reason for it to be the one Suibhne mentioned during a player's last conversation with him.
Text Commands
- The text command /checkname (/cn) has been introduced.
- This command enables players to examine the true names of adventurers while they are possessing monsters in Monstrosity.
- This command functions in the exact same manner as /check when using it on normal adventurers.
- This command enables players to examine the true names of adventurers while they are possessing monsters in Monstrosity.
- The text command /monsterskill (/ms) has been introduced.
- /monsterskill (/ms) "[m.s. name]" "[target name]"
- You cannot use a job ability that you have not learned, or if the current environment restricts monster ability usage.
- This command may only be used in Monstrosity.
- /monsterskill (/ms) "[m.s. name]" "[target name]"
Subcategories
This category has the following 3 subcategories, out of 3 total.
Pages in category "Monstrosity"
The following 16 pages are in this category, out of 16 total.
