The Voracious Resurgence | |
| Prime Weapons • Ultimate Weapons • Ultimate Augments • Abjurations iL119 • JSE Necks • Divergence Augments • Escutcheons | |
| Reforged Armor Artifact: +1 • iL109 • iL119/+2/+3 Relic: +1/+2 • iL109 • iL119/+2/+3 Empyrean: +1/+2 • iL109 • iL119/+2/+3 |
Guides • Crafting • Trusts • Apex Monsters |
Category:Reive: Difference between revisions
| (35 intermediate revisions by 9 users not shown) | |||
| Line 1: | Line 1: | ||
{{Category Page Header |
|||
| ⚫ | |||
|ToC=y |
|||
|Float=left |
|||
|Image=Reive Header.jpg |
|||
|Image Size=475 |
|||
|Image Link= |
|||
| ⚫ | |||
In order to participate in a Reive, a player simply needs to enter the area where a battle is taking place (noted by enemies and players with a battle icon next to their name). The player will join the Reive as soon as they approach the area. |
In order to participate in a Reive, a player simply needs to enter the area where a battle is taking place (noted by enemies and players with a battle icon next to their name). The player will join the Reive as soon as they approach the area. |
||
If the player moves too far from the Reive area, a warning and countdown will be displayed in the chat log and the player will have five seconds to return to the battle. |
If the player moves too far from the Reive area, a warning and countdown will be displayed in the chat log and the player will have five seconds to return to the battle.<br /> |
||
If the player does not return within five seconds, they will be locked out of participation in any type of Reive in the same area for 5 minutes. |
|||
:'''Note''': That the Reive re-entry restriction can be removed by changing zones. |
|||
}} |
|||
==Evaluations== |
==Evaluations== |
||
| Line 58: | Line 66: | ||
This type of reive tasks players with creating temporary bridges from fallen trees, destroying roots, or demolishing rock walls that impede progress through various areas in [[Ulbuka]]. The local wildlife is fiercely protective of the land, so players must be able to handle a number of attacking enemies while continuing to deal damage to the obstacle blocking the path. Defeated enemies will respawn periodically during the reive battle. |
This type of reive tasks players with creating temporary bridges from fallen trees, destroying roots, or demolishing rock walls that impede progress through various areas in [[Ulbuka]]. The local wildlife is fiercely protective of the land, so players must be able to handle a number of attacking enemies while continuing to deal damage to the obstacle blocking the path. Defeated enemies will respawn periodically during the reive battle. |
||
The reive will end in success once all targets on the obstacle are destroyed. Once destroyed, players can freely pass through the location that was previously impassable. The obstacle and local wildlife will reappear exactly one hour after being destroyed. |
The reive will end in success once all targets on the obstacle are destroyed. Once destroyed, players can freely pass through the location that was previously impassable.<br />The obstacle and local wildlife will reappear exactly ''one hour'' after being destroyed. |
||
Obstacles |
Obstacles may only be destroyed with the appropriate key item in possession: |
||
*Damage |
*Damage may only be dealt to {{color|green|trees}} and roots by players who possess the '''[["Logging"]]''' key item obtained from [[Grind to Sawdust]]. |
||
*Damage |
*Damage may only be dealt to {{color|earth|rocks}} by players who possess the '''[["Demolishing"]]''' key item obtained from [[A Stone's Throw Away]]. |
||
*Damage |
*Damage may only be dealt to {{color|ice|ice}} walls by players who possess the '''[["Fragmenting"]]''' key item obtained from [[Breaking the Ice]]. |
||
*Damage may only be dealt to {{color|grey|barriers}} by players who possess the '''[["Pulverizing"]]''' key item obtained from [[Lerene's Lament]]. |
|||
Colonization Reives can be found at the following locations: |
Colonization Reives can be found at the following locations: |
||
===Tier 1 |
===Tier 1=== |
||
| ⚫ | |||
::[[File:CeizakBattlegrounds 3.png|250px|link=]] |
|||
*[[Ceizak Battlegrounds]]: '''Knotted Roots''' ([["Logging"]]) |
*<big>[[Ceizak Battlegrounds]]</big>: '''Knotted Roots''' ([["Logging"]]) |
||
**Possible Rewards: [[King Locust]], [[Skull Locust]], [[Loc. Elutriator|Locust Elutriator]], [[Herb Seeds]], [[Vegetable Seeds]], [[Lauan Log]], [[Urunday Log]], [[Ulbuconut]], [[Revival Root]], [[:Category:Delve#Field NM Combat|Celadon Yggrete Shards]], [[Simulacrum Segment]]s |
**Possible Rewards: [[King Locust]], [[Skull Locust]], [[Loc. Elutriator|Locust Elutriator]], [[Herb Seeds]], [[Vegetable Seeds]], [[Lauan Log]], [[Urunday Log]], [[Ulbuconut]], [[Revival Root]], [[:Category:Delve#Field NM Combat|Celadon Yggrete Shards]], [[Simulacrum Segment]]s |
||
**(F/G-7): [[Floodplain Spider]] |
**(F/G-7): [[Floodplain Spider]] |
||
| Line 76: | Line 87: | ||
**(I-8): [[Bounding Chapuli]] |
**(I-8): [[Bounding Chapuli]] |
||
| ⚫ | |||
::[[File:YahseHuntingGrounds5.png|250px|link=]] |
|||
| ⚫ | |||
**Possible Rewards: [[King Locust]], [[Skull Locust]], [[Loc. Elutriator|Locust Elutriator]], [[Herb Seeds]], [[Vegetable Seeds]], [[Lauan Log]], [[Urunday Log]], [[Ulbuconut]], [[Revival Root]], [[Simulacrum Segment]]s |
**Possible Rewards: [[King Locust]], [[Skull Locust]], [[Loc. Elutriator|Locust Elutriator]], [[Herb Seeds]], [[Vegetable Seeds]], [[Lauan Log]], [[Urunday Log]], [[Ulbuconut]], [[Revival Root]], [[Simulacrum Segment]]s |
||
**(H-7): [[Temblor Beetle]] |
**(H-7): [[Temblor Beetle]] |
||
| Line 84: | Line 97: | ||
**(I-9): [[Shrubshredder Chapuli]] |
**(I-9): [[Shrubshredder Chapuli]] |
||
| ⚫ | |||
| ⚫ | |||
| ⚫ | |||
::[[File:SihGatesZone.jpg|250px|link=]] |
|||
| ⚫ | |||
| ⚫ | |||
| ⚫ | |||
| ⚫ | |||
::[[File:ForetdeHennetiel3.png|250px|link=]] |
|||
| ⚫ | |||
**Possible Rewards: [[Saffron]], [[Wijnruit]], [[Hemlock]], [[Herb Seeds]], [[Fresh Marjoram]], [[Fresh Mugwort]], [[Gnatbane]], [[:Category:Delve#Field NM Combat|Zaffre Yggrete Shards]], [[Simulacrum Segment]]s |
**Possible Rewards: [[Saffron]], [[Wijnruit]], [[Hemlock]], [[Herb Seeds]], [[Fresh Marjoram]], [[Fresh Mugwort]], [[Gnatbane]], [[:Category:Delve#Field NM Combat|Zaffre Yggrete Shards]], [[Simulacrum Segment]]s |
||
**(G-6): [[Cinder Crab]] and [[Blood Toad]] |
**(G-6): [[Cinder Crab]] and [[Blood Toad]] |
||
| Line 97: | Line 114: | ||
**Note: In Foret de Hennetiel, colonization reives take place on both sides of a river, so there are actually 10 available colonization reives. |
**Note: In Foret de Hennetiel, colonization reives take place on both sides of a river, so there are actually 10 available colonization reives. |
||
| ⚫ | |||
::[[File:MohGates4.png|250px|link=]] |
|||
| ⚫ | |||
**(I-7): [[Ruby Raptor]] and [[Skittish Matamata]] |
**(I-7): [[Ruby Raptor]] and [[Skittish Matamata]] |
||
**(G-8): [[Scoriaceous Clot]] and [[Skittish Matamata]] |
**(G-8): [[Scoriaceous Clot]] and [[Skittish Matamata]] |
||
| ⚫ | |||
::[[File:MorimarBasaltFieldsZone.jpg|250px|link=]] |
|||
| ⚫ | |||
**Possible Rewards: [[Sulfur]], [[Matamata Shell]], [[Flint Stone]], [[Marble Nugget]], [[Midrium Ore]], [[:Category:Delve#Field NM Combat|Alizarin Yggrete Shards]], [[Simulacrum Segment]]s |
**Possible Rewards: [[Sulfur]], [[Matamata Shell]], [[Flint Stone]], [[Marble Nugget]], [[Midrium Ore]], [[:Category:Delve#Field NM Combat|Alizarin Yggrete Shards]], [[Simulacrum Segment]]s |
||
**(H-8): [[Matamata]] and [[Snaggletooth Raptor]] |
**(H-8): [[Matamata]] and [[Snaggletooth Raptor]] |
||
| Line 111: | Line 132: | ||
**(F-6 E): [[Matamata]] and [[Snaggletooth Raptor]] |
**(F-6 E): [[Matamata]] and [[Snaggletooth Raptor]] |
||
| ⚫ | |||
::[[File:CirdasCaversnZone.jpg|250px|link=]] |
|||
| ⚫ | |||
**(I-6): [[Acuex]] and [[Tooth Cave Tarantula]] (east) or [[Tormented Obdella]] (west) |
**(I-6): [[Acuex]] and [[Tooth Cave Tarantula]] (east) or [[Tormented Obdella]] (west) |
||
**(I-8): [[Acuex]] and [[Umbril Shadewarrior]] (east) or [[Molten Clot]] (west) |
**(I-8): [[Acuex]] and [[Umbril Shadewarrior]] (east) or [[Molten Clot]] (west) |
||
| Line 119: | Line 142: | ||
**(F-9): [[Acuex]] and [[Sordid Lizard]] |
**(F-9): [[Acuex]] and [[Sordid Lizard]] |
||
===Tier 2 |
===Tier 2=== |
||
<big>'''[[Content Level]]s 6 ~ 9'''</big> |
|||
| ⚫ | |||
::[[File:Dho Gates Zone.png|250px|link=]] |
|||
| ⚫ | |||
**Possible Rewards: {{question}}, [[Simulacrum Segment]]s, Lv. 99 [[JSE Capes]] |
**Possible Rewards: {{question}}, [[Simulacrum Segment]]s, Lv. 99 [[JSE Capes]] |
||
**(H/I-7): |
**(H/I-7): |
||
**(J-9/10): |
**(J-9/10): |
||
| ⚫ | |||
::[[File:MajamiRivaneZone.png|250px|link=]] |
|||
| ⚫ | |||
**Possible Rewards: [[Titanium Ore]], [[Velkk Mask]], [[Velkk Necklace]], [[Pebble]], [[Iron Sand]], [[Voay Staff -1]], [[Wootz Ore]], [[Simulacrum Segment]]s, Lv. 99 [[JSE Capes]] |
**Possible Rewards: [[Titanium Ore]], [[Velkk Mask]], [[Velkk Necklace]], [[Pebble]], [[Iron Sand]], [[Voay Staff -1]], [[Wootz Ore]], [[Simulacrum Segment]]s, Lv. 99 [[JSE Capes]] |
||
**(L-9): [[Resilient Colibri]] and [[Preening Tulfaire]] |
**(L-9): [[Resilient Colibri]] and [[Preening Tulfaire]] |
||
| Line 135: | Line 163: | ||
**(I-11): [[Gerent Apkallu]] and [[Embattled Roc]] |
**(I-11): [[Gerent Apkallu]] and [[Embattled Roc]] |
||
| ⚫ | |||
::[[File:Yorcia Weald Zone.png|250px|link=]] |
|||
| ⚫ | |||
**Possible Rewards: [[Dryad Root]], [[Lauan Log]], [[Mistletoe]], [[Moko Grass]], [[Revival Tree Root]], [[Simulacrum Segment]]s, Lv. 99 [[JSE Capes]] |
**Possible Rewards: [[Dryad Root]], [[Lauan Log]], [[Mistletoe]], [[Moko Grass]], [[Revival Tree Root]], [[Simulacrum Segment]]s, Lv. 99 [[JSE Capes]] |
||
**(I-6): [[Sloshmouth Sapweed]] and [[Rustled Panopt]] |
**(I-6): [[Sloshmouth Sapweed]] and [[Rustled Panopt]] |
||
| Line 143: | Line 173: | ||
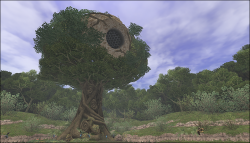
==Lair Reive== |
==Lair Reive== |
||
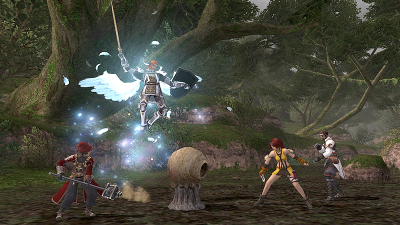
[[File:Lair Reive.png|400px|right|link=]] |
|||
In this type of reive, players destroy the homes of hostile wildlife in an effort to drive them out of the area. The lairs are protected by one or two types of enemies, which must be handled at the same time the lair is destroyed. Defeated enemies will respawn periodically during the reive. The reive will end in success when the target lair is destroyed. The lair and local wildlife will reappear exactly one hour after being destroyed. Items available from Lair Reives are the same as those available from Colonization Reives in each area (see above). |
In this type of reive, players destroy the homes of hostile wildlife in an effort to drive them out of the area. The lairs are protected by one or two types of enemies, which must be handled at the same time the lair is destroyed. Defeated enemies will respawn periodically during the reive. The reive will end in success when the target lair is destroyed. The lair and local wildlife will reappear exactly one hour after being destroyed. Items available from Lair Reives are the same as those available from Colonization Reives in each area (see above). |
||
Lair Reives can be found at the following locations: |
Lair Reives can be found at the following locations: |
||
===Tier 1=== |
|||
<big>'''[[Content Level]]s 1 ~ 5'''</big> |
|||
| ⚫ | |||
| ⚫ | |||
| ⚫ | |||
**(E/F-7): [[Waggling Wasp]] and [[Floodplain Spider]] |
**(E/F-7): [[Waggling Wasp]] and [[Floodplain Spider]] |
||
**(F-8/9): [[Waggling Wasp]] and [[Prosperous Luckybug]] |
**(F-8/9): [[Waggling Wasp]] and [[Prosperous Luckybug]] |
||
| Line 156: | Line 188: | ||
**(J-6 SW): [[Waggling Wasp]] and [[Lightfoot Lapinion]] |
**(J-6 SW): [[Waggling Wasp]] and [[Lightfoot Lapinion]] |
||
*[[Yahse Hunting Grounds]]: '''Wasp Nest''' |
*<big>[[Yahse Hunting Grounds]]</big>: '''[[Wasp Nest]]''' |
||
**(F-7): [[Cerise Wasp]] and [[Shrubshredder Chapuli]] |
**(F-7): [[Cerise Wasp]] and [[Shrubshredder Chapuli]] |
||
**(F-8): [[Cerise Wasp]] and [[Quivering Twitherym]] |
**(F-8): [[Cerise Wasp]] and [[Quivering Twitherym]] |
||
| Line 162: | Line 194: | ||
**(I-6): [[Cerise Wasp]] and [[Thrashing Mantis]] |
**(I-6): [[Cerise Wasp]] and [[Thrashing Mantis]] |
||
*[[Foret de Hennetiel]]: '''Sere Stump''' |
*<big>[[Foret de Hennetiel]]</big>: '''[[Sere Stump]]''' |
||
**(I/J-7): [[Craklaw]] and [[Cinder Crab]] |
**(I/J-7): [[Craklaw]] and [[Cinder Crab]] |
||
**(G-7/8): [[Craklaw]] and [[Blood Toad]] |
**(G-7/8): [[Craklaw]] and [[Blood Toad]] |
||
| Line 168: | Line 200: | ||
**(H-10): [[Craklaw]] and [[Wetlands Orobon]] |
**(H-10): [[Craklaw]] and [[Wetlands Orobon]] |
||
*[[Morimar Basalt Fields]]: '''Grimy Boulders''' |
*<big>[[Morimar Basalt Fields]]</big>: '''[[Grimy Boulders]]''' |
||
**(F-6): {{question}} |
**(F-6): {{question}} |
||
**(G-7 E): [[Matamata]] and [[Alpine Eft]] |
**(G-7 E): [[Matamata]] and [[Alpine Eft]] |
||
| Line 175: | Line 207: | ||
**(E-9): [[Matamata]] and [[Outlands Peiste]] |
**(E-9): [[Matamata]] and [[Outlands Peiste]] |
||
*[[Cirdas Caverns]]: ''' |
*<big>[[Cirdas Caverns]]</big>: '''[[Banespore]]s''' |
||
**(I-5 SE): [[Acuex]] |
**(I-5 SE): [[Acuex]] |
||
**(G-7): [[Acuex]] {{verification}} |
**(G-7): [[Acuex]] {{verification}} |
||
| Line 181: | Line 213: | ||
**(H-11): [[Acuex]] {{verification}} |
**(H-11): [[Acuex]] {{verification}} |
||
===Tier 2 |
===Tier 2=== |
||
<big>'''[[Content Level]]s 6 ~ 9'''</big> |
|||
*[[Marjami Ravine]]: '''Avian Roost''' |
*<big>[[Marjami Ravine]]</big>: '''[[Avian Roost]]''' |
||
**(E/F-7) |
**(E/F-7) |
||
**(E-10): [[Trembling Tulfaire]] |
**(E-10): [[Trembling Tulfaire]] |
||
| Line 190: | Line 223: | ||
**(C-7): |
**(C-7): |
||
*[[Yorcia Weald]]: |
*<big>[[Yorcia Weald]]</big>: '''[[Arboreal Bastion]]''' |
||
**(J-5) |
**(J-5) |
||
**(H-5) |
**(H-5) |
||
**(G-7) |
**(G-7) |
||
| Line 198: | Line 231: | ||
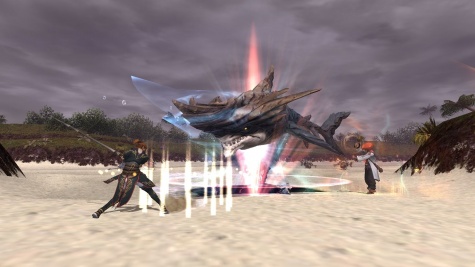
==Wildskeeper Reive== |
==Wildskeeper Reive== |
||
In this final, most challenging type of reive, players will face off against [[Ulbuka]]'s fiercest foes--the [[Naakual]]s. |
In this final, most challenging type of reive, players will face off against [[Ulbuka]]'s fiercest foes--the '''[[Naakual]]s'''. |
||
In order to participate in a Wildskeeper Reive, you must first complete the mission [[Life on the Frontier]], and then speak with [[Dimmian]] in [[Eastern Adoulin]] (E-6) to receive the [[Habitual behavior barometer]]. After receiving the barometer, you can purchase one-time use key items which allow for entry into a single Wildskeeper Reive for |
In order to participate in a Wildskeeper Reive, you must first complete the mission [[Life on the Frontier]], and then speak with [[Dimmian]] in [[Eastern Adoulin]] (E-6) to receive the [[Habitual behavior barometer]]. After receiving the barometer, you can purchase one-time use key items which allow for entry into a single Wildskeeper Reive for 30,000 [[Bayld]] each (this fee can be reduced in increments depending on the player's Adoulin fame and coalition standings as well as [[Rhapsody in Ochre]]). It is not possible to access the sections of zones which contain Wildskeeper Reives or receive Reive status without having the key item, which is expended upon entry. |
||
===Wildskeeper Reive Entry Items=== |
===Wildskeeper Reive Entry Items=== |
||
*Key Item cost: |
*Key Item cost: 7,500 - 30,000 [[Bayld]] |
||
**[[Brier-proof net]]: '''[[Colkhab]]''', entered at (H-6) in [[Ceizak Battlegrounds]] (nearest bivouac is #2) |
**[[File:Colkhab.png|link=|50px]] [[Brier-proof net]]: '''[[Colkhab]]''', entered at (H-6) in [[Ceizak Battlegrounds]] (nearest bivouac is #2) |
||
**[[Compass of transference]]: '''[[Tchakka]]''', entered at (F-10) in [[Foret de Hennetiel]] (nearest bivouac is #4) |
**[[File:Tchakka.png|link=|50px]] [[Compass of transference]]: '''[[Tchakka]]''', entered at (F-10) in [[Foret de Hennetiel]] (nearest bivouac is #4) |
||
**[[Magma mitigation set]]: '''[[Achuka]]''', entered at (E-5) in [[Morimar Basalt Fields]] (nearest bivouac is #5) |
**[[File:Achuka.png|link=|50px]] [[Magma mitigation set]]: '''[[Achuka]]''', entered at (E-5) in [[Morimar Basalt Fields]] (nearest bivouac is #5) |
||
**[[Resurrection retardant axe]]: '''[[Yumcax]]''', entered at (E-9) in [[Yorcia Weald]] (nearest bivouac is #3) |
**[[File:Yumcax.png|link=|50px]] [[Resurrection retardant axe]]: '''[[Yumcax]]''', entered at (E-9) in [[Yorcia Weald]] (nearest bivouac is #3) |
||
**[[Insulator tablet]]: '''[[Hurkan]]''', entered at (I-6) in [[Marjami Ravine]] (nearest bivouac is #3) |
**[[File:Hurkan.png|link=|50px]] [[Insulator tablet]]: '''[[Hurkan]]''', entered at (I-6) in [[Marjami Ravine]] (nearest bivouac is #3) |
||
**[[ Anti-glaciation gear]]: '''[[Kumhau]]''', entered at (I-6) in [[Kamihr Drifts]] (nearest bivouac is #3) |
**[[File:Kumhau.png|link=|50px]] [[Anti-glaciation gear]]: '''[[Kumhau]]''', entered at (I-6) in [[Kamihr Drifts]] (nearest bivouac is #3) |
||
Reference the individual Naakual pages for more information about each battle, including TP move lists and available drops. |
Reference the individual Naakual pages for more information about each battle, including TP move lists and available drops. |
||
| Line 219: | Line 252: | ||
At the end of a successful Wildskeeper Reive, if the player participated enough to receive item rewards, they will receive one random crafting material and one of several available unique drops from the defeated Naakual, guaranteed. After first defeating a particular Naakual, the player will also receive the Naakual crest key item marking the defeat, any one of which is required for leading entry into a [[Delve]] fracture. Note that you must have available inventory space at the end of the battle to receive the items, and, on repeat battles, if a Naakual item is selected which you already have, you will not obtain a Naakual item following that battle. |
At the end of a successful Wildskeeper Reive, if the player participated enough to receive item rewards, they will receive one random crafting material and one of several available unique drops from the defeated Naakual, guaranteed. After first defeating a particular Naakual, the player will also receive the Naakual crest key item marking the defeat, any one of which is required for leading entry into a [[Delve]] fracture. Note that you must have available inventory space at the end of the battle to receive the items, and, on repeat battles, if a Naakual item is selected which you already have, you will not obtain a Naakual item following that battle. |
||
Reive status will be lost following the battle, and although you will not be ejected from the area, you cannot participate in the next Reive until leaving and re-entering with a new key item. |
Reive status will be lost following the battle, and although you will not be ejected from the area, you cannot participate in the next Reive until leaving and re-entering with a new key item. |
||
====Respawn==== |
|||
Wildskeeper Reive battles respawn three hours after completion. |
|||
*During certain special campaigns the respawn timer is reduced down to 5 minutes. |
|||
====Augmenting Rewards==== |
|||
Item level 115 gear from Wildskeeper Reives may be augmented by '''[[Prah Janimhar]]''' near the Inventors' Coalition in [[Western Adoulin]] with [[Paragon Key Item]]s; rewarded from completing the [[Records of Eminence#Wildskeeper Reives|Records of Eminence]] Wildskeeper Reive objectives. |
|||
:Subsequently, trading all 6 Paragon Key Items to '''[[Eternal Flame]]''' near the mog house in [[Western Adoulin]] will allow you to receive a piece of equipment as a reward. |
|||
====Cashing In==== |
|||
Unwanted equipment from Wildskeeper Reives may be given to '''[[Runje Desaali]]''' near the castle in [[Eastern Adoulin]] in exchange for [[Bayld]]. |
|||
===Monthly Adventurer Campaigns=== |
|||
Item level 115 gear from Wildskeeper Reives can be augmented by [[Prah Janimhar]] with [[Paragon Key Items]]. |
|||
There are two types of campaigns that may run any given month. |
|||
{{Category:Adventurer_Campaigns |
|||
|transcludesection=WKR |
|||
}} |
|||
[[Category:Colonization]] |
[[Category:Colonization]] |
||
Revision as of 09:03, 17 March 2019
|
Evaluations
Periodically during Reives, players' progress will be assessed and they will be rewarded with varying amounts of Experience Points and Bayld. If a player stays in a Reive through to its conclusion, additional Experience Points and Bayld will be received, as well as a chance to receive one or more items from the lists below. All player actions factor into the evaluation (dealing damage, taking damage, healing, support buffs and debuffs, etc.).
At the time of each evaluation, a maximum Bayld value is established for all participating players, proportional to the amount of the HP reduction of the targets on the obstacle (colonization reive), nest (lair reive), or Naakual (wildskeeper reive). At the same time, each player's performance is individually evaluated for that period and assigned a score. The EXP/Bayld received by the player represents the score for that evaluation. If the player receives more EXP than Bayld for any given evaluation, the player received the maximum amount of bayld available for that evaluation period, based on target progress.
The final evaluation is dependent on your overall participation in a Reive and is subject to an overall cap: 250 Bayld/EXP for a Lair Reive, 700 EXP and 850 Bayld for a Colonization Reive, and 2250 Bayld/EXP for a Wildskeeper Reive. Players may also receive one or more items at the end of a Reive, based on evaluation performance during the Reive.
If the player is defeated at some point during the Reive, accumulated EXP and bayld will be carried over to the next evaluation that the player is alive for. If a player does not evaluate beyond a certain minimum threshold for an evaluation period, evaluations will be skipped until the player has performed enough actions to surpass the minimum threshold.
Note that while the maximum Bayld values are dependent only on damage dealt to the obstacle, lair, or Naakual, individual player calculations take all actions into account, including those on monsters defending the obstacle, lair, or Naakual.
Momentum
Prior to participating in Reives, obtaining the Reive unity key item from the Scaredy-Cats quest is highly recommended.
With this key item in possession, periodically throughout the Reive, players will receive messages giving certain optional objectives for players to fulfill noted as "Reive momentum score."
These can include one or more of the following:
- Physical attack
- Magic attack
- Ranged attack
- Damage taken
- HP recovery
- Attack success
- Skillchain success
- Resistance success
- Enhancing support
- Enfeebling support
- Raise support
- Monster vanquishing
Once players collectively successfully perform an objective action to a certain threshold, a "Momentum bonus" will be received from the following list by all participating players and a new objective will be chosen to replace the completed objective:
- HP Recovery (to full)
- MP Recovery (to full)
- TP Recovery (to 3000)
- Status ailment recovery
- Stoneskin
- Ability cast recovery (including SP abilities; this bonus can only be received once in a single Colonization or Lair Reive, but can be received multiple times in a Wildskeeper Reive).
- Increased maximum MP and HP (stacks continuously for the duration of the Reive)
- Potency
- Fast Cast
- Store TP
- Subtle Blow
Note that momentum bonuses do not directly impact the player's EXP/bayld calculation, but the effects are helpful in achieving higher evaluation values.
Bonus Key Items
- Ivory wing talisman: Obtained from Reja Ygridhi in Celennia Memorial Library for an achievement reward (complete all Ulbuka field area quests for Yahse Hunting Grounds, Ceizak Battlegrounds, Morimar Basalt Fields, and Foret de Hennetiel). This key item reduces EXP loss when KO'ed in a Reive.
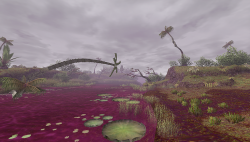
Colonization Reive
This type of reive tasks players with creating temporary bridges from fallen trees, destroying roots, or demolishing rock walls that impede progress through various areas in Ulbuka. The local wildlife is fiercely protective of the land, so players must be able to handle a number of attacking enemies while continuing to deal damage to the obstacle blocking the path. Defeated enemies will respawn periodically during the reive battle.
The reive will end in success once all targets on the obstacle are destroyed. Once destroyed, players can freely pass through the location that was previously impassable.
The obstacle and local wildlife will reappear exactly one hour after being destroyed.
Obstacles may only be destroyed with the appropriate key item in possession:
- Damage may only be dealt to trees and roots by players who possess the "Logging" key item obtained from Grind to Sawdust.
- Damage may only be dealt to rocks by players who possess the "Demolishing" key item obtained from A Stone's Throw Away.
- Damage may only be dealt to ice walls by players who possess the "Fragmenting" key item obtained from Breaking the Ice.
- Damage may only be dealt to barriers by players who possess the "Pulverizing" key item obtained from Lerene's Lament.
Colonization Reives can be found at the following locations:
Tier 1
Content Levels 1 ~ 5
- Ceizak Battlegrounds: Knotted Roots ("Logging")
- Possible Rewards: King Locust, Skull Locust, Locust Elutriator, Herb Seeds, Vegetable Seeds, Lauan Log, Urunday Log, Ulbuconut, Revival Root, Celadon Yggrete Shards, Simulacrum Segments
- (F/G-7): Floodplain Spider
- (G-8): Lightfoot Lapinion
- (G-9): Lavender Twitherym
- (I-8): Bounding Chapuli
- Yahse Hunting Grounds: Knotted Roots ("Logging")
- Possible Rewards: King Locust, Skull Locust, Locust Elutriator, Herb Seeds, Vegetable Seeds, Lauan Log, Urunday Log, Ulbuconut, Revival Root, Simulacrum Segments
- (H-7): Temblor Beetle
- (H-8): Lancing Wasp
- (J-8): Lancing Wasp
- (G-9): Quivering Twitherym
- (I-9): Shrubshredder Chapuli

- Sih Gates: Knotted Roots ("Logging")
- (H-6 SE): Chtonic Chapuli and Fetid Twitherym Spawn: @ 10:00
- (I-8): Somber Obdella and Mighty Craklaw Spawn: @20:00
- Foret de Hennetiel: Broadleaf Palms ("Logging")
- Possible Rewards: Saffron, Wijnruit, Hemlock, Herb Seeds, Fresh Marjoram, Fresh Mugwort, Gnatbane, Zaffre Yggrete Shards, Simulacrum Segments
- (G-6): Cinder Crab and Blood Toad
- (E-8): Craklaw and Primrose Jagil
- (H-7): Cinder Crab and Blood Toad
- (G-9/10): Wetlands Orobon and Primrose Jagil
- (I-10): Wetlands Orobon and Primrose Jagil
- Note: In Foret de Hennetiel, colonization reives take place on both sides of a river, so there are actually 10 available colonization reives.

- Moh Gates: Knotted Roots ("Logging")
- (I-7): Ruby Raptor and Skittish Matamata
- (G-8): Scoriaceous Clot and Skittish Matamata

- Morimar Basalt Fields: Bedrock Crag ("Demolishing")
- Possible Rewards: Sulfur, Matamata Shell, Flint Stone, Marble Nugget, Midrium Ore, Alizarin Yggrete Shards, Simulacrum Segments
- (H-8): Matamata and Snaggletooth Raptor
- (I-8): Matamata and Snaggletooth Raptor
- (H-10 W): Matamata and Basalt Lizard
- (G-11): Matamata and Basalt Lizard
- (F-9 SE): Matamata and Basalt Lizard
- (F-9 W): Matamata and Basalt Lizard
- (F-6 E): Matamata and Snaggletooth Raptor

- Cirdas Caverns: Knotted Roots ("Logging")
- (I-6): Acuex and Tooth Cave Tarantula (east) or Tormented Obdella (west)
- (I-8): Acuex and Umbril Shadewarrior (east) or Molten Clot (west)
- (F-8): Acuex and Oregorger Worm
- (J-9): Acuex and Slag Mandragora (north) or Frightful Funguar (south)
- (H-10): Acuex and Putrid Funguar (north) or Pyre Bat (south)
- (F-9): Acuex and Sordid Lizard
Tier 2
Content Levels 6 ~ 9
- Dho Gates: Knotted Roots ("Logging")
- Possible Rewards:
 , Simulacrum Segments, Lv. 99 JSE Capes
 - (H/I-7):
- (J-9/10):
- Possible Rewards:

- Marjami Ravine: Monolithic Boulders ("Demolishing")
- Possible Rewards: Titanium Ore, Velkk Mask, Velkk Necklace, Pebble, Iron Sand, Voay Staff -1, Wootz Ore, Simulacrum Segments, Lv. 99 JSE Capes
- (L-9): Resilient Colibri and Preening Tulfaire
- (K-8): Resilient Colibri and Embattled Roc
- (J-10/11): Precipice Vulture and Preening Tulfaire
- (F-10): Resilient Colibri and Preening Tulfaire
- (D-7/8): Preening Tulfaire and Gerent Apkallu
- (G-11):
- (I-11): Gerent Apkallu and Embattled Roc

- Yorcia Weald: Gnarled Ramparts ("Logging")
- Possible Rewards: Dryad Root, Lauan Log, Mistletoe, Moko Grass, Revival Tree Root, Simulacrum Segments, Lv. 99 JSE Capes
- (I-6): Sloshmouth Sapweed and Rustled Panopt
- (G-7): Crabapple Treant and Soiled Funguar
- (J-9): Larkish Opo-opo and Furfluff Lapinion
- (H-9): Twitherym Windstorm and Uprooted Sapling
Lair Reive
In this type of reive, players destroy the homes of hostile wildlife in an effort to drive them out of the area. The lairs are protected by one or two types of enemies, which must be handled at the same time the lair is destroyed. Defeated enemies will respawn periodically during the reive. The reive will end in success when the target lair is destroyed. The lair and local wildlife will reappear exactly one hour after being destroyed. Items available from Lair Reives are the same as those available from Colonization Reives in each area (see above).
Lair Reives can be found at the following locations:
Tier 1
Content Levels 1 ~ 5
- Ceizak Battlegrounds: Wasp Nest
- (E/F-7): Waggling Wasp and Floodplain Spider
- (F-8/9): Waggling Wasp and Prosperous Luckybug
- (H-6/7): Waggling Wasp and Bounding Chapuli
- (H-10/11): Waggling Wasp and Molted Mantis
- (J-6 SW): Waggling Wasp and Lightfoot Lapinion
- Yahse Hunting Grounds: Wasp Nest
- (F-7): Cerise Wasp and Shrubshredder Chapuli
- (F-8): Cerise Wasp and Quivering Twitherym
- (H-9): Cerise Wasp and Red Dropwing
- (I-6): Cerise Wasp and Thrashing Mantis
- Foret de Hennetiel: Sere Stump
- (I/J-7): Craklaw and Cinder Crab
- (G-7/8): Craklaw and Blood Toad
- (F-8/9): Craklaw and Primrose Jagil
- (H-10): Craklaw and Wetlands Orobon
- Morimar Basalt Fields: Grimy Boulders
- (F-6):
- (G-7 E): Matamata and Alpine Eft
- (G/H-9): Matamata and Wivre Cragdweller
- (I-7 NE): Matamata and Basalt Lizard
- (E-9): Matamata and Outlands Peiste
- (F-6):
Tier 2
Content Levels 6 ~ 9
- Marjami Ravine: Avian Roost
- (E/F-7)
- (E-10): Trembling Tulfaire
- (K-12)
- (I-8): Trembling Tulfaire and Undaunted Colibri
- (C-7):
- Yorcia Weald: Arboreal Bastion
- (J-5)
- (H-5)
- (G-7)
- (K-9)
- (J-11):
Wildskeeper Reive
In this final, most challenging type of reive, players will face off against Ulbuka's fiercest foes--the Naakuals.
In order to participate in a Wildskeeper Reive, you must first complete the mission Life on the Frontier, and then speak with Dimmian in Eastern Adoulin (E-6) to receive the Habitual behavior barometer. After receiving the barometer, you can purchase one-time use key items which allow for entry into a single Wildskeeper Reive for 30,000 Bayld each (this fee can be reduced in increments depending on the player's Adoulin fame and coalition standings as well as Rhapsody in Ochre). It is not possible to access the sections of zones which contain Wildskeeper Reives or receive Reive status without having the key item, which is expended upon entry.
Wildskeeper Reive Entry Items
- Key Item cost: 7,500 - 30,000 Bayld
 Brier-proof net: Colkhab, entered at (H-6) in Ceizak Battlegrounds (nearest bivouac is #2)
 Compass of transference: Tchakka, entered at (F-10) in Foret de Hennetiel (nearest bivouac is #4)
 Magma mitigation set: Achuka, entered at (E-5) in Morimar Basalt Fields (nearest bivouac is #5)
 Resurrection retardant axe: Yumcax, entered at (E-9) in Yorcia Weald (nearest bivouac is #3)
 Insulator tablet: Hurkan, entered at (I-6) in Marjami Ravine (nearest bivouac is #3)
 Anti-glaciation gear: Kumhau, entered at (I-6) in Kamihr Drifts (nearest bivouac is #3)
Reference the individual Naakual pages for more information about each battle, including TP move lists and available drops.
These fights proceed much in the same way as Colonization Reives where players will receive periodic evaluations for the duration of the fight, based on their actions taken, with Bayld caps determined by the battle progress (remaining HP of the Naakual). Many more bayld are potentially at stake during this type of reive (up to ~25,000 for a complete battle) because of the duration of the battle and the high HP of the Naakual. Note that the player's maximum Bayld yield will be capped depending on the percentage completion of the battle when the player entered (EXP will continue to be received at evaluations after Bayld is capped).
The damage reduction of the Naakual will be proportional to the colonization rate of the Naakual's area, with the Naakual taking little to no normal damage at very low colonization rates (forms of damage that normally bypass shields, such as Quick Draw, are not affected by this reduction and are extremely useful at lower colonization rates). Naakuals are assisted by a variety of monsters from the same monster family which can be handled separately from the Naakual by additional players present, but can generally be ignored as they are spread out over a large area.
At the end of a successful Wildskeeper Reive, if the player participated enough to receive item rewards, they will receive one random crafting material and one of several available unique drops from the defeated Naakual, guaranteed. After first defeating a particular Naakual, the player will also receive the Naakual crest key item marking the defeat, any one of which is required for leading entry into a Delve fracture. Note that you must have available inventory space at the end of the battle to receive the items, and, on repeat battles, if a Naakual item is selected which you already have, you will not obtain a Naakual item following that battle.
Reive status will be lost following the battle, and although you will not be ejected from the area, you cannot participate in the next Reive until leaving and re-entering with a new key item.
Respawn
Wildskeeper Reive battles respawn three hours after completion.
- During certain special campaigns the respawn timer is reduced down to 5 minutes.
Augmenting Rewards
Item level 115 gear from Wildskeeper Reives may be augmented by Prah Janimhar near the Inventors' Coalition in Western Adoulin with Paragon Key Items; rewarded from completing the Records of Eminence Wildskeeper Reive objectives.
- Subsequently, trading all 6 Paragon Key Items to Eternal Flame near the mog house in Western Adoulin will allow you to receive a piece of equipment as a reward.
Cashing In
Unwanted equipment from Wildskeeper Reives may be given to Runje Desaali near the castle in Eastern Adoulin in exchange for Bayld.
Monthly Adventurer Campaigns
There are two types of campaigns that may run any given month.
Wildskeeper Reive Campaign
- When this Monthly Adventurer Campaign is active, Wildskeeper Reives undergo the following changes:
- The required fame and Bayld cost of the entry Key Items are reduced
 High-Purity Bayld x2 are guaranteed from winning a battle.
- Players may obtain a
 Kupon AW-WK from winning a battle.
 - The respawn time of the following Notorious Monsters is reduced to 10 minutes:
- An additional personal drop containing Delve Materials or segments on top of the normal drops [1]
- Common:
 Airlixirs / +1 / +2
 - Uncommon:
 Simulacrum Segments
 - Rare: An item that drops from the Delve Boss of the same Naakual type.
 Bztavian Stinger,
  Gabbrath Horn,
  Rockfin Tooth,
  Waktza Rostrum
 - VRare or unknown rarity or not dropped:
 Bztavian Wing
  ,
,  Cehuetzi Claw ,
  Cehuetzi Ice Shard ,
  Cehuetzi Pelt ,
  Gabbrath Meat ,
  Rockfin Fin ,
  Waktza Crest ,
  Yggdreant Bole ,
  Yggdreant Root
- Common:
Wildskeeper Reive Campaign - PLUS!
- In addition to the benefits above, the following benefits are in place during this campaign:
- Instead of x2 High-Purity Bayld per fight, x4 are received.
- The respawn time of the following Notorious Monsters is reduced to 5 minutes instead of 10:
- Instead of x2
Pages in category "Reive"
The following 7 pages are in this category, out of 7 total.
