The Voracious Resurgence | |
| Prime Weapons • Ultimate Weapons • Ultimate Augments • Abjurations iL119 • JSE Necks • Divergence Augments • Escutcheons | |
| Reforged Armor Artifact: +1 • iL109 • iL119/+2/+3 Relic: +1/+2 • iL109 • iL119/+2/+3 Empyrean: +1/+2 • iL109 • iL119/+2/+3 |
Guides • Crafting • Trusts • Apex Monsters |
Ifrit's Cauldron: Difference between revisions
From FFXI Wiki
No edit summary |
(Updated page layout) |
||
| Line 1: | Line 1: | ||
{{Zone |
{{Zone Preliminary |
||
|Table_1= |
|||
|Introduction to Zone= |
|||
{{Zone Geography Table |
|||
|Map=Ifrit's Cauldron-map1.jpg |
|||
|Zone Geography Row= |
|||
|AreaImage= Ifrit's Cauldron header.jpg |
|||
{{Zone Geography Row |
|||
|Description of AreaImage= }} |
|||
|Geography.Zone=Cloister of Flames |
|||
|Geography.Entrance_Map=Ifrit%27s_Cauldron-map7.jpg |
|||
{{Connected Zone Table |
|||
|Geography.Entrance_Position=G-5 |
|||
|Insert Connected Zone Template1= |
|||
|Geography.Exit_Map=Cloister_of_Flames_-_Map.jpg |
|||
{{Connected Zone |
|||
|Geography.Exit_Position= |
|||
|Connecting Zone=Cloister of Flames |
|||
}} |
|||
|Position (pos)=(G-5) |
|||
{{Zone Geography Row |
|||
|Geography.Zone=Yhoator Jungle |
|||
|Geography.Entrance_Map=Ifrit%27s_Cauldron-map1.jpg |
|||
|Geography.Entrance_Position=K-9 |
|||
|Geography.Exit_Map=Yhoator_Jungle-map.jpg |
|||
|Geography.Exit_Position=I-5 |
|||
}} |
|||
{{Zone Geography Row |
|||
|Geography.Zone=Yhoator Jungle |
|||
|Geography.Entrance_Map=Ifrit%27s_Cauldron-map4.jpg |
|||
|Geography.Entrance_Position=K-10 |
|||
|Geography.Exit_Map=Yhoator_Jungle-map.jpg |
|||
|Geography.Exit_Position=G-6 |
|||
}} |
|||
{{Zone Geography Row |
|||
|Geography.Zone=Yuhtunga Jungle |
|||
|Geography.Entrance_Map=Ifrit%27s_Cauldron-map8.jpg |
|||
|Geography.Entrance_Position=D-7 |
|||
|Geography.Exit_Map=Yuhtunga_Jungle-map.jpg |
|||
|Geography.Exit_Position=K-6 |
|||
}} |
}} |
||
{{Connected Zone |
|||
|Connecting Zone=Yhoator Jungle |
|||
|Position (pos)=(K-9), (K-10) |
|||
}} |
}} |
||
|Table_2= |
|||
|Insert Connected Zone Template2= |
|||
{{Zone Description Table |
|||
{{Connected Zone |
|||
|Description.Image=Ifrit's Cauldron header.jpg |
|||
|Connecting Zone=Yuhtunga Jungle |
|||
|Description.Japanese= |
|||
|Position (pos)=(D-7) |
|||
|Description.Requires={{Zilart}} |
|||
|Description.Map_Acquisition=Treasure Coffer |
|||
|Description.Timeline=Present |
|||
|Description.Continent=Elshimo |
|||
|Description.Region=[[Elshimo Uplands]] |
|||
|Description.Zone_Type=Dungeon |
|||
|Description.Activities={{Mining Icon}} |
|||
|Description.Restrictions= |
|||
}} |
}} |
||
}} |
}} |
||
| Line 34: | Line 59: | ||
</gallery> |
</gallery> |
||
==Quests== |
|||
{{Quest List Table |
|||
|Insert Zone Quests Template= |
|||
|Quest List Color=709bcc |
|||
{{Zone Quests |
|||
|Quest List Row= |
|||
|Fame Level= |
|||
{{Quest List Row |
|||
|Fame= |
|||
|Name=Blood and Glory |
|||
|Reward=[[Retribution]] [[Weapon Skill]] |
|Reward=[[Retribution]] [[Weapon Skill]] |
||
| |
|NPC=Shantotto |
||
|Position |
|Position=K-7 |
||
|Zone=Windurst Walls |
|||
}} |
}} |
||
{{Quest List Row |
|||
{{Zone Quests |
|||
|Fame |
|Fame= |
||
| |
|Name=Borghertz's Dragon Hands |
||
|Reward=[[Drachen Mail]] |
|Reward=[[Drachen Mail]] |
||
| |
|NPC=Guslam |
||
|Position |
|Position=H-8 |
||
|Zone=Upper Jeuno |
|||
}} |
}} |
||
{{Quest List Row |
|||
{{Zone Quests |
|||
|Fame |
|Fame= |
||
| |
|Name=Borghertz's Lurking Hands |
||
|Reward=[[Ninja Tekko]] |
|Reward=[[Ninja Tekko]] |
||
| |
|NPC=Guslam |
||
|Position |
|Position=H-8 |
||
|Zone=Upper Jeuno |
|||
}} |
}} |
||
{{Quest List Row |
|||
{{Zone Quests |
|||
|Fame |
|Fame=[[Kazham]] level 7 |
||
| |
|Name=Greetings to the Guardian |
||
|Reward=5,000 gil |
|Reward=5,000 gil |
||
| |
|NPC=Hari Pakhroib |
||
|Position |
|Position=I-11 |
||
|Zone=Kazham |
|||
}} |
}} |
||
{{Quest List Row |
|||
{{Zone Quests |
|||
|Fame |
|Fame=[[Kazham]] level 6 |
||
| |
|Name=The Firebloom Tree |
||
|Reward=5,000 gil |
|Reward=5,000 gil |
||
| |
|NPC=Soun Abralah |
||
|Position |
|Position=H-9 |
||
|Zone=Kazham |
|||
}} |
}} |
||
}} |
}} |
||
| Line 87: | Line 119: | ||
|Expansion=Zilart |
|Expansion=Zilart |
||
}} |
}} |
||
}} |
|||
{{Zone Minigame Table |
|||
|Name of Minigame= |
|||
|Insert Zone Minigame Heading Template= |
|||
{{Zone Minigame Heading |
|||
|Heading 1= |
|||
|Heading 2= |
|||
}} |
|||
|Insert Zone Minigame Content= |
|||
{{Zone Minigame |
|||
|Left Column Text= |
|||
|Right Column Text= |
|||
}} |
|||
{{Zone Minigame |
|||
|Left Column Text= |
|||
|Right Column Text= |
|||
}} |
|||
{{Zone Minigame |
|||
|Left Column Text= |
|||
|Right Column Text= |
|||
}} |
|||
|Minigame Maps= |
|||
<Gallery align="center"> |
|||
Image:mapimage.jpg|Map Name 1 |
|||
Image:mapimage.jpg|Map Name 2 |
|||
</gallery><br> |
|||
}} |
}} |
||
| Line 222: | Line 227: | ||
}} |
}} |
||
== Historical Significance == |
|||
== Notes == |
== Notes == |
||
*Certain areas in this zone require using [[Ice Cluster]]s in order to bypass a Fire Spout. |
*Certain areas in this zone require using [[Ice Cluster]]s in order to bypass a Fire Spout. |
||
== Maps == |
|||
<Gallery align="center"> |
|||
Image:Ifrit's Cauldron-map1.jpg|{{PAGENAME}} - Map 1 |
|||
Image:Ifrit's Cauldron-map2.jpg|{{PAGENAME}} - Map 2 |
|||
Image:Ifrit's Cauldron-map3.jpg|{{PAGENAME}} - Map 3 |
|||
Image:Ifrit's Cauldron-map4.jpg|{{PAGENAME}} - Map 4 |
|||
Image:Ifrit's Cauldron-map5.jpg|{{PAGENAME}} - Map 5 |
|||
Image:Ifrit's Cauldron-map6.jpg|{{PAGENAME}} - Map 6 |
|||
Image:Ifrit's Cauldron-map7.jpg|{{PAGENAME}} - Map 7 |
|||
Image:Ifrit's Cauldron-map8.jpg|{{PAGENAME}} - Map 8 |
|||
</gallery> |
|||
== Related Links == |
== Related Links == |
||
{| border="0" cellpadding="5" cellspacing="0" width="100%" |
{| border="0" cellpadding="5" cellspacing="0" width="100%" |
||
Revision as of 09:43, 16 February 2015
| |||||||||||||||||||||||||||||||||||||||||||||||||||

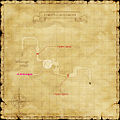
Maps for Ifrit's Cauldron
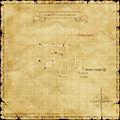
Ifrit's Cauldron - Map 1
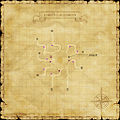
Ifrit's Cauldron - Map 2
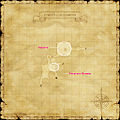
Ifrit's Cauldron - Map 3

Ifrit's Cauldron - Map 4

Ifrit's Cauldron - Map 5

Ifrit's Cauldron - Map 6

Ifrit's Cauldron - Map 7
Ifrit's Cauldron - Map 8


Quests
| Fame | Name | NPC | Pos. | Zone | Rewards |
|---|---|---|---|---|---|
| Blood and Glory | Shantotto | K-7 | Windurst Walls | Retribution Weapon Skill | |
| Borghertz's Dragon Hands | Guslam | H-8 | Upper Jeuno | Drachen Mail | |
| Borghertz's Lurking Hands | Guslam | H-8 | Upper Jeuno | Ninja Tekko | |
| Kazham level 7 | Greetings to the Guardian | Hari Pakhroib | I-11 | Kazham | 5,000 gil |
| Kazham level 6 | The Firebloom Tree | Soun Abralah | H-9 | Kazham | 5,000 gil |
| Mission Name | Mission Number | NPC | Storyline |
|---|---|---|---|
| Bastok Mission 6-2 | Zilart | ||
| Headstone Pilgrimage | Zilart |
| Name | Level | Position | Spawn Condition | Aggro | Notable Drops |
| Ash Dragon | 85 | (F-8/9) | Timed spawn approximately every 72 hours at (F-8/9) | True Sound | |
| Bomb Queen | 80 | (I-10) | Trade a Bomb Queen Core and 3 Bomb Queen Ash to the ??? at (I-10) | Sight, Magic | |
| Foreseer Oramix | 72 | (G-9) | Lottery spawn off of Goblin Alchemist at (G-9) | Sight | |
| Lindwurm | 75 | (F-8) - (G-9) | Lottery spawn off of Eotyrannus at (F-8) - (G-9). | Sound | |
| Tarasque | 73 | (I-7) | Forced spawn by trading a Rattling Egg to the ??? at (I-7) | Sound | |
| Tyrannic Tunnok | 75 | (E-10) | Lottery spawn off of Sulfur Scorpion at (E-10) | Sound | |
| Vouivre | 80 | (H-6/7) - (I-6/7) | Lottery spawn off of Hurricane Wyvern at (H-6/7) - (I-6/7) | Sight |
| Name | Family | Job | Min Level | Max Level | Detection | A | L | Number | Type | App. |
| Goblin's Bats | Bats | 53 | 55 | Sound | ||||||
| Dire Bat | Bat | 60 | 64 | Sound | A | L | ||||
| Volcano Wasp | Bee | 61 | 64 | Sight, Scent | L | |||||
| Old Opo-opo | Opo-Opo | 61 | 65 | Sight, Scent | L | |||||
| Volcanic Gas | Bomb | 62 | 68 | Sight, Magic | A | |||||
| Dodomeki | Hecteyes | 63 | 69 | Sound | A | |||||
| Goblin Alchemist | Goblin | WHM | 66 | 69 | Sight | A | L | |||
| Goblin Bandit | Goblin | THF | 66 | 69 | Sight | A | L | |||
| Goblin Mercenary | Goblin | WAR | 66 | 69 | Sight | A | L | |||
| Goblin Shepherd | Goblin | BST | 66 | 69 | Sight | A | L | |||
| Nightmare Bats | Bats | 68 | 72 | Sound | A | L | ||||
| Eotyrannus | Raptor | 70 | 73 | Sound, Scent | A | |||||
| Sulfur Scorpion | Scorpion | 70 | 73 | Sound, Scent | A | |||||
| Volcanic Bomb | Bomb | 71 | 78 | Sight, Magic | A | |||||
| Ash Lizard | Lizard | 73 | 76 | Sound | L | |||||
| Hurricane Wyvern | Wyvern | 75 | 78 | Sight | A | |||||
| Salamander | Lizard | ? | ? | Sound | A | L | Mission | |||
| Magma | Bomb | 65 | 65 | Sight, Magic | A | Mission | ||||
| Cailleach Bheur | Skeleton | BLM | 82 | 82 | Sound, HP | A | Quest |
| Appearance Key D = Dusk (18:00-6:00), N = Night (20:00 - 4:00), F = Fog, |
Historical Significance
Notes
- Certain areas in this zone require using Ice Clusters in order to bypass a Fire Spout.
Maps
Ifrit's Cauldron - Map 1
Ifrit's Cauldron - Map 2
Ifrit's Cauldron - Map 3
Ifrit's Cauldron - Map 4
Ifrit's Cauldron - Map 5
Ifrit's Cauldron - Map 6
Ifrit's Cauldron - Map 7
Ifrit's Cauldron - Map 8
Related Links
|
Sources |
