The Voracious Resurgence | |
| Prime Weapons • Ultimate Weapons • Ultimate Augments • Abjurations iL119 • JSE Necks • Divergence Augments • Escutcheons | |
| Reforged Armor Artifact: +1 • iL109 • iL119/+2/+3 Relic: +1/+2 • iL109 • iL119/+2/+3 Empyrean: +1/+2 • iL109 • iL119/+2/+3 |
Guides • Crafting • Trusts • Apex Monsters |
In Defiant Challenge
From FFXI Wiki
| In Defiant Challenge | |
|---|---|
| Required Fame | Jeuno Fame Level: 1 |
| Level Restriction: | Level 50 |
| Starting NPC | Maat, Ru'Lude Gardens (H-5) |
| Pack | None |
| Title | Horizon Breaker |
| Repeatable | No |
| Description | Apparently, your innate limits can be breached by acquiring the necessary items. |
| Previous Quest | Next Quest |
|---|---|
| None | Atop the Highest Mountains |
| Requirements | |
The following:
| |
| Rewards | |
| Raises level cap 55. | |
Walkthrough
- Speak to Maat on a level 50 job. He will ask you for three items that drop from dungeons around Jeuno.
- You may either defeat monsters in order to obtain the required items or select three ???s on the ground in the zones to obtain the key items instead.
- If you are attempting this solo you will need multiple forms of Sneak and Invisible:
- Sneak and Invisible spells.
- Silent Oil and Prism Powders items.
- Spectral Jig ability.
- Tonko: Ichi and Monomi: Ichi Ninjutsu.
- You will need to cancel invisible (not sneak) when the coast is clear in order to select the ??? and then reapply each time. Bringing some form of Reraise such as a Scroll of Instant Reraise is recommended.
- If you are attempting this solo you will need multiple forms of Sneak and Invisible:
- If you wish to fight the monsters for the drop because it is fun or whatever you feel. Then it isn't terribly hard to do so with your Trusts. The drops are fairly common.
The required items may be obtained in any order and are as follows:
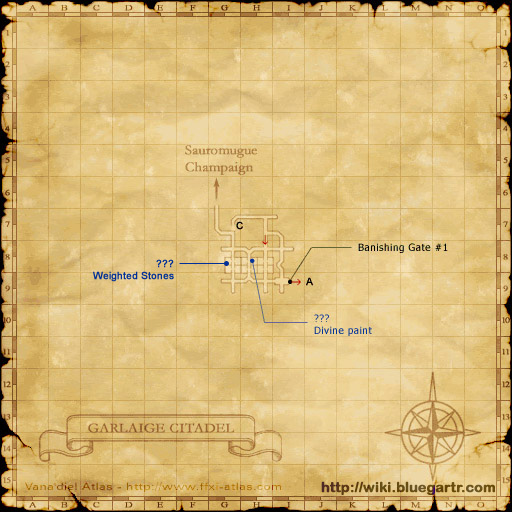
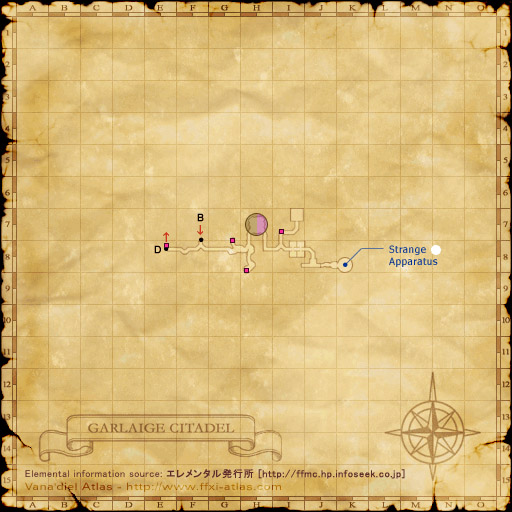
 Bomb Coal which drops from Explosures or can be received after obtaining three Bomb coal fragments from ??? targets in Garlaige Citadel.
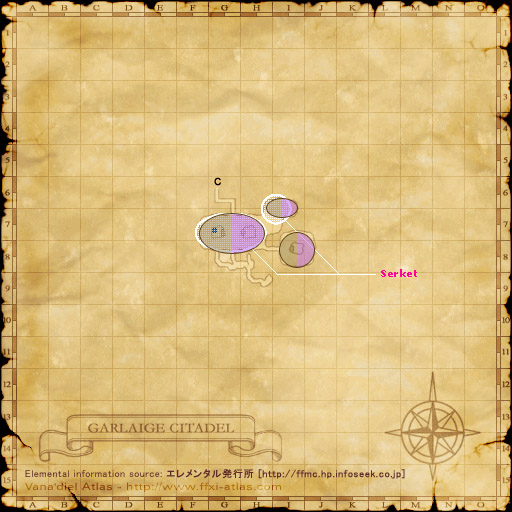
- All three ??? pieces may be obtained on Map 2 in Garlaige Citadel at (G-6), (H-7), and (I-8). Avoid falling in any holes in the floor on the way there.
- Use a Pouch of weighted stones (key item) to get past the first Banishing Gate up ahead soon.
- Obtained at (G-8) (Map 1) south of where you first enter, click the ??? on the floor and it is yours.
- Be careful as undead aggro low HP through sneak and invisible.
- Obtained at (G-8) (Map 1) south of where you first enter, click the ??? on the floor and it is yours.
- Proceed south and east until you reach the first Banishing Gate, and proceed through it.
- You will enter a square room, run along the outside to the east. There is only one real way to go.
- Once you reach and head down the stairs hug the left wall until you eventually reach a wide room.
- The First ??? is here at (I-8).
- Head north west to a second room where the second ??? is at (H-7)
- Continue north, and eventually make a left down a hallway.
- The last ??? will be at (G-6) on your right in the first room after running past the third Banishing Gate.
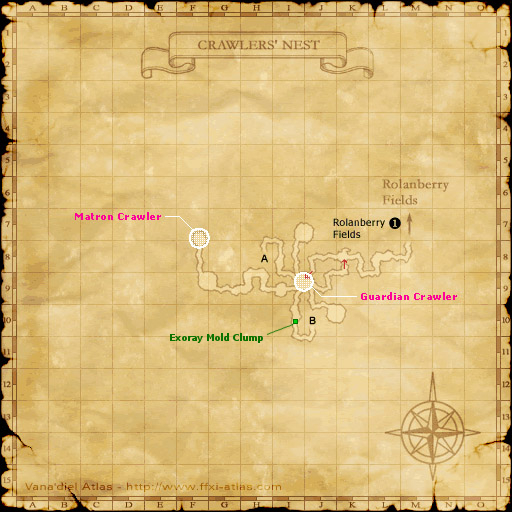
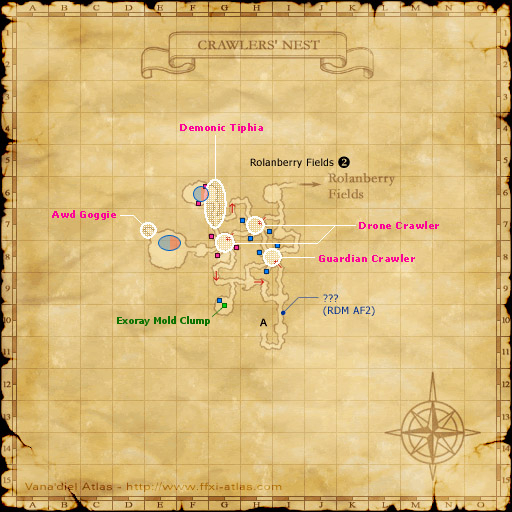
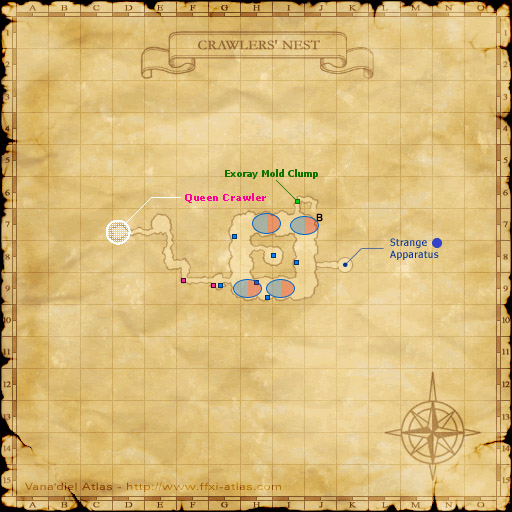
 Exoray Mold which drops from Exorays (U) or can be received after obtaining three Exoray mold crumbs from ??? targets in Crawler's Nest
- The first ??? may be found on the path from (I-10) on Map 1 heading towards map 3 (B). Use Sneak to avoid Exorays.
- Enter the zone, run past the crawlers and bees, run up the hill, and drop down into the "sack room" then head south west/south. It is not the dead end room directly south.
- The second ??? is at (I-6) on Map 3 further along the same path.
- The last ??? piece is located in the Exorays on Map 2 at (G-10).
- Double back past the first two ???s to the "sack room" again and take the north west tunnel. Not the dead end room with scorpions.
- Run forward through the green glow and up the hill to drop into a new sack room and take the left (west by south west) tunnel.
- Take a right at the ledge (don't fall down) and then your next left into a dead end room with the ???.
- The first ??? may be found on the path from (I-10) on Map 1 heading towards map 3 (B). Use Sneak to avoid Exorays.
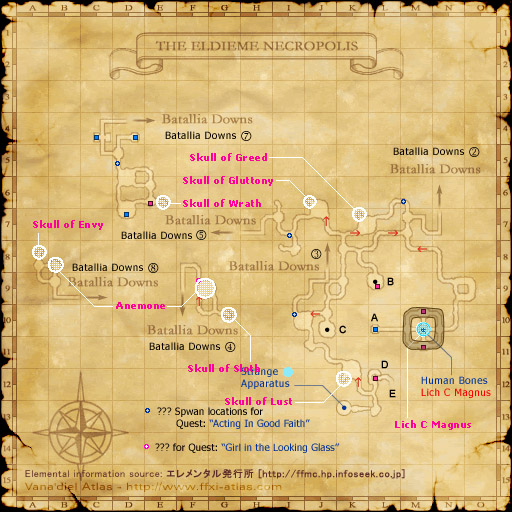
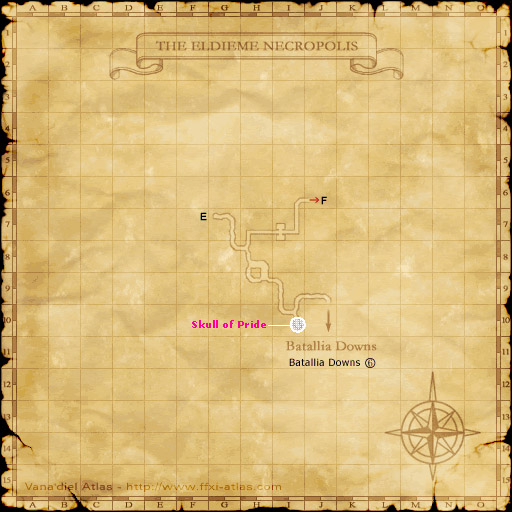
 Ancient Papyrus which drops from Liches (C) or can be received after obtaining three Ancient papyrus shreds from ??? targets in The Eldieme Necropolis
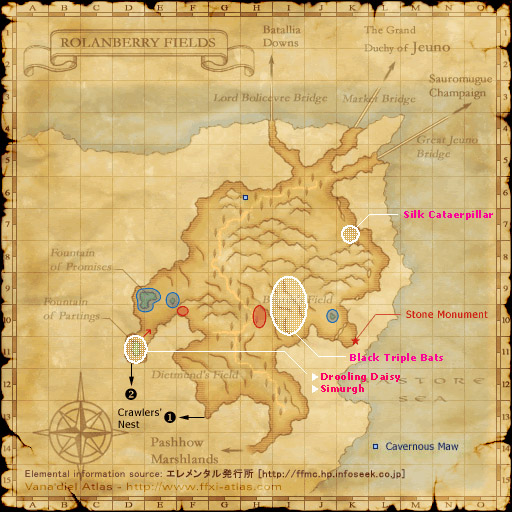
- Zone in to The Eldieme Necropolis from (I/J-10) in Batallia Downs.
- The three ???s are located at (F-7), (F-9), and (H-9) on Map 1.
- Run in and make a left where the road forks past the ghosts and follow the hallway.
- When the road forks at the Hellhounds, if the path to the leftis open and you see Liches around a Brazier (flame) then proceed that way the first ??? will be in the left corner of the room.
- If there is a wall to your left and the path is blocked, make a right (north) into a large room of square grave looking things.
- Do not walk over these graves throughout the zone as you may fall through them to a lower level. If this happens warp and reenter the zone.
- Make a left towards the Gravestone and behind will be the the East Plate. Select it and it will fall down, the path is now open so double back and obtain your first ??? in the room with the Liches and Brazier.
- Alternatively if you posses a Magicked astrolabe, purchased for 10,000 gil from Churano-Shurano in Windurst Waters at (F-8) you may just open the gate by yourself.
- You will no longer need to use this or any plate to change the doors again.
- Be careful as the bomb by the plate lever thing is aggressive to magic.
- Alternatively if you posses a Magicked astrolabe, purchased for 10,000 gil from Churano-Shurano in Windurst Waters at (F-8) you may just open the gate by yourself.
- If there is a wall to your left and the path is blocked, make a right (north) into a large room of square grave looking things.
- Proceed through this first room of Liches/Fallen Knights around a Brazier and your first ??? to then reach an identical one down the hallway where your second ??? is located in the corner of the room.
- Continuing following the path west from there (the only way you can still go) and round the corner (north) into a large room of square graves and ghosts/fomors.
- Once again do not walk over any of these graves as some are a hidden drop down hole.
- Proceed north through this room and up the stairs on the other side.
- Round the corner again and you will reach another room of Liches and a Brazier; the final ??? will be in the corner of the room once more.
- Speak to Maat/trade him the items to complete the quest.
Maps

|
|

|
|
|
|
|
|
| |

|

|
|
|


