The Voracious Resurgence | |
| Prime Weapons • Ultimate Weapons • Ultimate Augments • Abjurations iL119 • JSE Necks • Divergence Augments • Escutcheons | |
| Reforged Armor Artifact: +1 • iL109 • iL119/+2/+3 Relic: +1/+2 • iL109 • iL119/+2/+3 Empyrean: +1/+2 • iL109 • iL119/+2/+3 |
Guides • Crafting • Trusts • Apex Monsters |
The Eldieme Necropolis: Difference between revisions
m (Zone Connections) |
No edit summary |
||
| (8 intermediate revisions by 7 users not shown) | |||
| Line 1: | Line 1: | ||
{{Zone |
{{Zone Preliminary |
||
|Table_1= |
|||
|Introduction to Zone= |
|||
{{Zone Geography Table |
|||
|Map=The Eldieme Necropolis-map2.jpg |
|||
|Zone Geography Row= |
|||
|AreaImage= |
|||
{{Zone Geography Row |
|||
|Description of AreaImage= }} |
|||
|Geography.Zone=Batallia Downs |
|||
|Geography.Entrance_Map=The_Eldieme_Necropolis-map1.jpg |
|||
{{Connected Zone Table |
|||
|Geography.Entrance_Position=J-10 |
|||
|Insert Connected Zone Template1= |
|||
|Geography.Exit_Map=Batilla_Downs.jpg |
|||
{{Connected Zone |
|||
|Geography.Exit_Position=I-10 |
|||
|Connecting Zone=Batallia Downs |
|||
|Position (pos)= Map 1: (J-9), Map 2: (J-9), Map 3: (N-7), (J-8), (F-9), (B-9), (H-7), (D-4) |
|||
}} |
}} |
||
{{Zone Geography Row |
|||
|Insert Connected Zone Template2= |
|||
|Geography.Zone=Batallia Downs |
|||
|Geography.Entrance_Map=The_Eldieme_Necropolis-map2.jpg |
|||
|Geography.Entrance_Position=N-7 |
|||
|Geography.Exit_Map=Batilla_Downs.jpg |
|||
|Geography.Exit_Position=I-7 |
|||
}} |
}} |
||
{{Zone Geography Row |
|||
|Geography.Zone=Batallia Downs |
|||
|Geography.Entrance_Map=The_Eldieme_Necropolis-map2.jpg |
|||
|Geography.Entrance_Position=J-8 |
|||
|Geography.Exit_Map=Batilla_Downs.jpg |
|||
|Geography.Exit_Position=H-8 |
|||
}} |
|||
{{Zone Geography Row |
|||
|Geography.Zone=Batallia Downs |
|||
|Geography.Entrance_Map=The_Eldieme_Necropolis-map2.jpg |
|||
|Geography.Entrance_Position=F-9 |
|||
|Geography.Exit_Map=Batilla_Downs.jpg |
|||
|Geography.Exit_Position=G-8 |
|||
}} |
|||
{{Zone Geography Row |
|||
|Geography.Zone=Batallia Downs |
|||
|Geography.Entrance_Map=The_Eldieme_Necropolis-map2.jpg |
|||
|Geography.Entrance_Position=H-7 |
|||
|Geography.Exit_Map=Batilla_Downs.jpg |
|||
|Geography.Exit_Position=G-7 |
|||
}} |
|||
{{Zone Geography Row |
|||
|Geography.Zone=Batallia Downs |
|||
|Geography.Entrance_Map=The_Eldieme_Necropolis-map2.jpg |
|||
|Geography.Entrance_Position=D-4 |
|||
|Geography.Exit_Map=Batilla_Downs.jpg |
|||
|Geography.Exit_Position=F-5 |
|||
}} |
|||
{{Zone Geography Row |
|||
|Geography.Zone=Batallia Downs |
|||
|Geography.Entrance_Map=The_Eldieme_Necropolis-map2.jpg |
|||
|Geography.Entrance_Position=B-9 |
|||
|Geography.Exit_Map=Batilla_Downs.jpg |
|||
|Geography.Exit_Position=D-6 |
|||
}} |
|||
{{Zone Geography Row |
|||
|Geography.Zone=Batallia Downs |
|||
|Geography.Entrance_Map=The_Eldieme_Necropolis-map3.jpg |
|||
|Geography.Entrance_Position=J-9 |
|||
|Geography.Exit_Map=Batilla_Downs.jpg |
|||
|Geography.Exit_Position=J-11 |
|||
}} |
|||
}} |
|||
|Table_2= |
|||
{{Zone Description Table |
|||
|Description.Image= The Eldieme Necropolis header.jpg |
|||
|Description.Japanese= |
|||
|Description.Requires= |
|||
|Description.Map_Acquisition=[[Rusese]] (H-6)<br>[[Upper Jeuno]] |
|||
|Description.Timeline=Present |
|||
|Description.Continent=Quon |
|||
|Description.Region=Norvallen |
|||
|Description.Zone_Type=Dungeon |
|||
|Description.Activities= |
|||
|Description.Restrictions= |
|||
}} |
|||
}} |
|||
==NPC== |
|||
{{Zone NPC Table |
{{Zone NPC Table |
||
| |
|Zone NPC Row_1= |
||
{{Zone NPC |
{{Zone NPC Row |
||
|NPC |
|NPC.Name=Cannau |
||
|NPC.Map= |
|||
|Position (pos)= |
|||
|NPC.Position= |
|||
|Function/Role= |
|||
|NPC.Notes= Quest |
|||
}} |
}} |
||
|Zone NPC Row_2= |
|||
|NPC Name= |
|||
|Position (pos)= |
|||
|Function/Role= |
|||
}} |
}} |
||
|Insert Zone NPC Template 2= |
|||
==Quests== |
|||
{{Zone NPC |
|||
{{Quest List Table |
|||
|NPC Name= |
|||
|Quest List Color=709bcc |
|||
|Position (pos)= |
|||
|Quest List Row= |
|||
|Function/Role= |
|||
{{Quest List Row |
|||
|Fame= |
|||
|Name=A New Dawn |
|||
|Reward= [[Beast Trousers]] |
|||
|NPC=Dietmund |
|||
|Position=G-11 |
|||
|Zone=Lower Jeuno |
|||
}} |
}} |
||
{{Quest List Row |
|||
{{Zone NPC |
|||
|Fame=[[Windurst]] 4 |
|||
|NPC Name= |
|||
|Name=Acting in Good Faith |
|||
|Position (pos)= |
|||
|Reward= [[Teleport-Mea (Scroll)|Scroll of Teleport-Mea]] |
|||
|Function/Role= |
|||
|NPC=Gantineux |
|||
|Position=E-10 |
|||
|Zone=Windurst Waters |
|||
}} |
}} |
||
{{Quest List Row |
|||
|Fame=[[Windurst]] 5 |
|||
|Name=Blue Ribbon Blues |
|||
|Reward= [[Blue Ribbon]]<br>3,600 Gil |
|||
|NPC=Kerutoto |
|||
|Position=J-8 |
|||
|Zone=Windurst Waters |
|||
}} |
}} |
||
{{Quest List Row |
|||
|Fame= |
|||
{{Zone Quests Table |
|||
|Name=Borghertz's Sorcerous Hands |
|||
|Insert Zone Quests Template= |
|||
|Reward= [[Wizard's Tonban]] |
|||
{{Zone Quests |
|||
|NPC=Guslam |
|||
|Fame Level= |
|||
|Position=H-8 |
|||
|Quest Name= |
|||
|Zone=Upper Jeuno |
|||
|Reward= |
|||
|Quest Giver Name= |
|||
|Position (pos)= |
|||
}} |
}} |
||
{{Quest List Row |
|||
{{Zone Quests |
|||
|Fame |
|Fame= |
||
|Name=Borghertz's Shadowy Hands |
|||
|Quest Name= |
|||
|Reward= |
|Reward= [[Chaos Gauntlets]] |
||
|NPC=Guslam |
|||
|Quest Giver Name= |
|||
|Position |
|Position=H-8 |
||
|Zone=Upper Jeuno |
|||
}} |
}} |
||
{{Quest List Row |
|||
{{Zone Quests |
|||
|Fame |
|Fame= |
||
|Name=Borghertz's Stalwart Hands |
|||
|Quest Name= |
|||
|Reward= [[Gallant Gauntlets]] |
|||
|NPC=Guslam |
|||
|Position=H-8 |
|||
|Zone=Upper Jeuno |
|||
}} |
|||
{{Quest List Row |
|||
|Fame= |
|||
|Name=Borghertz's Vermillion Hands |
|||
|Reward= [[Warlock's Gloves]] |
|||
|NPC=Guslam |
|||
|Position=H-8 |
|||
|Zone=Upper Jeuno |
|||
}} |
|||
{{Quest List Row |
|||
|Fame= |
|||
|Name=Borghertz's Warring Hands |
|||
|Reward= [[Fighter's Mufflers]] |
|||
|NPC=Guslam |
|||
|Position=H-8 |
|||
|Zone=Upper Jeuno |
|||
}} |
|||
{{Quest List Row |
|||
|Fame= |
|||
|Name=Catch It If You Can! |
|||
|Reward= 1,000-1,500 gil |
|||
|NPC=Ohruru |
|||
|Position=E-7 |
|||
|Zone=Port Windurst |
|||
}} |
|||
{{Quest List Row |
|||
|Fame= |
|||
|Name=Escort for Hire (San d'Oria) |
|||
|Reward= [[Miratete's Memoirs]] |
|||
|NPC=Rondipur |
|||
|Position=F-6 |
|||
|Zone=Northern San d'Oria |
|||
}} |
|||
{{Quest List Row |
|||
|Fame= |
|||
|Name=Fire and Brimstone |
|||
|Reward= [[Hunter's Beret]] |
|||
|NPC=Perih Vashai |
|||
|Position=K-7 |
|||
|Zone=Windurst Woods |
|||
}} |
|||
{{Quest List Row |
|||
|Fame= |
|||
|Name=Girl in the Looking Glass |
|||
|Reward= |
|Reward= |
||
|NPC=Luto Mewrilah |
|||
|Quest Giver Name= |
|||
|Position |
|Position=G-8 |
||
|Zone=Upper Jeuno |
|||
}} |
}} |
||
{{Quest List Row |
|||
|Fame= |
|||
|Name=In Defiant Challenge |
|||
|Reward= Raises level cap to 55. |
|||
|NPC=Maat |
|||
|Position=H-5 |
|||
|Zone=Ru'Lude Gardens |
|||
}} |
}} |
||
{{Quest List Row |
|||
|Fame= |
|||
{{Zone Minigame Table |
|||
|Name |
|Name=Pieuje's Decision |
||
|Reward= [[Healer's Briault]] |
|||
|Insert Zone Minigame Heading Template= |
|||
|NPC= Pieuje |
|||
{{Zone Minigame Heading |
|||
|Position=H-8 |
|||
|Heading 1= |
|||
|Zone=Chateau d'Oraguille |
|||
|Heading 2= |
|||
}} |
}} |
||
{{Quest List Row |
|||
|Insert Zone Minigame Content= |
|||
|Fame=[[Jeuno]] 4 |
|||
{{Zone Minigame |
|||
|Name=Save My Sister |
|||
|Left Column Text= |
|||
|Reward=[[Holy Mace]]<br>3,000g |
|||
|Right Column Text= |
|||
|NPC=Baudin |
|||
|Position=G-8 |
|||
|Zone=Upper Jeuno |
|||
}} |
}} |
||
{{Quest List Row |
|||
{{Zone Minigame |
|||
|Fame= |
|||
|Left Column Text= |
|||
|Name=Strange Apparatus |
|||
|Right Column Text= |
|||
|Reward= Varies |
|||
|NPC= |
|||
|Position= |
|||
|Zone= |
|||
}} |
}} |
||
{{Quest List Row |
|||
{{Zone Minigame |
|||
|Fame= |
|||
|Left Column Text= |
|||
|Name=The Requiem |
|||
|Right Column Text= |
|||
|Reward= [[Choral Slippers]] |
|||
|NPC=Bki Tbujhja |
|||
|Position=H-8 |
|||
|Zone=Lower Jeuno |
|||
}} |
}} |
||
|Minigame Maps= |
|||
<Gallery align="center"> |
|||
Image:The Eldieme Necropolis-map1.jpg|{{PAGENAME}} - Map 1 |
|||
Image:The Eldieme Necropolis-map2.jpg|{{PAGENAME}} - Map 2 |
|||
Image:The Eldieme Necropolis-map3.jpg|{{PAGENAME}} - Map 3 |
|||
Image:The Eldieme Necropolis-map4.jpg|{{PAGENAME}} - Map 4 |
|||
</gallery><br> |
|||
}} |
}} |
||
| Line 96: | Line 232: | ||
|Insert Zone Bestiary Content Template= |
|Insert Zone Bestiary Content Template= |
||
{{Zone Bestiary |
{{Zone Bestiary |
||
|Monster Name= |
|Monster Name=Cwn Cyrff |
||
|Level Range= |
|Level Range=68 |
||
|Pop Position (pos)=(D-5/6) |
|||
|Notable Drops= |
|||
*[[Swan Bilbo]] |
|||
|Aggros To=Sound, HP |
|||
|Monster Family Type=Hound |
|||
|Spawn Condition=Lottery spawn off of [[Tomb Wolf]] at (D-5/6). |
|||
}} |
|||
{{Zone Bestiary |
|||
|Monster Name=Skull of Envy |
|||
|Level Range=60 |
|||
|Pop Position (pos)= |
|Pop Position (pos)= |
||
|Notable Drops= |
|Notable Drops= |
||
*[[ |
*[[Envy Spear]] |
||
|Aggros To=Sound, HP |
|||
*[[Place Name of Drop Here]] |
|||
|Monster Family Type=Skeleton |
|||
*[[Place Name of Drop Here]] |
|||
|Spawn Condition=Trade a [[Flint Stone]] to each of the 7 tallow candles at the same time. |
|||
|Aggros To= |
|||
|Monster Family Type= |
|||
|Spawn Condition= |
|||
}} |
}} |
||
{{Zone Bestiary |
{{Zone Bestiary |
||
|Monster Name= |
|Monster Name=Skull of Gluttony |
||
|Level Range= |
|Level Range=60 |
||
|Pop Position (pos)= |
|Pop Position (pos)= |
||
|Notable Drops= |
|Notable Drops= |
||
*[[Gluttony Sword]] |
|||
*[[Place Name of Drop Here]] |
|||
|Aggros To=Sound, HP |
|||
*[[Place Name of Drop Here]] |
|||
|Monster Family Type=Skeleton |
|||
*[[Place Name of Drop Here]] |
|||
|Spawn Condition=Trade a [[Flint Stone]] to each of the 7 tallow candles at the same time. |
|||
|Aggros To= |
|||
}} |
|||
|Monster Family Type= |
|||
{{Zone Bestiary |
|||
|Spawn Condition= |
|||
|Monster Name=Skull of Greed |
|||
|Level Range=60 |
|||
|Pop Position (pos)= |
|||
|Notable Drops= |
|||
*[[Greed Scimitar]] |
|||
|Aggros To=Sound, HP |
|||
|Monster Family Type=Skeleton |
|||
|Spawn Condition=Trade a [[Flint Stone]] to each of the 7 tallow candles at the same time. |
|||
}} |
|||
{{Zone Bestiary |
|||
|Monster Name=Skull of Lust |
|||
|Level Range=60 |
|||
|Pop Position (pos)= |
|||
|Notable Drops= |
|||
*[[Lust Dagger]] |
|||
|Aggros To=Sound, HP |
|||
|Monster Family Type=Skeleton |
|||
|Spawn Condition=Trade a [[Flint Stone]] to each of the 7 tallow candles at the same time. |
|||
}} |
|||
{{Zone Bestiary |
|||
|Monster Name=Skull of Pride |
|||
|Level Range=60 |
|||
|Pop Position (pos)= |
|||
|Notable Drops= |
|||
*[[Pride Staff]] |
|||
|Aggros To=Sound, HP |
|||
|Monster Family Type=Skeleton |
|||
|Spawn Condition=Trade a [[Flint Stone]] to each of the 7 tallow candles at the same time. |
|||
}} |
|||
{{Zone Bestiary |
|||
|Monster Name=Skull of Sloth |
|||
|Level Range=60 |
|||
|Pop Position (pos)= |
|||
|Notable Drops= |
|||
*[[Sloth Wand]] |
|||
|Aggros To=Sound, HP |
|||
|Monster Family Type=Skeleton |
|||
|Spawn Condition=Trade a [[Flint Stone]] to each of the 7 tallow candles at the same time. |
|||
}} |
|||
{{Zone Bestiary |
|||
|Monster Name=Skull of Wrath |
|||
|Level Range=60 |
|||
|Pop Position (pos)= |
|||
|Notable Drops= |
|||
*[[Wrath Tabar]] |
|||
|Aggros To=Sound, HP |
|||
|Monster Family Type=Skeleton |
|||
|Spawn Condition=Trade a [[Flint Stone]] to each of the 7 tallow candles at the same time. |
|||
}} |
}} |
||
}} |
}} |
||
| Line 159: | Line 351: | ||
{{Zone Monster Instance |Spriggan |Shadow |BLM |64 |66 |Sound, HP |A |L |||}} |
{{Zone Monster Instance |Spriggan |Shadow |BLM |64 |66 |Sound, HP |A |L |||}} |
||
{{Zone Monster Instance |Spriggan |Shadow |THF |64 |66 |Sound, HP |A |L |||}} |
{{Zone Monster Instance |Spriggan |Shadow |THF |64 |66 |Sound, HP |A |L |||}} |
||
{{Zone Monster Instance |Nekros Hound |Hound ||? |? |Sound, HP |A ||||}} |
|||
{{Zone Monster Instance |Hellbound Warlock|Skeleton |BLM |? |? |Sound, HP |A ||||}} |
|||
{{Zone Monster Instance |Hellbound Warrior |Skeleton |WAR |? |? |Sound, HP |A ||||}} |
|||
{{Zone Monster Instance |Namorodo |Skeleton ||? |? |Sound, HP |A |||Quest |}} |
{{Zone Monster Instance |Namorodo |Skeleton ||? |? |Sound, HP |A |||Quest |}} |
||
{{Zone Monster Instance |Dog Guardian |Skeleton ||52 |52 |Sound, HP |A |||Quest |}} |
{{Zone Monster Instance |Dog Guardian |Skeleton ||52 |52 |Sound, HP |A |||Quest |}} |
||
| Line 168: | Line 363: | ||
{{Zone Monster Instance |Sturm |Hound ||62 |62 |Sound, HP |A |L ||Quest |}} |
{{Zone Monster Instance |Sturm |Hound ||62 |62 |Sound, HP |A |L ||Quest |}} |
||
}} |
}} |
||
== Historical Significance == |
|||
The ancient Elvaan built these burial mounds, also known as the Coveffe Barrows, in an attempt to bring themselves closer to the Goddess Altana in death. Within the San d'Orian Church, to spend one's final days on Vana'diel within these tombs was often considered the greatest blessing before departing to the afterlife. This resulted in a wave of followers traveling to the barrows and constructing the underground necropolis that remains there to this day. However, during the Great War, these catacombs were also the sites of fierce battles that left thousands dead or injured. The spirits of these lost souls still roam the tombs below. |
|||
== Notes == |
== Notes == |
||
*[[Escape]]s to [[Batallia Downs]] (G-8). |
|||
Replace this text with additional text/notes/landmarks etc. |
|||
*To open the doors on your own, obtain the [[Magicked astrolabe]]. |
|||
== Maps == |
|||
<Gallery align="center"> |
|||
Image:The_Eldieme_Necropolis-map1.jpg|{{PAGENAME}} - Map 1 |
|||
Image:The_Eldieme_Necropolis-map2.jpg|{{PAGENAME}} - Map 2 |
|||
Image:The_Eldieme_Necropolis-map3.jpg|{{PAGENAME}} - Map 3 |
|||
Image:The_Eldieme_Necropolis-map4.jpg|{{PAGENAME}} - Map 4 |
|||
</gallery> |
|||
== Related Links == |
== Related Links == |
||
To link to other pages within the wiki or to cite sources, replace this text with relevant information and fill in the placeholders below. |
|||
{| border="0" cellpadding="5" cellspacing="0" width="100%" |
{| border="0" cellpadding="5" cellspacing="0" width="100%" |
||
|valign="top" width="50%"| |
|valign="top" width="50%"| |
||
Revision as of 20:42, 18 August 2016
| |||||||||||||||||||||||||||||||||||||||||||||||||||||||||||||||||||||||

NPC
| Name | Map | Pos. | Notes |
|---|---|---|---|
| Cannau | Quest |
| Name | Map | Pos. | Notes |
|---|
Quests
| Name | Level | Position | Spawn Condition | Aggro | Notable Drops |
| Cwn Cyrff | 68 | (D-5/6) | Lottery spawn off of Tomb Wolf at (D-5/6). | Sound, HP | |
| Skull of Envy | 60 | Trade a Flint Stone to each of the 7 tallow candles at the same time. | Sound, HP | ||
| Skull of Gluttony | 60 | Trade a Flint Stone to each of the 7 tallow candles at the same time. | Sound, HP | ||
| Skull of Greed | 60 | Trade a Flint Stone to each of the 7 tallow candles at the same time. | Sound, HP | ||
| Skull of Lust | 60 | Trade a Flint Stone to each of the 7 tallow candles at the same time. | Sound, HP | ||
| Skull of Pride | 60 | Trade a Flint Stone to each of the 7 tallow candles at the same time. | Sound, HP | ||
| Skull of Sloth | 60 | Trade a Flint Stone to each of the 7 tallow candles at the same time. | Sound, HP | ||
| Skull of Wrath | 60 | Trade a Flint Stone to each of the 7 tallow candles at the same time. | Sound, HP |
| Name | Family | Job | Min Level | Max Level | Detection | A | L | Number | Type | App. |
| Marchosias | Hound | 40 | 43 | Sound, HP | A | |||||
| Gazer | Hecteyes | 41 | 43 | Sound | A | |||||
| Puroboros | Bomb | 42 | 44 | Sight, Magic | A | |||||
| Lost Soul | Skeleton | BLM | 42 | 46 | Sound, HP | A | ||||
| Lost Soul | Skeleton | WAR | 42 | 46 | Sound, HP | A | ||||
| Revenant | Ghost | 44 | 47 | Sound, HP | A | |||||
| Anemone | Morbol | 45 | 46 | Sound | A | |||||
| Shade | Shadow | WAR | 46 | 48 | Sound, HP | A | L | |||
| Shade | Shadow | RNG | 46 | 48 | Sound, HP | A | L | |||
| Shade | Shadow | THF | 46 | 48 | Sound, HP | A | L | |||
| Shade | Shadow | BLM | 46 | 48 | Sound, HP | A | L | |||
| Hell Hound | Hound | 46 | 49 | Sound, HP | A | |||||
| Blood Soul | Ghost | 50 | 52 | Sound, HP | A | |||||
| Mummy | Skeleton | WAR | 50 | 52 | Sound, HP | A | ||||
| Azer | Bomb | 51 | 53 | Sight, Magic | A | |||||
| Lich | Skeleton | BLM | 51 | 55 | Sound, HP | A | ||||
| Ka | Shadow | BLM | 52 | 54 | Sound, HP | A | L | |||
| Ka | Shadow | THF | 52 | 54 | Sound, HP | A | L | |||
| Ka | Shadow | RNG | 52 | 54 | Sound, HP | A | L | |||
| Ka | Shadow | WAR | 52 | 54 | Sound, HP | A | L | |||
| Earth Elemental | Elemental | 52 | 55 | Magic | A | |||||
| Ice Elemental | Elemental | 52 | 55 | Magic | A | |||||
| Tomb Wolf | Hound | 53 | 55 | Sound, HP | A | |||||
| Fallen Knight | Skeleton | WAR | 54 | 56 | Sound, HP | A | ||||
| Utukku | Ghost | 55 | 57 | Sound, HP | A | |||||
| Dark Stalker | Shadow | WAR | 57 | 59 | Sound, HP | A | L | |||
| Dark Stalker | Shadow | THF | 57 | 59 | Sound, HP | A | L | |||
| Dark Stalker | Shadow | RNG | 57 | 59 | Sound, HP | A | L | |||
| Dark Stalker | Shadow | BLM | 57 | 59 | Sound, HP | A | L | |||
| Tomb Warrior | Skeleton | WAR | 60 | 62 | Sound, HP | A | ||||
| Tomb Mage | Skeleton | BLM | 60 | 63 | Sound, HP | A | ||||
| Haunt | Ghost | 63 | 65 | Sound, HP | A | |||||
| Spriggan | Shadow | WAR | 64 | 66 | Sound, HP | A | L | |||
| Spriggan | Shadow | RNG | 64 | 66 | Sound, HP | A | L | |||
| Spriggan | Shadow | BLM | 64 | 66 | Sound, HP | A | L | |||
| Spriggan | Shadow | THF | 64 | 66 | Sound, HP | A | L | |||
| Nekros Hound | Hound | ? | ? | Sound, HP | A | |||||
| Hellbound Warlock | Skeleton | BLM | ? | ? | Sound, HP | A | ||||
| Hellbound Warrior | Skeleton | WAR | ? | ? | Sound, HP | A | ||||
| Namorodo | Skeleton | ? | ? | Sound, HP | A | Quest | ||||
| Dog Guardian | Skeleton | 52 | 52 | Sound, HP | A | Quest | ||||
| Owl Guardian | Skeleton | 52 | 52 | Sound, HP | A | Quest | ||||
| Yum Kimil | Skeleton | 54 | 54 | Sound, HP | A | Quest | ||||
| Lich C Magnus | Skeleton | BLM | 58 | 58 | Sound, HP | A | Quest | |||
| Taifun | Tiger | 58 | 58 | Sight, Scent | A | L | Quest | |||
| Trombe | Tiger | 58 | 58 | Sight, Scent | A | L | Quest | |||
| Sturm | Hound | 62 | 62 | Sound, HP | A | L | Quest |
| Appearance Key D = Dusk (18:00-6:00), N = Night (20:00 - 4:00), F = Fog, |
Historical Significance
The ancient Elvaan built these burial mounds, also known as the Coveffe Barrows, in an attempt to bring themselves closer to the Goddess Altana in death. Within the San d'Orian Church, to spend one's final days on Vana'diel within these tombs was often considered the greatest blessing before departing to the afterlife. This resulted in a wave of followers traveling to the barrows and constructing the underground necropolis that remains there to this day. However, during the Great War, these catacombs were also the sites of fierce battles that left thousands dead or injured. The spirits of these lost souls still roam the tombs below.
Notes
- Escapes to Batallia Downs (G-8).
- To open the doors on your own, obtain the Magicked astrolabe.
Maps
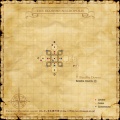
The Eldieme Necropolis - Map 1

The Eldieme Necropolis - Map 2
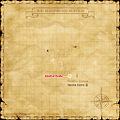
The Eldieme Necropolis - Map 3
The Eldieme Necropolis - Map 4


Related Links
|
Sources |
|
