|
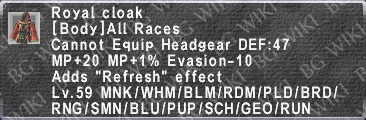
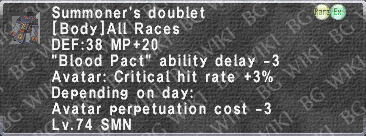
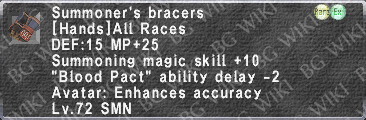
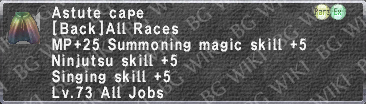
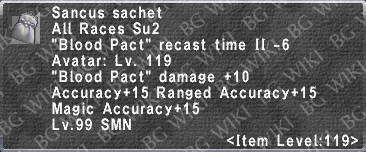
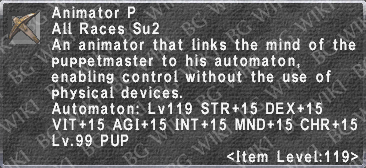
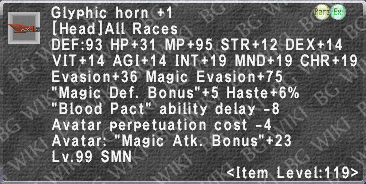
By the time you ping 75, and should you be fortunate enough to have been able to get AF2 pieces, you'll likely be in a mix of AF1 and AF2 using a Chatoyant/Iridal Staff. (Remember, Skill and MP are the things you want the most of.)
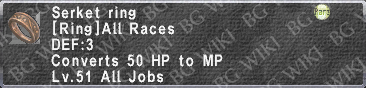
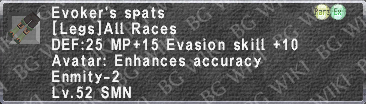
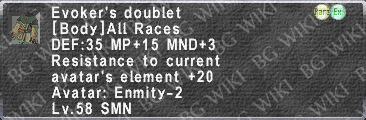
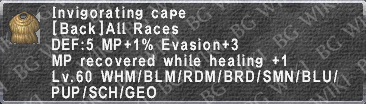
| Here is an example of gear:
|
You may have noted that comes from Al'Taieu. Up to this point I've made sure to include only free, NQ, or easily obtainable (aka cheap off the AH) for the gear selection in the leveling guide. Here I skewed a bit more "advanced" as if SMN is your first 99, you likely won't be able to have access to either Dynamis or Al'Taieu. So don't feel bad if you can't get some of these items. After all, this is just a guide, so these are just recommendations. In order to have much of this last set, you'll either need a 99 job already to farm it (*coughcoughTHFcough*) or have a high level friend who is kind enough to farm Dynamis for your AF2 pieces and Al'Taieu for the cape. (Though to be perfectly honest, you can skip the cape. Sure it's really good and BiS until 99+... buuuuut, for what it's worth, it may be a larger hassle to get than just waiting to get the Reive or Ambuscade capes.)
The Final Levels (75~99)
Sadly these are the levels where I just don't have any place to really recommend out of experience.
In the 99era, there were Abyssea burns alliances... those are now deader than Colibri exp parties. Worms or Frogs in [A] La Theine Plateau... Birds or Raptors in [A] Misareaux Coast... No one exp alliances anymore. So the best I can give you is to tell you to go to:
Escha - Zi'Tah
Here you will find mobs that can take you from 75 to 99, just start at the entrance and work your way back further in.
With the death of Abyssea, you'll likely be starved for cruor (unless you decide to farm some Voidwatch at some point)... and not only that, but you'll also not be able to mooch any papers off of other people for your AF3+1 set... At least though you'll only ever need the +1 version, and you can get a whole set of +1 papers just from the Login Campaign.... that is when it's being offered as a reward. And you'll still need some cruor to buy some of the base items. At least there are Copper Vouchers that you can trade for the small cruor you'll need to get to buy your AF3.
Merits
| Template:TOC-Summoner Guide
|
Originally Merits were a lot more... singular... in their regard to player choice: 5/5 Acc, MAB, and 2 of your favorite Avatars' BP. But the 99era changed that slightly, and now that Job Points are a thing, there are actually real options.
| Job Specific Merit Categories
|
|
|
Like previously mentioned, 5/5 Accuracy & Magic Attack Bonus were the only way to go. And even now, it's the best you'll do. However... Once you hit 360 Job Points spent... That Acc+15 from Merits starts to depreciate in value, and as you gain more and more Job Point Gifts it will matter less and less. 15 accuracy is a lot when you don't have any else... but when you have +70...? There's not much of a functional difference between +70 and +85 accuracy. Especially now that there's a plethora of +acc gear and your avatar gets substantial amounts of Accuracy from having Item Levels... especially when you have a Lv.120 (+30ish Acc) or Lv.122 (+90ish Acc) Avatar.
So then what should you do? Well that's simple: 5/5 Accuracy & Magic Attack Bonus until you get 360 Job Points spent. Then you can drop your Accuracy Merits for one of the other groups. Personally, I'd recommend the Fast Cast group if you're wanting to change it up (+15 acc won't ever make or break you, but it does add up.), as having a -25% casting time lets you free up a rather large portion inventory you might have devoted to Fast Cast gear.
Why the "Summoning Magic Cast Time" and not attack or magic accuracy? Well +15 Atk is even less worthwhile than +15 Acc. And Macc is relatively the same argument for having dropped the Acc Merits. (Only Avatars have a larger natural Macc than they do Acc, and there's much more Macc gear readily available to compensate any Macc deficiencies.)
All that being said... if you have "Summoning Magic Cast Time" merited before you hit 360 Job Points spent... You're doing yourself a disservice and have likely gimped your damage and won't be close to "evening out" until you hit 360... so... Anything that's not 5/5 Accuracy & Magic Attack Bonus before 360 Job Points spent is doing it wrong.
And if you're wondering why MAB isn't up for discussion and should never not be merited: MAB is a soft multiplier. Which makes +10 MAB *almost* a direct 10% increase to your magic damage ala the magic damage formula: DamageBase × (100 + Magic Attack Bonus) ÷ (100 + Magic Defense Bonus)
|
|
| Group 2
|
| Name
|
Description
|
| Meteor Strike
|
Blood Pact Rage. Deals fire elemental damage. Increase TP bonus by 400.
|
| Heavenly Strike
|
Blood Pact Rage. Deals ice elemental damage. Increase TP bonus by 400.
|
| Wind Blade
|
Blood Pact Rage. Deals wind elemental damage. Increase TP bonus by 400.
|
| Geocrush
|
Blood Pact Rage. Deals earth elemental damage. Increase TP bonus by 400.
|
| Thunderstorm
|
Blood Pact Rage. Deals lightning elemental damage. Increase TP bonus by 400.
|
| Grand Fall
|
Blood Pact Rage. Deals water elemental damage. Increase TP bonus by 400.
|
|
Originally you'd just pick your two favorite Avatars and 5/5 their BPs. Then in the 99era it started to be more prudent to have access to every BP, as before the June 2012 update [13], each merit BP was a Voidwatch proc. This eventually would carry its way through to the 119era, as variance and power are the two things a SMN needs to bring to the table.
So obviously you need 1/5 in all six BPs. And with that, you have just enough points to be able to max at least one. Which you don't necessarily have to do... but I would highly recommend that you 5/5 as that is the Blood Pact you will be asked to use in the hardest of endgame content.
|
Generic Merit Categories
|
| Combat Skills
|
| Name
|
Description
|
| Staff
|
Increases Staff Skill by 2.
|
| Evasion
|
Increases Evasion Skill by 2.
|
| Magic Skills
|
| Name
|
Description
|
| Summoning Magic
|
Increases Summoning Magic Skill by 2.
|
|
You don't really have much choice for the generic Merits anymore... as you can just max all of the ones available for your job now. HP, MP & Base Stats can all be maxed out (15/15) all on one job. And Combat Skills and Magic Skills can have each category capped (8/8) as well, but you'll need to have a job with that skill naturally at 75+ to be able to merit those skills. (eg: Summoner only has the ability to merit Dagger, Club, Staff, and Evasion Skills and Summoning Magic Skill.)
So for those categories where you'll eventually want all capped.... it's really a matter of what to cap first. I would recommend you cap Staff, Evasion, Summoning skills and MP first. Then the "Other" category (where you actually have to pick and choose), then at least 1/5 in Shattersoul before you move on to the monumental task of 15/15ing your Stats and "Merit Points" category. And when you're finally ready to start, I'd recommend focusing on getting INT and MND up to 15/15 before you add other stats... as those are your two main WS mods.
The "Other" and Weapon Skill categories are the only ones left where you have to consider your other jobs, as you can't just max all the categories therein. And I'd recommend at least 1 rank into Shattersoul as it's the only way for a SMN to apply a MDB down effect (thereby increasing BP damage). As for the "Other" category, the only one that really helps SMN is the Spell Interruption Rate down... that being said, you shouldn't really have much of an issue with or without it, because you shouldn't be getting hit. But even though you shouldn't be getting hit... better safe than sorry.
The other one you can cap (as you can only 5/5 two of the four in the "Other" category), should be +crit rate, as it should help out any other job you have. -enmity is tempting, but you shouldn't be able to pull enough hate for it to matter... and +enmity is a bad idea. -enemy crit rate may be a tempting idea, given how paper thin SMN is, but... it doesn't do a lot in practice and any physical DD you may have leveled will thank you more for the extra 5% crit rate.
|
|
Job Points
Introduced in the March 2014 update[14], Job Points are envisioned as a sort of "post 99" "leveling" system... However it wouldn't be until December of that year[15] that it would actually realize that idea with the addition of Job Point Gifts. And for that nine month interim, Job Points were nothing more than "super Merits" which cost more to get, gave less effects (original cap per category was 10, unlike now which is 20), and weren't especially amazing... namely because they dealt with 1hr abilities and for many jobs (namely any with a Circle-type Abilities) focused on abilities that, generally, range from lackluster to utterly useless. At least they initially did. Now we have a rather robust selection, and SMN managed to have not only one of the best Job Point categories in general, but also some of the better Gifts.
There are 10 different Job Point categories, 5 that augment certain Job Abilities and 5 that increase Avatars' and Elemental Spirits' various attributes:
| Job Ability Augments
|
 Astral Flow Effect Astral Flow Effect
|
Increases attributes of Avatars and Spirits by 5 while under the effects of Astral Flow.
|
| Astral Conduit Effect
|
Increases damage dealt by Blood Pact: Rages by 1% and duration of Blood Pact: Wards by 1% while under the effects of Astral Conduit.
|
| Elemental Siphon Effect
|
Increases amount of MP recovered by 3 when using Elemental Siphon.
|
| Mana Cede Effect
|
Increases the amount of TP by 50 given to Avatars and Spirits when using Mana Cede.
|
| Avatar's Favor Effect
|
Increases the starting value of the summoned Avatar's duration for the purposes of determining the effects of Avatar's Favor by 3s.
|
|
| Avatar/Spirit Augments
|
| Avatar/Spirit Accuracy Bonus
|
Increases Avatar and Spirit physical accuracy by 1.
|
| Avatar/Spirit Magic Accuracy Bonus
|
Increases Avatar and Spirit magic accuracy by 1.
|
| Avatar/Spirit Attack
|
Increases Avatar and Spirit physical attack by 2.
|
| Avatar/Spirit Magic Damage
|
Increases Avatar and Spirit magic damage by 5.
|
| Blood Pact Damage
|
Increases damage dealt by Blood Pacts by 3.
|
|
There are ultimately 6 tiers to Job Points: 0JP, Su1(50JP), Su2(100jp), 550JP, 1200JP, and ★Master!(2100JP). All based on the number of Job Points spent on the job.
0JP
Everyone has to start somewhere... and Luckily, the first 100JP are the easiest to get. So don't despair if it seems like it's taking you a while, with each tier of the Capacity Points Bonus Gift you'll gain Job Points faster and faster.
You should prioritize the 5 Avatar/Spirit Augments over the 5 Job Ability Augments. Though to be honest, you'll want to build all of the categories... except "Mana Cede Effect". The Job Ability is garbage. The Job Point Category is garbage. Save your points for the other 9 categories and only put any into it if you can hit a new Gift tier with it, or if the other 9 categories are 20/20 (the max).
|
Su1
What is "Su1" you ask? It's SE's fancy term for "Superior Item Level 1". Back when we started down this Item Level path, SE made the decision that no 119 item should ever be allowed on the Auction House. Why is that? Probably because there's no progression if you just buy yourself a full set of 119 armor and weapons. (as 119 is the "top of the line". Only SMN and PUP can break Level 119.)
BUT then they had the idea to allow iLv.119 items on the AH with a sort of caveat that a person couldn't just ding 99 and then be 119. And thus, "Superior Item"s were born. It takes 50 Job Points spent to be able to equip a Su1 item, which is mostly armor but also has the Arasy line of items whose NQ versions may be bought from Antonia in Upper Jeuno at (H-8).
|
Su2
As should be obvious, "Su2" stands for "Superior Item Level 2". Su2 items are mostly weapons, including the "Blurred" line of crafted-only weapons and the "reforged" versions of the Su1 and .
The main power here is the additional Gift at 100JP: -5s to your Blood Pact Ability Delay.
Originally thought to be BP Ability Delay II, it was in fact myself who disproved that errant belief. (Back then the only test done was with capped BP Ability Delay I in addition to BPdelayII and this gift totaling -15s. That singular test showed us that there is an overall cap to BPdelay (-30s) but due to it having more than one variable quantity, it was bad science and didn't actually test what this gift was.) Like I had theorized back then, it was most likely a "Job Trait Blood Pact Ability Delay" and not just BPdelayII. And by the time that there was enough BPdelayII equipment around (and me having enough Gifts to have the second tier of this effect to make things super easy to test), I was able to show that there are 3 different BPdelays: BPdelay (-15s cap), BPdelayII (likely -15s cap), JT-BPdelay (caps at -10s as that's all that is available with Gifts).
This is also the last time you'll be getting Gift levels quickly. As the rate that you gain and upgrade Job Points feels like it decreases significantly past 100. Given how easy it is to reach this level solo, and how slow it will be going from here on out solo... I highly recommend to start joining "Apex parties" whenever you see a shout for one (and are in the mood to grind out some Job Points). Depending on how good the party is, you can gain 100~300 Job Points in a single hour!
|
550JP
These next two tiers don't have fancy titles. (Though if they ever add more "Superior Item" Levels, my money is for any theoretical Su3 being at 550JP and any Su4 being at 1200JP.) The reason why this is a Gift Tier is because at 550JP you gain +1 to the maximum level of Avatar's Favor. It's not that substantial of a boon, as favor tiers only give you a buff to the tune of DEF+5 or Evasion+3... However the real boon that this gives is the fact that that extra tier of Favor will reduce your BPdelay past the hard capped delay reduction of -30s.
Now keep in mind that a capped Favor Tier (575 Skill +4 Tiers) is supposed to give you an extra -10s[16] off of your Wards and Rages. However, as of writing this, you can only get -8s off, as it would appear that the 575 and the fourth +1 tiers aren't being taken into account. So currently a Favor of 512+3 will give you the same BPdelay reduction as the cap of 575+4.
Furthermore, the "dry spell" of Job Point accumulation ends once you hit 550. Or rather, it starts to pick up.
|
1200JP
At Su2, you should have been able to reach the hard cap -30s thanks to the first -5s Gift (most likely thanks to -15s BPdelay and -10 BPdelay II). Now at 1200JP, you can reach it much easier. You'll likely be able to toss some gear and get some much needed inventory wiggle room once you reach this point. And furthermore, as this is NOT BPdelayII, you won't be needing to reach the two caps of BPdelay and BPdelayII. Truly giving you the freedom to use most any gear! So long as your total of all three types equals -30s and neither BPdelay or BPdelayII are over -15s.
|
★Master!
Not much to really say about Job Mastery. You'll be gaining just slightly over 3x the amount of Capacity Points you were gaining when you started this "leveling" process... but you have nothing to spend them on anymore.
If you never have put any points into the "Mana Cede Effect" category, once you hit 20/20 in each of the other 9 categories... you'll be only 2 Gifts away from the 2100 needed for Job Mastery. So there really is 0 reason to ever put any points into that garbage category until the very end when all you have left is to get your ★★★.
The only thing that Job Mastery will give you is the unique title of "Master Evoker", which gives your one-hour abilities -15min to their recast... making them 45min abilities. Nothing insane, and you'll likely never really notice it... You also get a lovely ★★★ above your name.
|
Template:THA:CSMNG-Endgame
Abilities and Macros
When I came back in 2012, I thought long and hard for how exactly to set up my Summoner macros... I was directed by a LSmate of mine to a guide on FFxiclopedia[17], and it's ultimately what I wound up using as the inspiration for my own macros which have slowly evolved over time. (Especially with the introduction of Equipsets in the August 2014 update[18].)
I'll detail the syntax that I have set up with my macros in this section, and I'll suggest what armor and weapons to use via the /equipset commands listed here in the next section.
- A note: For the equipsets I use here I'll be using a simple code instead of numbers. You have 100 equipsets and the ability to use more than one job. I like to have my equipsets all in order based on Job order... so my SMN equipsets are in the early 40s. There's no right or wrong way to order your equipsets. Just be sure you keep track of them and have them labeled. See Equipment Sets below for more info on what gear you should want to use in these macros.
Ok, so the basic idea with this is to have a main hub that you link to other pages and back in a big old webbed network of macros.
Please Note: While it may be tempting to open all the collapsed macros at once, lower resolution devices will find that the table exceeds the bounds of their window. (Meaning you will have to scroll to the right. So if you don't want to scroll to the right, just don't open all the macros at once.)
I've included the button to expand all tables here only for the users who have the Always Expand All Gadget enabled in their user preferences that didn't read the note at the very top of the guide.
Macro Book 1
Like equipsets, my Macro Books are arranged by Job, so the ones that mine take up are not #1 and #2... and you will need 2 Books to do this properly. But it doesn't matter which ones you use, just make sure that you keep everything pathed correctly.
Page 1
This is the example of how I have my Hub Page set up. You'll want it to be Page 1 so that when you swap macros, you'll be on the hub first thing.
You might be wondering why I have Odin, Alexander, and Atomos arranged as they are... it's very simple: Odin on 4 because 四 is 死. My keyboard has a circular bubble around the 6 key, like a shield, so Alexander with his Perfect Defense sits there. And Atomos is on 8 because he 8s everything.
Also a bit of fun history: I used to have ALT1 and ALT2 be /heal on and /heal off respectively... back before refresh was everywhere on gear. (I can't even make a joke that the last time I /healed on SMN was for Swift Shoes... Because Garuda gives that everywhere. Unlike Swift Shoes being limited to the Middle Lands. And for a 5% larger effect too.)
A small note on the first equipsets mentioned: /equipset {FC}. As mentioned above, this will my stylized codes for Equipsets. It should be obvious, but "FC" stands for "Fast Cast". And as should be obvious, "{FC}" will be whatever number you have as your FC equipset.
Also: I like to use the "echo" command for my /equipset commands. Feel free to not use it, I just have been conditioned to make sure things equip in my logs... as that's how it is with the /equip command.
But if you don't like it, by all means, omit the word echo wherever you find it below.
Carby
CTRL 1
|
| /equipset {FC} echo <wait 0>
|
| /ma "Carbuncle" <me> <wait 0>
|
| /equipset {I} echo
|
| /macro book {1}
|
| /macro set {CP}
|
|
|
|
CaitSith
CTRL 2
|
| /equipset {FC} echo <wait 0>
|
| /ma "Cait Sith" <me> <wait 0>
|
| /equipset {I} echo
|
| /macro book {1}
|
| /macro set {CP}
|
|
|
|
Ifrit
CTRL 3
|
| /equipset {FC} echo <wait 0>
|
| /ma "Ifrit" <me> <wait 0>
|
| /equipset {I} echo
|
| /macro book {1}
|
| /macro set {IP}
|
|
|
|
Shiva
CTRL 4
|
| /equipset {FC} echo <wait 0>
|
| /ma "Shiva" <me> <wait 0>
|
| /equipset {I} echo
|
| /macro book {1}
|
| /macro set {SP}
|
|
|
|
Garuda
CTRL 5
|
| /equipset {FC} echo <wait 0>
|
| /ma "Garuda" <me> <wait 0>
|
| /equipset {I} echo
|
| /macro book {1}
|
| /macro set {GP}
|
|
|
|
Titan
CTRL 6
|
| /equipset {FC} echo <wait 0>
|
| /ma "Titan" <me> <wait 0>
|
| /equipset {I} echo
|
| /macro book {1}
|
| /macro set {TP}
|
|
|
|
Ramuh
CTRL 7
|
| /equipset {FC} echo <wait 0>
|
| /ma "Ramuh" <me> <wait 0>
|
| /equipset {I} echo
|
| /macro book {1}
|
| /macro set {RP}
|
|
|
|
Levi
CTRL 8
|
| /equipset {FC} echo <wait 0>
|
| /ma "Leviathan" <me> <wait 0>
|
| /equipset {I} echo
|
| /macro book {1}
|
| /macro set {LP}
|
|
|
|
Fenrir
CTRL 9
|
| /equipset {FC} echo <wait 0>
|
| /ma "Fenrir" <me> <wait 0>
|
| /equipset {I} echo
|
| /macro book {1}
|
| /macro set {FP}
|
|
|
|
Diabolos
CTRL 0
|
| /equipset {FC} echo <wait 0>
|
| /ma "Diabolos" <me> <wait 0>
|
| /equipset {I} echo
|
| /macro book {1}
|
| /macro set {DP}
|
|
|
|
|
|
|
|
|
Odin
ALT 4
|
| /equipset {FC} echo <wait 0>
|
| /ja "Astral Flow" <me> <wait 1>
|
| /ma "Odin" <t> <wait 1>
|
| /equipset {Alex} echo <wait 10>
|
| /equipset {I} echo
|
|
|
|
|
Alexandr
ALT 6
|
| /equipset {FC} echo <wait 0>
|
| /ja "Astral Flow" <me> <wait 1>
|
| /ma "Alexander" <me> <wait 1>
|
| /equipset {Alex} echo <wait 10>
|
| /equipset {I} echo
|
|
|
|
|
Atomos
ALT 8
|
| /equipset {FC} echo <wait 0>
|
| /ma "Atomos" <t> <wait 1>
|
| /equipset {Alex} echo <wait 19>
|
| /equipset {I} echo
|
|
|
|
|
|
|
Siphons
ALT 0
|
| /equipset {Si} echo
|
| /macro book {2}
|
| /macro set {ES}
|
|
|
|
|
|
|
|
|
As this is only a guide, and also so that I am perfectly honest with you, my personal macros deviate ever so slightly from my examples above. I like to have in between the /ma and the /equipset {I} lines a /jobemote RUN line. Why? Because it's fancy. (And reminds me of the old FFs where the SMN would have the magic circle under them when they summon.) I especially like it on the unconventional summons, as it makes them feel more epic. I also use /jobemote WHM in my cures... And you should feel free to think for yourself and tailor these macros to your own ends and fancies!
Carbuncle Page
It wouldn't be until just fairly recently that Carbuncle gained enough WardsBlood Pacts to fill his page's row... And you'll likely never really use him a whole lot 99+ as you'll be sick of him from leveling. But he is the only reliable source of  damage. damage.
As this is the first Avatar page I'm talking about, I think I should clarify some choices I've made with my <wait> choices.
For BPs, I like to be 100% sure I'm in my damage set... so I like to stay in it for the animation. Obviously this isn't something that you need to do, as the damage is actually dealt before the animation completes... I'm just super paranoid about that kind of thing, so it gives me peace of mind to have <wait>s that swap after the animation finishes. And since everything I've macro'd starts with an /equipset line, there isn't any risk of needing to trigger another set swap before the animation finishes. (C3/4 being the two examples of "interrupting" a BP's animation.)
Same deal with the only two WSs that really matter: Garland of Bliss and Shattersoul. You could make an argument of Myrkr needing to have a macro'd exchange... but with how infrequently you'll have TP in serious content, I don't bother with that on SMN. (though you should have Myrkr unlocked. It's hella awesome, just not as good on SMN as say BLM or SCH.)
Originally I followed suit with the old guide and had the name of the Avatar page on Alt-6, but since I also doubled down and made the "nameplate" macro the macro for activating Mythic Aftermath, I moved it to 5. (My reasoning was 2 fold: 1) Garland of Bliss is a Lv.75 WS, and Shattersoul is Lv.96... I liked them in ascending order from left to right. 2) my 6 key has a bubble on it, as previously mentioned, and Shattersoul has a giant magic bubble in the animation.)
2Hour
CTRL 1
|
| /equip head "" <wait 0>
|
| /ja "Astral Flow" <me> <wait 1>
|
| /pet "Searing Light" <t> <wait>
|
| /equipset {M} echo <wait 6>
|
| /equipset {I} echo
|
|
|
|
PsnNails
CTRL 2
|
| /equipset {D} echo <wait 0>
|
| /pet "Poison Nails" <t> <wait>
|
| /equipset {P} echo <wait 4>
|
| /equipset {I} echo
|
|
|
|
|
|
Meteor
CTRL 3
|
| /equipset {D} echo <wait 0>
|
| /pet "Meteorite" <t> <wait>
|
| /equipset {M} echo <wait 3>
|
| /equipset {I} echo
|
|
|
|
|
|
HolyMist
CTRL 4
|
| /equipset {D} echo <wait 0>
|
| /pet "Holy Mist" <t> <wait>
|
| /equipset {M} echo <wait 7>
|
| /equipset {I} echo
|
|
|
|
|
|
Shining
CTRL 5
|
| /equipset {D} echo <wait 0>
|
| /pet "Shining Ruby" <me> <wait>
|
| /equipset {W} echo <wait 2>
|
| /equipset {I} echo
|
|
|
|
|
|
Glittery
CTRL 6
|
| /equipset {D} echo <wait 0>
|
| /pet "Glittering Ruby" <me> <wait>
|
| /equipset {W} echo <wait 2>
|
| /equipset {I} echo
|
|
|
|
|
|
Soothing
CTRL 7
|
| /equipset {D} echo <wait 0>
|
| /pet "Soothing Ruby" <me> <wait>
|
| /equipset {W} echo <wait 2>
|
| /equipset {I} echo
|
|
|
|
|
|
Pacify
CTRL 8
|
| /equipset {D} echo <wait 0>
|
| /pet "Pacifying Ruby" <stal> <wait>
|
| /equipset {W} echo <wait 2>
|
| /equipset {I} echo
|
|
|
|
|
|
Healing
CTRL 9
|
| /equipset {D} echo <wait 0>
|
| /pet "Healing Ruby" <stal> <wait>
|
| /equipset {W} echo <wait 2>
|
| /equipset {I} echo
|
|
|
|
|
|
Healing2
CTRL 0
|
| /equipset {D} echo <wait 0>
|
| /pet "Healing Ruby II" <me> <wait>
|
| /equipset {W} echo <wait 2>
|
| /equipset {I} echo
|
|
|
|
|
|
|
Release
ALT 1
|
| /pet "Release" <me> <wait 1>
|
| /equipset {I} echo
|
| /equip main ""
|
| /equip feet ""
|
| /macro book {1}
|
| /macro set {1}
|
|
AstFlCnd
ALT 2
|
| /equip head "" <wait 0>
|
| /ja "Astral Flow" <me> <wait 1>
|
| /ja "Astral Conduit" <me>
|
|
|
|
|
|
|
|
Cure III
ALT 3
|
| /equipset {C} echo
|
| /ma "Cure III" <stal> <wait 3>
|
| /equipset {I} echo
|
|
|
|
|
|
|
|
Cure IV
ALT 4
|
| /equipset {C} echo
|
| /ma "Cure IV" <stal> <wait 3>
|
| /equipset {I} echo
|
|
|
|
|
|
|
|
Carby
ALT 5
|
| /equipset {GB} echo <wait 0>
|
| /weaponskill "Garland of Bliss" <t> <wait 6>
|
| /equipset {I} echo
|
|
|
|
|
|
|
|
Shttrsol
ALT 6
|
| /equipset {SS} echo <wait 0>
|
| /weaponskill "Shattersoul" <t> <wait 5>
|
| /equipset {I} echo
|
|
|
|
|
|
|
|
AvaFavor
ALT 7
|
| /pet "Avatar's Favor" <me>
|
|
|
|
|
|
|
|
|
|
|
|
Apogee
ALT 8
|
| /ja "Apogee" <me>
|
|
|
|
|
|
|
|
|
|
|
|
Assault
ALT 9
|
| /recast "Elemental Siphon"
|
| /recast "Astral Conduit"
|
| /recast "Blood Pact: Rage"
|
| /recast "Blood Pact: Ward"
|
| /recast "Apogee"
|
| /pet "Assault" <stnpc>
|
|
Retreat
ALT 0
|
| /pet "Retreat" <me>
|
|
|
|
|
|
|
|
|
|
|
|
|
A huge difference between my recommended set-up and the aforementioned old macro guide, is the placement of the Release, Assault, and Retreat keys. I originally used their placements... but found that I would occasionally hit the release button when I went for Assault. Especially when I just started using this style of macros. So I moved Release over to the other side of they keyboard, which reduced my accidental releases to a rate of 0%.
The biggest change though would also probably not having subjob abilities/spells macro'd except for Cure III and Cure IV. As a WHM, I know first hand that cures need to be fast... so the old guide's method of hiding cures behind a secondary click can be the difference between life and death.
That being said, feel free to use that system. With the advent of Trusts, and the implementation of the Curio Moogle system... I have found little need to ever really -na myself; or even cast cures (while solo). (Plus if helping the party, Leviathan and Carbuncle can -na-ga, so... even less need for those to be macro'd on SMN.) The rare time that I've needed to -na or some other spell or a subjob's Job Ability... I've just used the context menu. The most used unmacro'd spell I cast is Flurry on the COR, everything else is either a spell cast by the party's WHM or an Avatar. (As I've said before, /RDM is my preferred subjob of the three best ones.)
Finally, the best thing I did was to set up Assault like I did. By using <stnpc> instead of something like <t>, you can use it constantly to check on your BP timers and other useful abilities! And no one will be the wiser.
Also, why did I put Astral Flow in the same macro as Astral Conduit? Because there is little reason to use one without the other. Together they make for unparalleled damage, apart... Conduit is really the only one of merit. (Without Job Points, Astral Flow doesn't really do anything aside from letting you use the over-costed, under-powered AoE AF BPs... But with JPs? It turns the otherwise useless ability into a true powerhouse of a boost, giving out a massive Base Stat boost.)
Ifrit Page
Ever since the December 2014 Update[19], the Celestial Avatars (and Carbuncle) have had one too many BPs for their Macro pages. (The other / Avatars would get their Lv.99 BPs in the March 2015 Update[20].) Avatars would get their Lv.99 BPs in the March 2015 Update[20].)
So you can no longer have EVERY BP on each page (except for the summons... as those have either 1 less than everyone else, or are missing all BPs for levels 76~98).
The BP I dropped from Ifrit's repertoire was Punch. I tended to drop most of the Lv1 BPs as they are just too minimal in their damage to honestly keep using. (Especially the ones who don't have any additional effect, or larger potency versions.)
2Hour
CTRL 1
|
| /equip head "" <wait 0>
|
| /ja "Astral Flow" <me> <wait 1>
|
| /pet "Inferno" <t> <wait>
|
| /equipset {M} echo <wait 6>
|
| /equipset {I} echo
|
|
|
|
BurnStrk
CTRL 2
|
| /equipset {D} echo <wait 0>
|
| /pet "Burning Strike" <t> <wait>
|
| /equipset {H} echo <wait 3>
|
| /equipset {I} echo
|
|
|
|
|
|
2xPunch
CTRL 3
|
| /equipset {D} echo <wait 0>
|
| /pet "Double Punch" <t> <wait>
|
| /equipset {P} echo <wait 4>
|
| /equipset {I} echo
|
|
|
|
|
|
FlamCrsh
CTRL 4
|
| /equipset {D} echo <wait 0>
|
| /pet "Flaming Crush" <t> <wait>
|
| /equipset {H} echo <wait 5>
|
| /equipset {I} echo
|
|
|
|
|
|
Fire2
CTRL 5
|
| /equipset {D} echo <wait 0>
|
| /pet "Fire II" <t> <wait>
|
| /equipset {M} echo <wait 4>
|
| /equipset {I} echo
|
|
|
|
|
|
Fire4
CTRL 6
|
| /equipset {D} echo <wait 0>
|
| /pet "Fire IV" <t> <wait>
|
| /equipset {M} echo <wait 4>
|
| /equipset {I} echo
|
|
|
|
|
|
MeteoStr
CTRL 7
|
| /equipset {D} echo <wait 0>
|
| /pet "Meteor Strike" <t> <wait>
|
| /equipset {M} echo <wait 7>
|
| /equipset {I} echo
|
|
|
|
|
|
CnflgStr
CTRL 8
|
| /equipset {D} echo <wait 0>
|
| /pet "Conflag Strike" <t> <wait>
|
| /equipset {M} echo <wait 6>
|
| /equipset {I} echo
|
|
|
|
|
|
CrimHowl
CTRL 9
|
| /equipset {D} echo <wait 0>
|
| /pet "Crimson Howl" <me> <wait>
|
| /equipset {W} echo <wait 2>
|
| /equipset {I} echo
|
|
|
|
|
|
InfrHowl
CTRL 0
|
| /equipset {D} echo <wait 0>
|
| /pet "Inferno Howl" <me> <wait>
|
| /equipset {W} echo <wait 2>
|
| /equipset {I} echo
|
|
|
|
|
|
|
Release
ALT 1
|
| /pet "Release" <me> <wait 1>
|
| /equipset {I} echo
|
| /equip main ""
|
| /equip feet ""
|
| /macro book {1}
|
| /macro set {1}
|
|
AstFlCnd
ALT 2
|
| /equip head "" <wait 0>
|
| /ja "Astral Flow" <me> <wait 1>
|
| /ja "Astral Conduit" <me>
|
|
|
|
|
|
|
|
Cure III
ALT 3
|
| /equipset {C} echo
|
| /ma "Cure III" <stal> <wait 3>
|
| /equipset {I} echo
|
|
|
|
|
|
|
|
Cure IV
ALT 4
|
| /equipset {C} echo
|
| /ma "Cure IV" <stal> <wait 3>
|
| /equipset {I} echo
|
|
|
|
|
|
|
|
Ifrit
ALT 5
|
| /equipset {GB} echo <wait 0>
|
| /weaponskill "Garland of Bliss" <t> <wait 6>
|
| /equipset {I} echo
|
|
|
|
|
|
|
|
Shttrsol
ALT 6
|
| /equipset {SS} echo <wait 0>
|
| /weaponskill "Shattersoul" <t> <wait 5>
|
| /equipset {I} echo
|
|
|
|
|
|
|
|
AvaFavor
ALT 7
|
| /pet "Avatar's Favor" <me>
|
|
|
|
|
|
|
|
|
|
|
|
Apogee
ALT 8
|
| /ja "Apogee" <me>
|
|
|
|
|
|
|
|
|
|
|
|
Assault
ALT 9
|
| /recast "Elemental Siphon"
|
| /recast "Astral Conduit"
|
| /recast "Blood Pact: Rage"
|
| /recast "Blood Pact: Ward"
|
| /recast "Apogee"
|
| /pet "Assault" <stnpc>
|
|
Retreat
ALT 0
|
| /pet "Retreat" <me>
|
|
|
|
|
|
|
|
|
|
|
|
|
Shiva Page
Shiva is one of the few who I kept their Lv1 BP, namely because the one I dropped, Double Slap, has the same Skillchain Property as her Lv.70 BP, Rush.
2Hour
CTRL 1
|
| /equip head "" <wait 0>
|
| /ja "Astral Flow" <me> <wait 1>
|
| /pet "Diamond Dust" <t> <wait>
|
| /equipset {M} echo <wait 6>
|
| /equipset {I} echo
|
|
|
|
AxeKick
CTRL 2
|
| /equipset {D} echo <wait 0>
|
| /pet "Axe Kick" <t> <wait>
|
| /equipset {P} echo <wait 4>
|
| /equipset {I} echo
|
|
|
|
|
|
Rush
CTRL 3
|
| /equipset {D} echo <wait 0>
|
| /pet "Rush" <t> <wait>
|
| /equipset {P} echo <wait 4>
|
| /equipset {I} echo
|
|
|
|
|
|
Blizzar2
CTRL 4
|
| /equipset {D} echo <wait 0>
|
| /pet "Blizzard II" <t> <wait>
|
| /equipset {M} echo <wait 6>
|
| /equipset {I} echo
|
|
|
|
|
|
Blizzar4
CTRL 5
|
| /equipset {D} echo <wait 0>
|
| /pet "Blizzard IV" <t> <wait>
|
| /equipset {M} echo <wait 6>
|
| /equipset {I} echo
|
|
|
|
|
|
HeavnStr
CTRL 6
|
| /equipset {D} echo <wait 0>
|
| /pet "Heavenly Strike" <t> <wait>
|
| /equipset {M} echo <wait 5>
|
| /equipset {I} echo
|
|
|
|
|
|
DmndStrm
CTRL 7
|
| /equipset {D} echo <wait 0>
|
| /pet "Diamond Storm" <t> <wait>
|
| /equipset {MA} echo <wait 4>
|
| /equipset {I} echo
|
|
|
|
|
|
Sleepga
CTRL 8
|
| /equipset {D} echo <wait 0>
|
| /pet "Sleepga" <t> <wait>
|
| /equipset {MA} echo <wait 5>
|
| /equipset {I} echo
|
|
|
|
|
|
FrosArmr
CTRL 9
|
| /equipset {D} echo <wait 0>
|
| /pet "Frost Armor" <me> <wait>
|
| /equipset {W} echo <wait 2>
|
| /equipset {I} echo
|
|
|
|
|
|
CrystBls
CTRL 0
|
| /equipset {D} echo <wait 0>
|
| /pet "Crystal Blessing" <me> <wait>
|
| /equipset {W} echo <wait 2>
|
| /equipset {I} echo
|
|
|
|
|
|
|
Release
ALT 1
|
| /pet "Release" <me> <wait 1>
|
| /equipset {I} echo
|
| /equip main ""
|
| /equip feet ""
|
| /macro book {1}
|
| /macro set {1}
|
|
AstFlCnd
ALT 2
|
| /equip head "" <wait 0>
|
| /ja "Astral Flow" <me> <wait 1>
|
| /ja "Astral Conduit" <me>
|
|
|
|
|
|
|
|
Cure III
ALT 3
|
| /equipset {C} echo
|
| /ma "Cure III" <stal> <wait 3>
|
| /equipset {I} echo
|
|
|
|
|
|
|
|
Cure IV
ALT 4
|
| /equipset {C} echo
|
| /ma "Cure IV" <stal> <wait 3>
|
| /equipset {I} echo
|
|
|
|
|
|
|
|
Shiva
ALT 5
|
| /equipset {GB} echo <wait 0>
|
| /weaponskill "Garland of Bliss" <t> <wait 6>
|
| /equipset {I} echo
|
|
|
|
|
|
|
|
Shttrsol
ALT 6
|
| /equipset {SS} echo <wait 0>
|
| /weaponskill "Shattersoul" <t> <wait 5>
|
| /equipset {I} echo
|
|
|
|
|
|
|
|
AvaFavor
ALT 7
|
| /pet "Avatar's Favor" <me>
|
|
|
|
|
|
|
|
|
|
|
|
Apogee
ALT 8
|
| /ja "Apogee" <me>
|
|
|
|
|
|
|
|
|
|
|
|
Assault
ALT 9
|
| /recast "Elemental Siphon"
|
| /recast "Astral Conduit"
|
| /recast "Blood Pact: Rage"
|
| /recast "Blood Pact: Ward"
|
| /recast "Apogee"
|
| /pet "Assault" <stnpc>
|
|
Retreat
ALT 0
|
| /pet "Retreat" <me>
|
|
|
|
|
|
|
|
|
|
|
|
|
Garuda Page
Garuda was an easy one to pick which BP had to go... her 99 is Hastega II... since there is never a reason to ever use the Lv.48 Hastega after Lv.99... It was the one on the floor.
2Hour
CTRL 1
|
| /equip head "" <wait 0>
|
| /ja "Astral Flow" <me> <wait 1>
|
| /pet "Aerial Blast" <t> <wait>
|
| /equipset {M} echo <wait 6>
|
| /equipset {I} echo
|
|
|
|
Claw
CTRL 2
|
| /equipset {D} echo <wait 0>
|
| /pet "Claw" <t> <wait>
|
| /equipset {P} echo <wait 4>
|
| /equipset {I} echo
|
|
|
|
|
|
PredClaw
CTRL 3
|
| /equipset {D} echo <wait 0>
|
| /pet "Predator Claws" <t> <wait>
|
| /equipset {P} echo <wait 4>
|
| /equipset {I} echo
|
|
|
|
|
|
Aero2
CTRL 4
|
| /equipset {D} echo <wait 0>
|
| /pet "Aero II" <t> <wait>
|
| /equipset {M} echo <wait 6>
|
| /equipset {I} echo
|
|
|
|
|
|
Aero4
CTRL 5
|
| /equipset {D} echo <wait 0>
|
| /pet "Aero IV" <t> <wait>
|
| /equipset {M} echo <wait 6>
|
| /equipset {I} echo
|
|
|
|
|
|
WindBlad
CTRL 6
|
| /equipset {D} echo <wait 0>
|
| /pet "Wind Blade" <t> <wait>
|
| /equipset {M} echo <wait 6>
|
| /equipset {I} echo
|
|
|
|
|
|
AeroArmr
CTRL 7
|
| /equipset {D} echo <wait 0>
|
| /pet "Aerial Armor" <me> <wait>
|
| /equipset {W} echo <wait 2>
|
| /equipset {I} echo
|
|
|
|
|
|
Hastega
CTRL 8
|
| /equipset {D} echo <wait 0>
|
| /pet "Hastega II" <me> <wait>
|
| /equipset {W} echo <wait 2>
|
| /equipset {I} echo
|
|
|
|
|
|
FleeWind
CTRL 9
|
| /equipset {D} echo <wait 0>
|
| /pet "Fleet Wind" <me> <wait>
|
| /equipset {W} echo <wait 2>
|
| /equipset {I} echo
|
| /equip feet ""
|
|
|
|
WispWind
CTRL 0
|
| /equipset {D} echo <wait 0>
|
| /pet "Whispering Wind" <me> <wait>
|
| /equipset {W} echo <wait 2>
|
| /equipset {I} echo
|
|
|
|
|
|
|
Release
ALT 1
|
| /pet "Release" <me> <wait 1>
|
| /equipset {I} echo
|
| /equip main ""
|
| /equip feet ""
|
| /macro book {1}
|
| /macro set {1}
|
|
AstFlCnd
ALT 2
|
| /equip head "" <wait 0>
|
| /ja "Astral Flow" <me> <wait 1>
|
| /ja "Astral Conduit" <me>
|
|
|
|
|
|
|
|
Cure III
ALT 3
|
| /equipset {C} echo
|
| /ma "Cure III" <stal> <wait 3>
|
| /equipset {I} echo
|
|
|
|
|
|
|
|
Cure IV
ALT 4
|
| /equipset {C} echo
|
| /ma "Cure IV" <stal> <wait 3>
|
| /equipset {I} echo
|
|
|
|
|
|
|
|
Garuda
ALT 5
|
| /equipset {GB} echo <wait 0>
|
| /weaponskill "Garland of Bliss" <t> <wait 6>
|
| /equipset {I} echo
|
|
|
|
|
|
|
|
Shttrsol
ALT 6
|
| /equipset {SS} echo <wait 0>
|
| /weaponskill "Shattersoul" <t> <wait 5>
|
| /equipset {I} echo
|
|
|
|
|
|
|
|
AvaFavor
ALT 7
|
| /pet "Avatar's Favor" <me>
|
|
|
|
|
|
|
|
|
|
|
|
Apogee
ALT 8
|
| /ja "Apogee" <me>
|
|
|
|
|
|
|
|
|
|
|
|
Assault
ALT 9
|
| /recast "Elemental Siphon"
|
| /recast "Astral Conduit"
|
| /recast "Blood Pact: Rage"
|
| /recast "Blood Pact: Ward"
|
| /recast "Apogee"
|
| /pet "Assault" <stnpc>
|
|
Retreat
ALT 0
|
| /pet "Retreat" <me>
|
|
|
|
|
|
|
|
|
|
|
|
|
Titan Page
As mentioned above in the Avatars Section, Titan has two lines of  Blood Pacts: Rock/Megalith/Crag Throw and Rock/Mountain Buster. Since Megalith and Crag Throws are very similar, and Megalith's Skillchain Property is the secondary Property of Mountain Buster, I saw no reason to keep the weaker-but-similarly costed Megalith Throw. Blood Pacts: Rock/Megalith/Crag Throw and Rock/Mountain Buster. Since Megalith and Crag Throws are very similar, and Megalith's Skillchain Property is the secondary Property of Mountain Buster, I saw no reason to keep the weaker-but-similarly costed Megalith Throw.
2Hour
CTRL 1
|
| /equip head "" <wait 0>
|
| /ja "Astral Flow" <me> <wait 1>
|
| /pet "Earthen Fury" <t> <wait>
|
| /equipset {M} echo <wait 6>
|
| /equipset {I} echo
|
|
|
|
RockBust
CTRL 2
|
| /equipset {D} echo <wait 0>
|
| /pet "Rock Buster" <t> <wait>
|
| /equipset {P} echo <wait 4>
|
| /equipset {I} echo
|
|
|
|
|
|
MtnBust
CTRL 3
|
| /equipset {D} echo <wait 0>
|
| /pet "Mountain Buster" <t> <wait>
|
| /equipset {P} echo <wait 5>
|
| /equipset {I} echo
|
|
|
|
|
|
RockThrw
CTRL 4
|
| /equipset {D} echo <wait 0>
|
| /pet "Rock Throw" <t> <wait>
|
| /equipset {P} echo <wait 5>
|
| /equipset {I} echo
|
|
|
|
|
|
CragThrw
CTRL 5
|
| /equipset {D} echo <wait 0>
|
| /pet "Crag Throw" <t> <wait>
|
| /equipset {P} echo <wait 7>
|
| /equipset {I} echo
|
|
|
|
|
|
Stone2
CTRL 6
|
| /equipset {D} echo <wait 0>
|
| /pet "Stone II" <t> <wait>
|
| /equipset {M} echo <wait 6>
|
| /equipset {I} echo
|
|
|
|
|
|
Stone4
CTRL 7
|
| /equipset {D} echo <wait 0>
|
| /pet "Stone IV" <t> <wait>
|
| /equipset {M} echo <wait 7>
|
| /equipset {I} echo
|
|
|
|
|
|
Geocrush
CTRL 8
|
| /equipset {D} echo <wait 0>
|
| /pet "Geocrush" <t> <wait>
|
| /equipset {M} echo <wait 6>
|
| /equipset {I} echo
|
|
|
|
|
|
ErthWard
CTRL 9
|
| /equipset {D} echo <wait 0>
|
| /pet "Earthen Ward" <me> <wait>
|
| /equipset {W} echo <wait 2>
|
| /equipset {I} echo
|
|
|
|
|
|
ErthArmr
CTRL 0
|
| /equipset {D} echo <wait 0>
|
| /pet "Earthen Armor" <me> <wait>
|
| /equipset {W} echo <wait 2>
|
| /equipset {I} echo
|
|
|
|
|
|
|
Release
ALT 1
|
| /pet "Release" <me> <wait 1>
|
| /equipset {I} echo
|
| /equip main ""
|
| /equip feet ""
|
| /macro book {1}
|
| /macro set {1}
|
|
AstFlCnd
ALT 2
|
| /equip head "" <wait 0>
|
| /ja "Astral Flow" <me> <wait 1>
|
| /ja "Astral Conduit" <me>
|
|
|
|
|
|
|
|
Cure III
ALT 3
|
| /equipset {C} echo
|
| /ma "Cure III" <stal> <wait 3>
|
| /equipset {I} echo
|
|
|
|
|
|
|
|
Cure IV
ALT 4
|
| /equipset {C} echo
|
| /ma "Cure IV" <stal> <wait 3>
|
| /equipset {I} echo
|
|
|
|
|
|
|
|
Titan
ALT 5
|
| /equipset {GB} echo <wait 0>
|
| /weaponskill "Garland of Bliss" <t> <wait 6>
|
| /equipset {I} echo
|
|
|
|
|
|
|
|
Shttrsol
ALT 6
|
| /equipset {SS} echo <wait 0>
|
| /weaponskill "Shattersoul" <t> <wait 5>
|
| /equipset {I} echo
|
|
|
|
|
|
|
|
AvaFavor
ALT 7
|
| /pet "Avatar's Favor" <me>
|
|
|
|
|
|
|
|
|
|
|
|
Apogee
ALT 8
|
| /ja "Apogee" <me>
|
|
|
|
|
|
|
|
|
|
|
|
Assault
ALT 9
|
| /recast "Elemental Siphon"
|
| /recast "Astral Conduit"
|
| /recast "Blood Pact: Rage"
|
| /recast "Blood Pact: Ward"
|
| /recast "Apogee"
|
| /pet "Assault" <stnpc>
|
|
Retreat
ALT 0
|
| /pet "Retreat" <me>
|
|
|
|
|
|
|
|
|
|
|
|
|
Ramuh Page
Ramuh's three Strike BPs are all just increasingly larger versions of the previous ones... so... there's no reason to keep the Lv.1 one. (Especially because Chaotic Strike ⇛ Volt Strike yields a Distortion Skillchain. Useful for Apogee and Astral Conduit damage boosting.)
2Hour
CTRL 1
|
| /equip head "" <wait 0>
|
| /ja "Astral Flow" <me> <wait 1>
|
| /pet "Judgement Bolt" <t> <wait>
|
| /equipset {M} echo <wait 6>
|
| /equipset {I} echo
|
|
|
|
ChaosStr
CTRL 2
|
| /equipset {D} echo <wait 0>
|
| /pet "Chaotic Strike" <t> <wait>
|
| /equipset {P} echo <wait 4>
|
| /equipset {I} echo
|
|
|
|
|
|
VoltStr
CTRL 3
|
| /equipset {D} echo <wait 0>
|
| /pet "Volt Strike" <t> <wait>
|
| /equipset {P} echo <wait 5>
|
| /equipset {I} echo
|
|
|
|
|
|
Thunder2
CTRL 4
|
| /equipset {D} echo <wait 0>
|
| /pet "Thunder II" <t> <wait>
|
| /equipset {M} echo <wait 6>
|
| /equipset {I} echo
|
|
|
|
|
|
Thunder4
CTRL 5
|
| /equipset {D} echo <wait 0>
|
| /pet "Thunder IV" <t> <wait>
|
| /equipset {M} echo <wait 6>
|
| /equipset {I} echo
|
|
|
|
|
|
ThunStrm
CTRL 6
|
| /equipset {D} echo <wait 0>
|
| /pet "Thunderstorm" <t> <wait>
|
| /equipset {M} echo <wait 6>
|
| /equipset {I} echo
|
|
|
|
|
|
ThunSprk
CTRL 7
|
| /equipset {D} echo <wait 0>
|
| /pet "Thunderspark" <t> <wait>
|
| /equipset {M} echo <wait 4>
|
| /equipset {I} echo
|
|
|
|
|
|
ShckSqal
CTRL 8
|
| /equipset {D} echo <wait 0>
|
| /pet "Shock Squall" <t> <wait>
|
| /equipset {MA} echo <wait 4>
|
| /equipset {I} echo
|
|
|
|
|
|
RollThun
CTRL 9
|
| /equipset {D} echo <wait 0>
|
| /pet "Rolling Thunder" <me> <wait>
|
| /equipset {W} echo <wait 2>
|
| /equipset {I} echo
|
|
|
|
|
|
LtngArmr
CTRL 0
|
| /equipset {D} echo <wait 0>
|
| /pet "Lightning Armor" <me> <wait>
|
| /equipset {W} echo <wait 2>
|
| /equipset {I} echo
|
|
|
|
|
|
|
Release
ALT 1
|
| /pet "Release" <me> <wait 1>
|
| /equipset {I} echo
|
| /equip main ""
|
| /equip feet ""
|
| /macro book {1}
|
| /macro set {1}
|
|
AstFlCnd
ALT 2
|
| /equip head "" <wait 0>
|
| /ja "Astral Flow" <me> <wait 1>
|
| /ja "Astral Conduit" <me>
|
|
|
|
|
|
|
|
Cure III
ALT 3
|
| /equipset {C} echo
|
| /ma "Cure III" <stal> <wait 3>
|
| /equipset {I} echo
|
|
|
|
|
|
|
|
Cure IV
ALT 4
|
| /equipset {C} echo
|
| /ma "Cure IV" <stal> <wait 3>
|
| /equipset {I} echo
|
|
|
|
|
|
|
|
Ramuh
ALT 5
|
| /equipset {GB} echo <wait 0>
|
| /weaponskill "Garland of Bliss" <t> <wait 6>
|
| /equipset {I} echo
|
|
|
|
|
|
|
|
Shttrsol
ALT 6
|
| /equipset {SS} echo <wait 0>
|
| /weaponskill "Shattersoul" <t> <wait 5>
|
| /equipset {I} echo
|
|
|
|
|
|
|
|
AvaFavor
ALT 7
|
| /pet "Avatar's Favor" <me>
|
|
|
|
|
|
|
|
|
|
|
|
Apogee
ALT 8
|
| /ja "Apogee" <me>
|
|
|
|
|
|
|
|
|
|
|
|
Assault
ALT 9
|
| /recast "Elemental Siphon"
|
| /recast "Astral Conduit"
|
| /recast "Blood Pact: Rage"
|
| /recast "Blood Pact: Ward"
|
| /recast "Apogee"
|
| /pet "Assault" <stnpc>
|
|
Retreat
ALT 0
|
| /pet "Retreat" <me>
|
|
|
|
|
|
|
|
|
|
|
|
|
Leviathan Page
Once again, I dropped the Lv.1 BP. This is because even though Tail Whip's Skillchain Property is the same as Spinning Dive's secondary Property, Tail Whip gives a very potent Gravity effect, whereas Barracuda Dive is nothing but a Lv.1 Spinning.
2Hour
CTRL 1
|
| /equip head "" <wait 0>
|
| /ja "Astral Flow" <me> <wait 1>
|
| /pet "Tidal Wave" <t> <wait>
|
| /equipset {M} echo <wait 6>
|
| /equipset {I} echo
|
|
|
|
TailWhip
CTRL 2
|
| /equipset {D} echo <wait 0>
|
| /pet "Tail Whip" <t> <wait>
|
| /equipset {P} echo <wait 4>
|
| /equipset {I} echo
|
|
|
|
|
|
SpinDive
CTRL 3
|
| /equipset {D} echo <wait 0>
|
| /pet "Spinning Dive" <t> <wait>
|
| /equipset {P} echo <wait 4>
|
| /equipset {I} echo
|
|
|
|
|
|
Water2
CTRL 4
|
| /equipset {D} echo <wait 0>
|
| /pet "Water II" <t> <wait>
|
| /equipset {M} echo <wait 6>
|
| /equipset {I} echo
|
|
|
|
|
|
Water4
CTRL 5
|
| /equipset {D} echo <wait 0>
|
| /pet "Water IV" <t> <wait>
|
| /equipset {M} echo <wait 6>
|
| /equipset {I} echo
|
|
|
|
|
|
GranFall
CTRL 6
|
| /equipset {D} echo <wait 0>
|
| /pet "Grand Fall" <t> <wait>
|
| /equipset {M} echo <wait 7>
|
| /equipset {I} echo
|
|
|
|
|
|
Slowga
CTRL 7
|
| /equipset {D} echo <wait 0>
|
| /pet "Slowga" <t> <wait>
|
| /equipset {MA} echo <wait 6>
|
| /equipset {I} echo
|
|
|
|
|
|
TideRoar
CTRL 8
|
| /equipset {D} echo <wait 0>
|
| /pet "Tidal Roar" <t> <wait>
|
| /equipset {MA} echo <wait 5>
|
| /equipset {I} echo
|
|
|
|
|
|
SoothCrr
CTRL 9
|
| /equipset {D} echo <wait 0>
|
| /pet "Soothing Current" <me> <wait>
|
| /equipset {W} echo <wait 2>
|
| /equipset {I} echo
|
|
|
|
|
|
SprngWtr
CTRL 0
|
| /equipset {D} echo <wait 0>
|
| /pet "Spring Water" <me> <wait>
|
| /equipset {W} echo <wait 2>
|
| /equipset {I} echo
|
|
|
|
|
|
|
Release
ALT 1
|
| /pet "Release" <me> <wait 1>
|
| /equipset {I} echo
|
| /equip main ""
|
| /equip feet ""
|
| /macro book {1}
|
| /macro set {1}
|
|
AstFlCnd
ALT 2
|
| /equip head "" <wait 0>
|
| /ja "Astral Flow" <me> <wait 1>
|
| /ja "Astral Conduit" <me>
|
|
|
|
|
|
|
|
Cure III
ALT 3
|
| /equipset {C} echo
|
| /ma "Cure III" <stal> <wait 3>
|
| /equipset {I} echo
|
|
|
|
|
|
|
|
Cure IV
ALT 4
|
| /equipset {C} echo
|
| /ma "Cure IV" <stal> <wait 3>
|
| /equipset {I} echo
|
|
|
|
|
|
|
|
Levi
ALT 5
|
| /equipset {GB} echo <wait 0>
|
| /weaponskill "Garland of Bliss" <t> <wait 6>
|
| /equipset {I} echo
|
|
|
|
|
|
|
|
Shttrsol
ALT 6
|
| /equipset {SS} echo <wait 0>
|
| /weaponskill "Shattersoul" <t> <wait 5>
|
| /equipset {I} echo
|
|
|
|
|
|
|
|
AvaFavor
ALT 7
|
| /pet "Avatar's Favor" <me>
|
|
|
|
|
|
|
|
|
|
|
|
Apogee
ALT 8
|
| /ja "Apogee" <me>
|
|
|
|
|
|
|
|
|
|
|
|
Assault
ALT 9
|
| /recast "Elemental Siphon"
|
| /recast "Astral Conduit"
|
| /recast "Blood Pact: Rage"
|
| /recast "Blood Pact: Ward"
|
| /recast "Apogee"
|
| /pet "Assault" <stnpc>
|
|
Retreat
ALT 0
|
| /pet "Retreat" <me>
|
|
|
|
|
|
|
|
|
|
|
|
|
Fenrir Page
Moonlit Charge Blinds, Crescent Fang Paralyzes (and is the most powerful  Blood Pact in the game), and Eclipse Bite is the most powerful Blood Pact Fenrir has. So I had no qualms dropping Moonlit for the macro for Impact. Blood Pact in the game), and Eclipse Bite is the most powerful Blood Pact Fenrir has. So I had no qualms dropping Moonlit for the macro for Impact.
2Hour
CTRL 1
|
| /equip head "" <wait 0>
|
| /ja "Astral Flow" <me> <wait 1>
|
| /pet "Howling Moon" <t> <wait>
|
| /equipset {M} echo <wait 6>
|
| /equipset {I} echo
|
|
|
|
CrsntFng
CTRL 2
|
| /equipset {D} echo <wait 0>
|
| /pet "Crescent Fang" <t> <wait>
|
| /equipset {P} echo <wait 5>
|
| /equipset {I} echo
|
|
|
|
|
|
EclipsBit
CTRL 3
|
| /equipset {D} echo <wait 0>
|
| /pet "Eclipse Bite" <t> <wait>
|
| /equipset {P} echo <wait 5>
|
| /equipset {I} echo
|
|
|
|
|
|
LunarBay
CTRL 4
|
| /equipset {D} echo <wait 0>
|
| /pet "Lunar Bay" <t> <wait>
|
| /equipset {M} echo <wait 5>
|
| /equipset {I} echo
|
|
|
|
|
|
Impact
CTRL 5
|
| /equipset {D} echo <wait 0>
|
| /pet "Impact" <t> <wait>
|
| /equipset {Alex} echo <wait 5>
|
| /equipset {I} echo
|
|
|
|
|
|
LunarCry
CTRL 6
|
| /equipset {D} echo <wait 0>
|
| /pet "Lunar Cry" <t> <wait>
|
| /equipset {MA} echo <wait 7>
|
| /equipset {I} echo
|
|
|
|
|
|
LunaRoar
CTRL 7
|
| /equipset {D} echo <wait 0>
|
| /pet "Lunar Roar" <t> <wait>
|
| /equipset {MA} echo <wait 7>
|
| /equipset {I} echo
|
|
|
|
|
|
EclpGrwl
CTRL 8
|
| /equipset {D} echo <wait 0>
|
| /pet "Ecliptic Growl" <me> <wait>
|
| /equipset {W} echo <wait 2>
|
| /equipset {I} echo
|
|
|
|
|
|
EclpHowl
CTRL 9
|
| /equipset {D} echo <wait 0>
|
| /pet "Ecliptic Howl" <me> <wait>
|
| /equipset {W} echo <wait 2>
|
| /equipset {I} echo
|
|
|
|
|
|
HeavnHwl
CTRL 0
|
| /equipset {D} echo <wait 0>
|
| /pet "Heavenward Howl" <me> <wait>
|
| /equipset {W} echo <wait 2>
|
| /equipset {I} echo
|
|
|
|
|
|
|
Release
ALT 1
|
| /pet "Release" <me> <wait 1>
|
| /equipset {I} echo
|
| /equip main ""
|
| /equip feet ""
|
| /macro book {1}
|
| /macro set {1}
|
|
AstFlCnd
ALT 2
|
| /equip head "" <wait 0>
|
| /ja "Astral Flow" <me> <wait 1>
|
| /ja "Astral Conduit" <me>
|
|
|
|
|
|
|
|
Cure III
ALT 3
|
| /equipset {C} echo
|
| /ma "Cure III" <stal> <wait 3>
|
| /equipset {I} echo
|
|
|
|
|
|
|
|
Cure IV
ALT 4
|
| /equipset {C} echo
|
| /ma "Cure IV" <stal> <wait 3>
|
| /equipset {I} echo
|
|
|
|
|
|
|
|
Fenrir
ALT 5
|
| /equipset {GB} echo <wait 0>
|
| /weaponskill "Garland of Bliss" <t> <wait 6>
|
| /equipset {I} echo
|
|
|
|
|
|
|
|
Shttrsol
ALT 6
|
| /equipset {SS} echo <wait 0>
|
| /weaponskill "Shattersoul" <t> <wait 5>
|
| /equipset {I} echo
|
|
|
|
|
|
|
|
AvaFavor
ALT 7
|
| /pet "Avatar's Favor" <me>
|
|
|
|
|
|
|
|
|
|
|
|
Apogee
ALT 8
|
| /ja "Apogee" <me>
|
|
|
|
|
|
|
|
|
|
|
|
Assault
ALT 9
|
| /recast "Elemental Siphon"
|
| /recast "Astral Conduit"
|
| /recast "Blood Pact: Rage"
|
| /recast "Blood Pact: Ward"
|
| /recast "Apogee"
|
| /pet "Assault" <stnpc>
|
|
Retreat
ALT 0
|
| /pet "Retreat" <me>
|
|
|
|
|
|
|
|
|
|
|
|
|
Diabolos Page
Diabolos' Lv.99 Blindside is a more powerful version of his Lv.1 Blood Pact: Camisado. And as they make up the only Blood Pacts Diabolos has, I saw no reason to keep Camisado. Especially not when all his other BPs are actually super useful. Though the fact that I dropped the ability to apogee Camisado ⇛ Blindside to make Transfixion and Camisado ⇚ Blindside to make Compression, which Diabolos could Magic Burst off of... though the only Blood Pact he could make use of that 3 step Blood Pact chain is Somnolence... a Lv.20 BP that deals small damage, but is the only damaging Ward. Though what else could be dropped other than Camisado?? Nether Blast's  damage? Night Terror's Merit BP level damage? Somnolence, the only damaging Ward? Nightmare's super Sleepga+Bio? Ultimate Terror's AoE Base Stat Absorb? Noctoshield's Phalanxga? Dream Shroud's MAB&MDB boost? Pavor Nocturnus' Dispel? I think the additive usefulness of all his other Blood Pacts outweigh the loss of the Magic Bursted Somnolence. (even more so when they boost the potency of buffing Wards... and the fact that these are just Level 1 Skillchains. The weakest of all Skillchains.) damage? Night Terror's Merit BP level damage? Somnolence, the only damaging Ward? Nightmare's super Sleepga+Bio? Ultimate Terror's AoE Base Stat Absorb? Noctoshield's Phalanxga? Dream Shroud's MAB&MDB boost? Pavor Nocturnus' Dispel? I think the additive usefulness of all his other Blood Pacts outweigh the loss of the Magic Bursted Somnolence. (even more so when they boost the potency of buffing Wards... and the fact that these are just Level 1 Skillchains. The weakest of all Skillchains.)
This is especially compounded when Garland of Bliss ⇛ Blindside makes Gravitation, a Level 2 Skillchain, which allows you to Apogee Magic Burst the more powerful Night Terror.
2Hour
CTRL 1
|
| /equip head "" <wait 0>
|
| /ja "Astral Flow" <me> <wait 1>
|
| /pet "Ruinous Omen" <t> <wait>
|
| /equipset {M} echo <wait 6>
|
| /equipset {I} echo
|
|
|
|
Blindside
CTRL 2
|
| /equipset {D} echo <wait 0>
|
| /pet "Blindside" <t> <wait>
|
| /equipset {P} echo <wait 3>
|
| /equipset {I} echo
|
|
|
|
|
|
Somnolen
CTRL 3
|
| /equipset {D} echo <wait 0>
|
| /pet "Somnolence" <t> <wait>
|
| /equipset {M} echo <wait 4>
|
| /equipset {I} echo
|
|
|
|
|
|
NthrBlst
CTRL 4
|
| /equipset {D} echo <wait 0>
|
| /pet "Nether Blast" <t> <wait>
|
| /equipset {M} echo <wait 5>
|
| /equipset {I} echo
|
|
|
|
|
|
NightTer
CTRL 5
|
| /equipset {D} echo <wait 0>
|
| /pet "Night Terror" <t> <wait>
|
| /equipset {M} echo <wait 5>
|
| /equipset {I} echo
|
|
|
|
|
|
PavoNoct
CTRL 6
|
| /equipset {D} echo <wait 0>
|
| /pet "Pavor Nocturnus" <t> <wait>
|
| /equipset {MA} echo <wait 6>
|
| /equipset {I} echo
|
|
|
|
|
|
UltiTerr
CTRL 7
|
| /equipset {D} echo <wait 0>
|
| /pet "Ultimate Terror" <t> <wait>
|
| /equipset {MA} echo <wait 4>
|
| /equipset {I} echo
|
|
|
|
|
|
Nightmar
CTRL 8
|
| /equipset {D} echo <wait 0>
|
| /pet "Nightmare" <t> <wait>
|
| /equipset {MA} echo <wait 6>
|
| /equipset {I} echo
|
|
|
|
|
|
Noctos
CTRL 9
|
| /equipset {D} echo <wait 0>
|
| /pet "Noctoshield" <me> <wait>
|
| /equipset {W} echo <wait 2>
|
| /equipset {I} echo
|
|
|
|
|
|
DreamShr
CTRL 0
|
| /equipset {D} echo <wait 0>
|
| /pet "Dream Shroud" <me> <wait>
|
| /equipset {W} echo <wait 2>
|
| /equipset {I} echo
|
|
|
|
|
|
|
Release
ALT 1
|
| /pet "Release" <me> <wait 1>
|
| /equipset {I} echo
|
| /equip main ""
|
| /equip feet ""
|
| /macro book {1}
|
| /macro set {1}
|
|
AstFlCnd
ALT 2
|
| /equip head "" <wait 0>
|
| /ja "Astral Flow" <me> <wait 1>
|
| /ja "Astral Conduit" <me>
|
|
|
|
|
|
|
|
Cure III
ALT 3
|
| /equipset {C} echo
|
| /ma "Cure III" <stal> <wait 3>
|
| /equipset {I} echo
|
|
|
|
|
|
|
|
Cure IV
ALT 4
|
| /equipset {C} echo
|
| /ma "Cure IV" <stal> <wait 3>
|
| /equipset {I} echo
|
|
|
|
|
|
|
|
Diabolos
ALT 5
|
| /equipset {GB} echo <wait 0>
|
| /weaponskill "Garland of Bliss" <t> <wait 6>
|
| /equipset {I} echo
|
|
|
|
|
|
|
|
Shttrsol
ALT 6
|
| /equipset {SS} echo <wait 0>
|
| /weaponskill "Shattersoul" <t> <wait 5>
|
| /equipset {I} echo
|
|
|
|
|
|
|
|
AvaFavor
ALT 7
|
| /pet "Avatar's Favor" <me>
|
|
|
|
|
|
|
|
|
|
|
|
Apogee
ALT 8
|
| /ja "Apogee" <me>
|
|
|
|
|
|
|
|
|
|
|
|
Assault
ALT 9
|
| /recast "Elemental Siphon"
|
| /recast "Astral Conduit"
|
| /recast "Blood Pact: Rage"
|
| /recast "Blood Pact: Ward"
|
| /recast "Apogee"
|
| /pet "Assault" <stnpc>
|
|
Retreat
ALT 0
|
| /pet "Retreat" <me>
|
|
|
|
|
|
|
|
|
|
|
|
|
Macro Book 2
Book #2 is where the "extra stuff" goes.... so basically Cait Sith and Siphons. (Though you're welcome to have them anywhere... It just wound up like this for me as Cait Sith was the last full Avatar added, so she wound up in the "extra" Book with the Siphon page. Like with the previous Book, the order can be anything you want. Just make sure your Macro Page swaps link to the right pages.
Cait Sith Page
Poor Cait Sith.... She doesn't have the "issue" of having 11 BPs like the others... namely because she lacks any and all BPs from Lv.76 to Lv.98. But that means you can have all her BPs macro'd!! Joy.
2Hour
CTRL 1
|
| /equip head "" <wait 0>
|
| /ja "Astral Flow" <me> <wait 1>
|
| /pet "Altana's Favor" <me> <wait>
|
| /equipset {I} echo
|
|
|
|
|
|
RegalScr
CTRL 2
|
| /equipset {D} echo <wait 0>
|
| /pet "Regal Scratch" <t> <wait>
|
| /equipset {P} echo <wait 4>
|
| /equipset {I} echo
|
|
|
|
|
|
RegalGsh
CTRL 3
|
| /equipset {D} echo <wait 0>
|
| /pet "Regal Gash" <t> <wait>
|
| /equipset {P} echo <wait 5>
|
| /equipset {I} echo
|
|
|
|
|
|
Lv?Holy
CTRL 4
|
| /equipset {D} echo <wait 0>
|
| /pet "Level ? Holy" <t> <wait>
|
| /equipset {M} echo <wait 8>
|
| /equipset {I} echo
|
|
|
|
|
|
|
MewLulby
CTRL 6
|
| /equipset {D} echo <wait 0>
|
| /pet "Mewing Lullaby" <t> <wait>
|
| /equipset {MA} echo <wait 7>
|
| /equipset {I} echo
|
|
|
|
|
|
EerieEye
CTRL 7
|
| /equipset {D} echo <wait 0>
|
| /pet "Eerie Eye" <t> <wait>
|
| /equipset {MA} echo <wait 5>
|
| /equipset {I} echo
|
|
|
|
|
|
|
Raise2
CTRL 9
|
| /equipset {D} echo <wait 0>
|
| /pet "Raise II" <t> <wait>
|
| /equipset {I} echo
|
|
|
|
|
|
|
|
ReRaise2
CTRL 0
|
| /equipset {D} echo <wait 0>
|
| /pet "Reraise II" <stal> <wait>
|
| /equipset {I} echo
|
|
|
|
|
|
|
|
|
Release
ALT 1
|
| /pet "Release" <me> <wait 1>
|
| /equipset {I} echo
|
| /equip main ""
|
| /equip feet ""
|
| /macro book {1}
|
| /macro set {1}
|
|
AstFlCnd
ALT 2
|
| /equip head "" <wait 0>
|
| /ja "Astral Flow" <me> <wait 1>
|
| /ja "Astral Conduit" <me>
|
|
|
|
|
|
|
|
Cure III
ALT 3
|
| /equipset {C} echo
|
| /ma "Cure III" <stal> <wait 3>
|
| /equipset {I} echo
|
|
|
|
|
|
|
|
Cure IV
ALT 4
|
| /equipset {C} echo
|
| /ma "Cure IV" <stal> <wait 3>
|
| /equipset {I} echo
|
|
|
|
|
|
|
|
CaitSith
ALT 5
|
| /equipset {GB} echo <wait 0>
|
| /weaponskill "Garland of Bliss" <t> <wait 6>
|
| /equipset {I} echo
|
|
|
|
|
|
|
|
Shttrsol
ALT 6
|
| /equipset {SS} echo <wait 0>
|
| /weaponskill "Shattersoul" <t> <wait 5>
|
| /equipset {I} echo
|
|
|
|
|
|
|
|
AvaFavor
ALT 7
|
| /pet "Avatar's Favor" <me>
|
|
|
|
|
|
|
|
|
|
|
|
Apogee
ALT 8
|
| /ja "Apogee" <me>
|
|
|
|
|
|
|
|
|
|
|
|
Assault
ALT 9
|
| /recast "Elemental Siphon"
|
| /recast "Astral Conduit"
|
| /recast "Blood Pact: Rage"
|
| /recast "Blood Pact: Ward"
|
| /recast "Apogee"
|
| /pet "Assault" <stnpc>
|
|
Retreat
ALT 0
|
| /pet "Retreat" <me>
|
|
|
|
|
|
|
|
|
|
|
|
|
You may have noticed that I break away from the style I have described in other buffing Ward BPs. Raise and RR, don't benefit from any skill or TP Bonus... so there isn't really any need or reason to swap into something. Though you could make the argument for Blood Boon.... but, personally... I'd rather just be refreshing.
Should you want to devote an entire equipset to just Re/Raise... By all means. Or if you just want to utilize the generic Buffing Ward equipset for it, the same <wait 2> will suffice for the swap back into your idle.
Elemental Siphon Page
Why the double line? Accident proof and convenience. This way no matter what you hit CTRL or ALT, you'll be looking at your Siphon commands. The Release command is included for when you decide to idle with Light Spirit. (Can just cast it from the context menu. You shouldn't have any issue with Perp. And this lets you swap into a high-skill set which decreases Light Spirit's recast. Then when you're all Pro/Shell5'd up, just hit Release from this page and you'll be back in idle and the hub.)
I also have the elements arranged according to the day of the week, as that makes better use of 's effect.
Fire
CTRL 1
|
| /ma "Fire Spirit" <me> <wait 5>
|
| /ja "Elemental Siphon" <me> <wait 1>
|
| /ja "Release" <me> <wait 1>
|
| /macro book {1}
|
| /macro set {1}
|
| /equipset {I} echo
|
|
Earth
CTRL 2
|
| /ma "Earth Spirit" <me> <wait 5>
|
| /ja "Elemental Siphon" <me> <wait 1>
|
| /ja "Release" <me> <wait 1>
|
| /macro book {1}
|
| /macro set {1}
|
| /equipset {I} echo
|
|
Water
CTRL 3
|
| /ma "Water Spirit" <me> <wait 5>
|
| /ja "Elemental Siphon" <me> <wait 1>
|
| /ja "Release" <me> <wait 1>
|
| /macro book {1}
|
| /macro set {1}
|
| /equipset {I} echo
|
|
Wind
CTRL 4
|
| /ma "Wind Spirit" <me> <wait 5>
|
| /ja "Elemental Siphon" <me> <wait 1>
|
| /ja "Release" <me> <wait 1>
|
| /macro book {1}
|
| /macro set {1}
|
| /equipset {I} echo
|
|
Ice
CTRL 5
|
| /ma "Ice Spirit" <me> <wait 5>
|
| /ja "Elemental Siphon" <me> <wait 1>
|
| /ja "Release" <me> <wait 1>
|
| /macro book {1}
|
| /macro set {1}
|
| /equipset {I} echo
|
|
Thunder
CTRL 6
|
| /ma "Thunder Spirit" <me> <wait 5>
|
| /ja "Elemental Siphon" <me> <wait 1>
|
| /ja "Release" <me> <wait 1>
|
| /macro book {1}
|
| /macro set {1}
|
| /equipset {I} echo
|
|
Light
CTRL 7
|
| /ma "Light Spirit" <me> <wait 5>
|
| /ja "Elemental Siphon" <me> <wait 1>
|
| /ja "Release" <me> <wait 1>
|
| /macro book {1}
|
| /macro set {1}
|
| /equipset {I} echo
|
|
Dark
CTRL 8
|
| /ma "Dark Spirit" <me> <wait 5>
|
| /ja "Elemental Siphon" <me> <wait 1>
|
| /ja "Release" <me> <wait 1>
|
| /macro book {1}
|
| /macro set {1}
|
| /equipset {I} echo
|
|
|
Release
CTRL 0
|
| /pet "Release" <me> <wait 1>
|
| /equipset {I} echo
|
| /equip main ""
|
| /equip feet ""
|
| /macro book {1}
|
| /macro set {1}
|
|
|
Fire
ALT 1
|
| /ma "Fire Spirit" <me> <wait 5>
|
| /ja "Elemental Siphon" <me> <wait 1>
|
| /ja "Release" <me> <wait 1>
|
| /macro book {1}
|
| /macro set {1}
|
| /equipset {I} echo
|
|
Earth
ALT 2
|
| /ma "Earth Spirit" <me> <wait 5>
|
| /ja "Elemental Siphon" <me> <wait 1>
|
| /ja "Release" <me> <wait 1>
|
| /macro book {1}
|
| /macro set {1}
|
| /equipset {I} echo
|
|
Water
ALT 3
|
| /ma "Water Spirit" <me> <wait 5>
|
| /ja "Elemental Siphon" <me> <wait 1>
|
| /ja "Release" <me> <wait 1>
|
| /macro book {1}
|
| /macro set {1}
|
| /equipset {I} echo
|
|
Wind
ALT 4
|
| /ma "Wind Spirit" <me> <wait 5>
|
| /ja "Elemental Siphon" <me> <wait 1>
|
| /ja "Release" <me> <wait 1>
|
| /macro book {1}
|
| /macro set {1}
|
| /equipset {I} echo
|
|
Ice
ALT 5
|
| /ma "Ice Spirit" <me> <wait 5>
|
| /ja "Elemental Siphon" <me> <wait 1>
|
| /ja "Release" <me> <wait 1>
|
| /macro book {1}
|
| /macro set {1}
|
| /equipset {I} echo
|
|
Thunder
ALT 6
|
| /ma "Thunder Spirit" <me> <wait 5>
|
| /ja "Elemental Siphon" <me> <wait 1>
|
| /ja "Release" <me> <wait 1>
|
| /macro book {1}
|
| /macro set {1}
|
| /equipset {I} echo
|
|
Light
ALT 7
|
| /ma "Light Spirit" <me> <wait 5>
|
| /ja "Elemental Siphon" <me> <wait 1>
|
| /ja "Release" <me> <wait 1>
|
| /macro book {1}
|
| /macro set {1}
|
| /equipset {I} echo
|
|
Dark
ALT 8
|
| /ma "Dark Spirit" <me> <wait 5>
|
| /ja "Elemental Siphon" <me> <wait 1>
|
| /ja "Release" <me> <wait 1>
|
| /macro book {1}
|
| /macro set {1}
|
| /equipset {I} echo
|
|
|
Release
ALT 0
|
| /pet "Release" <me> <wait 1>
|
| /equipset {I} echo
|
| /equip main ""
|
| /equip feet ""
|
| /macro book {1}
|
| /macro set {1}
|
|
|
The idea with this is to almost automate the process of using elemental siphon: you equip your ES when you go to this page, then just push the element of the day (or double weather), and you'll be dumped back to the hub with no pet, ready to summon a proper Avatar.
As mentioned before, you can run around with Light Spirit out to get Pro/Shell-V natively. This is the reason for the inclusion of the release command on this page: you can just poop out your Light Spirit, and then hit alt+0 twice and dismiss it when ready to actually do something.
Equipment
Template:THA:CSMNG-Equipment-New
Template:THA:CSMNG-Equipment1
Template:THA:CSMNG-Equipment2
Template:THA:CSMNG-Equipment3
Template:THA:CSMNG-Equipment4
| That's all y'all♥!
|

|
|
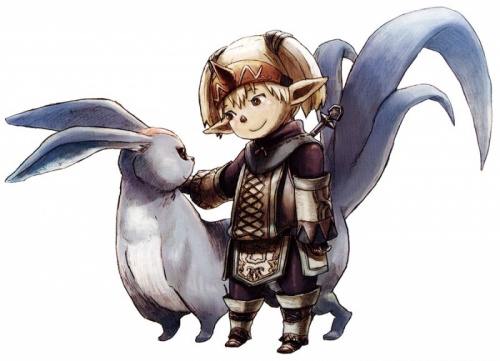
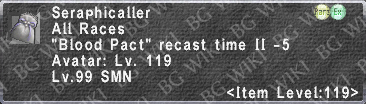
 - Offers the largest MP pool, and with the advent of Trust Magic, the refresh effects of the other two become less important. Also offers native Reraise, making for a quick recovery in case of death. Cure IV with the highest MND, direct access to -nas, and the highest natural Healing Magic Skill makes this an ideal support type subjob. However, remember that Trusts can take care of much of what any of these three subs do, and possibly do it better.
 - The main draw here now is Convert. Elemental Siphon+Convert+Myrkr+large natural Auto Refresh = nigh infinite MP. The ability to refresh yourself is also a good ability to have, though mostly for playing with other people as Trusts ensure that solo you will always have a RDM to refresh you... a convenience not always afforded in a group of real people. There's also the benefit of having access to Flurry, which should you find yourself with a COR, which should be often enough, they will love your gift of 15% ranged haste... possibly moreso than a melee's love of Garuda's Hastega II (30%).
 - This works best when you have a 119 staff to idle in, as most have both generic mage stats and Avatar specific ones. Which makes the B+ boost to magic skills to be more worthwhile than the olden days. The drawbacks here though are that everything really useful is hidden behind addendums (so there's a bit of very minor set-up involved), with mostly being relegated to T1 and a handful of T2 nukes and only Cure III (instead of RDM and WHM's C4 access). However, you also have access to both sets of Helix and Storm spells in their entirety.
 - You're only here for the Warps. And with the abundance of warp items... As well as the Home Point warp system... And the warp system with Survival Guides... You're not likely to ever be subbing BLM except in very rare occasions. Besides, you should try to have such foresight, and carry no less than 5 warp items on you at all times, like a sensible person.
 - Treasure Hunter. There are THF Trusts. Sure they only have TH1.... but if you REALLY need more TH... like desperately enough to /thf and wear enough TH+ gear to reach the cap of +4[3]... You might as well be ON THF instead of SMN... or, here's a wild idea, call up a THF friend and team up for whatever you are trying to get.
 - You'll only ever sub this for the Threnodies. And only in Abyssea for yellow procs... which is a much rarer occurance than it used to be. Especially with how often they release Empyrean armor slips in the Login Campaign.
 - There is one reason and one reason alone to /sam on SMN: Meditate for Aftermath Level 3. SMN is too squishy to readily survive on the frontlines, so the Store TP is wasted on it... and you'll only have Aftermath as an option if you commit and get Nirvana
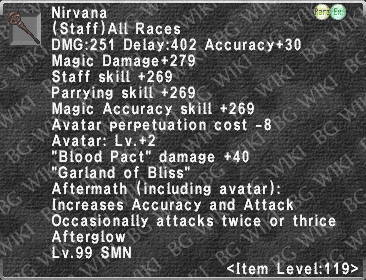 .
. - It's /nin. There's really nothing here but the same thing /nin offers all other jobs: Dual Wield (useless for SMN) and Utsusemi. /nin is the same regardless of your main job.
 - There' two reasons you will be subbing Corsair. And they're both: Corsair's Roll. Either you'll be Lv.10+ and you either don't have Qultada yet or you've just gotten tired of having to rely on Dedication effects to get him to use it... or you're in an Apex party grinding Job Points and no one wanted to come COR.
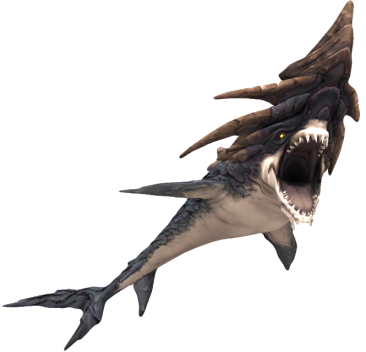
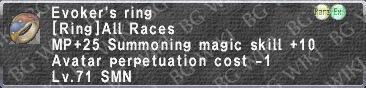 Furthermore, while it doesn't take long, should you not have completed the first chapter of Rhapsodies of Vana'diel, using the Home Points to warp that much over and over can get quite expensive. *Especially* for a SMN who is just starting out. And free is always better than any cost.
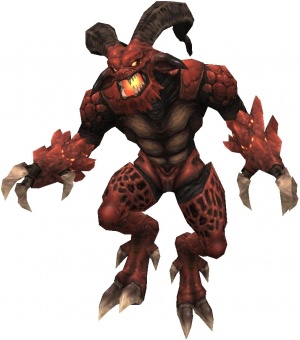
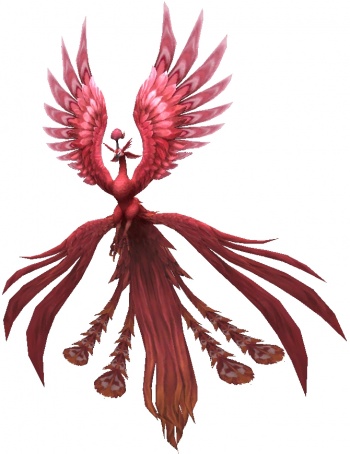
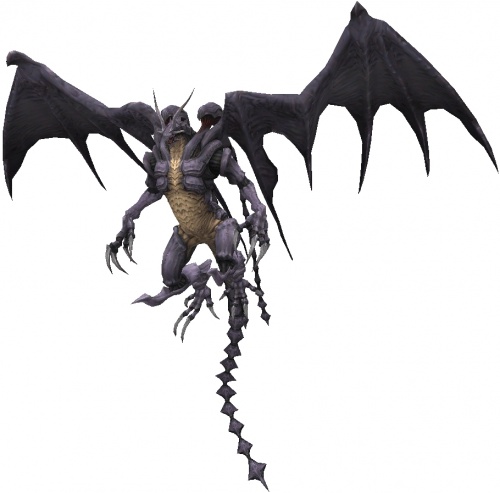


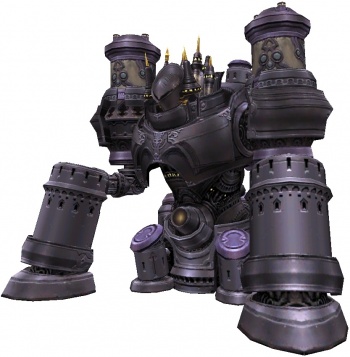

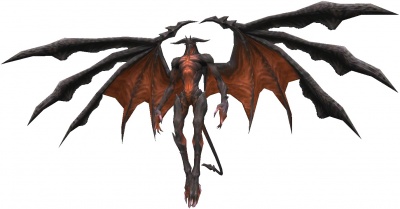
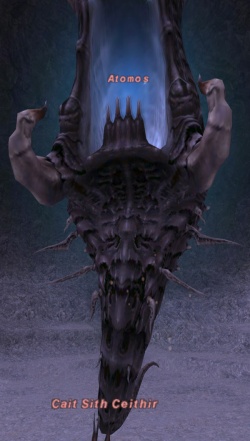
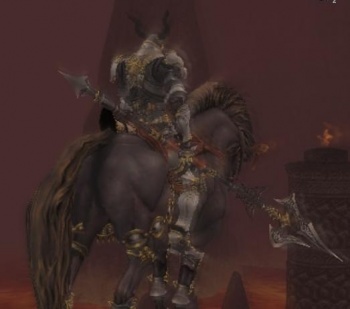


||
||
||
||
||
||
||


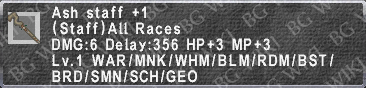


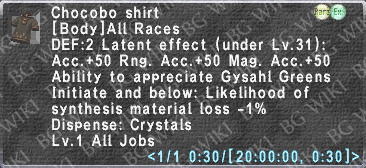 and Destrier Beret
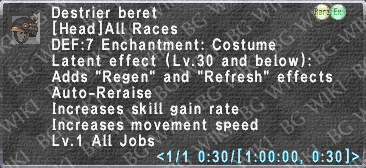 should be worn all the way to 30, where you can replace them with a head of your choice and your Lv.30 RSE body armor. Personally, I like a Trump Crown
 for 20+, as the HP boost is welcome while using multiple "converts HP to MP" items
 ... especially with how little base HP SMN has... and the HP and MP values increase every few levels! (Meaning you won't need to replace it until Lv.60!
 )
)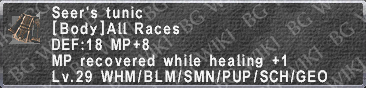 Attire
 Set
Set /+1.
/+1. And best of all, it's now even easier to get than your Lv.30 RSE Set! Remember all those sparks you got while leveling Lv.1~15? Well you likely have enough to get at least the body
 and Mitts
 once you hit Lv.20. They have the hidden effect of cutting Carbuncle's perpetuation cost down by half... making him almost (or even) completely free! However they come from a SMN NM (Crimson-toothed Pawberry) who is from a much higher level area than you are by now (60~75). The fight is exceedingly easy for a 99+ character, but it takes a bit to get to the pop item... and Carbuncle Mitts
 . You can use it all the way to Lv.51. Namely because: you won't be finding a staff with more MP for these levels. In fact, you won't find one with more MP until Lv. 40
 !
!


 is just so lackluster when compared to Pestle
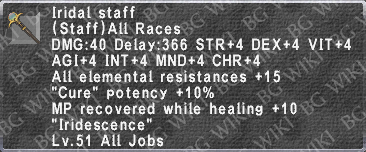 (the NQ) and Chatoyant Staff
 (the HQ)