The Voracious Resurgence | |
| Prime Weapons • Ultimate Weapons • Ultimate Augments • Abjurations iL119 • JSE Necks • Divergence Augments • Escutcheons | |
| Reforged Armor Artifact: +1 • iL109 • iL119/+2/+3 Relic: +1/+2 • iL109 • iL119/+2/+3 Empyrean: +1/+2 • iL109 • iL119/+2/+3 |
Guides • Crafting • Trusts • Apex Monsters |
Batcher's 99 WHM Gear Guide
|

|
|
Introductions
Hi! My name is Batcher! I play on Asura Server and you may have seen me around! I like to help people and this guide is meant to serve as a goal for career white mages who intend to master white mage and play at an optimal level while still being conscious of their gear. Tremendous credit must go to Cronagh's On Healing Hands Guide and the rest of the FFXI community. This guide, while similar, will take a different approach to gear. I want to make sure I emphasize this is not a budget-guide or a BiS guide. This is how I gear my WHM. Let's just jump into it.
Regarding Subjobs, this guide will assume you are utilizing either Scholar or Red Mage. I understand BLM/SMN/DNC all have different viabilities and uses, but for the sake of this guide we are going on the idea that you are playing a standard support role with an arsenal to ensure MP management and cure strength.
Note: Hover over augment icon to see which augments I recommend!
Gear Sets
Key Stats
|
Key Stats
|
Fast Cast, Recast, and Cure Casting Time Oh My!
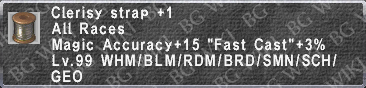
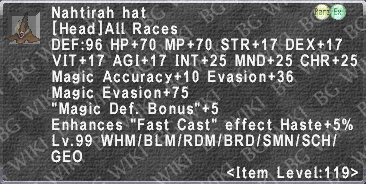
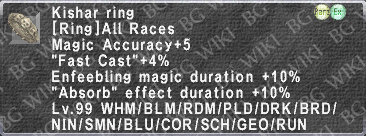
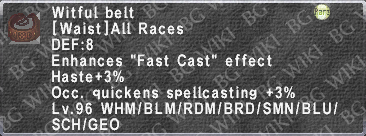
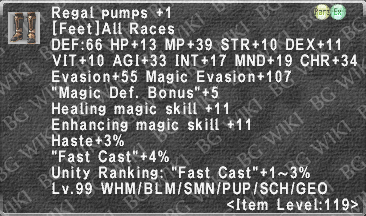
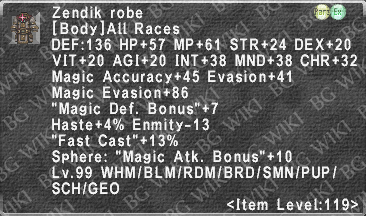
Typically, most guides will indicate that you want a FastCast set, a Recast set, a Quick Cast Set and a Cure Casting Time Set. One might think this is the only way to achieve the ideal results, but unfortunately the grand sacrifice it has to inventory space makes it unideal. As such, the following set is one that is able to accomplish everything you need in those sets while sacrificing very little. I included two sets depending on whether you use SCH or RDM as a subjob as each one has a different Fast Cast Cap (78% with Light Arts and 55% respectively). Note: Cure Casting Time and Fast Cast all fall under the umbrella of the 80% cap. It is a 1% = 1% ratio as such, since we are able to hit our caps via this gear, we do not need it. That being said, as you build this set you can substitute any pieces of gear to hit your 25% Haste, 80% FC, and Quick Magic caps. Reference: Cronagh on CCT and FC Ashitacast/Gearswap: I recommend you precast using this set for all magic, and midcast it for Reraise, Arise/Raise, Haste, and any other spell that you need to cast as soon as possible that doesn't depend on potency. I will discuss a niche set for extending the length of enhancements like Haste further below. |


Key Stats
|
Key Stats
|
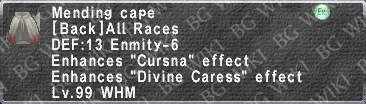
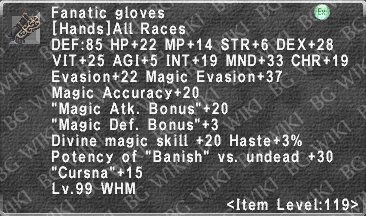
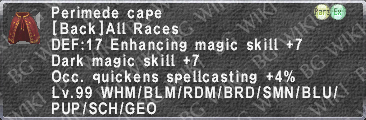
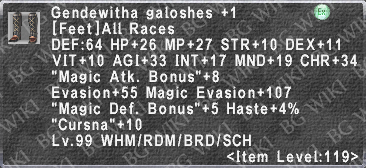
Curing: A Study Let's start with the basics. Cure Potency has a 50% cap. Cure Potency II likely has a cap, but its unreachable at this time. The cure potency job points do not add potency % but instead increase your "cure power" (that is used in the formula to determine how much you cure for). So you still need 50% cure potency in gear. Additionally, Healing Magic caps at 500. With a 424 skill cap, and 26 points via Job Points, you need only +50 Healing Magic via gear to reach the cap. This generally means that Cures have a ceiling they cannot pass, regardless of gear. That is, until you add SCH to the equation. With SCH as a subjob, you gain access to Aurorastorm. This spell creates a light weather around you and your party. This effect normally means that it has a -chance- to grant you a 10% cure potency ON TOP of the cap. The Hachirin-no-Obi ensures this effect is 100%. Chatoyant Staff adds an additional 10% cure potency that the obi now guarantees and the Twilight cape adds another 5%. That is a whopping 25% ON TOP of the existing 50% cap! This means you essentially became a healing god as you can heal strictly with Cure III's if you want and never lose mp. I included the /rdm set as well but I can't stress enough how superior the SCH set is. Ashitacast/Gearswap: Midcast this set into your cure spells AND your curaga's. Why? If you don't know, Curagas utilize the old cure formula which emphasized MND over Cure Potency. As such, stacking MND is more effective for Curaga. That being said, Looking strictly at the best possible gear available we are looking at a 18MND loss if we just stick to one gear set instead of two separate ones. This is ultimately negligible. I accept I am making a concession. Feel free to macro in Nuna Gorget +1 and Leviathan Ring +1 , I just don't think you need to spend the money or inventory space if you sub scholar. (Which you should!) |


|
Get Yagrush. Seriously Get a Yagrush. Any 119 content is inevitably going to be full of AoE debuffs and going 1 by 1 or relying on Divine Seal every few minutes is simply impractical. A Yagrush ensures that EVERY -NA spell and Erase is performed on all nearby targets. Every. Single. Time. Seriously... Get a Yagrush. The good news is that the 75 version is all you REALLY need, and every upgrade after is just icing on the cake. So get to doing Nyzul and dont forget to rank up with Naja! Ashitacast/Gearswap: Midcast this set into your -na and erase spells (Excluding Cursna, see the other section. Additionally, make sure you set your Precast/FastCast set to be the baseset of this set. Theres an argument to be made that it is better to stack ConserveMP over Recast/speed of cast, but I hold firm that having the ability to cast quickly in dangerous situations is the better move. |
|
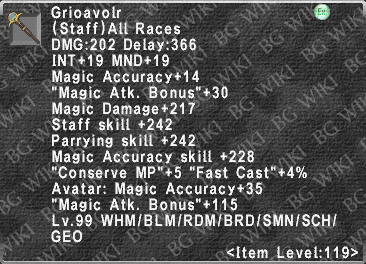
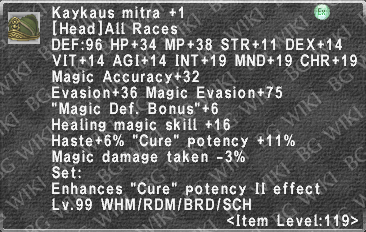
Cursna Set In 2016, SE Confirmed that Cursna has a 26% success rate with 500 Healing Magic Skill and subsequent points above 500 help the success rate. As such, we need to pump as much healing magic skill as possible. The only concession I am making here is using Kaykaus Mitra +1 instead of Vanya head with augments. We are talking 4 Healing Magic Skill for a piece of gear we ONLY use for this, so I think its a fair trade for inventory space. The BiS item here is Gambanteinn with its +100 Cursna. I honestly don't see any but the most senior of white mages taking the time to build this AND yagrush, so using Gada is just fine. However, if you have reached the pinnacle of your gear, then this is the final goal for you. Ashitacast/Gearswap: Midcast this set into your Cursna spellcast. |