The Voracious Resurgence | |
| Prime Weapons • Ultimate Weapons • Ultimate Augments • Abjurations iL119 • JSE Necks • Divergence Augments • Escutcheons | |
| Reforged Armor Artifact: +1 • iL109 • iL119/+2/+3/+4 Relic: +1/+2 • iL109 • iL119/+2/+3/+4 Empyrean: +1/+2 • iL109 • iL119/+2/+3 |
Guides • Crafting • Trusts • Apex Monsters |
Whence Blows the Wind
| Whence Blows the Wind | |
|---|---|
| Required Fame | Jeuno Fame Level: 1 |
| Level Restriction: | Level 56 |
| Starting NPC | Maat, Ru'Lude Gardens (H-5) |
| Pack | None |
| Title | Sky Breaker |
| Repeatable | No |
| Description | Your innate limits can be pushed further by collecting the crests of the Orcs, the Quadav, and the Yagudo. |
| Previous Quest | Next Quest |
|---|---|
| Atop the Highest Mountains | Riding on the Clouds |
| Rewards | |
| Raises level cap to 65. | |
Walkthrough
- Try to pair this with Nation Mission Magicite (4-1) as you will visit the same areas.
- If doing this solo, Rank 4 and at a minimum the flagging of 4-1 is REQUIRED as Aldo won't give you the Silver bell at a lower rank.
- Either you or a player assisting you must have the following Key Items for this quest:
 Crimson orb,
  Yagudo torch,
  Silver bell,
  Coruscant rosary, and
  Black matinee necklace from the mission Magicite.
- Speak to Maat on a level 56 job. He will ask you for three key items deep in the beastmen strongholds.
Zone Position Key Item Monastic Cavern (J-6) Orcish crest Qulun Dome (J-7) Quadav crest Castle Oztroja (H-6) Yagudo crest
- A ??? spot appears in each of these areas, and are close to True-Sight/Sound Notorious Monsters.
Orcish Crest
 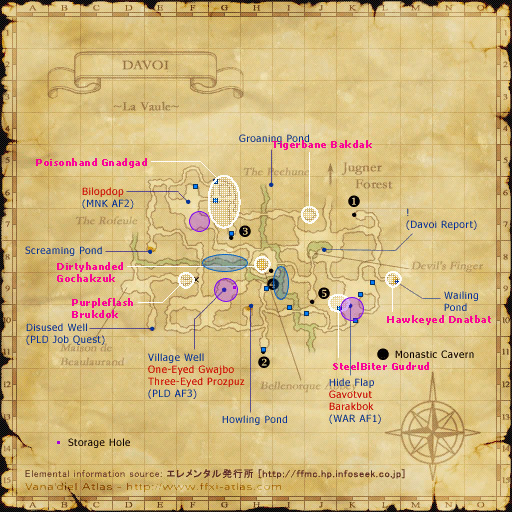
|
 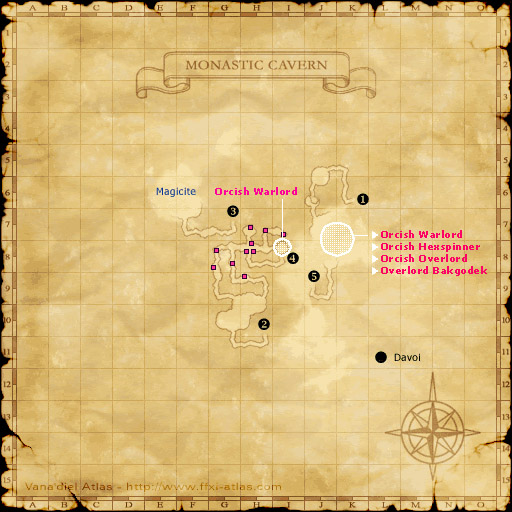
|
| Davoi Map | Monastic Caverns Map |
Note: Either you or a player assisting you must possess a ![]() Crimson orb from a mini-quest below.
Crimson orb from a mini-quest below.
- To obtain the
 Orcish crest, head to Davoi and enter the Monastic Cavern at (H-11).
 - Exit the Monastic Cavern at (I-8).
- Proceed to the (J-9) entrance to Monastic Cavern. You or a partner will need a
 Crimson orb from Sedal-Godjal to access it though.
- Once inside Monastic Cavern, click the ??? at (J-6) to get the Orcish Crest.
- Take care as orcs around this wall will aggro you after dropping invisible and interrupt the prompt to open the wall.
Obtaining the Crimson Orb
- After following the path mentioned above up to the J-9 entrance, speak to Sedal-Godjal in Davoi at (J-8) just north of the (J-9) Wall of Banishing.
- Proceed to and touch the Wall of Banishing to the south at (J-9), then return to him to get the
 White orb.
 - From there head to and touch the ponds at (H-10), (L-9), (E-8) and (H-6).
- After each pond, the orb will turn into a darker orb color:
 Pink orb >
  Red orb >
  Blood orb.
 - Touching the 4th will grant the
 Cursed orb, and you will have Curse inflicted on you. This can be removed through normal means like Holy Water or Cursna.
- After each pond, the orb will turn into a darker orb color:
- Return to Sedal-Godjal to get the final
 Crimson orb.
- After obtaining the
 Crimson orb, return to the Wall of Banishing you were previously at in Davoi, (J-9).
 - Once inside Monastic Cavern, to get to the ??? at (J-6), stick to the west wall to avoid true-sight Notorious Monsters.
- The Crest is in some weird cave-flower-looking stalks before the cliff. Do not fall down the cliff.
Quadav Crest
|
|
|
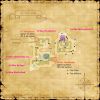
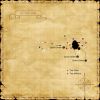
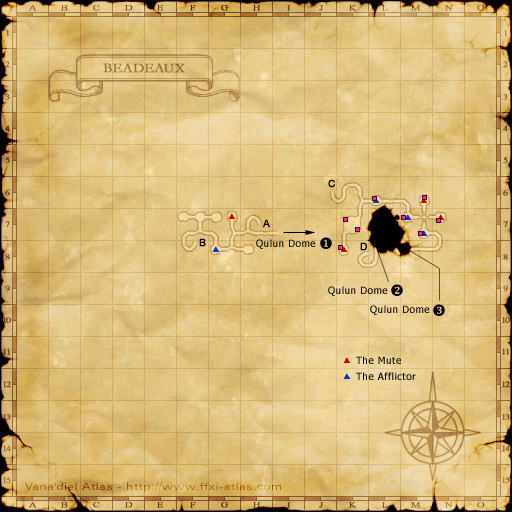
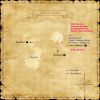
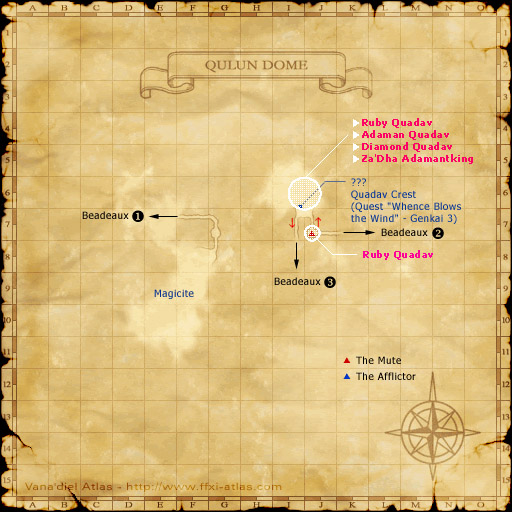
| Beadeaux Map 1 | Beadeaux Map 2 | Qulun Dome Map |
Note: Either you or a player assisting you must possess the ![]() Silver bell,
Silver bell, ![]() Coruscant rosary, and
Coruscant rosary, and ![]() Black matinee necklace from the mission Magicite before you may get this crest.
Black matinee necklace from the mission Magicite before you may get this crest.
Note: It is also recommended to bring some form of Sneak for this; Invisible is not needed. Silent Oils from the Curio Moogle are preferred, as you should use The Mute to silence yourself before running through Beadeaux. This prevents The Afflictor from cursing you which inflicts a super gravity effect on you.
- To obtain the
 Quadav crest, proceed to Beadeaux (K-6) and enter the tunnel.
- To the eastern half of the map, first go to the tunnel starting at (H-7) (marked "A") to go to map 2.
- Get muted by The Mute at (G-7) so you can pass by The Afflictor safely at (G-8) and others back on map 1. This will make you silenced for approximately 10 minutes, so have Silent Oil as needed to stay safely sneak'ed as mentioned above.
- Proceed to (F-8) (marked "B") to return to map 1.
- Go to the ramp to the second level at (E-10), and navigate to (I-9).
- Now make your way to K-6. You don't need to go through the trenches; you can drop from the second level to the first.
- Follow the path to (M-8) and enter Qulun Dome.
- You are almost there, proceed through the door to the right after zoning. This requires the key items mentioned above.
- One true-sound NM, Ruby Quadav, guards the first room. You should be fine to run past if it is on the far side of the room. Otherwise this NM is level 71-73 and will likely stomp you or take a long time with a party of trusts, so just zone instead.
- Once inside the main room, hug the south wall to avoid several other true-sound NMs to reach the ??? spot and obtain the crest. Do not drop off the ledge.
Yagudo Crest
|
|
|
|
|
|
|
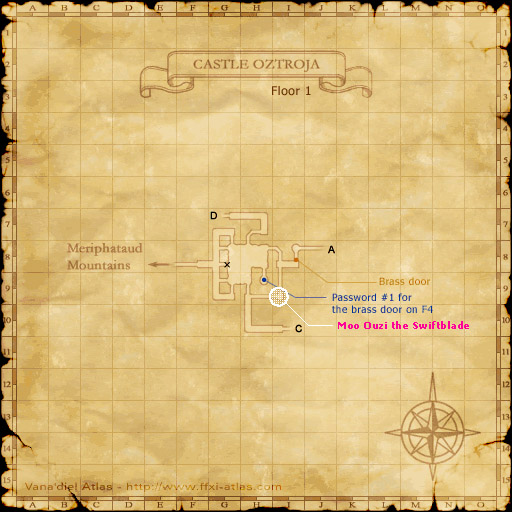
| Map 1 | Map 2 | Map 3 | Map 4 | Map 5 | Map 6 | Map 7 |
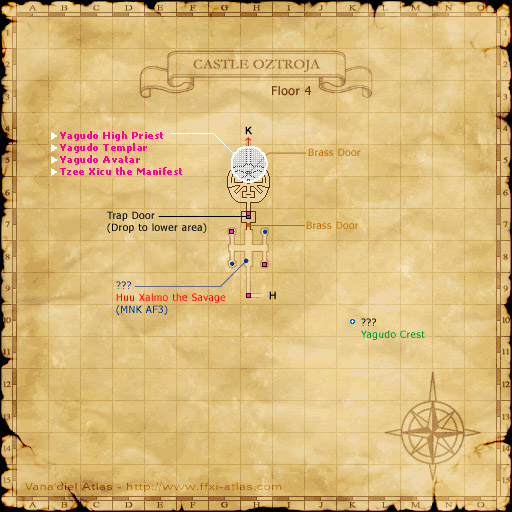
Note: The Yagudo Crest is located on the 4th floor of Castle Oztroja at H-6.
Note: Lower level players may want to bring and use a Reraise item such as an ![]() Instant Reraise.
Instant Reraise.
Note: Either you or a player assisting you must possess the ![]() Yagudo torch to progress.
Yagudo torch to progress.
- To obtain the
 Yagudo crest, find the 3 passwords throughout the zone and open the 3 password trap door on the fourth floor.
- The passwords reset when the game day changes so you may want to time your journey accordingly.
- On the climb you will find 3 of the passwords. You may guess any one of them from the list below.
- It may be considerably quicker to brute force the Brass Statue's passwords instead of attempting to gather all three passwords before the rollover of the next Vana'diel day.
Floor 1
- Password #1 is near the entrance in the room at (H-9).
- Proceed to the Brass Door at (I-8):
- Pull one of the levers and run back. There is a 50% chance you will trigger a trap door, but you may run away after hitting the handle and not fall.
- Simply use the other handle after the floor raises back up if need be otherwise proceed.
- Follow the stairs, at (J-8) you reach the next floor, Map 2.
Floor 2
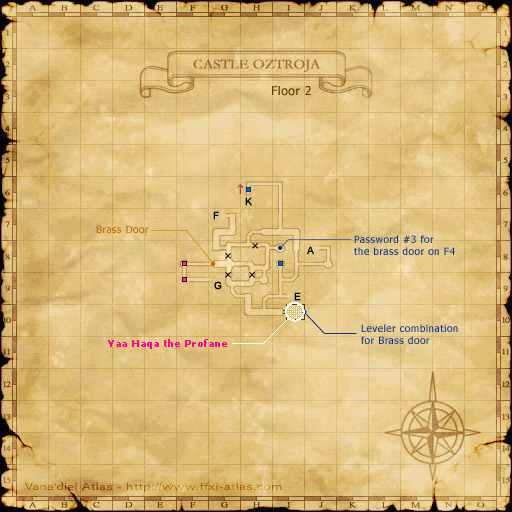
- To get the 2nd password, take a right at the first intersection on map 2 and run west to (G-7) to reach map 6.
- Head north to reach map 7 the password is at (H-9).
- Go back to the first intersection on map 2
- Head south to the fork in the path at (H-10) then make a left.
- There is a hidden door at the Eastern Wall at (I-10). Behind you will find the pattern of levers needed for opening the upcoming Brass Door on this floor.
- Follow the path to to the password #3 in the room at the north west corner of (I-8)
- Head to the Brass Door at (G-8)
- Play with the levers there in different combinations (you may have already seen the correct combination in (I-10)) until the door opens.
- After this door, monsters will now be more challenging to low level players and then dangerous by the fourth floor.
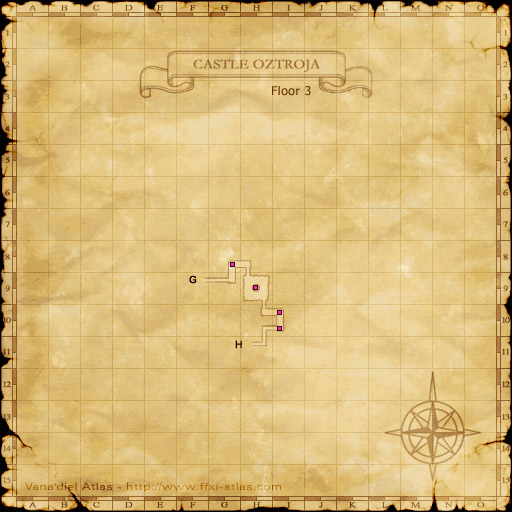
- Follow the path to (G-9) and on to the next floor, Map 3.
Floor 3
- Follow the one way path of this floor, up the stairs to (H-11), and on to the last floor.
- The leeches in the pool will aggro sound if you are only running with invisible for the Yagudos. Don't run through the pool.
Floor 4
- Once you reach this floor you must open the Brass Door at (H-7) by selecting and lighting one of the torches in the corner rooms at (G-7), (G-8), (H-7), or (H-8).
- You must input the 3 passwords you collected into the pedestal (Brass Statue). If you want to try guessing the passwords then you may guess from the below list.
- If using Trusts: it's recommended you release all of them before attempting the passwords. Due to physical positioning, it's possible your Trusts will not fall through the floor, resulting in you being alone and unable to release them.
- In such a situation, you'll need to log out and back in, or type
/returntrust all
- In such a situation, you'll need to log out and back in, or type
- The 3 passwords can be entered in any order.
- You have to use Proper Capitalization and re-enter the menu from the beginning each time you fail at guessing.
- When guessing, the system will tell you immediately when you enter an incorrect password.
- If using Trusts: it's recommended you release all of them before attempting the passwords. Due to physical positioning, it's possible your Trusts will not fall through the floor, resulting in you being alone and unable to release them.
Possible passwords: Buxu Deggi Duzu Gadu Haqa 
Mjuu Mong Ouzi Puqu Xicu Domi Xalmo Ovzi Misu Duxo 
Zhuu Quu Huja
- When you get the password right you will drop down and see a courtyard to the North, the ??? spot is on the first platform.
- Two true-sight NMs named Yagudo High Priest are in this courtyard. The relevant one for right now usually stands almost exactly on top of the ??? spot.
- Either be patient and wait for it to move, or deliberately aggro it and have a Trust tank hold it while you click the ??? and Warp afterwards.