The Voracious Resurgence | |
| Prime Weapons • Ultimate Weapons • Ultimate Augments • Abjurations iL119 • JSE Necks • Divergence Augments • Escutcheons | |
| Reforged Armor Artifact: +1 • iL109 • iL119/+2/+3 Relic: +1/+2 • iL109 • iL119/+2/+3 Empyrean: +1/+2 • iL109 • iL119/+2/+3 |
Guides • Crafting • Trusts • Apex Monsters |
Category:Escutcheons: Difference between revisions
m (→Spirit) |
|||
| (39 intermediate revisions by 16 users not shown) | |||
| Line 63: | Line 63: | ||
<span id="Background"></span> |
<span id="Background"></span> |
||
===Escutcheon Background=== |
===Escutcheon Background=== |
||
Originally teased in the [https://www.youtube.com/watch?v=1PfOq5vix78&feature=player_detailpage#t=4660.7 November 2016 Freshly Picked Vana'diel livestream] and introduced in the [http://forum.square-enix.com/ffxi/threads/52095-Feb.-10-2017-%28JST%29-Version-Update?p=591912&viewfull=1#post591912 February 2017 Version Update], '''Escutcheons''' are classified as the<br> "Ultimate Synthesis Equipment" by the developers. |
|||
The Escutcheons were meant to replace the [[Kupo Shield]], while at the same time offering unique bonuses. While the Kupo Shield has one extra level of skill, as well as offers a bonus to every craft, Escutcheons offer a higher rate of High Quality synthesis results while at the same time offering a bonus to crafting speed. |
The Escutcheons were meant to replace the [[Kupo Shield]], while at the same time offering unique bonuses. While the Kupo Shield has one extra level of skill, as well as offers a<br> bonus to every craft, Escutcheons offer a higher rate of High Quality synthesis results while at the same time offering a bonus to crafting speed. |
||
There are four phases in which one must progress in order to fully complete a shield. Each phase offers a unique challenge which consist of countless hours spent crafting and gathering various materials to finally synthesize the shield each time from its component parts. The quest line is similar across all eight crafts, but obviously have their own unique aspects due to varying recipes. This being said, a few steps in some crafts are more tedious than other similar steps in other crafts. |
There are four phases in which one must progress in order to fully complete a shield. Each phase offers a unique challenge which consist of countless hours spent crafting and<br> gathering various materials to finally synthesize the shield each time from its component parts. The quest line is similar across all eight crafts, but obviously have their own unique<br> aspects due to varying recipes. This being said, a few steps in some crafts are more tedious than other similar steps in other crafts. |
||
The basic gist of completing a crafting shield is to do the following in all four phases: |
The basic gist of completing a crafting shield is to do the following in all four phases: |
||
| Line 78: | Line 78: | ||
#Synthesize the current phase's shield. |
#Synthesize the current phase's shield. |
||
You will be synthing tons of items for a long time. This is the crafting equivalent of an [[Ultimate Weapon]]. Be prepared to dedicate blood, sweat and tears in order to complete your shield. If you have hopes of completing further shields on alternate characters, you will have a large endeavor in front of you. |
You will be synthing tons of items for a long time. This is the crafting equivalent of an [[Ultimate Weapon]]. Be prepared to dedicate blood, sweat and tears in order to complete your <br>shield. If you have hopes of completing further shields on alternate characters, you will have a large endeavor in front of you. |
||
As an additional note, there is no formal quest that appears in your log for the Escutcheon process. There are, however, steps that involve [[Records of Eminence]] objectives that do appear in your RoE menus. |
As an additional note, there is no formal quest that appears in your log for the Escutcheon process. There are, however, steps that involve [[Records of Eminence]] objectives that <br>do appear in your RoE menus. |
||
<span id=Prerequisites></span> |
<span id=Prerequisites></span> |
||
| Line 147: | Line 147: | ||
|} |
|} |
||
The next step is to trade the shield you received to your guild master. They will mention the recipe required to complete phase one and to synthesize your +1 skill shield. This will also unlock the [[Crafter Points]] system for you to begin accumulating points. |
The next step is to trade the shield you received to your guild master. They will mention the recipe required to complete phase one and to synthesize your +1 skill shield. This <br>will also unlock the [[Crafter Points]] system for you to begin accumulating points. |
||
| Line 285: | Line 285: | ||
If you started the Escutcheon quest but wish to level a different craft, you must abandon the quest line. This prevents a player from having more than one shield. |
If you started the Escutcheon quest but wish to level a different craft, you must abandon the quest line. This prevents a player from having more than one shield. |
||
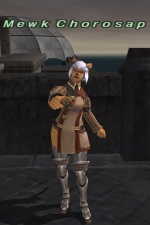
Speak with [[Mewk Chorosap]] and tell her you wish to give up. She will ask three times if you truly wish to give up. After confirming, she will tell you to throw away your shield. Until you do these steps, you are not given the option to renounce your |
Speak with [[Mewk Chorosap]] and tell her you wish to give up. She will ask three times if you truly wish to give up. After confirming, she will tell you to throw away your shield. <br>Until you do these steps, you are not given the option to renounce your Artisan rank at your current craft. Furthermore, you will only be able to level your new craft to level 100<br> until these steps are taken. |
||
|} |
|} |
||
| Line 326: | Line 326: | ||
*You will receive the first required ingredient: Craftsman's Crystal: <Craft>. |
*You will receive the first required ingredient: Craftsman's Crystal: <Craft>. |
||
**Your craftsmanship skill will also decrease on your shield by one-third (33.33%) to 66.66% |
**Your craftsmanship skill will also decrease on your shield by one-third (33.33%) to 66.66% |
||
***''If you fail |
***''If you fail to craft the shield and lose the Craftsman: Crystal <Craft>, then you will need to relevel it back up to 100% to get another crystal from the Guild NPC.'' |
||
|- |
|- |
||
| align=center | |
| align=center | |
||
| Line 576: | Line 576: | ||
To obtain the crafting specific '''Titanium Frame''', you need to complete '''4 [[:Category:Records_of_Eminence#Crafting:_General|Records of Eminence → Crafting]] Objectives''': |
To obtain the crafting specific '''Titanium Frame''', you need to complete '''4 [[:Category:Records_of_Eminence#Crafting:_General|Records of Eminence → Crafting]] Objectives''': |
||
:''To unlock these objectives, trade the Ecu to your guild master '''at any time''' and they will be able to be set.'' |
:''To unlock these objectives, trade the Ecu to your guild master '''at any time''' and they will be able to be set.'' |
||
::'''The Objectives are to <u>synthesize</u> the item the required number of times.''' |
::'''The Objectives are to <u>synthesize</u> the item the required number of times.''' Make sure to have the objectives set '''<i>before you start crafting</i>'''. |
||
:<span style="color:red;">'''Completing the first three objectives rewards 5,000 [[Guild Points]] each, for a total of 15,000 GP.'''</span> |
:<span style="color:red;">'''Completing the first three objectives rewards 5,000 [[Guild Points]] each, for a total of 15,000 GP.'''</span> |
||
{| class="default1 C-Highlight-Blue" style="max-width:1400px; text-align:center;" align=center |
{| class="default1 C-Highlight-Blue" style="max-width:1400px; text-align:center;" align=center |
||
| Line 671: | Line 671: | ||
|} |
|} |
||
|} |
|} |
||
:<big>†</big> |
:<big>†</big> You must synthesize the '''NQ''' Item with the appropriate Records of Eminence objective set.<br /> |
||
::<big>‡</big> |
::<big>‡</big> You must synthesize the '''HQ''' Item with the appropriate Records of Eminence objective set. |
||
<span id=PhaseTwoComplete></span> |
<span id=PhaseTwoComplete></span> |
||
=== Phase Two Completion === |
=== Phase Two Completion === |
||
The list of completed second phase shields are shown below. View their page for the specific synthesis recipe. |
The list of completed second phase shields are shown below. View their page for the specific synthesis recipe. |
||
| Line 740: | Line 741: | ||
|- |
|- |
||
| |
| |
||
To proceed to Phase Three you must zone after completing Phase Two, or [[Mewk Chorosap]] will say she needs more time. |
|||
Speak to [[Mewk_Chorosap|Mewk Chorosap]] in Port-Jeuno with your completed phase 2 Scutum equipped, she will ask to borrow the shield. Unequip your Scutum and trade it to her.<br /> |
|||
Here she will describe the process and the materials needed for the next synthesis to complete phase 3 and direct you to your guild master. |
Here she will describe the process and the materials needed for the next synthesis to complete phase 3 and direct you to your guild master. |
||
<span id=PhaseThreeCraftsmanship></span> |
<span id=PhaseThreeCraftsmanship></span> |
||
=== Increasing Craftsmanship === |
=== Increasing Craftsmanship === |
||
Unlike previous phases, repeating the same synth over and over is not the best way to raise craftsmanship. You should concentrate on completing the Craftsmanship Upgrade objectives on your shield as much as possible.<br /> |
you will need to raise your craftsmanship from 0-100% again. Unlike previous phases, repeating the same synth over and over is not the best way to raise craftsmanship. You should concentrate on completing the Craftsmanship Upgrade objectives on your shield as much as possible, Although you will still receive craftsmanship with no conditions met 0.15% for HQ1 0.20% for HQ2 0.25% for HQ3 and with conditions met 0.10% for NQ 0.30% for HQ1 0.40% for HQ2 and 0.50% for HQ3 so repeating the same cheap synth is still an option.<br /> |
||
Performing a synthesis that does not match up with your objective (even if there is none) may cause you to gain a level of "Synthesis Success Down" added to your shield. This can happen regardless if your synthesis is an NQ, HQ or a break result. This amount |
Performing a synthesis that does not match up with your objective (even if there is none) may cause you to gain a level of "Synthesis Success Down" added to your shield. This can happen regardless if your synthesis is an NQ, HQ or a break result. This amount will cap at -30%. |
||
The only way to get out of this hole and lower the "Synthesis Success Down" amount is to follow the bonus objective on the shield. This will remove one "Synthesis Success Down" level effect for each successful bonus completion.<br /> The bonuses do not always change every completion, but are highly likely to. The bonuses have been observed to remain the same for 10 or more synths. |
The only way to get out of this hole and lower the "Synthesis Success Down" amount is to follow the bonus objective on the shield. This will remove one "Synthesis Success Down" level effect for each successful bonus completion.<br /> The bonuses do not always change every completion, but are highly likely to. The bonuses have been observed to remain the same for 10 or more synths. |
||
| Line 755: | Line 757: | ||
<span id=PhaseThreeCP></span> |
<span id=PhaseThreeCP></span> |
||
===Crafter Points=== |
===Crafter Points=== |
||
These three crafter point items will cost a total of '''28,000''' [[Crafter Points]]. |
For Phase 3 you will require two "Platinum Screw: Craft" (10,000 Crafter Points each) and one "Sequoia: Craft" (8,000 Crafter Points) to create your shield.<br>These three crafter point items will cost a total of '''28,000''' [[Crafter Points]]. |
||
|- |
|- |
||
| align=center | |
| align="center" | |
||
{| class=default1 style="max-width:400px" align=center |
{| class=default1 style="max-width:400px" align=center |
||
! BGCOLOR="#cee0f2" width="60%" | Crafter Point Items |
! BGCOLOR="#cee0f2" width="60%" | Crafter Point Items |
||
| Line 790: | Line 793: | ||
<span id=PhaseThreeCR></span> |
<span id=PhaseThreeCR></span> |
||
==== Customer Requests ==== |
==== Customer Requests ==== |
||
New to this phase are delivery orders requested by various NPCs around Vana'diel, some may be a simple turn in X amount of items to this NPC while others require you to craft the items <u>within range of the NPC</u>. The guild master will tell you if the contract |
New to this phase are delivery orders requested by various NPCs around Vana'diel, some may be a simple turn in X amount of items to this NPC while others require you to craft the items <u>within range of the NPC</u>. The guild master will tell you if the contract *DOES NOT* need to be crafting in range of the NPC immediately following the item request and NPC. '''If no mention about crafting near the customer is made then the items need to be crafted at the NPC'''. |
||
*A dialog will be displayed in your chat log when you are in range for the traded items to count towards completion. |
*A dialog will be displayed in your chat log when you are in range for the traded items to count towards completion. |
||
**Items crafted outside of this range, or purchased separately, will not count. '''Be careful when progressing!''' |
**Items crafted outside of this range, or purchased separately, will not count. '''Be careful when progressing!''' |
||
**Trade items to NPC recipient '''''before''''' you leave the crafting area! |
**Trade items to NPC recipient '''''before''''' you leave the crafting area! |
||
***Leaving area, returning into it, and trading them the crafted item will not count, even if you ''had'' crafted it in the area previously. |
***Leaving area, returning into it, and trading them the crafted item will not count, even if you ''had'' crafted it in the area previously. |
||
****I believe this has changed as I was able to successfully trade the items after leaving and coming back. |
|||
**HQ items will not count. |
**'''HQ items will not count'''. |
||
The items are divided into 4 categories per craft. To complete your 4 requests, you will have to do one synth from each category.<br /> |
The items are divided into 4 categories per craft. To complete your 4 requests, you will have to do one synth from each category.<br /> |
||
Some of the items may have materials that have rare or difficult to acquire materials. In this case, talk to the guild master and tell him that you've "had enough" and the contract will be cancelled.<br /> |
Some of the items may have materials that have rare or difficult to acquire materials. In this case, talk to the guild master and tell him that you've "had enough" and the contract will be cancelled.<br /> |
||
Speak with the guild master again |
Speak with the guild master again after zoning and a game day has passed and a new recipe from one of the categories you have failed to complete will be chosen at random.<br /> |
||
Whenever you complete a recipe, all 3 recipes in that category are removed from the roulette. |
Whenever you complete a recipe, all 3 recipes in that category are removed from the roulette. |
||
| Line 1,095: | Line 1,099: | ||
|- |
|- |
||
| |
| |
||
You must zone first if you just completed phase three. |
|||
Speak to [[Mewk Chorosap]] in [[Port Jeuno]] to begin. |
|||
Afterwards, trade your shield to your Guild Master |
|||
Trade your shield to [[Mewk Chorosap]], she will explain about the the final crafter points items and raising the craftsmanship. |
|||
Afterwards, trade your shield to your Guild Master, then trade it to [[Mewk Chorosap]], zone in and out, and trade it to [[Mewk Chorosap]] again. |
|||
<span id=PhaseFourCraftsmanship></span> |
<span id=PhaseFourCraftsmanship></span> |
||
| Line 1,176: | Line 1,184: | ||
==== Spirit ==== |
==== Spirit ==== |
||
You will have to imbue your Craftsman's Crystal with some amount of Spirit. You are notified when you increase Spirit, |
You will have to imbue your Craftsman's Crystal with some amount of Spirit. You are notified when you increase Spirit, by how much. |
||
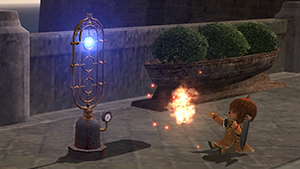
As of the June 2018 Version Update, your total Spirit is now visible in the main menu of the Synthesis Focuser II. You are also told amount imbued after completing any Synth or Synthchain, followed by your total running amount. |
|||
[[Image:EscutcheonFocuser.jpg|350px|right|link=]] |
[[Image:EscutcheonFocuser.jpg|350px|right|link=]] |
||
Mewk may like to <span class="has-image-popup">''horse''<span class="image-popup" style="z-index: 10;width: ??? px; padding: 1px; background-color: #; border: 1px solid #DDDDDD; text-align: center;">[[File:Spirit.jpg|400px|link=]]</span></span> around, but obtaining Spirit is no joke.<br /> |
Mewk may like to <span class="has-image-popup">''horse''<span class="image-popup" style="z-index: 10;width: ??? px; padding: 1px; background-color: #; border: 1px solid #DDDDDD; text-align: center;">[[File:Spirit.jpg|400px|link=]]</span></span> around, but obtaining Spirit is no joke.<br /> |
||
{{color|red|You will need to build your Spirit up to 100,000 to obtain your [[File:A. Crystal- Alch. icon.png|23px|link=]] Apex Crystal}}. There are 64 pixels in the Transmutation bar, and each pixel is worth 1,562 spirit. [ |
{{color|red|You will need to build your Spirit up to 100,000 to obtain your [[File:A. Crystal- Alch. icon.png|23px|link=]] Apex Crystal}}. There are 64 pixels in the Transmutation bar, and each pixel is worth 1,562 spirit. [[Category_talk:Escutcheons#Completing_Stage_4_and_Infusing_Craftsman_Crystal_with_Spirit|See the talk page for further information.]] |
||
Spirit is obtained from Synthesis Chains. Synthesis Chains are similar to [[skillchain]]s where each Synthesis Chain corresponds to a [[skillchain]] property |
Spirit is obtained from Synthesis Chains. Synthesis Chains are similar to [[skillchain]]s where each Synthesis Chain corresponds to a [[skillchain]] property |
||
| Line 1,190: | Line 1,200: | ||
You will need 3 ingredients for ''each'' synthesis: a crystal, a catalyst, and a Synthesis Chain Sphere. |
You will need 3 ingredients for ''each'' synthesis: a crystal, a catalyst, and a Synthesis Chain Sphere. |
||
* '''Crystal''': Ordinary crystals, trade to the Focuser to add to |
* '''Crystal''': Ordinary crystals, trade to the Focuser to add to its inventory. |
||
** |
**Like with the [[Ephemeral Moogle]]s, you may mix and match crystal type. |
||
*'''Catalyst''': Sold by [[Mewk Chorosap]]. There are 3 tiers of catalysts, with price in gil increasing per tier. The tier of catalyst must match up with the level of the Synthesis Chain Sphere for the synthesis to work. |
*'''Catalyst''': Sold by [[Mewk Chorosap]]. There are 3 tiers of catalysts, with price in gil increasing per tier. The tier of catalyst must match up with the level of the Synthesis Chain Sphere for the synthesis to work. |
||
| Line 1,197: | Line 1,207: | ||
**For example, if using a Distortion (level 2 chain) sphere, you must use a tier 2 catalyst. |
**For example, if using a Distortion (level 2 chain) sphere, you must use a tier 2 catalyst. |
||
**When you buy the catalyst from Mewk, she places them directly in the Focuser for you; they never appear in your inventory. |
**When you buy the catalyst from Mewk, she places them directly in the Focuser for you; they never appear in your inventory. |
||
::{| class=default1 style="max-width:400px |
::{| class=default1 style="max-width:400px; text-align: center;" |
||
! |
! style="width: 60%;" | Catalyst Item |
||
! |
! style="width: 40%;" | [[File:Counterfeit Gil icon.png|25px|link=]] Cost |
||
|- |
|- |
||
|'''MC-I-SR01''' |
|||
| 300 Gil |
|||
|- |
|- |
||
|'''MC-I-SR02''' |
|||
| 8,000 Gil |
|||
|- |
|- |
||
|'''MC-I-SR03''' |
|||
| 40,000 Gil |
|||
|} |
|} |
||
| Line 1,220: | Line 1,230: | ||
An NQ/HQ1 result will produce a sphere corresponding to a level 1 skillchain, an HQ2 will result in a sphere corresponding to a level 2 skillchain of that same element, and an HQ3 will result in a sphere for Darkness or Light. |
An NQ/HQ1 result will produce a sphere corresponding to a level 1 skillchain, an HQ2 will result in a sphere corresponding to a level 2 skillchain of that same element, and an HQ3 will result in a sphere for Darkness or Light. |
||
:<span style="color:red;">'''Note: ''The following items in the table below are not recipes, but merely a list of individual items you may use to create spheres.'''''</span> |
|||
<span id=PhaseFourSR></span> |
<span id=PhaseFourSR></span> |
||
| Line 1,238: | Line 1,249: | ||
| bgcolor="#FFFFFF" style="border: 1px solid #C9CDE0;" valign="top" | [[File:Bomb Coal icon.png|23px|link=]] [[Bomb Coal]] <font color="#000000">•</font> [[File:Ancient Salt icon.png|23px|link=]] [[Ancient Salt]] |
| bgcolor="#FFFFFF" style="border: 1px solid #C9CDE0;" valign="top" | [[File:Bomb Coal icon.png|23px|link=]] [[Bomb Coal]] <font color="#000000">•</font> [[File:Ancient Salt icon.png|23px|link=]] [[Ancient Salt]] |
||
| bgcolor="#FFFFFF" style="border: 1px solid #C9CDE0;" | [[File:Fetich Arms icon.png|23px|link=]] [[Fetich Arms]] <br />[[File:Rusty_Medal_icon.png |23px|link=]] [[Rusty Medal]] |
| bgcolor="#FFFFFF" style="border: 1px solid #C9CDE0;" | [[File:Fetich Arms icon.png|23px|link=]] [[Fetich Arms]] <br />[[File:Rusty_Medal_icon.png |23px|link=]] [[Rusty Medal]] |
||
| bgcolor="#FFFFFF" style="border: 1px solid #C9CDE0;" valign="top" | [[File:Fire |
| bgcolor="#FFFFFF" style="border: 1px solid #C9CDE0;" valign="top" | [[File:Fire Crest Card icon.png|23px|link=]] [[Fire Crest Card]] |
||
| bgcolor="#FFFFFF" style="border: 1px solid #C9CDE0;" | [[Image:Lightning Crystal icon.png|25px|link=Lightning Crystal|Lightning Crystal]] |
| bgcolor="#FFFFFF" style="border: 1px solid #C9CDE0;" | [[Image:Lightning Crystal icon.png|25px|link=Lightning Crystal|Lightning Crystal]] |
||
| bgcolor="#FFDDDD" style="border: 1px solid #C9CDE0;" | [[File:Lique. Sphere icon.png|25px|link=]] [[Liquefaction Sphere|Liquefaction]] |
| bgcolor="#FFDDDD" style="border: 1px solid #C9CDE0;" | [[File:Lique. Sphere icon.png|25px|link=]] [[Liquefaction Sphere|Liquefaction]] |
||
| Line 1,246: | Line 1,257: | ||
| bgcolor="#FFFFFF" style="border: 1px solid #C9CDE0;" | [[File:Lucky Egg icon.png|23px|link=]] [[Lucky Egg]] <font color="#000000">•</font> [[File:Carbuncle's Ruby icon.png|23px|link=]] [[Carbuncle's Ruby]] <br /> [[File:White Memosphere icon.png|23px|link=]] [[White Memosphere|White Memosphere]] |
| bgcolor="#FFFFFF" style="border: 1px solid #C9CDE0;" | [[File:Lucky Egg icon.png|23px|link=]] [[Lucky Egg]] <font color="#000000">•</font> [[File:Carbuncle's Ruby icon.png|23px|link=]] [[Carbuncle's Ruby]] <br /> [[File:White Memosphere icon.png|23px|link=]] [[White Memosphere|White Memosphere]] |
||
| bgcolor="#FFFFFF" style="border: 1px solid #C9CDE0;" valign="top" | [[File:Bruised Starfruit icon.png|23px|link=]] [[Bruised Starfruit]] |
| bgcolor="#FFFFFF" style="border: 1px solid #C9CDE0;" valign="top" | [[File:Bruised Starfruit icon.png|23px|link=]] [[Bruised Starfruit]] |
||
| bgcolor="#FFFFFF" style="border: 1px solid #C9CDE0;" valign="top" | [[File:Light |
| bgcolor="#FFFFFF" style="border: 1px solid #C9CDE0;" valign="top" | [[File:Light Crest Card icon.png|23px|link=]] [[Light Crest Card]] |
||
| bgcolor="#FFFFFF" style="border: 1px solid #C9CDE0;" | [[Image:Wind Crystal icon.png|25px|link=Wind Crystal|Wind Crystal]] |
| bgcolor="#FFFFFF" style="border: 1px solid #C9CDE0;" | [[Image:Wind Crystal icon.png|25px|link=Wind Crystal|Wind Crystal]] |
||
| bgcolor="#F6F6F6" style="border: 1px solid #C9CDE0;" | [[File:Trans. Sphere icon.png|25px|link=]] [[Transfixion Sphere|Transfixion]] |
| bgcolor="#F6F6F6" style="border: 1px solid #C9CDE0;" | [[File:Trans. Sphere icon.png|25px|link=]] [[Transfixion Sphere|Transfixion]] |
||
| Line 1,259: | Line 1,270: | ||
| bgcolor="#FFFFFF" style="border: 1px solid #C9CDE0;" | [[File:Soiled Letter icon.png|23px|link=]] [[Soiled Letter]] <font color="#000000">•</font> [[File:Beryl Memosphere icon.png|23px|link=]] [[Beryl Memosphere]] |
| bgcolor="#FFFFFF" style="border: 1px solid #C9CDE0;" | [[File:Soiled Letter icon.png|23px|link=]] [[Soiled Letter]] <font color="#000000">•</font> [[File:Beryl Memosphere icon.png|23px|link=]] [[Beryl Memosphere]] |
||
| bgcolor="#FFFFFF" style="border: 1px solid #C9CDE0;" | |
| bgcolor="#FFFFFF" style="border: 1px solid #C9CDE0;" | |
||
| bgcolor="#FFFFFF" style="border: 1px solid #C9CDE0;" | [[File:Wind |
| bgcolor="#FFFFFF" style="border: 1px solid #C9CDE0;" | [[File:Wind Crest Card icon.png|23px|link=]] [[Wind Crest Card]] |
||
| bgcolor="#FFFFFF" style="border: 1px solid #C9CDE0;" | [[Image:Wind Crystal icon.png|25px|link=Wind Crystal|Wind Crystal]] |
| bgcolor="#FFFFFF" style="border: 1px solid #C9CDE0;" | [[Image:Wind Crystal icon.png|25px|link=Wind Crystal|Wind Crystal]] |
||
|- |
|- |
||
| Line 1,270: | Line 1,281: | ||
| bgcolor="#FFFFFF" style="border: 1px solid #C9CDE0;" | [[File:Ancient Papyrus icon.png|23px|link=]] [[Ancient Papyrus]] <font color="#000000">•</font> [[File:Star_Spinel_icon.png |23px|link=]] [[Star Spinel]] |
| bgcolor="#FFFFFF" style="border: 1px solid #C9CDE0;" | [[File:Ancient Papyrus icon.png|23px|link=]] [[Ancient Papyrus]] <font color="#000000">•</font> [[File:Star_Spinel_icon.png |23px|link=]] [[Star Spinel]] |
||
| bgcolor="#FFFFFF" style="border: 1px solid #C9CDE0;" | [[File:Test_Answers_icon.png |23px|link=]] [[Test Answers]] |
| bgcolor="#FFFFFF" style="border: 1px solid #C9CDE0;" | [[File:Test_Answers_icon.png |23px|link=]] [[Test Answers]] |
||
| bgcolor="#FFFFFF" style="border: 1px solid #C9CDE0;" | [[File:Lightning |
| bgcolor="#FFFFFF" style="border: 1px solid #C9CDE0;" | [[File:Lightning Crest Card icon.png|23px|link=]] [[Lightning Crest Card]] |
||
| bgcolor="#FFFFFF" style="border: 1px solid #C9CDE0;" | [[Image:Wind Crystal icon.png|25px|link=Wind Crystal|Wind Crystal]] |
| bgcolor="#FFFFFF" style="border: 1px solid #C9CDE0;" | [[Image:Wind Crystal icon.png|25px|link=Wind Crystal|Wind Crystal]] |
||
|- |
|- |
||
| bgcolor="#FFFFFF" style="border: 1px solid #C9CDE0;" | [[File:Rusty Key icon.png|23px|link=]] [[Rusty Key]] <font color="#000000">•</font> [[File:Giant Fish Bones icon.png|23px|link=]] [[Giant Fish Bones]] <br />[[File:Exoray Mold icon.png|23px|link=]] [[Exoray Mold]] |
| bgcolor="#FFFFFF" style="border: 1px solid #C9CDE0;" | [[File:Rusty Key icon.png|23px|link=]] [[Rusty Key]] <font color="#000000">•</font> [[File:Giant Fish Bones icon.png|23px|link=]] [[Giant Fish Bones]] <br />[[File:Exoray Mold icon.png|23px|link=]] [[Exoray Mold]] |
||
| bgcolor="#FFFFFF" style="border: 1px solid #C9CDE0;" | |
| bgcolor="#FFFFFF" style="border: 1px solid #C9CDE0;" | |
||
| bgcolor="#FFFFFF" style="border: 1px solid #C9CDE0;" | [[File:Ice |
| bgcolor="#FFFFFF" style="border: 1px solid #C9CDE0;" | [[File:Ice Crest Card icon.png|23px|link=]] [[Ice Crest Card]] |
||
| bgcolor="#FFFFFF" style="border: 1px solid #C9CDE0;" | [[Image:Lightning Crystal icon.png|25px|link=Lightning Crystal|Lightning Crystal]] |
| bgcolor="#FFFFFF" style="border: 1px solid #C9CDE0;" | [[Image:Lightning Crystal icon.png|25px|link=Lightning Crystal|Lightning Crystal]] |
||
| bgcolor="#DDFFFF" style="border: 1px solid #C9CDE0;" rowspan="2" | [[File:Indur. Sphere icon.png|25px|link=]] [[Induration Sphere|Induration]] |
| bgcolor="#DDFFFF" style="border: 1px solid #C9CDE0;" rowspan="2" | [[File:Indur. Sphere icon.png|25px|link=]] [[Induration Sphere|Induration]] |
||
| Line 1,288: | Line 1,299: | ||
| bgcolor="#FFFFFF" style="border: 1px solid #C9CDE0;" valign="top" | [[File:Delkfutt Key icon.png |23px|link=]] [[Delkfutt Key]] |
| bgcolor="#FFFFFF" style="border: 1px solid #C9CDE0;" valign="top" | [[File:Delkfutt Key icon.png |23px|link=]] [[Delkfutt Key]] |
||
| bgcolor="#FFFFFF" style="border: 1px solid #C9CDE0;" | [[File:Fetich Torso icon.png|23px|link=]] [[Fetich Torso]] <br />[[File:Desert_Venom_icon.png |23px|link=]] [[Desert Venom]] |
| bgcolor="#FFFFFF" style="border: 1px solid #C9CDE0;" | [[File:Fetich Torso icon.png|23px|link=]] [[Fetich Torso]] <br />[[File:Desert_Venom_icon.png |23px|link=]] [[Desert Venom]] |
||
| bgcolor="#FFFFFF" style="border: 1px solid #C9CDE0;" valign="top" | [[File:Water |
| bgcolor="#FFFFFF" style="border: 1px solid #C9CDE0;" valign="top" | [[File:Water Crest Card icon.png|23px|link=]] [[Water Crest Card]] |
||
| bgcolor="#FFFFFF" style="border: 1px solid #C9CDE0;" | [[Image:Lightning Crystal icon.png|25px|link=Lightning Crystal|Lightning Crystal]] |
| bgcolor="#FFFFFF" style="border: 1px solid #C9CDE0;" | [[Image:Lightning Crystal icon.png|25px|link=Lightning Crystal|Lightning Crystal]] |
||
| bgcolor="#DDDDFF" style="border: 1px solid #C9CDE0;" rowspan="2" | [[File:Rever. Sphere icon.png|25px|link=]] [[Reverberation Sphere|Reverberation]] |
| bgcolor="#DDDDFF" style="border: 1px solid #C9CDE0;" rowspan="2" | [[File:Rever. Sphere icon.png|25px|link=]] [[Reverberation Sphere|Reverberation]] |
||
| Line 1,306: | Line 1,317: | ||
| bgcolor="#FFFFFF" style="border: 1px solid #C9CDE0;" | [[File:Elshimo Marble icon.png|23px|link=]] [[Elshimo Marble]] |
| bgcolor="#FFFFFF" style="border: 1px solid #C9CDE0;" | [[File:Elshimo Marble icon.png|23px|link=]] [[Elshimo Marble]] |
||
| bgcolor="#FFFFFF" style="border: 1px solid #C9CDE0;" | |
| bgcolor="#FFFFFF" style="border: 1px solid #C9CDE0;" | |
||
| bgcolor="#FFFFFF" style="border: 1px solid #C9CDE0;" | [[File:Earth |
| bgcolor="#FFFFFF" style="border: 1px solid #C9CDE0;" | [[File:Earth Crest Card icon.png|23px|link=]] [[Earth Crest Card]] |
||
| bgcolor="#FFFFFF" style="border: 1px solid #C9CDE0;" | [[Image:Wind Crystal icon.png|25px|link=Wind Crystal|Wind Crystal]] |
| bgcolor="#FFFFFF" style="border: 1px solid #C9CDE0;" | [[Image:Wind Crystal icon.png|25px|link=Wind Crystal|Wind Crystal]] |
||
|- |
|- |
||
| bgcolor="#FFFFFF" style="border: 1px solid #C9CDE0;" | [[File:Demon Pen icon.png|23px|link=]] [[Demon Pen]] <font color="#000000">•</font> [[File:Tonberry Board icon.png|23px|link=]] [[Tonberry Board]] <br /> [[File:Orcish Mail Scales icon.png|23px|link=]] [[Orcish Mail Scales]] |
| bgcolor="#FFFFFF" style="border: 1px solid #C9CDE0;" | [[File:Demon Pen icon.png|23px|link=]] [[Demon Pen]] <font color="#000000">•</font> [[File:Tonberry Board icon.png|23px|link=]] [[Tonberry Board]] <br /> [[File:Orcish Mail Scales icon.png|23px|link=]] [[Orcish Mail Scales]] |
||
| bgcolor="#FFFFFF" style="border: 1px solid #C9CDE0;" valign="top" | [[File:Colorful Hair icon.png|23px|link=]] [[Colorful Hair]] |
| bgcolor="#FFFFFF" style="border: 1px solid #C9CDE0;" valign="top" | [[File:Colorful Hair icon.png|23px|link=]] [[Colorful Hair]] |
||
| bgcolor="#FFFFFF" style="border: 1px solid #C9CDE0;" valign="top" | [[File:Dark |
| bgcolor="#FFFFFF" style="border: 1px solid #C9CDE0;" valign="top" | [[File:Dark Crest Card icon.png|23px|link=]] [[Dark Crest Card]] |
||
| bgcolor="#FFFFFF" style="border: 1px solid #C9CDE0;" | [[Image:Wind Crystal icon.png|25px|link=Wind Crystal|Wind Crystal]] |
| bgcolor="#FFFFFF" style="border: 1px solid #C9CDE0;" | [[Image:Wind Crystal icon.png|25px|link=Wind Crystal|Wind Crystal]] |
||
| bgcolor="#DDDDDD" style="border: 1px solid #C9CDE0;" | [[File:Compr. Sphere icon.png|25px|link=]] [[Compression Sphere|Compression]] |
| bgcolor="#DDDDDD" style="border: 1px solid #C9CDE0;" | [[File:Compr. Sphere icon.png|25px|link=]] [[Compression Sphere|Compression]] |
||
| Line 1,486: | Line 1,497: | ||
::You may then combine this with [[File:Light Crystal icon.png|23px|link=]] Light Crystal + [[File:Light Sphere icon.png|23px|link=]] [[Light Sphere]] for another Light synthesis chain. |
::You may then combine this with [[File:Light Crystal icon.png|23px|link=]] Light Crystal + [[File:Light Sphere icon.png|23px|link=]] [[Light Sphere]] for another Light synthesis chain. |
||
:::Although this is technically Double Light, you only receive 15 spirit. |
:::Although this is technically Double Light, you only receive 15 spirit. |
||
{{color|red|Note:}} The time allowed seems to be a lot more strict than performing a skillchain with actual weapons. It is very hard, if not impossible, to successfully perform a double light with the above synthchain. It is for informational purposes only. |
|||
You may synthesize an HQ result while doing the synthesis. This will grant bonus spirit. |
You may synthesize an HQ result while doing the synthesis. This will grant bonus spirit. |
||
| Line 1,551: | Line 1,564: | ||
After completing your Apex Crystal, you will receive a cutscene with Mewk who will ask you to trade her the following: |
After completing your Apex Crystal, you will receive a cutscene with Mewk who will ask you to trade her the following: |
||
*Earth Crystal |
|||
*Your Shield |
|||
*Apex Crystal |
*Apex Crystal |
||
*Adamantite Screw x2 |
*[[:Category:Escutcheons#PhaseFourCP|Adamantite Screw]] x2 |
||
*Duralumin Frame |
*[[:Category:Escutcheons#PhaseFourCP|Duralumin Frame]] |
||
After trading the items, she will request that you speak to your Guild Master for the final ingredient. |
After trading the items, she will request that you speak to your Guild Master for the final ingredient. |
||
Visit your Guild Master, who will congratulate you |
Visit your Guild Master, who will congratulate you, but inform you that the "Guild Emblem: Craft" was shipped to Mewk. |
||
|- |
|- |
||
| Line 1,607: | Line 1,622: | ||
|- |
|- |
||
| |
| |
||
Upon returning to Mewk, you receive one last cutscene and the "Guild Emblem: Craft". |
|||
Perform your final shield synthesis and you will then have a completed Escutcheon. View their page for the specific synthesis recipe. |
Perform your final shield synthesis and you will then have a completed Escutcheon. View their page for the specific synthesis recipe. |
||
| Line 1,660: | Line 1,675: | ||
Trade the completed shield to [[Mewk Chorosap]] for another cutscene with her. |
Trade the completed shield to [[Mewk Chorosap]] for another cutscene with her. |
||
Trade the completed shield to your Guild Master |
<span id=aurumtome>Trade the completed shield to your Guild Master to be granted the '''aurum tome''' Key Item for your craft.</span> |
||
|- |
|- |
||
| align=center | |
| align=center | |
||
| Line 1,703: | Line 1,718: | ||
Return to [[Mewk Chorosap]] one final time to obtain a unique title for your efforts. |
Return to [[Mewk Chorosap]] one final time to obtain a unique title for your efforts. |
||
{| width=600px align=center style="border: 1px solid black" bgcolor="#FFFFFF" |
{| class="R-Highlight-WikiBlue" width=600px align=center style="border: 1px solid black" bgcolor="#FFFFFF" |
||
! BGCOLOR="#cee0f2" colspan=4 | Titles |
! BGCOLOR="#cee0f2" colspan=4 | Titles |
||
|- |
|- |
||
| Line 1,742: | Line 1,757: | ||
|} |
|} |
||
|} |
|} |
||
<span id=minusone></span> |
|||
==-1 Shield Versions== |
==-1 Shield Versions== |
||
There exists in the game -1 versions of all phases of the Escutcheon except for the final form |
There exists in the game -1 versions of all phases of the Escutcheon except for the final form. In the past, it was theorized that failing an Escutcheon upgrade synthesis would result in the -1 shield being obtained, but this has concluded to be false. Another theory was that they are intended to be used in the future to "skip" phases, perhaps Bonanza rewards. |
||
In actuality, these shields exist in case a player somehow disposes or loses their phase of a shield, but wishes to recover it. Because of the way a GM's '''One Time Account Recovery''' tool works, items with augment data on them cannot be recovered directly into a player's inventory. Instead, these items were added so that they can be generated on a player's character and they will not have to start over on the shield upgrade process. |
|||
Trading these -1 shields to [[Mewk Chorosap]] will result in her "repairing" the shield in a brief cutscene, and then providing you with that stage's base shield with no progress made on that stage. Additionally, any [[Records of Eminence]] completed objectives will be reset. |
|||
See [https://forum.square-enix.com/ffxi/threads/52345?p=596426&viewfull=1#post596426 this post on the official forum] for details from a player's account. |
|||
{| class="C-Highlight-Blue" style="text-align:center;" |
|||
{| |
|||
! colspan=8 |
! colspan=8 bgcolor=#2A4865 | <font color=#FFFFFF>Phase One "Ecu"</font> |
||
|- |
|- |
||
| [[Beveler's Ecu -1]] |
| [[Beveler's Ecu -1]] |
||
| Line 1,758: | Line 1,781: | ||
| [[Toreutic Ecu -1]] |
| [[Toreutic Ecu -1]] |
||
|- |
|- |
||
! colspan=8 |
! colspan=8 bgcolor=#2A4865 | <font color=#FFFFFF>Phase Two "Scutum"</font> |
||
|- |
|- |
||
| [[Beveler's Scutum -1]] |
| [[Beveler's Scutum -1]] |
||
| Line 1,769: | Line 1,792: | ||
| [[Toreutic Scutum -1]] |
| [[Toreutic Scutum -1]] |
||
|- |
|- |
||
! colspan=8 |
! colspan=8 bgcolor=#2A4865 | <font color=#FFFFFF>Phase Three "Shield"</font> |
||
|- |
|- |
||
| [[Beveler's Shield -1]] |
| [[Beveler's Shield -1]] |
||
Latest revision as of 21:27, 13 June 2023
|
Escutcheon BackgroundOriginally teased in the November 2016 Freshly Picked Vana'diel livestream and introduced in the February 2017 Version Update, Escutcheons are classified as the The Escutcheons were meant to replace the Kupo Shield, while at the same time offering unique bonuses. While the Kupo Shield has one extra level of skill, as well as offers a There are four phases in which one must progress in order to fully complete a shield. Each phase offers a unique challenge which consist of countless hours spent crafting and The basic gist of completing a crafting shield is to do the following in all four phases:
You will be synthing tons of items for a long time. This is the crafting equivalent of an Ultimate Weapon. Be prepared to dedicate blood, sweat and tears in order to complete your As an additional note, there is no formal quest that appears in your log for the Escutcheon process. There are, however, steps that involve Records of Eminence objectives that
PrerequisitesIn order to begin creating your shield, you must first achieve the following requirements:
|
|||||||||||||||||||||||||||||||||||||||||||||||||||||||||||||||||||||||||||||||||||||||||||||||||||||||||||||||||||||||||||||||||||||||||||||||||||||||||||||||||||||||||||||||||||||||||||||||||||||||||||||||||||||||||||||||||||||||||||||||||||||||||||||||||||||||||||||||||||||||||||||||||||||||||||||||||||||||||||||||||||||||||||||||||||||||||||||||||||||||||||||||||||||||||||||||||||||||||||||||||||||||||||||||||||||||||||||||||||||||||||||||||||||||||||||||||||||||||||||||||||||||||||||||||||||||||||||||||||||||||||||||||||||||||||||||||||||||||||||||||||||||||||||||||||||||||||||||||||||||||||||||||||||||||||||||||||||||||||||||||||||||||||||||||||||||||||||||||||||||||||||||||||||||||||||||||||||||||||||||||||||||||||||||||||||||||||||||||||||||||||||||||||||||||||||||||||||||||||||||||||||||||||||||||||||||


Pages in category "Escutcheons"
The following 65 pages are in this category, out of 65 total.
