The Voracious Resurgence | |
| Prime Weapons • Ultimate Weapons • Ultimate Augments • Abjurations iL119 • JSE Necks • Divergence Augments • Escutcheons | |
| Reforged Armor Artifact: +1 • iL109 • iL119/+2/+3/+4 Relic: +1/+2 • iL109 • iL119/+2/+3/+4 Empyrean: +1/+2 • iL109 • iL119/+2/+3 |
Guides • Crafting • Trusts • Apex Monsters |
Community Corsair Guide
|
Latest Updates
- Filled out AF/Relic/Empy gear set and recommendations. A lot of these recommendations were pulled from the Corsair guide on ffxiah.com. Please refer to the following link for the guide notes: https://www.ffxiah.com/forum/topic/52018/luck-of-the-draw-a-corsairs-guide-new --Rockzilla (talk) 3 October 2023 (EST)
General Information
Introduced in TOAU expension, COR is one of FFXI's support class with DD ability.
Strength:
- Ability to fit in all the setup
In FFXI, there are primarily 4 different setups depending on DD type: pet setup, melee setup, mage setup and ranged setup. COR is one of a very few job that fits into all 4 setup and still have the ability to contribute as a support job and DD job.
- Versatile DD playstyle
COR has access to magical, ranged, melee and none elemental damage, plus the ability to gain tp without having to engage the NM. This gives the job incredibly wide range of tools to counter NM mechanics and contribute in different situations.
- Strong lowman job
With the ability to self buff, COR is a pretty efficient lowman class in a party size smaller than 3.
Weakness:
- RNG dependent
While Corsair has ways to mitigate this downside, its utility is still heavily dependent on having good RNG, and managing your risk carefully.
- Weaker DD than other jobs
Corsair does good damage, but not as good as other DDs.
Roles
Hybrid Support DD
Abilities and Traits
| Level | Roll | Lucky | Unlucky | Effect | Acquisition | ||
|---|---|---|---|---|---|---|---|
| 5 | Corsair's Roll | 5 | 9 | Increases CP/EXP gain rate | Free | Luck of the Draw | |
| 11 | Hunter's Roll | 4 | 8 | Increases Accuracy/Ranged Accuracy | 1,300 Gil | Chayaya, Al Zahbi (J-8) | |
| 14 | Chaos Roll | 4 | 8 | Increases Attack/Ranged Attack | 2,205 Gil | Chayaya, Al Zahbi (J-8) | |
| 17 | Magus's Roll | 2 | 6 | Increases Magic Defense | 3,525 Gil | Jajaroon, Nashmau (G-7) | |
| 23 | Drachen Roll | 4 | 8 | Increases Pet: Accuracy/Ranged Accuracy | 9,216 Gil | Jajaroon, Nashmau (G-7) | |
| 34 | Beast Roll | 4 | 8 | Increases Pet: Attack/Ranged Attack | 26,600 Gil | Chayaya, Al Zahbi (J-8) | |
| 37 | Samurai Roll | 2 | 6 | Increases Store-TP | 35,200 Gil | Jajaroon, Nashmau (G-7) | |
| 46 | Warlock's Roll | 4 | 8 | Increases Magic Accuracy | 62,000 Gil | Chayaya, Al Zahbi (J-8) | |
| 55 | Gallant's Roll | 3 | 7 | Increases Defense | 90,750 Gil | Chayaya, Al Zahbi (J-8) | |
| 58 | Wizard's Roll | 5 | 9 | Increases Magic Attack | 108,000 Gil | Chayaya, Al Zahbi (J-8) | |
| 70 | Runeist's Roll | 4 | 8 | Increases Magic Evasion | 73,920 Gil | Chichiroon, Nashmau (G-7) | |
| 76 | Bolter's Roll | 3 | 9 | Increases Movement Speed | 99,225 Gil | Chichiroon, Nashmau (G-7) | |
| 86 | Tactician's Roll | 5 | 8 | Grants Regain effect | 109,440 Gil | Chichiroon, Nashmau (G-7) | |
| 89 | Allies' Roll | 3 | 10 | Increases Skillchain Damage | 116,568 Gil | Chichiroon, Nashmau (G-7) | |
| 92 | Miser' Roll | 5 | 7 | Grants Save-TP Effect | 96,250 Gil | Chichiroon, Nashmau (G-7) | |
Merits
| Group 1 | ||
|---|---|---|
| Name | Description | Upgrades |
| Phantom Roll Recast | Shorten recast time by 2 seconds. | 5/5 |
| Quick Draw Recast | Shorten recast time by 2 seconds. | 5/5 |
| Quick Draw Accuracy | Increase the accuracy of Quick Draw by 2. | 5/5 |
| Random Deal Recast | Shorten recast time by 40 seconds. | 0/5 |
| Bust Duration | Shorten the duration of the Bust penalty by 10 seconds. | 0/5 |
| ◆ For Group 1 merit category: |
- 5/5 » Quick Draw Recast is a must have.
- 5/5 » Phantom Roll Recast or 5/5 Quick Draw Accuracy, or split between them.
![]() Light and
Light and ![]() Dark shot usually need Quick Draw Accuracy a lot more than damage dealing elemental shots.
Dark shot usually need Quick Draw Accuracy a lot more than damage dealing elemental shots.
| Group 2 | ||
|---|---|---|
| Name | Description | Upgrades |
| Snake Eye | Next roll will automatically be a 1. Recast: 5min. When current roll is 5 or higher, increase chance of rolling an 11 by 10%. | 3-5/5 |
| Fold | Erases one roll or bust effect. Targets self-cast effect with the longest remaining duration. Recast: 5min. Increase chance of resetting Phantom Roll recast timer by 10%. | 1/5 |
| Winning Streak | Extends the duration of Phantom Roll effects. Increase duration of effect by 20 seconds. | 3-5/5 |
| Loaded Deck | Focuses effect of Random Deal on abilities waiting on recast. Has a chance to fail if only one ability is waiting on recast. Reduce chance of failure by 10%. | 1/5 |
| ◆ For Group 2 merit category: |
- 1/5 » Fold
- 1/5 » Loaded Deck
- 3/5 » Snake Eye
- 5/5 » Winning Streak
...is more useful in endgame event because it allows COR to full time Crooked Card bonus on one roll, and jump between different parties and give rolls for different roles.
- 1/5 » Fold
- 1/5 » Loaded Deck
- 5/5 » Snake Eye
- 3/5 » Winning Streak
...is more useful in short spammable fights such as Ambuscade and Hard Mode Mission Battles in which extra roll duration isn't relevant. This is because Double-Up on 6 and Bust is not ideal in these fights due to how time consuming it is to reroll, instead it's more ideal to Snake Eye on 6+ for a chance to get No.11. With 5/5 Snake Eye merit, there is higher chance to get a free No.11 from Snake Eye.
Support Jobs
Pre-November 2021 Update, these subjobs are commonly used. The introduction of Master Levels may affect viability of certain subjobs.
| ◆ Damage Dealers |
| These support jobs are used for DD purpose. |
| » Dancer | ||||||||||
Gives COR access to Dual Wield, Job Ability Haste via Haste Samba, survivability via Waltzez and Debuffs via Steps. Additionally, Spectral Jig can be quite convenient.
|
| » Ninja | |||||
|
| » Warrior | |||||
|
| ◆ Supports |
| These support jobs are used when COR is expected to fulfill some of the support duty in party. |
| » White Mage | |||||
|
| » Scholar | |||||
|
| ◆ Situational |
| Other situational support jobs. |
| » Dragoon | |||||
|
| » Dark Knight | |||||
|
Playstyle
As a Corsair, you're expected to maintain a number of buffs for your party while still keeping your DD duties under control.
Luck of the Draw: Phantom Roll
There are two major schools of thought when it comes to using Phantom Roll and Double-Up: 11 or bust, and Lucky Numbers.
11 or Bust
In high-end optimization, it's an improvement to go for 11s on your phantom rolls wherever possible, because 11 has the highest possible bonus for each die.
This strategy comes with a major risk, which is that if you end up with 12 or higher you get the Bust status effect for the die you rolled. Busting both gives you a penalty to that die's attribute and takes up a roll slot that you could be using to apply buffs.
However, the payoff for getting an 11 is huge. The instant you roll that 11 your Phantom Roll recast timer is reset. Additionally, you are immune to bust effects as long as you still have the effect of that 11 roll on your character. Finally, the recast timer for Phantom Roll is halved, allowing you to dig for more 11s to keep your streak going.
Lucky Numbers
This is going to be your bread and butter in more casual group play situations, as well as playing solo.
Each die has a lucky and an unlucky number. Rolling the Lucky number of your chosen die is the second best value you can get on it, and is generally sufficient for casual content. You're going to use Double-Up just to dig for that lucky number. If you overshoot, make a decision about how much risk you're willing to put your party through, and double up to that risk tolerance.
| Current Total | Chance to bust |
|---|---|
| 1-5 | 0/6 (0%) |
| 6 | 1/6 (16.6%) |
| 7 | 2/6 (33.3%) |
| 8 | 3/6 (50%) |
| 9 | 4/6 (66.6%) |
| 10 | 5/6 (83.3%) |
| 11 | 6/6 (100%) |
Job-Specific Armor: AF/Relic/Empyrean
| Job Specific Equipment | ||
|---|---|---|
| Item | Upgrade? | Notes |
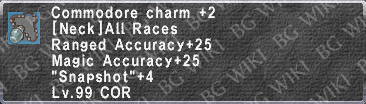
Laksa. Tricorne +4 
|
Probably | Best in slot for Magic Accuracy for Quick Draw to help land sleeps and dispels from Light and Dark Shot. |
Laksa. Frac +4 
|
MUST | Perfect Ranged WS body with Rapid Shot for Flurry builds and Recycle as icing. (Has no DT, just be aware of that.) |
Lak. Gants +4 
|
No | What were they even thinking? |
Laksa. Trews +4 
|
Yes | Best Snapshot in any slot, allows AF body and Empy head to be utilized more easily. |
Laksa. Bottes +4 
|
Probably | Good Quick Draw piece, helps lands sleeps and dispels from Light and Dark Shot. Eventually obsoleted by |
Lanun Tricorne +4  Increases base roll duration by +6 seconds per Winning Streak merit level for a maximum of +30s roll duration. |
Maybe | Get the +1 at least for the Phantom Roll duration augment. |
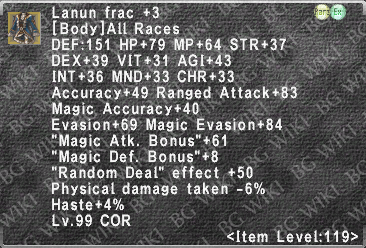
Lanun Frac +4  Reduces the chance of "one ability" Random Deal failure by 10% per merit. |
MUST | Premiere magical WS/Quick Draw piece |
Lanun Gants +4  Clears both Phantom Rolls (or Bust) 20% of the time per merit level for a maximum of 100% of the time. |
Probably | Turns Triple Shot into Quad Shot 50% of the time. Combine with Empy Body. |
Lanun Trews +4  Gives Snake Eye a 4% chance of having no recast per merit level for a maximum of a 20% chance. |
Probably Not | Reforge to NQ for the Snake Eye augment. Not useful beyond that. |
Lanun Bottes +4  Gives an invisible re-roll if the initial roll lands on a 1 or 2 changing the odds to |
MUST | The most ridiculous magical WSD piece for the job |
Chass. Tricorne +3 
|
Yes | 18 Rapid Shot - good for Flurry builds. 10 DT is comparable to |
Chasseur's Frac +3 
|
Yes | Activates Triple Shot 14% more often (combine with Relic Hands.) and gives 10 TP more Regain with Tactician's Roll. |
Chasseur's Gants +3 
|
MUST | A strong WSD piece if you don't need DT at the same time, only lacking normal Attack. Also roll duration! |
Chas. Culottes +3 
|
Yes | Lovely Store TP piece with 12 DT. May create (solvable) issues with gear haste - look at |
Chass. Bottes +3 
|
Yes | Possibly COR's most misleadingly worded piece of gear. This does not boost Quick Draw's potency! Instead, the next hit of the same element as the Quick Draw (if Quick Draw successfully landed - so you do have to dispel something with Dark Shot) landed on the target within 10 seconds will deal +31% damage. So, say, your Leaden Salute or Hot Shot, or someone else's Trueflight or Tachi: Jinpu. Hint: Those do a lot more damage than Quick Draw does. |


Equipment
New Player sets
|
|
| |||||||||||||||||||||||||||||||||||||||||||||||||||||||||||||||||||||
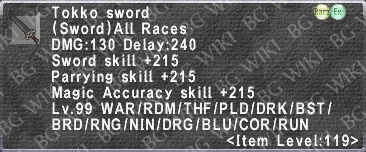
|
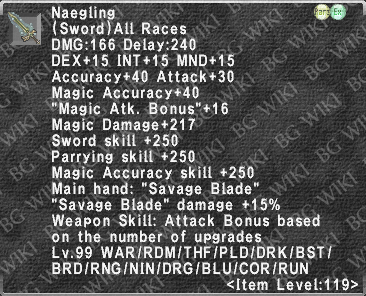
I recommend this build to start with for a number of reasons: It's non-trivial to obtain two iLvl 119 weapons that COR can wield, not to mention the dearth of early-119 Dual-Wield gear. There's also the consideration that Savage Blade is very strong, and the Tokko Sword can be upgraded all the way to Naegling, which is arguably the best 1h sword pound for pound, across all classes that can wield it. |
This is about the lowest amount of gear where I would consider moving on to doing higher level content with other people. Keep doing ambuscade and gathering currency, by the end of your progression you're gonna need between 6 and 10 differently augmented capes from this, plus the 26k and change Hallmarks you need to get Naegling. |


TP Sets
|


| Magic Haste | Magic Haste (subbed Dancer + Haste Samba) | |||||||||||
|---|---|---|---|---|---|---|---|---|---|---|---|---|
| 0% | 10% | 15% | 30% | Cap | 0% | 10% | 15% | 30% | Cap | |||
| DNC | 59 | 55 | 52 | 41 | 21 | 57 | 52 | 49 | 35 | 9 | ||
| NIN | 49 | 45 | 42 | 31 | 11 | 47 | 42 | 39 | 25 | 0 | ||
|
|
Weaponskill Sets
Multi step skillchains:
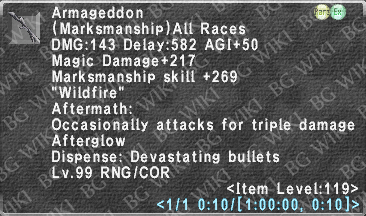
Wildfire → Wildfire = Darkness
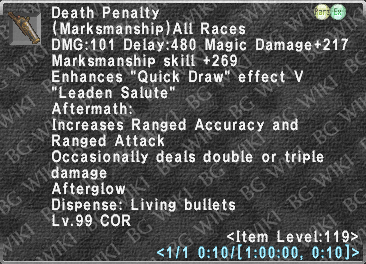
Leaden Salute → Viper Bite or Requiescat (Distortion) → Leaden Salute (Darkness) → Wildfire = Darkness
Hot Shot → Savage Blade (Distortion) → Leaden Salute (Darkness) → Wildfire = Darkness
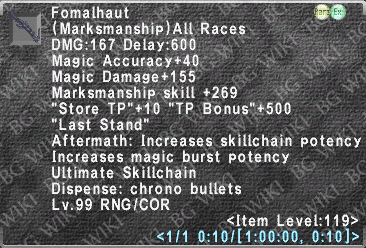
Hot Shot → Savage Blade (Distortion) → Last Stand (Fusion) → Savage Blade = Light
Last Stand → Savage Blade = Light
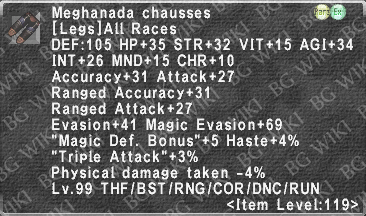
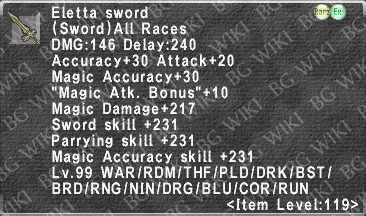
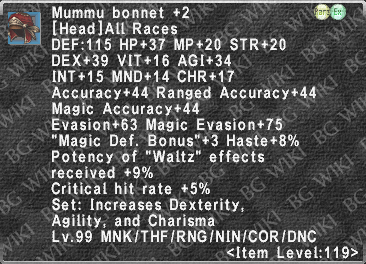
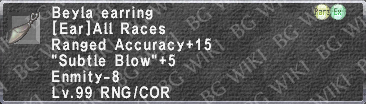
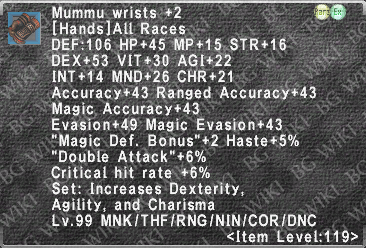
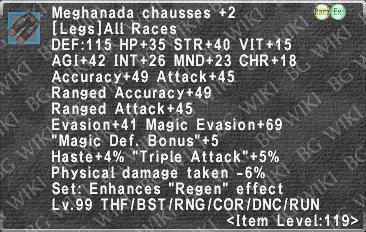
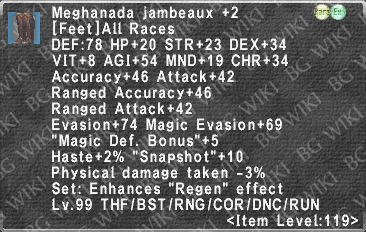
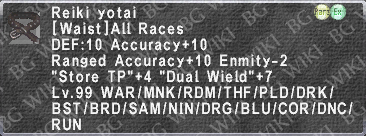
|
|
|
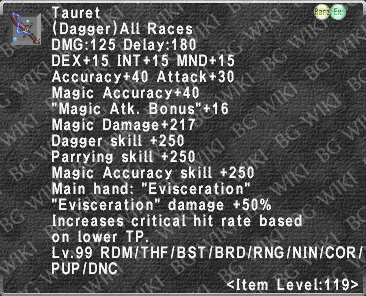

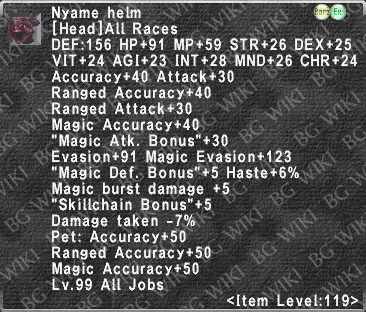


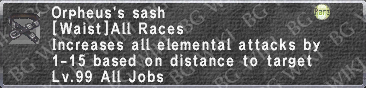


|
|
|


Ability Enhancing Equipment
- Roll Duration +
 Compensator
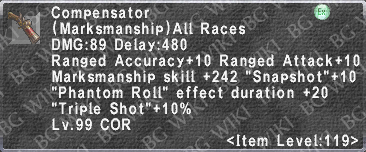
 Camulus's Mantle
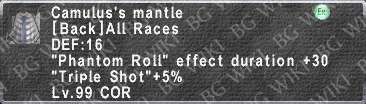
 Chasseur's Gants +1
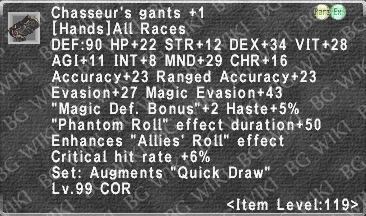
 Lanun Tricorne
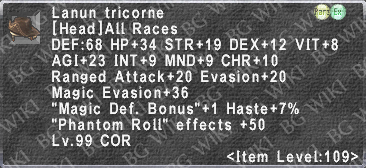
 Enhances Winning Streak effect by an additional 6 seconds per merit level.
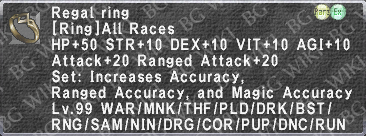
 Regal Necklace
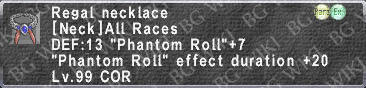
- Roll Effect +
- Lanun Tricorne
- 50% Chance at providing the job bonus to a roll without having the job in the party.
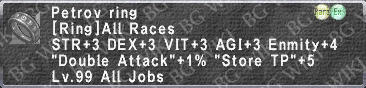
 Merirosvo Ring
- There is no real reason or excuse for using this ring, it doesn't stack with the Barataria.
 Barataria Ring
- Regal Necklace
 Rostam
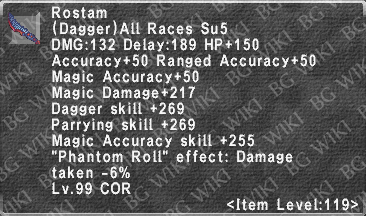
- Augmented Path C for Roll Effect +8
 Chasseur's Tricorne
- Enhances Blitzer's Roll
 Chasseur's Frac
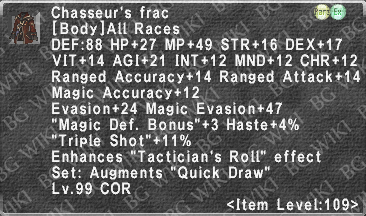
- Enhances Tactician's Roll
 Chasseur's Gants
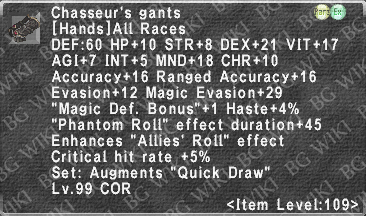
- Enhances Allies' Roll
 Chasseur's Culottes
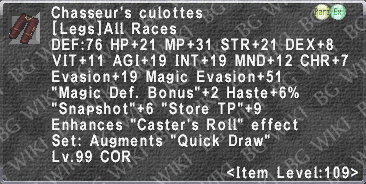
- Enhances Caster's Roll
 Chasseur's Bottes +1
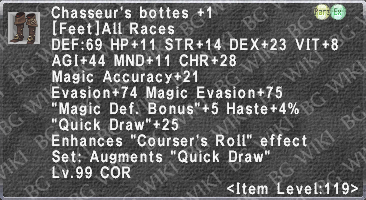
- Enhances Courser's Roll and Quick Draw
- Roll Range:
 Luzaf's Ring
- Increases the range of rolls from 8' to 16' while equipped.
- Roll Recast-:
