The Voracious Resurgence | |
| Prime Weapons • Ultimate Weapons • Ultimate Augments • Abjurations iL119 • JSE Necks • Divergence Augments • Escutcheons | |
| Reforged Armor Artifact: +1 • iL109 • iL119/+2/+3 Relic: +1/+2 • iL109 • iL119/+2/+3 Empyrean: +1/+2 • iL109 • iL119/+2/+3 |
Guides • Crafting • Trusts • Apex Monsters |
Abyssea - Attohwa: Difference between revisions
From FFXI Wiki
(→Adversaries: I forgot to include {{Links}} tags during the table conversion; resolved now) |
(→Notorious Monsters: - Inserted drop icons) |
||
| Line 611: | Line 611: | ||
|NM.Main= |
|NM.Main= |
||
|NM.Sub= |
|NM.Sub= |
||
|NM.Aggressive= |
|NM.Aggressive=Y |
||
|NM.Detects={{True Sound}} |
|NM.Detects={{True Sound}} |
||
|NM.Level= |
|NM.Level= |
||
|NM.Spawn_Condition=10-15 |
|NM.Spawn_Condition='''Timed''': 10-15 min. |
||
|NM.Treasure= |
|NM.Treasure= |
||
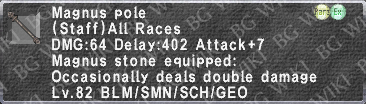
* {{imgpop|[[Magnus Pole]]|Magnus Pole description.png|link=}} |
* {{ItemIcon|Magnus Pole|22}} {{imgpop|[[Magnus Pole]]|Magnus Pole description.png|link=}} |
||
* {{imgpop|[[Goetia Seal: Head]] {{Green!}}|Goetia Seal-_Hd._description.png|link=}} |
* {{ItemIcon|Goetia Seal-_Hd.|22}} {{imgpop|[[Goetia Seal: Head]] {{Green!}}|Goetia Seal-_Hd._description.png|link=}} |
||
* {{imgpop|[[Aoidos' Seal: Head]] {{Green!}}|Aoidos' Seal-_Hd._description.png|link=}} |
* {{ItemIcon|Aoidos' Seal-_Hd.|22}} {{imgpop|[[Aoidos' Seal: Head]] {{Green!}}|Aoidos' Seal-_Hd._description.png|link=}} |
||
* {{imgpop|[[Caller's Seal: Head]] {{Green!}}|Caller Seal-_Hd._description.png|link=}} |
* {{ItemIcon|Caller Seal-_Hd.|22}} {{imgpop|[[Caller's Seal: Head]] {{Green!}}|Caller Seal-_Hd._description.png|link=}} |
||
* {{imgpop|[[Cirque Seal: Head]] {{Green!}}|Cirque Seal-_Hd._description.png|link=}} |
* {{ItemIcon|Cirque Seal-_Hd.|22}} {{imgpop|[[Cirque Seal: Head]] {{Green!}}|Cirque Seal-_Hd._description.png|link=}} |
||
|NM.Steal= |
|NM.Steal= |
||
|NM.Position=E-7/8 |
|NM.Position=(E-7/8) |
||
|NM.Map=Abyssea_-_Attohwa-Map.jpg{{!}}650px |
|NM.Map=Abyssea_-_Attohwa-Map.jpg{{!}}650px |
||
}} |
}} |
||
| Line 630: | Line 630: | ||
|NM.Main= |
|NM.Main= |
||
|NM.Sub= |
|NM.Sub= |
||
|NM.Aggressive= |
|NM.Aggressive=Y |
||
|NM.Detects={{True Sight}} |
|NM.Detects={{True Sight}} |
||
|NM.Level= |
|NM.Level= |
||
|NM.Spawn_Condition=10-15 |
|NM.Spawn_Condition='''Timed''': 10-15 min. |
||
|NM.Treasure= |
|NM.Treasure= |
||
* {{imgpop|[[Cantabank's Horn]] {{Blue!}}|Cantabank's Horn description.png|link=}} |
* {{ItemIcon|Cantabank's Horn|22}} {{imgpop|[[Cantabank's Horn]] {{Blue!}}|Cantabank's Horn description.png|link=}} |
||
* {{imgpop|[[Tantra Seal: Head]] {{Green!}}|Tantra Seal-_Hd._description.png|link=}} |
* {{ItemIcon|Tantra Seal-_Hd.|22}} {{imgpop|[[Tantra Seal: Head]] {{Green!}}|Tantra Seal-_Hd._description.png|link=}} |
||
* {{imgpop|[[Creed Seal: Head]] {{Green!}}|Creed Seal-_Hd._description.png|link=}} |
* {{ItemIcon|Creed Seal-_Hd.|22}} {{imgpop|[[Creed Seal: Head]] {{Green!}}|Creed Seal-_Hd._description.png|link=}} |
||
* {{imgpop|[[Iga Seal: Head]] {{Green!}}|Iga Seal-_Hd._description.png|link=}} |
* {{ItemIcon|Iga Seal-_Hd.|22}} {{imgpop|[[Iga Seal: Head]] {{Green!}}|Iga Seal-_Hd._description.png|link=}} |
||
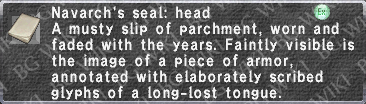
* {{imgpop|[[Navarch's Seal: Head]] {{Green!}}|Nvrch._Seal-_Hd._description.png|link=}} |
* {{ItemIcon|Nvrch._Seal-_Hd.|22}} {{imgpop|[[Navarch's Seal: Head]] {{Green!}}|Nvrch._Seal-_Hd._description.png|link=}} |
||
* {{imgpop|{{KI}} [[Shriveled hecteyes stalk]] {{Red!}}|Shriveled hecteyes stalk.jpg|link=}} |
* {{imgpop|{{KI}} [[Shriveled hecteyes stalk]] {{Red!}}|Shriveled hecteyes stalk.jpg|link=}} |
||
|NM.Steal= |
|NM.Steal= |
||
|NM.Position=H/I-8/9 |
|NM.Position=(H/I-8/9) |
||
|NM.Map=Abyssea_-_Attohwa-Map.jpg{{!}}650px |
|NM.Map=Abyssea_-_Attohwa-Map.jpg{{!}}650px |
||
}} |
}} |
||
| Line 650: | Line 650: | ||
|NM.Main= |
|NM.Main= |
||
|NM.Sub= |
|NM.Sub= |
||
|NM.Aggressive= |
|NM.Aggressive=Y |
||
|NM.Detects={{True Sound}} |
|NM.Detects={{True Sound}} |
||
|NM.Level= |
|NM.Level= |
||
|NM.Spawn_Condition=Trade [[Extended Eyestalk]] to |
|NM.Spawn_Condition='''Forced''': Trade [[Extended Eyestalk]] to '''???''' |
||
|NM.Treasure= |
|NM.Treasure= |
||
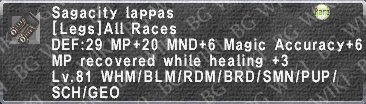
* {{imgpop|[[Sagacity Lappas]]|Sagacity Lappas description.png|link=}} |
* {{ItemIcon|Sagacity Lappas|22}} {{imgpop|[[Sagacity Lappas]]|Sagacity Lappas description.png|link=}} |
||
* {{imgpop|[[Tantra Seal: Head]] {{Green!}}|Tantra Seal-_Hd._description.png|link=}} |
* {{ItemIcon|Tantra Seal-_Hd.|22}} {{imgpop|[[Tantra Seal: Head]] {{Green!}}|Tantra Seal-_Hd._description.png|link=}} |
||
* {{imgpop|[[Raider's Seal: Head]] {{Green!}}|Raider's Seal-_Hd._description.png|link=}} |
* {{ItemIcon|Raider's Seal-_Hd.|22}} {{imgpop|[[Raider's Seal: Head]] {{Green!}}|Raider's Seal-_Hd._description.png|link=}} |
||
* {{imgpop|[[Iga Seal: Head]] {{Green!}}|Iga Seal-_Hd._description.png|link=}} |
* {{ItemIcon|Iga Seal-_Hd.|22}} {{imgpop|[[Iga Seal: Head]] {{Green!}}|Iga Seal-_Hd._description.png|link=}} |
||
* {{imgpop|[[Charis Seal: Head]] {{Green!}}|Charis Seal-_Hd._description.png|link=}} |
* {{ItemIcon|Charis Seal-_Hd.|22}} {{imgpop|[[Charis Seal: Head]] {{Green!}}|Charis Seal-_Hd._description.png|link=}} |
||
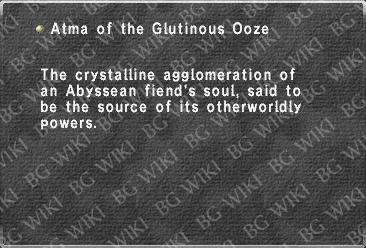
* {{imgpop|{{KI}} [[Atma of the Glutinous Ooze]] {{Red!}}|Atma of the Glutinous Ooze.jpg|link=}} |
* {{imgpop|{{KI}} [[Atma of the Glutinous Ooze]] {{Red!}}|Atma of the Glutinous Ooze.jpg|link=}} |
||
|NM.Steal= |
|NM.Steal= |
||
|NM.Position=G-9 |
|NM.Position=(G-9) |
||
|NM.Map=Abyssea_-_Attohwa-Map.jpg{{!}}650px |
|NM.Map=Abyssea_-_Attohwa-Map.jpg{{!}}650px |
||
}} |
}} |
||
| Line 673: | Line 673: | ||
|NM.Detects={{True Sound}} |
|NM.Detects={{True Sound}} |
||
|NM.Level= |
|NM.Level= |
||
|NM.Spawn_Condition=Trade [[Eruca Egg]] to |
|NM.Spawn_Condition='''Forced''': Trade [[Eruca Egg]] to '''???''' |
||
|NM.Treasure= |
|NM.Treasure= |
||
* {{imgpop|[[Vihuela]]|Vihuela description.png|link=}} |
* {{ItemIcon|Vihuela|22}} {{imgpop|[[Vihuela]]|Vihuela description.png|link=}} |
||
* {{imgpop|[[Goetia Seal: Head]] {{Green!}}|Goetia Seal-_Hd._description.png|link=}} |
* {{ItemIcon|Goetia Seal-_Hd.|22}} {{imgpop|[[Goetia Seal: Head]] {{Green!}}|Goetia Seal-_Hd._description.png|link=}} |
||
* {{imgpop|[[Bale Seal: Head]] {{Green!}}|Bale Seal-_Hd._description.png|link=}} |
* {{ItemIcon|Bale Seal-_Hd.|22}} {{imgpop|[[Bale Seal: Head]] {{Green!}}|Bale Seal-_Hd._description.png|link=}} |
||
* {{imgpop|[[Iga Seal: Head]] {{Green!}}|Iga Seal-_Hd._description.png|link=}} |
* {{ItemIcon|Iga Seal-_Hd.|22}} {{imgpop|[[Iga Seal: Head]] {{Green!}}|Iga Seal-_Hd._description.png|link=}} |
||
* {{imgpop|[[Cirque Seal: Head]] {{Green!}}|Cirque Seal-_Hd._description.png|link=}} |
* {{ItemIcon|Cirque Seal-_Hd.|22}} {{imgpop|[[Cirque Seal: Head]] {{Green!}}|Cirque Seal-_Hd._description.png|link=}} |
||
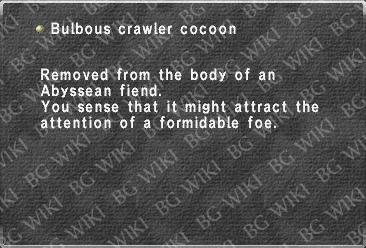
* {{imgpop|{{KI}} [[Bulbous crawler cocoon]] {{Red!}}|Bulbous crawler cocoon.jpg|link=}} |
* {{imgpop|{{KI}} [[Bulbous crawler cocoon]] {{Red!}}|Bulbous crawler cocoon.jpg|link=}} |
||
|NM.Steal= |
|NM.Steal= |
||
|NM.Position=J-10 |
|NM.Position=(J-10) |
||
|NM.Map=Abyssea_-_Attohwa-Map.jpg{{!}}650px |
|NM.Map=Abyssea_-_Attohwa-Map.jpg{{!}}650px |
||
}} |
}} |
||
| Line 690: | Line 690: | ||
|NM.Main= |
|NM.Main= |
||
|NM.Sub= |
|NM.Sub= |
||
|NM.Aggressive= |
|NM.Aggressive=Y |
||
|NM.Detects={{True Sound}} |
|NM.Detects={{True Sound}} |
||
|NM.Level= |
|NM.Level= |
||
|NM.Spawn_Condition=Trade [[Wailing Rags]] to |
|NM.Spawn_Condition='''Forced''': Trade [[Wailing Rags]] to '''???''' |
||
|NM.Treasure= |
|NM.Treasure= |
||
* {{imgpop|[[Ney]]|Ney description.png|link=}} |
* {{ItemIcon|Ney|22}} {{imgpop|[[Ney]]|Ney description.png|link=}} |
||
* {{imgpop|{{KI}} [[Writhing ghost finger]] {{Red!}}|Writhing ghost finger.jpg|link=}} |
* {{imgpop|{{KI}} [[Writhing ghost finger]] {{Red!}}|Writhing ghost finger.jpg|link=}} |
||
|NM.Steal= |
|NM.Steal= |
||
|NM.Position=G-7 |
|NM.Position=(G-7) |
||
|NM.Map=Abyssea_-_Attohwa-Map.jpg{{!}}650px |
|NM.Map=Abyssea_-_Attohwa-Map.jpg{{!}}650px |
||
}} |
}} |
||
| Line 706: | Line 706: | ||
|NM.Main= |
|NM.Main= |
||
|NM.Sub= |
|NM.Sub= |
||
|NM.Aggressive= |
|NM.Aggressive=Y |
||
|NM.Detects={{True Sound}} |
|NM.Detects={{True Sound}} |
||
|NM.Level= |
|NM.Level= |
||
|NM.Spawn_Condition=Trade [[Undying Ooze]] to |
|NM.Spawn_Condition='''Forced''': Trade [[Undying Ooze]] to '''???''' |
||
|NM.Treasure= |
|NM.Treasure= |
||
* {{imgpop|[[Jinx Discus]]|Jinx Discus description.png|link=}} |
* {{ItemIcon|Jinx Discus|22}} {{imgpop|[[Jinx Discus]]|Jinx Discus description.png|link=}} |
||
* {{imgpop|[[Tantra Seal: Head]] {{Green!}}|Tantra Seal-_Hd._description.png|link=}} |
* {{ItemIcon|Tantra Seal-_Hd.|22}} {{imgpop|[[Tantra Seal: Head]] {{Green!}}|Tantra Seal-_Hd._description.png|link=}} |
||
* {{imgpop|[[Aoidos' Seal: Head]] {{Green!}}|Aoidos' Seal-_Hd._description.png|link=}} |
* {{ItemIcon|Aoidos' Seal-_Hd.|22}} {{imgpop|[[Aoidos' Seal: Head]] {{Green!}}|Aoidos' Seal-_Hd._description.png|link=}} |
||
* {{imgpop|[[Lancer's Seal: Head]] {{Green!}}|Lancer's Seal-_Hd._description.png|link=}} |
* {{ItemIcon|Lancer's Seal-_Hd.|22}} {{imgpop|[[Lancer's Seal: Head]] {{Green!}}|Lancer's Seal-_Hd._description.png|link=}} |
||
* {{imgpop|[[Savant's Seal: Head]] {{Green!}}|Savant's Seal-_Hd._description.png|link=}} |
* {{ItemIcon|Savant's Seal-_Hd.|22}} {{imgpop|[[Savant's Seal: Head]] {{Green!}}|Savant's Seal-_Hd._description.png|link=}} |
||
* {{imgpop|{{KI}} [[Blotched doomed tongue]] {{Red!}}|Blotched doomed tongue.jpg|link=}} |
* {{imgpop|{{KI}} [[Blotched doomed tongue]] {{Red!}}|Blotched doomed tongue.jpg|link=}} |
||
|NM.Steal= |
|NM.Steal= |
||
|NM.Position=H-8/9 |
|NM.Position=(H-8/9) |
||
|NM.Map=Abyssea_-_Attohwa-Map.jpg{{!}}650px |
|NM.Map=Abyssea_-_Attohwa-Map.jpg{{!}}650px |
||
}} |
}} |
||
| Line 729: | Line 729: | ||
|NM.Detects={{True Sound}} |
|NM.Detects={{True Sound}} |
||
|NM.Level= |
|NM.Level= |
||
|NM.Spawn_Condition=10-15 |
|NM.Spawn_Condition='''Timed''': 10-15 min. |
||
|NM.Treasure= |
|NM.Treasure= |
||
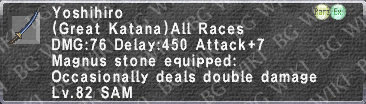
* {{imgpop|[[Yoshihiro]]|Yoshihiro description.png|link=}} |
* {{ItemIcon|Yoshihiro|22}} {{imgpop|[[Yoshihiro]]|Yoshihiro description.png|link=}} |
||
* {{imgpop|[[Ravager's Seal: Head]] {{Green!}}|Rvg._Seal-_Hd._description.png|link=}} |
* {{ItemIcon|Rvg._Seal-_Hd.|22}} {{imgpop|[[Ravager's Seal: Head]] {{Green!}}|Rvg._Seal-_Hd._description.png|link=}} |
||
* {{imgpop|[[Raider's Seal: Head]] {{Green!}}|Raider's Seal-_Hd._description.png|link=}} |
* {{ItemIcon|Raider's Seal-_Hd.|22}} {{imgpop|[[Raider's Seal: Head]] {{Green!}}|Raider's Seal-_Hd._description.png|link=}} |
||
* {{imgpop|[[Lancer's Seal: Head]] {{Green!}}|Lancer's Seal-_Hd._description.png|link=}} |
* {{ItemIcon|Lancer's Seal-_Hd.|22}} {{imgpop|[[Lancer's Seal: Head]] {{Green!}}|Lancer's Seal-_Hd._description.png|link=}} |
||
* {{imgpop|[[Charis Seal: Head]] {{Green!}}|Charis Seal-_Hd._description.png|link=}} |
* {{ItemIcon|Charis Seal-_Hd.|22}} {{imgpop|[[Charis Seal: Head]] {{Green!}}|Charis Seal-_Hd._description.png|link=}} |
||
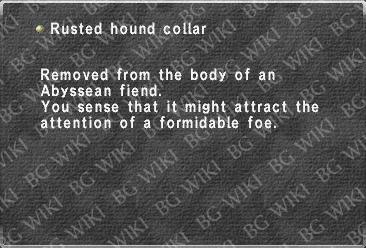
* {{imgpop|{{KI}} [[Rusted hound collar]] {{Red!}}|Rusted hound collar.jpg|link=}} |
* {{imgpop|{{KI}} [[Rusted hound collar]] {{Red!}}|Rusted hound collar.jpg|link=}} |
||
|NM.Steal= |
|NM.Steal= |
||
|NM.Position=F-6 |
|NM.Position=(F-6) |
||
|NM.Map=Abyssea_-_Attohwa-Map.jpg{{!}}650px |
|NM.Map=Abyssea_-_Attohwa-Map.jpg{{!}}650px |
||
}} |
}} |
||
| Line 749: | Line 749: | ||
|NM.Detects={{True Sound}} |
|NM.Detects={{True Sound}} |
||
|NM.Level= |
|NM.Level= |
||
|NM.Spawn_Condition=Trade [[Withered Cocoon]] to |
|NM.Spawn_Condition='''Forced''': Trade [[Withered Cocoon]] to '''???''' |
||
|NM.Treasure= |
|NM.Treasure= |
||
* {{imgpop|[[Volley Earring]]|Volley Earring description.png|link=}} |
* {{ItemIcon|Volley Earring|22}} {{imgpop|[[Volley Earring]]|Volley Earring description.png|link=}} |
||
* {{imgpop|[[Ravager's Seal: Head]] {{Green!}}|Rvg._Seal-_Hd._description.png|link=}} |
* {{ItemIcon|Rvg._Seal-_Hd.|22}} {{imgpop|[[Ravager's Seal: Head]] {{Green!}}|Rvg._Seal-_Hd._description.png|link=}} |
||
* {{imgpop|[[Orison Seal: Head]] {{Green!}}|Orison Seal-_Hd._description.png|link=}} |
* {{ItemIcon|Orison Seal-_Hd.|22}} {{imgpop|[[Orison Seal: Head]] {{Green!}}|Orison Seal-_Hd._description.png|link=}} |
||
* {{imgpop|[[Navarch's Seal: Head]] {{Green!}}|Nvrch._Seal-_Hd._description.png|link=}} |
* {{ItemIcon|Nvrch._Seal-_Hd.|22}} {{imgpop|[[Navarch's Seal: Head]] {{Green!}}|Nvrch._Seal-_Hd._description.png|link=}} |
||
* {{imgpop|[[Charis Seal: Head]] {{Green!}}|Charis Seal-_Hd._description.png|link=}} |
* {{ItemIcon|Charis Seal-_Hd.|22}} {{imgpop|[[Charis Seal: Head]] {{Green!}}|Charis Seal-_Hd._description.png|link=}} |
||
* {{imgpop|{{KI}} [[Venomous wamoura feeler]] {{Red!}}|Venomous wamoura feeler.jpg|link=}} |
* {{imgpop|{{KI}} [[Venomous wamoura feeler]] {{Red!}}|Venomous wamoura feeler.jpg|link=}} |
||
|NM.Steal= |
|NM.Steal= |
||
|NM.Position=K-10 |
|NM.Position=(K-10) |
||
|NM.Map=Abyssea_-_Attohwa-Map.jpg{{!}}650px |
|NM.Map=Abyssea_-_Attohwa-Map.jpg{{!}}650px |
||
}} |
}} |
||
| Line 766: | Line 766: | ||
|NM.Main= |
|NM.Main= |
||
|NM.Sub= |
|NM.Sub= |
||
|NM.Aggressive= |
|NM.Aggressive=Y |
||
|NM.Detects={{True Sound}} {{True Sight}} |
|NM.Detects={{True Sound}} {{True Sight}} |
||
|NM.Level= |
|NM.Level= |
||
|NM.Spawn_Condition=10-15 |
|NM.Spawn_Condition='''Timed''': 10-15 min. |
||
|NM.Treasure= |
|NM.Treasure= |
||
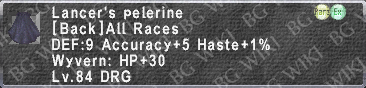
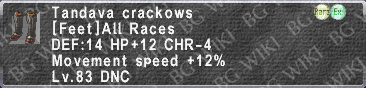
* {{imgpop|[[Lancer's Pelerine]]|Lancer's Pelerine description.png|link=}} |
* {{ItemIcon|Lancer's Pelerine|22}} {{imgpop|[[Lancer's Pelerine]]|Lancer's Pelerine description.png|link=}} |
||
* {{imgpop|[[Tandava Crackows]]|Tandava Crackows description.png|link=}} |
* {{ItemIcon|Tandava Crackows|22}} {{imgpop|[[Tandava Crackows]]|Tandava Crackows description.png|link=}} |
||
* {{imgpop|[[Tantra Tathlum]]|Tantra Tathlum description.png|link=}} |
* {{ItemIcon|Tantra Tathlum|22}} {{imgpop|[[Tantra Tathlum]]|Tantra Tathlum description.png|link=}} |
||
* {{imgpop|[[Velox Harness]] {{Blue!}}|Velox Harness description.png|link=}} |
* {{ItemIcon|Velox Harness|22}} {{imgpop|[[Velox Harness]] {{Blue!}}|Velox Harness description.png|link=}} |
||
* {{imgpop|[[Jewel of Wieldance]] {{Green!}}|Wieldance_Jewel_description.png|link=}} |
* {{ItemIcon|Wieldance_Jewel|22}} {{imgpop|[[Jewel of Wieldance]] {{Green!}}|Wieldance_Jewel_description.png|link=}} |
||
* {{imgpop|[[Card of Wieldance]] {{Green!}}|Wieldance_Card_description.png|link=}} |
* {{ItemIcon|Wieldance_Card|22}} {{imgpop|[[Card of Wieldance]] {{Green!}}|Wieldance_Card_description.png|link=}} |
||
|NM.Steal= |
|NM.Steal= |
||
|NM.Position=G-9 |
|NM.Position=(G-9) |
||
|NM.Map=Abyssea_-_Attohwa-Map.jpg{{!}}650px |
|NM.Map=Abyssea_-_Attohwa-Map.jpg{{!}}650px |
||
}} |
}} |
||
| Line 789: | Line 789: | ||
|NM.Detects={{links}} |
|NM.Detects={{links}} |
||
|NM.Level= |
|NM.Level= |
||
|NM.Spawn_Condition=Examine |
|NM.Spawn_Condition='''Forced''': Examine '''???''' with {{KI}} [[Venomous wamoura feeler]], [[Bulbous crawler cocoon]], and [[Distended chigoe abdomen]] |
||
|NM.Treasure= |
|NM.Treasure= |
||
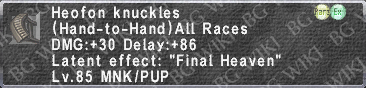
* {{imgpop|[[Heofon Knuckles]] {{Blue!}}|Heofon Knuckles description.png|link=}} |
* {{ItemIcon|Heofon Knuckles|22}} {{imgpop|[[Heofon Knuckles]] {{Blue!}}|Heofon Knuckles description.png|link=}} |
||
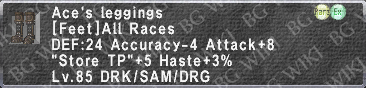
* {{imgpop|[[Ace's Leggings]]|Ace%27s_Leggings_description.png|link=}} |
* {{ItemIcon|Ace%27s_Leggings|22}} {{imgpop|[[Ace's Leggings]]|Ace%27s_Leggings_description.png|link=}} |
||
* {{imgpop|[[Stone of Vision]] {{Green!}}|Vision_Stone_description.png|link=}} |
* {{ItemIcon|Vision_Stone|22}} {{imgpop|[[Stone of Vision]] {{Green!}}|Vision_Stone_description.png|link=}} |
||
* {{imgpop|[[Card of Vision]] {{Green!}}|Vision_Card_description.png|link=}} |
* {{ItemIcon|Vision_Card|22}} {{imgpop|[[Card of Vision]] {{Green!}}|Vision_Card_description.png|link=}} |
||
* {{imgpop|[[Stone of Ardor]] {{Green!}}|Ardor_Stone_description.png|link=}} |
* {{ItemIcon|Ardor_Stone|22}} {{imgpop|[[Stone of Ardor]] {{Green!}}|Ardor_Stone_description.png|link=}} |
||
* {{imgpop|[[Coin of Ardor]] {{Green!}}|Ardor_Coin_description.png|link=}} |
* {{ItemIcon|Ardor_Coin|22}} {{imgpop|[[Coin of Ardor]] {{Green!}}|Ardor_Coin_description.png|link=}} |
||
* {{imgpop|[[Itzpapalotl's Scale]]|Itzpapa._Scale_description.png|link=}} |
* {{ItemIcon|Itzpapa._Scale|22}} {{imgpop|[[Itzpapalotl's Scale]]|Itzpapa._Scale_description.png|link=}} |
||
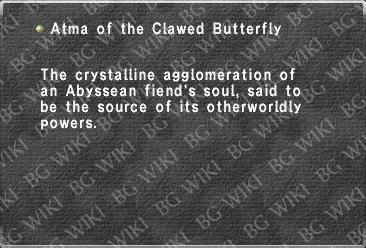
* {{imgpop|{{KI}} [[Atma of the Clawed Butterfly]] {{Red!}}|Atma of the Clawed Butterfly.jpg|link=}} |
* {{imgpop|{{KI}} [[Atma of the Clawed Butterfly]] {{Red!}}|Atma of the Clawed Butterfly.jpg|link=}} |
||
|NM.Steal= |
|NM.Steal= |
||
|NM.Position=K-10 |
|NM.Position=(K-10) |
||
|NM.Map=Abyssea_-_Attohwa-Map.jpg{{!}}650px |
|NM.Map=Abyssea_-_Attohwa-Map.jpg{{!}}650px |
||
}} |
}} |
||
| Line 811: | Line 811: | ||
|NM.Detects={{True Sound}} |
|NM.Detects={{True Sound}} |
||
|NM.Level= |
|NM.Level= |
||
|NM.Spawn_Condition=Trade [[Gory Pincer]] to |
|NM.Spawn_Condition='''Forced''': Trade [[Gory Pincer]] to '''???''' |
||
|NM.Treasure= |
|NM.Treasure= |
||
* {{imgpop|[[Heed Ring]]|Heed Ring description.png|link=}} |
* {{ItemIcon|Heed Ring|22}} {{imgpop|[[Heed Ring]]|Heed Ring description.png|link=}} |
||
* {{imgpop|[[Ravager's Seal: Head]] {{Green!}}|Rvg._Seal-_Hd._description.png|link=}} |
* {{ItemIcon|Rvg._Seal-_Hd.|22}} {{imgpop|[[Ravager's Seal: Head]] {{Green!}}|Rvg._Seal-_Hd._description.png|link=}} |
||
* {{imgpop|[[Bale Seal: Head]] {{Green!}}|Bale Seal-_Hd._description.png|link=}} |
* {{ItemIcon|Bale Seal-_Hd.|22}} {{imgpop|[[Bale Seal: Head]] {{Green!}}|Bale Seal-_Hd._description.png|link=}} |
||
* {{imgpop|[[Unkai Seal: Head]] {{Green!}}|Unkai Seal-_Hd._description.png|link=}} |
* {{ItemIcon|Unkai Seal-_Hd.|22}} {{imgpop|[[Unkai Seal: Head]] {{Green!}}|Unkai Seal-_Hd._description.png|link=}} |
||
* {{imgpop|[[Lancer's Seal: Head]] {{Green!}}|Lancer's Seal-_Hd._description.png|link=}} |
* {{ItemIcon|Lancer's Seal-_Hd.|22}} {{imgpop|[[Lancer's Seal: Head]] {{Green!}}|Lancer's Seal-_Hd._description.png|link=}} |
||
* {{imgpop|{{KI}} [[Atma of the Golden Claw]] {{Red!}}|Atma of the Golden Claw.jpg|link=}} |
* {{imgpop|{{KI}} [[Atma of the Golden Claw]] {{Red!}}|Atma of the Golden Claw.jpg|link=}} |
||
|NM.Steal= |
|NM.Steal= |
||
|NM.Position=F-10 |
|NM.Position=(F-10) |
||
|NM.Map=Abyssea_-_Attohwa-Map.jpg{{!}}650px |
|NM.Map=Abyssea_-_Attohwa-Map.jpg{{!}}650px |
||
}} |
}} |
||
| Line 828: | Line 828: | ||
|NM.Main= |
|NM.Main= |
||
|NM.Sub= |
|NM.Sub= |
||
|NM.Aggressive= |
|NM.Aggressive=Y |
||
|NM.Detects={{True Sound}} |
|NM.Detects={{True Sound}} |
||
|NM.Level= |
|NM.Level= |
||
|NM.Spawn_Condition=Trade [[Bone Chips]] to |
|NM.Spawn_Condition='''Forced''': Trade [[Bone Chips]] to '''???''' |
||
|NM.Treasure= |
|NM.Treasure= |
||
* {{imgpop|[[Elementa Grip]]|Elementa Grip description.png|link=}} |
* {{ItemIcon|Elementa Grip|22}} {{imgpop|[[Elementa Grip]]|Elementa Grip description.png|link=}} |
||
* {{imgpop|[[Ferine Seal: Head]] {{Green!}}|Ferine Seal-_Hd._description.png|link=}} |
* {{ItemIcon|Ferine Seal-_Hd.|22}} {{imgpop|[[Ferine Seal: Head]] {{Green!}}|Ferine Seal-_Hd._description.png|link=}} |
||
* {{imgpop|[[Sylvan Seal: Head]] {{Green!}}|Sylvan Seal-_Hd._description.png|link=}} |
* {{ItemIcon|Sylvan Seal-_Hd.|22}} {{imgpop|[[Sylvan Seal: Head]] {{Green!}}|Sylvan Seal-_Hd._description.png|link=}} |
||
* {{imgpop|[[Caller's Seal: Head]] {{Green!}}|Caller Seal-_Hd._description.png|link=}} |
* {{ItemIcon|Caller Seal-_Hd.|22}} {{imgpop|[[Caller's Seal: Head]] {{Green!}}|Caller Seal-_Hd._description.png|link=}} |
||
* {{imgpop|[[Mavi Seal: Head]] {{Green!}}|Mavi Seal-_Hd._description.png|link=}} |
* {{ItemIcon|Mavi Seal-_Hd.|22}} {{imgpop|[[Mavi Seal: Head]] {{Green!}}|Mavi Seal-_Hd._description.png|link=}} |
||
* {{imgpop|{{KI}} [[Cracked skeleton clavicle]] {{Red!}}|Cracked skeleton clavicle.jpg|link=}} |
* {{imgpop|{{KI}} [[Cracked skeleton clavicle]] {{Red!}}|Cracked skeleton clavicle.jpg|link=}} |
||
|NM.Steal= |
|NM.Steal= |
||
|NM.Position=F-7 |
|NM.Position=(F-7) |
||
|NM.Map=Abyssea_-_Attohwa-Map.jpg{{!}}650px |
|NM.Map=Abyssea_-_Attohwa-Map.jpg{{!}}650px |
||
}} |
}} |
||
| Line 851: | Line 851: | ||
|NM.Detects={{True Sound}} |
|NM.Detects={{True Sound}} |
||
|NM.Level= |
|NM.Level= |
||
|NM.Spawn_Condition=Trade [[Coeurl Round]] to |
|NM.Spawn_Condition='''Forced''': Trade [[Coeurl Round]] to '''???''' |
||
|NM.Treasure= |
|NM.Treasure= |
||
* {{imgpop|[[Vallus Grip]]|Vallus Grip description.png|link=}} |
* {{ItemIcon|Vallus Grip|22}} {{imgpop|[[Vallus Grip]]|Vallus Grip description.png|link=}} |
||
* {{imgpop|{{KI}} [[Atma of the Lightning Beast]] {{Red!}}|Atma of the Lightning Beast.jpg|link=}} |
* {{imgpop|{{KI}} [[Atma of the Lightning Beast]] {{Red!}}|Atma of the Lightning Beast.jpg|link=}} |
||
|NM.Steal= |
|NM.Steal= |
||
|NM.Position=J-9 |
|NM.Position=(J-9) |
||
|NM.Map=Abyssea_-_Attohwa-Map.jpg{{!}}650px |
|NM.Map=Abyssea_-_Attohwa-Map.jpg{{!}}650px |
||
}} |
}} |
||
| Line 867: | Line 867: | ||
|NM.Detects= |
|NM.Detects= |
||
|NM.Level= |
|NM.Level= |
||
|NM.Spawn_Condition=Trade [[Great Root]] to |
|NM.Spawn_Condition='''Forced''': Trade [[Great Root]] to '''???''' |
||
|NM.Treasure= |
|NM.Treasure= |
||
* {{imgpop|[[Bloom Buckler]]|Bloom Buckler description.png|link=}} |
* {{ItemIcon|Bloom Buckler|22}} {{imgpop|[[Bloom Buckler]]|Bloom Buckler description.png|link=}} |
||
* {{imgpop|[[Ferine Seal: Head]] {{Green!}}|Ferine Seal-_Hd._description.png|link=}} |
* {{ItemIcon|Ferine Seal-_Hd.|22}} {{imgpop|[[Ferine Seal: Head]] {{Green!}}|Ferine Seal-_Hd._description.png|link=}} |
||
* {{imgpop|[[Caller's Seal: Head]] {{Green!}}|Caller Seal-_Hd._description.png|link=}} |
* {{ItemIcon|Caller Seal-_Hd.|22}} {{imgpop|[[Caller's Seal: Head]] {{Green!}}|Caller Seal-_Hd._description.png|link=}} |
||
* {{imgpop|[[Navarch's Seal: Head]] {{Green!}}|Nvrch._Seal-_Hd._description.png|link=}} |
* {{ItemIcon|Nvrch._Seal-_Hd.|22}} {{imgpop|[[Navarch's Seal: Head]] {{Green!}}|Nvrch._Seal-_Hd._description.png|link=}} |
||
* {{imgpop|[[Cirque Seal: Head]] {{Green!}}|Cirque Seal-_Hd._description.png|link=}} |
* {{ItemIcon|Cirque Seal-_Hd.|22}} {{imgpop|[[Cirque Seal: Head]] {{Green!}}|Cirque Seal-_Hd._description.png|link=}} |
||
* {{imgpop|{{KI}} [[Jade abyssite of sojourn]] {{Red!}}|Jade abyssite of sojourn.jpg|link=}} |
* {{imgpop|{{KI}} [[Jade abyssite of sojourn]] {{Red!}}|Jade abyssite of sojourn.jpg|link=}} |
||
|NM.Steal= |
|NM.Steal= |
||
|NM.Position=K-8 |
|NM.Position=(K-8) |
||
|NM.Map=Abyssea_-_Attohwa-Map.jpg{{!}}650px |
|NM.Map=Abyssea_-_Attohwa-Map.jpg{{!}}650px |
||
}} |
}} |
||
| Line 887: | Line 887: | ||
|NM.Detects={{True Sound}} |
|NM.Detects={{True Sound}} |
||
|NM.Level= |
|NM.Level= |
||
|NM.Spawn_Condition=Trade [[Withered Bud]] to |
|NM.Spawn_Condition='''Forced''': Trade [[Withered Bud]] to '''???''' |
||
|NM.Treasure= |
|NM.Treasure= |
||
* {{imgpop|[[Airy Ring]]|Airy Ring description.png|link=}} |
* {{ItemIcon|Airy Ring|22}} {{imgpop|[[Airy Ring]]|Airy Ring description.png|link=}} |
||
* {{imgpop|[[Creed Seal: Head]] {{Green!}}|Creed Seal-_Hd._description.png|link=}} |
* {{ItemIcon|Creed Seal-_Hd.|22}} {{imgpop|[[Creed Seal: Head]] {{Green!}}|Creed Seal-_Hd._description.png|link=}} |
||
* {{imgpop|[[Aoidos' Seal: Head]] {{Green!}}|Aoidos' Seal-_Hd._description.png|link=}} |
* {{ItemIcon|Aoidos' Seal-_Hd.|22}} {{imgpop|[[Aoidos' Seal: Head]] {{Green!}}|Aoidos' Seal-_Hd._description.png|link=}} |
||
* {{imgpop|[[Sylvan Seal: Head]] {{Green!}}|Sylvan Seal-_Hd._description.png|link=}} |
* {{ItemIcon|Sylvan Seal-_Hd.|22}} {{imgpop|[[Sylvan Seal: Head]] {{Green!}}|Sylvan Seal-_Hd._description.png|link=}} |
||
* {{imgpop|[[Mavi Seal: Head]] {{Green!}}|Mavi Seal-_Hd._description.png|link=}} |
* {{ItemIcon|Mavi Seal-_Hd.|22}} {{imgpop|[[Mavi Seal: Head]] {{Green!}}|Mavi Seal-_Hd._description.png|link=}} |
||
* {{imgpop|{{KI}} [[Atma of the Noxious Bloom]] {{Red!}}|Atma of the Noxious Bloom.jpg|link=}} |
* {{imgpop|{{KI}} [[Atma of the Noxious Bloom]] {{Red!}}|Atma of the Noxious Bloom.jpg|link=}} |
||
|NM.Steal= |
|NM.Steal= |
||
|NM.Position=K-8 |
|NM.Position=(K-8) |
||
|NM.Map=Abyssea_-_Attohwa-Map.jpg{{!}}650px |
|NM.Map=Abyssea_-_Attohwa-Map.jpg{{!}}650px |
||
}} |
}} |
||
| Line 907: | Line 907: | ||
|NM.Detects={{True Sound}} |
|NM.Detects={{True Sound}} |
||
|NM.Level= |
|NM.Level= |
||
|NM.Spawn_Condition=Trade [[Blanched Silver]] to |
|NM.Spawn_Condition='''Forced''': Trade [[Blanched Silver]] to '''???''' |
||
|NM.Treasure= |
|NM.Treasure= |
||
* {{imgpop|[[Incantor Stone]]|Incantor Stone description.png|link=}} |
* {{ItemIcon|Incantor Stone|22}} {{imgpop|[[Incantor Stone]]|Incantor Stone description.png|link=}} |
||
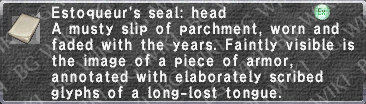
* {{imgpop|[[Estoqueur's Seal: Head]] {{Green!}}|Estq._Seal-_Hd._description.png|link=}} |
* {{ItemIcon|Estq._Seal-_Hd.|22}} {{imgpop|[[Estoqueur's Seal: Head]] {{Green!}}|Estq._Seal-_Hd._description.png|link=}} |
||
* {{imgpop|[[Raider's Seal: Head]] {{Green!}}|Raider's Seal-_Hd._description.png|link=}} |
* {{ItemIcon|Raider's Seal-_Hd.|22}} {{imgpop|[[Raider's Seal: Head]] {{Green!}}|Raider's Seal-_Hd._description.png|link=}} |
||
* {{imgpop|[[Creed Seal: Head]] {{Green!}}|Creed Seal-_Hd._description.png|link=}} |
* {{ItemIcon|Creed Seal-_Hd.|22}} {{imgpop|[[Creed Seal: Head]] {{Green!}}|Creed Seal-_Hd._description.png|link=}} |
||
* {{imgpop|[[Unkai Seal: Head]] {{Green!}}|Unkai Seal-_Hd._description.png|link=}} |
* {{ItemIcon|Unkai Seal-_Hd.|22}} {{imgpop|[[Unkai Seal: Head]] {{Green!}}|Unkai Seal-_Hd._description.png|link=}} |
||
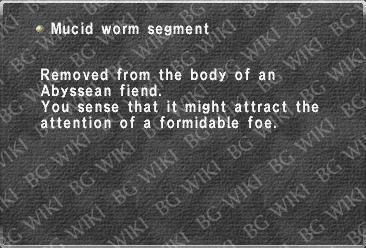
* {{imgpop|{{KI}} [[Mucid worm segment]] {{Red!}}|Mucid worm segment.jpg|link=}} |
* {{imgpop|{{KI}} [[Mucid worm segment]] {{Red!}}|Mucid worm segment.jpg|link=}} |
||
|NM.Steal= |
|NM.Steal= |
||
|NM.Position=J-7 |
|NM.Position=(J-7) |
||
|NM.Map=Abyssea_-_Attohwa-Map.jpg{{!}}650px |
|NM.Map=Abyssea_-_Attohwa-Map.jpg{{!}}650px |
||
}} |
}} |
||
| Line 924: | Line 924: | ||
|NM.Main= |
|NM.Main= |
||
|NM.Sub= |
|NM.Sub= |
||
|NM.Aggressive= |
|NM.Aggressive=Y |
||
|NM.Detects={{True Sound}} |
|NM.Detects={{True Sound}} |
||
|NM.Level= |
|NM.Level= |
||
|NM.Spawn_Condition=Examine |
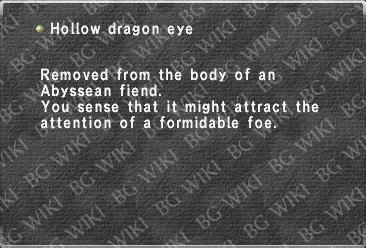
|NM.Spawn_Condition='''Forced''': Examine '''???''' with {{KI}} [[Hollow dragon eye]] |
||
|NM.Treasure= |
|NM.Treasure= |
||
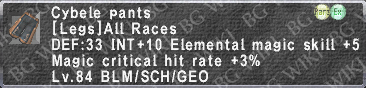
* {{imgpop|[[Cybele Pants]] {{Blue!}}|Cybele Pants description.png|link=}} |
* {{ItemIcon|Cybele Pants|22}} {{imgpop|[[Cybele Pants]] {{Blue!}}|Cybele Pants description.png|link=}} |
||
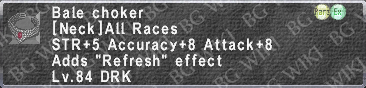
* {{imgpop|[[Bale Choker]]|Bale Choker description.png|link=}} |
* {{ItemIcon|Bale Choker|22}} {{imgpop|[[Bale Choker]]|Bale Choker description.png|link=}} |
||
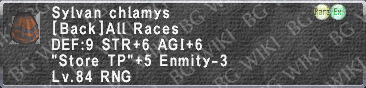
* {{imgpop|[[Sylvan Chlamys]]|Sylvan Chlamys description.png|link=}} |
* {{ItemIcon|Sylvan Chlamys|22}} {{imgpop|[[Sylvan Chlamys]]|Sylvan Chlamys description.png|link=}} |
||
* {{imgpop|[[Stone of Wieldance]] {{Green!}}|Wieldance_Stone_description.png|link=}} |
* {{ItemIcon|Wieldance_Stone|22}} {{imgpop|[[Stone of Wieldance]] {{Green!}}|Wieldance_Stone_description.png|link=}} |
||
* {{imgpop|[[Stone of Ardor]] {{Green!}}|Ardor_Stone_description.png|link=}} |
* {{ItemIcon|Ardor_Stone|22}} {{imgpop|[[Stone of Ardor]] {{Green!}}|Ardor_Stone_description.png|link=}} |
||
* {{imgpop|{{KI}} [[Atma of the Smoldering Sky]] {{Red!}}|Atma of the Smoldering Sky.jpg|link=}} |
* {{imgpop|{{KI}} [[Atma of the Smoldering Sky]] {{Red!}}|Atma of the Smoldering Sky.jpg|link=}} |
||
|NM.Steal= |
|NM.Steal= |
||
|NM.Position=E-9 |
|NM.Position=(E-9) |
||
|NM.Map=Abyssea_-_Attohwa-Map.jpg{{!}}650px |
|NM.Map=Abyssea_-_Attohwa-Map.jpg{{!}}650px |
||
}} |
}} |
||
| Line 944: | Line 944: | ||
|NM.Main= |
|NM.Main= |
||
|NM.Sub= |
|NM.Sub= |
||
|NM.Aggressive= |
|NM.Aggressive=Y |
||
|NM.Detects={{Sound}} |
|NM.Detects={{Sound}} |
||
|NM.Level= |
|NM.Level= |
||
|NM.Spawn_Condition=Trade [[Cracked Dragonscale]] to |
|NM.Spawn_Condition='''Forced''': Trade [[Cracked Dragonscale]] to '''???''' |
||
|NM.Treasure= |
|NM.Treasure= |
||
* {{imgpop|[[Killer Shortbow]]|Killer Shortbow description.png|link=}} |
* {{ItemIcon|Killer Shortbow|22}} {{imgpop|[[Killer Shortbow]]|Killer Shortbow description.png|link=}} |
||
* {{imgpop|{{KI}} [[Hollow dragon eye]] {{Red!}}|Hollow dragon eye.jpg|link=}} |
* {{imgpop|{{KI}} [[Hollow dragon eye]] {{Red!}}|Hollow dragon eye.jpg|link=}} |
||
|NM.Steal= |
|NM.Steal= |
||
|NM.Position=E-9 |
|NM.Position=(E-9) |
||
|NM.Map=Abyssea_-_Attohwa-Map.jpg{{!}}650px |
|NM.Map=Abyssea_-_Attohwa-Map.jpg{{!}}650px |
||
}} |
}} |
||
| Line 963: | Line 963: | ||
|NM.Detects= |
|NM.Detects= |
||
|NM.Level= |
|NM.Level= |
||
|NM.Spawn_Condition=20 |
|NM.Spawn_Condition='''Timed''': 20 min. with 5 spawns |
||
|NM.Treasure= |
|NM.Treasure= |
||
|NM.Steal= |
|NM.Steal= |
||
|NM.Position=Roaming |
|NM.Position=(Roaming) |
||
|NM.Map=Abyssea_-_Attohwa-Map.jpg{{!}}650px |
|NM.Map=Abyssea_-_Attohwa-Map.jpg{{!}}650px |
||
}} |
}} |
||
| Line 974: | Line 975: | ||
|NM.Main= |
|NM.Main= |
||
|NM.Sub= |
|NM.Sub= |
||
|NM.Aggressive= |
|NM.Aggressive=Y |
||
|NM.Detects={{True Sound}} |
|NM.Detects={{True Sound}} |
||
|NM.Level= |
|NM.Level= |
||
|NM.Spawn_Condition=Examine |
|NM.Spawn_Condition='''Forced''': Examine '''???''' with {{KI}} [[Blotched doomed tongue]], [[Cracked skeleton clavicle]], [[Writhing ghost finger]], and [[Rusted hound collar]] |
||
|NM.Treasure= |
|NM.Treasure= |
||
* {{imgpop|[[Virtus Crossbow]]|Virtus Crossbow description.png|link=}} |
* {{ItemIcon|Virtus Crossbow|22}} {{imgpop|[[Virtus Crossbow]]|Virtus Crossbow description.png|link=}} |
||
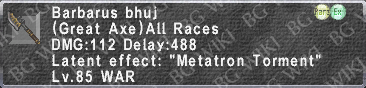
* {{imgpop|[[Barbarus Bhuj]] {{Blue!}}|Barbarus Bhuj description.png|link=}} |
* {{ItemIcon|Barbarus Bhuj|22}} {{imgpop|[[Barbarus Bhuj]] {{Blue!}}|Barbarus Bhuj description.png|link=}} |
||
* {{imgpop|[[Jewel of Vision]] {{Green!}}|Vision_Jewel_description.png|link=}} |
* {{ItemIcon|Vision_Jewel|22}} {{imgpop|[[Jewel of Vision]] {{Green!}}|Vision_Jewel_description.png|link=}} |
||
* {{imgpop|[[Stone of Vision]] {{Green!}}|Vision_Stone_description.png|link=}} |
* {{ItemIcon|Vision_Stone|22}} {{imgpop|[[Stone of Vision]] {{Green!}}|Vision_Stone_description.png|link=}} |
||
* {{imgpop|[[Jewel of Ardor]] {{Green!}}|Ardor_Jewel_description.png|link=}} |
* {{ItemIcon|Ardor_Jewel|22}} {{imgpop|[[Jewel of Ardor]] {{Green!}}|Ardor_Jewel_description.png|link=}} |
||
* {{imgpop|[[Card of Ardor]] {{Green!}}|Ardor_Card_description.png|link=}} |
* {{ItemIcon|Ardor_Card|22}} {{imgpop|[[Card of Ardor]] {{Green!}}|Ardor_Card_description.png|link=}} |
||
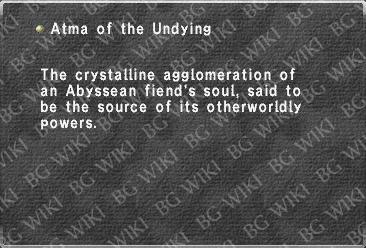
* {{imgpop|{{KI}} [[Atma of the Undying]] {{Red!}}|Atma of the Undying.jpg|link=}} |
* {{imgpop|{{KI}} [[Atma of the Undying]] {{Red!}}|Atma of the Undying.jpg|link=}} |
||
|NM.Steal= |
|NM.Steal= |
||
|NM.Position=F-7 |
|NM.Position=(F-7) |
||
|NM.Map=Abyssea_-_Attohwa-Map.jpg{{!}}650px |
|NM.Map=Abyssea_-_Attohwa-Map.jpg{{!}}650px |
||
}} |
}} |
||
| Line 995: | Line 996: | ||
|NM.Main= |
|NM.Main= |
||
|NM.Sub= |
|NM.Sub= |
||
|NM.Aggressive= |
|NM.Aggressive=Y |
||
|NM.Detects={{True Sight}} {{True Sound}} {{Links}} |
|NM.Detects={{True Sight}} {{True Sound}} {{Links}} |
||
|NM.Level= |
|NM.Level= |
||
|NM.Spawn_Condition=10-15 |
|NM.Spawn_Condition='''Timed''': 10-15 min. |
||
|NM.Treasure= |
|NM.Treasure= |
||
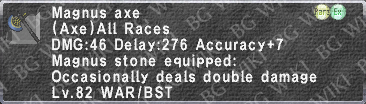
* {{imgpop|[[Hikmet Hat]] {{Blue!}}|Hikmet Hat description.png|link=}} |
* {{ItemIcon|Hikmet Hat|22}} {{imgpop|[[Hikmet Hat]] {{Blue!}}|Hikmet Hat description.png|link=}} |
||
* {{imgpop|[[Magnus Axe]]|Magnus Axe description.png|link=}} |
* {{ItemIcon|Magnus Axe|22}} {{imgpop|[[Magnus Axe]]|Magnus Axe description.png|link=}} |
||
* {{imgpop|{{KI}} [[Distended chigoe abdomen]] {{Red!}}|Distended chigoe abdomen.jpg|link=}} |
* {{imgpop|{{KI}} [[Distended chigoe abdomen]] {{Red!}}|Distended chigoe abdomen.jpg|link=}} |
||
|NM.Steal= |
|NM.Steal= |
||
|NM.Position=K-9/10 |
|NM.Position=(K-9/10) |
||
|NM.Map=Abyssea_-_Attohwa-Map.jpg{{!}}650px |
|NM.Map=Abyssea_-_Attohwa-Map.jpg{{!}}650px |
||
}} |
}} |
||
| Line 1,012: | Line 1,013: | ||
|NM.Main= |
|NM.Main= |
||
|NM.Sub= |
|NM.Sub= |
||
|NM.Aggressive= |
|NM.Aggressive=Y |
||
|NM.Detects={{True Sound}} |
|NM.Detects={{True Sound}} |
||
|NM.Level= |
|NM.Level= |
||
|NM.Spawn_Condition=Examine |
|NM.Spawn_Condition='''Forced''': Examine '''???''' with {{KI}} [[Mucid worm segment]] and [[Shriveled hecteyes stalk]] |
||
|NM.Treasure= |
|NM.Treasure= |
||
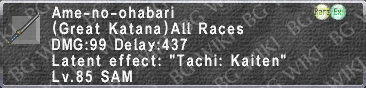
* {{imgpop|[[Ame-no-ohabari]] {{Blue!}}|Ame-no-ohabari description.png|link=}} |
* {{ItemIcon|Ame-no-ohabari|22}} {{imgpop|[[Ame-no-ohabari]] {{Blue!}}|Ame-no-ohabari description.png|link=}} |
||
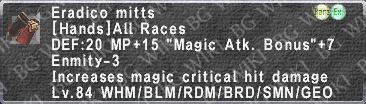
* {{imgpop|[[Eradico Mitts]]|Eradico Mitts description.png|link=}} |
* {{ItemIcon|Eradico Mitts|22}} {{imgpop|[[Eradico Mitts]]|Eradico Mitts description.png|link=}} |
||
* {{imgpop|[[Coin of Vision]] {{Green!}}|Vision_Coin_description.png|link=}} |
* {{ItemIcon|Vision_Coin|22}} {{imgpop|[[Coin of Vision]] {{Green!}}|Vision_Coin_description.png|link=}} |
||
* {{imgpop|[[Jewel of Vision]] {{Green!}}|Vision_Jewel_description.png|link=}} |
* {{ItemIcon|Vision_Jewel|22}} {{imgpop|[[Jewel of Vision]] {{Green!}}|Vision_Jewel_description.png|link=}} |
||
* {{imgpop|[[Coin of Wieldance]] {{Green!}}|Wieldance_Coin_description.png|link=}} |
* {{ItemIcon|Wieldance_Coin|22}} {{imgpop|[[Coin of Wieldance]] {{Green!}}|Wieldance_Coin_description.png|link=}} |
||
* {{imgpop|[[Stone of Wieldance]] {{Green!}}|Wieldance_Stone_description.png|link=}} |
* {{ItemIcon|Wieldance_Stone|22}} {{imgpop|[[Stone of Wieldance]] {{Green!}}|Wieldance_Stone_description.png|link=}} |
||
* {{imgpop|[[Ulhuadshi's Fang]]|Ulhuadshi's Fang description.png|link=}} |
* {{ItemIcon|Ulhuadshi's Fang|22}} {{imgpop|[[Ulhuadshi's Fang]]|Ulhuadshi's Fang description.png|link=}} |
||
* {{imgpop|{{KI}} [[Atma of the Desert Worm]] {{Red!}}|Atma of the Desert Worm.jpg|link=}} |
* {{imgpop|{{KI}} [[Atma of the Desert Worm]] {{Red!}}|Atma of the Desert Worm.jpg|link=}} |
||
|NM.Steal= |
|NM.Steal= |
||
|NM.Position=J-7 |
|NM.Position=(J-7) |
||
|NM.Map=Abyssea_-_Attohwa-Map.jpg{{!}}650px |
|NM.Map=Abyssea_-_Attohwa-Map.jpg{{!}}650px |
||
}} |
}} |
||
| Line 1,034: | Line 1,035: | ||
|NM.Main= |
|NM.Main= |
||
|NM.Sub= |
|NM.Sub= |
||
|NM.Aggressive= |
|NM.Aggressive=Y |
||
|NM.Detects={{True Sight}} {{True Sound}} |
|NM.Detects={{True Sight}} {{True Sound}} |
||
|NM.Level= |
|NM.Level= |
||
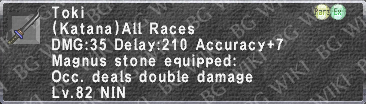
|NM.Spawn_Condition=10-15 |
|NM.Spawn_Condition='''Timed''': 10-15 min. |
||
|NM.Treasure= |
|NM.Treasure= |
||
* {{imgpop|[[Toki]]|Toki description.png|link=}} |
* {{ItemIcon|Toki|22}} {{imgpop|[[Toki]]|Toki description.png|link=}} |
||
* {{imgpop|[[Estoqueur's Seal: Head]] {{Green!}}|Estq._Seal-_Hd._description.png|link=}} |
* {{ItemIcon|Estq._Seal-_Hd.|22}} {{imgpop|[[Estoqueur's Seal: Head]] {{Green!}}|Estq._Seal-_Hd._description.png|link=}} |
||
* {{imgpop|[[Ferine Seal: Head]] {{Green!}}|Ferine Seal-_Hd._description.png|link=}} |
* {{ItemIcon|Ferine Seal-_Hd.|22}} {{imgpop|[[Ferine Seal: Head]] {{Green!}}|Ferine Seal-_Hd._description.png|link=}} |
||
* {{imgpop|[[Sylvan Seal: Head]] {{Green!}}|Sylvan Seal-_Hd._description.png|link=}} |
* {{ItemIcon|Sylvan Seal-_Hd.|22}} {{imgpop|[[Sylvan Seal: Head]] {{Green!}}|Sylvan Seal-_Hd._description.png|link=}} |
||
* {{imgpop|[[Savant's Seal: Head]] {{Green!}}|Savant's Seal-_Hd._description.png|link=}} |
* {{ItemIcon|Savant's Seal-_Hd.|22}} {{imgpop|[[Savant's Seal: Head]] {{Green!}}|Savant's Seal-_Hd._description.png|link=}} |
||
* {{imgpop|{{KI}} [[Jade abyssite of merit]] {{Red!}}|Jade abyssite of merit.jpg|link=}} |
* {{imgpop|{{KI}} [[Jade abyssite of merit]] {{Red!}}|Jade abyssite of merit.jpg|link=}} |
||
|NM.Steal= |
|NM.Steal= |
||
|NM.Position=E-7 |
|NM.Position=(E-7) |
||
|NM.Map=Abyssea_-_Attohwa-Map.jpg{{!}}650px |
|NM.Map=Abyssea_-_Attohwa-Map.jpg{{!}}650px |
||
}} |
}} |
||
| Line 1,057: | Line 1,058: | ||
|NM.Detects= |
|NM.Detects= |
||
|NM.Level= |
|NM.Level= |
||
|NM.Spawn_Condition=Trade [[Mangled Cockatrice Skin]] to |
|NM.Spawn_Condition='''Forced''': Trade [[Mangled Cockatrice Skin]] to '''???''' |
||
|NM.Treasure= |
|NM.Treasure= |
||
* {{imgpop|[[Divinus Grip]]|Divinus Grip description.png|link=}} |
* {{ItemIcon|Divinus Grip|22}} {{imgpop|[[Divinus Grip]]|Divinus Grip description.png|link=}} |
||
* {{imgpop|[[Estoqueur's Seal: Head]] {{Green!}}|Estq._Seal-_Hd._description.png|link=}} |
* {{ItemIcon|Estq._Seal-_Hd.|22}} {{imgpop|[[Estoqueur's Seal: Head]] {{Green!}}|Estq._Seal-_Hd._description.png|link=}} |
||
* {{imgpop|[[Goetia Seal: Head]] {{Green!}}|Goetia Seal-_Hd._description.png|link=}} |
* {{ItemIcon|Goetia Seal-_Hd.|22}} {{imgpop|[[Goetia Seal: Head]] {{Green!}}|Goetia Seal-_Hd._description.png|link=}} |
||
* {{imgpop|[[Orison Seal: Head]] {{Green!}}|Orison Seal-_Hd._description.png|link=}} |
* {{ItemIcon|Orison Seal-_Hd.|22}} {{imgpop|[[Orison Seal: Head]] {{Green!}}|Orison Seal-_Hd._description.png|link=}} |
||
* {{imgpop|[[Savant's Seal: Head]] {{Green!}}|Savant's Seal-_Hd._description.png|link=}} |
* {{ItemIcon|Savant's Seal-_Hd.|22}} {{imgpop|[[Savant's Seal: Head]] {{Green!}}|Savant's Seal-_Hd._description.png|link=}} |
||
* {{imgpop|{{KI}} [[Jade abyssite of expertise]] {{Red!}}|Jade abyssite of expertise.jpg|link=}} |
* {{imgpop|{{KI}} [[Jade abyssite of expertise]] {{Red!}}|Jade abyssite of expertise.jpg|link=}} |
||
|NM.Steal= |
|NM.Steal= |
||
|NM.Position=I-8 |
|NM.Position=(I-8) |
||
|NM.Map=Abyssea_-_Attohwa-Map.jpg{{!}}650px |
|NM.Map=Abyssea_-_Attohwa-Map.jpg{{!}}650px |
||
}} |
}} |
||
| Line 1,074: | Line 1,075: | ||
|NM.Main= |
|NM.Main= |
||
|NM.Sub= |
|NM.Sub= |
||
|NM.Aggressive= |
|NM.Aggressive=Y |
||
|NM.Detects={{True Sound}} {{Links}} |
|NM.Detects={{True Sound}} {{Links}} |
||
|NM.Level= |
|NM.Level= |
||
|NM.Spawn_Condition=10-15 |
|NM.Spawn_Condition='''Timed''': 10-15 min. |
||
|NM.Treasure= |
|NM.Treasure= |
||
* {{imgpop|[[Fluid Crossbow]] {{Blue!}}|Fluid Crossbow description.png|link=}} |
* {{ItemIcon|Fluid Crossbow|22}} {{imgpop|[[Fluid Crossbow]] {{Blue!}}|Fluid Crossbow description.png|link=}} |
||
* {{imgpop|[[Orison Seal: Head]] {{Green!}}|Orison Seal-_Hd._description.png|link=}} |
* {{ItemIcon|Orison Seal-_Hd.|22}} {{imgpop|[[Orison Seal: Head]] {{Green!}}|Orison Seal-_Hd._description.png|link=}} |
||
* {{imgpop|[[Bale Seal: Head]] {{Green!}}|Bale Seal-_Hd._description.png|link=}} |
* {{ItemIcon|Bale Seal-_Hd.|22}} {{imgpop|[[Bale Seal: Head]] {{Green!}}|Bale Seal-_Hd._description.png|link=}} |
||
* {{imgpop|[[Unkai Seal: Head]] {{Green!}}|Unkai Seal-_Hd._description.png|link=}} |
* {{ItemIcon|Unkai Seal-_Hd.|22}} {{imgpop|[[Unkai Seal: Head]] {{Green!}}|Unkai Seal-_Hd._description.png|link=}} |
||
* {{imgpop|[[Mavi Seal: Head]] {{Green!}}|Mavi Seal-_Hd._description.png|link=}} |
* {{ItemIcon|Mavi Seal-_Hd.|22}} {{imgpop|[[Mavi Seal: Head]] {{Green!}}|Mavi Seal-_Hd._description.png|link=}} |
||
|NM.Steal= |
|NM.Steal= |
||
|NM.Position=K-8/9 |
|NM.Position=(K-8/9) |
||
|NM.Map=Abyssea_-_Attohwa-Map.jpg{{!}}650px |
|NM.Map=Abyssea_-_Attohwa-Map.jpg{{!}}650px |
||
}} |
}} |
||
| Line 1,093: | Line 1,094: | ||
|NM.Main= |
|NM.Main= |
||
|NM.Sub= |
|NM.Sub= |
||
|NM.Aggressive= |
|NM.Aggressive=Y |
||
|NM.Detects={{True Sight}} |
|NM.Detects={{True Sight}} |
||
|NM.Level= |
|NM.Level= |
||
|NM.Spawn_Condition= |
|NM.Spawn_Condition='''Time of Day''': 15:00 |
||
|NM.Treasure= |
|NM.Treasure= |
||
* {{imgpop|[[Aias Bonnet]] {{Blue!}}|Aias Bonnet description.png|link=}} |
* {{ItemIcon|Aias Bonnet|22}} {{imgpop|[[Aias Bonnet]] {{Blue!}}|Aias Bonnet description.png|link=}} |
||
* {{imgpop|[[Estoqueur's Cape]]|Estoqueur's Cape description.png|link=}} |
* {{ItemIcon|Estoqueur's Cape|22}} {{imgpop|[[Estoqueur's Cape]]|Estoqueur's Cape description.png|link=}} |
||
* {{imgpop|[[Ferine Necklace]]|Ferine Necklace description.png|link=}} |
* {{ItemIcon|Ferine Necklace|22}} {{imgpop|[[Ferine Necklace]]|Ferine Necklace description.png|link=}} |
||
* {{imgpop|{{KI}} [[Atma of the Impregnable Tower]] {{Red!}}|Atma of the Impregnable Tower.jpg|link=}} |
* {{imgpop|{{KI}} [[Atma of the Impregnable Tower]] {{Red!}}|Atma of the Impregnable Tower.jpg|link=}} |
||
|NM.Steal= |
|NM.Steal= |
||
|NM.Position=J-8/9 |
|NM.Position=(J-8/9) |
||
|NM.Map=Abyssea_-_Attohwa-Map.jpg{{!}}650px |
|NM.Map=Abyssea_-_Attohwa-Map.jpg{{!}}650px |
||
}} |
}} |
||
| Line 1,111: | Line 1,112: | ||
|NM.Main= |
|NM.Main= |
||
|NM.Sub= |
|NM.Sub= |
||
|NM.Aggressive= |
|NM.Aggressive=Y |
||
|NM.Detects={{True Sound}} |
|NM.Detects={{True Sound}} |
||
|NM.Level= |
|NM.Level= |
||
|NM.Spawn_Condition= |
|NM.Spawn_Condition='''Forced''': Resting with {{KI}} [[Clear demilune abyssite]] |
||
|NM.Treasure= |
|NM.Treasure= |
||
* {{imgpop|{{KI}} [[Colorful demilune abyssite]]|Colorful demilune abyssite.jpg|link=}} |
* {{imgpop|{{KI}} [[Colorful demilune abyssite]]|Colorful demilune abyssite.jpg|link=}} |
||
|NM.Steal= |
|NM.Steal= |
||
|NM.Position=Roaming |
|NM.Position=(Roaming) |
||
|NM.Map=Abyssea_-_Attohwa-Map.jpg{{!}}650px |
|NM.Map=Abyssea_-_Attohwa-Map.jpg{{!}}650px |
||
}} |
}} |
||
| Line 1,126: | Line 1,127: | ||
|NM.Main= |
|NM.Main= |
||
|NM.Sub= |
|NM.Sub= |
||
|NM.Aggressive= |
|NM.Aggressive=Y |
||
|NM.Detects={{True Sound}} |
|NM.Detects={{True Sound}} |
||
|NM.Level= |
|NM.Level= |
||
|NM.Spawn_Condition= |
|NM.Spawn_Condition='''Forced''': Resting with {{KI}} [[Colorful demilune abyssite]] |
||
|NM.Treasure= |
|NM.Treasure= |
||
* {{imgpop|[[Awilda's Gun]]|Awilda's Gun description.png|link=}} |
* {{ItemIcon|Awilda's Gun|22}} {{imgpop|[[Awilda's Gun]]|Awilda's Gun description.png|link=}} |
||
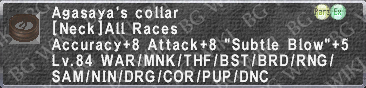
* {{imgpop|[[Agasaya's Collar]] {{Blue!}}|Agasaya's Collar description.png|link=}} |
* {{ItemIcon|Agasaya's Collar|22}} {{imgpop|[[Agasaya's Collar]] {{Blue!}}|Agasaya's Collar description.png|link=}} |
||
* {{imgpop|{{KI}} [[Jade demilune abyssite]]|Jade demilune abyssite.jpg|link=}} |
* {{imgpop|{{KI}} [[Jade demilune abyssite]]|Jade demilune abyssite.jpg|link=}} |
||
|NM.Steal= |
|NM.Steal= |
||
|NM.Position=Roaming |
|NM.Position=(Roaming) |
||
|NM.Map=Abyssea_-_Attohwa-Map.jpg{{!}}650px |
|NM.Map=Abyssea_-_Attohwa-Map.jpg{{!}}650px |
||
}} |
}} |
||
| Line 1,143: | Line 1,144: | ||
|NM.Main= |
|NM.Main= |
||
|NM.Sub= |
|NM.Sub= |
||
|NM.Aggressive= |
|NM.Aggressive=Y |
||
|NM.Detects={{True Sound}} |
|NM.Detects={{True Sound}} |
||
|NM.Level= |
|NM.Level= |
||
|NM.Spawn_Condition= |
|NM.Spawn_Condition='''Forced''': Resting with {{KI}} [[Jade demilune abyssite]] |
||
|NM.Treasure= |
|NM.Treasure= |
||
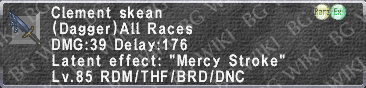
* {{imgpop|[[Clement Skean]] {{Blue!}}|Clement Skean description.png|link=}} |
* {{ItemIcon|Clement Skean|22}} {{imgpop|[[Clement Skean]] {{Blue!}}|Clement Skean description.png|link=}} |
||
* {{imgpop|[[Khloros Blade]] {{Blue!}}|Khloros Blade description.png|link=}} |
* {{ItemIcon|Khloros Blade|22}} {{imgpop|[[Khloros Blade]] {{Blue!}}|Khloros Blade description.png|link=}} |
||
* {{imgpop|[[Card of Vision]] {{Green!}}|Vision_Card_description.png|link=}} |
* {{ItemIcon|Vision_Card|22}} {{imgpop|[[Card of Vision]] {{Green!}}|Vision_Card_description.png|link=}} |
||
* {{imgpop|[[Coin of Vision]] {{Green!}}|Vision_Coin_description.png|link=}} |
* {{ItemIcon|Vision_Coin|22}} {{imgpop|[[Coin of Vision]] {{Green!}}|Vision_Coin_description.png|link=}} |
||
* {{imgpop|[[Stone of Ardor]] {{Green!}}|Ardor_Stone_description.png|link=}} |
* {{ItemIcon|Ardor_Stone|22}} {{imgpop|[[Stone of Ardor]] {{Green!}}|Ardor_Stone_description.png|link=}} |
||
* {{imgpop|[[Card of Ardor]] {{Green!}}|Ardor_Card_description.png|link=}} |
* {{ItemIcon|Ardor_Card|22}} {{imgpop|[[Card of Ardor]] {{Green!}}|Ardor_Card_description.png|link=}} |
||
* {{imgpop|{{KI}} [[Atma of the Demonic Skewer]] {{Red!}}|Atma of the Demonic Skewer.jpg|link=}} |
* {{imgpop|{{KI}} [[Atma of the Demonic Skewer]] {{Red!}}|Atma of the Demonic Skewer.jpg|link=}} |
||
|NM.Steal= |
|NM.Steal= |
||
|NM.Position=Roaming |
|NM.Position=(Roaming) |
||
|NM.Map=Abyssea_-_Attohwa-Map.jpg{{!}}650px |
|NM.Map=Abyssea_-_Attohwa-Map.jpg{{!}}650px |
||
}} |
}} |
||
Revision as of 00:04, 13 December 2022
| ||||||||||||||||||||||||||||||||||||||||||||||||||||||||


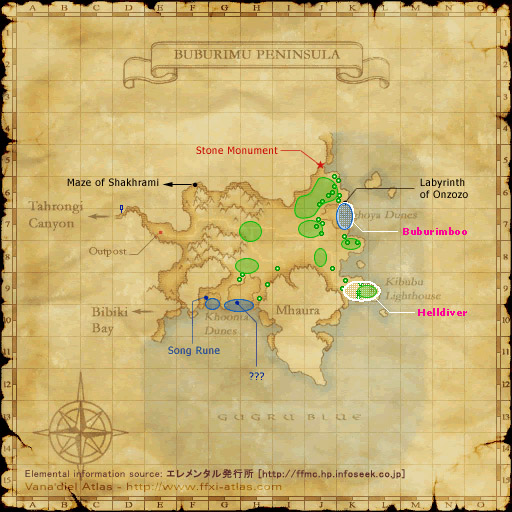
Flowchart Map
| Linked Zone Map |
|---|
|
The map below is clickable for most items, which will take you to that wiki page. 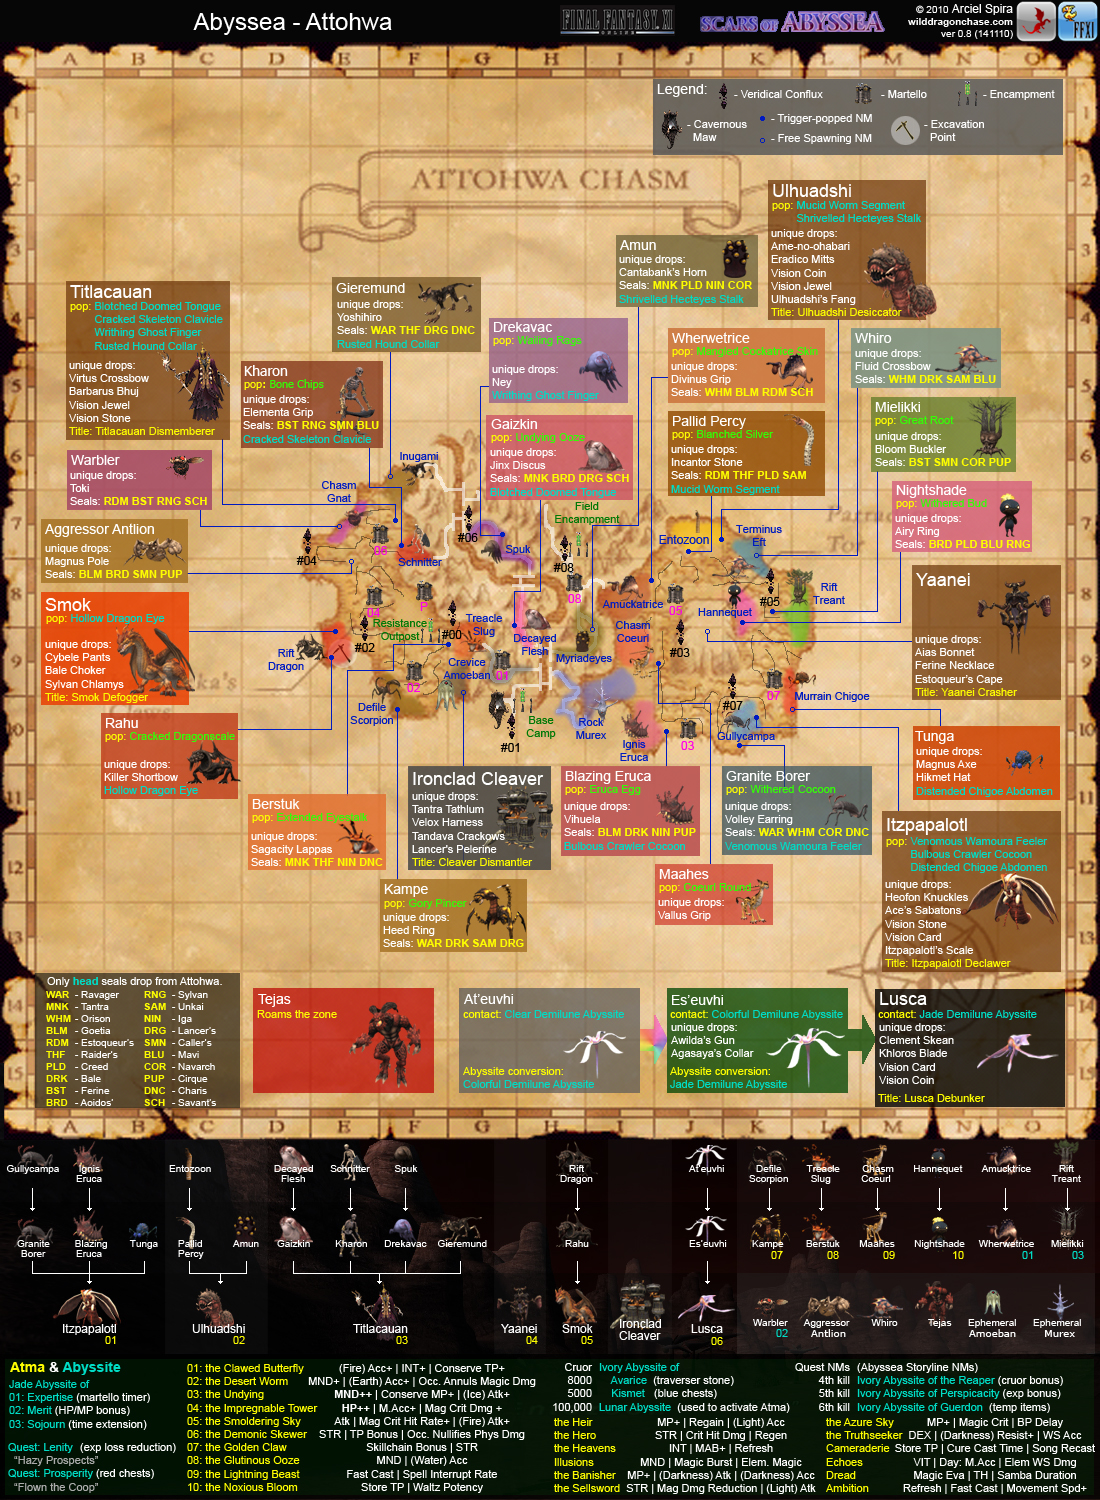  |
Empyrean Farming Flowchart
| Empyrean NM Farming Guide | ||||
|---|---|---|---|---|
| Itzpapalotl | ||||
| Ignis Eruca (I-10), Flux #1 | → | Blazing Eruca (J-10), Flux #1 | → | Itzpapalotl (K-10), Flux #7
|
| Gullycampa (K-10), Flux #7 | → | Granite Borer (K-10), Flux #7 | ||
| Tunga (L-9/10), Flux #7
(Timed Spawn, 10-15 Minutes) |
→ | |||
| Ulhuadshi | ||||
| Entozoon (J-7), Flux #3 | → | Pallid Percy (J-7), Flux #3 | → | Ulhuadshi (J/K-7), Flux #3
|
| Amun (K-9), Flux #8
(Timed Spawn, 10-15 Minutes) |
→ | |||
Zone Information
| Monster | Azure | Ruby | Amber |
|---|---|---|---|
| Amuckatrice | 8 | 8 | 8 |
| Chasm Coeurl | 8 | 8 | 8 |
| Crevice Amoeban | 8 | 8 | 0 |
| Chasm Gnat | 8 | 0 | 8 |
| Decayed Flesh | 8 | 8 | 8 |
| Defile Scorpion | 0 | 8 | 8 |
| Entozoon | 0 | 8 | 8 |
| Funnel Antlion | 8 | 8 | 8 |
| Gullycampa | 8 | 8 | 8 |
| Hannequet | 8 | 8 | 8 |
| Ignis Eruca | 8 | 8 | 8 |
| Inugami | 8 | 8 | 8 |
| Murrain Chigoe | 8 | 0 | 8 |
| Myriadeyes | 0 | 8 | 8 |
| Rift Dragon | 8 | 16 | 0 |
| Rift Treant | 0 | 0 | 16 |
| Rock Murex | 8 | 0 | 8 |
| Schnitter | 8 | 8 | 8 |
| Spuk | 8 | 8 | 0 |
| Terminus Eft | 8 | 8 | 0 |
| Treacle Slug | 0 | 8 | 8 |
| Ephemeral Murex | 16~128 | 16 | 16 |
| Ephemeral Amoeban | 16 | 16~128 | 16 |
| Tejas | 16 | 16 | 16~128 |
| Excavation | |
|---|---|
| Item | Rarity |
| R | |
| U | |
| C | |
| R | |
| C | |
| C | |
| U | |
| R | |
| R | |
Quests
NPCs
| Name | Map | Pos. | Notes |
|---|---|---|---|
| Akta (A) | 1 | ||
| Alrauverat (A) | 1 | ||
| Atma Fabricant (Attohwa) | 1 | ||
| Atma Infusionist (Attohwa) | 1 | ||
| Bastion Prefect (Attohwa) | 1 | ||
| Brutus (A) | 1 | ||
| Chapi Galepilai (A) | 1 | ||
| Chocobo Tamer (Attohwa) | 1 | ||
| Colti (A) | 1 | ||
| Conflux Surveyor (Attohwa) | 1 | ||
| Cruor Prospector (Attohwa) | 1 | ||
| Gabriele (A) | 1 | ||
| Garnev (A) | 1 | ||
| Gottah Maporushanoh (A) | 1 | ||
| Gurdern (A) | 1 | ||
| Harith (A) | 1 | ||
| High Wind (A) | 1 | Goal Tracker |
| Name | Map | Pos. | Notes |
|---|---|---|---|
| Jakaka (A) | 1 | ||
| Leepe-Hoppe (A) | 1 | ||
| Machine Outfitter (Attohwa) | 1 | ||
| Mendi (A) | 1 | ||
| Mojuro-Nojuro (A) | 1 | ||
| Monberaux (A) | 1 | ||
| Morlepiche (A) | 1 | ||
| Naruru (A) | 1 | ||
| Navisse (A) | 1 | ||
| Panta-Putta (A) | 1 | ||
| Ponono (A) | 1 | ||
| Rainhard (A) | 1 | ||
| Red Ghost (A) | 1 | ||
| Resistance Sapper (Attohwa) | 1 | ||
| Soni-Muni (A) | 1 | ||
| Tsugumi (A) | 1 | ||
| Yoran-Oran (A) | 1 |
Notorious Monsters
| Notorious Monsters | ||||
|---|---|---|---|---|
| Lv. | Name | Genus | Drops | Map |
| Aggressor Antlion Timed: 10-15 min. |
Antlion | (E-7/8) | ||
| Amun Timed: 10-15 min. |
Hecteyes | (H/I-8/9) | ||
| Berstuk Forced: Trade Extended Eyestalk to ??? |
Slug | (G-9) | ||
| Blazing Eruca Forced: Trade Eruca Egg to ??? |
Crawler | (J-10) | ||
| Drekavac Forced: Trade Wailing Rags to ??? |
Ghost | (G-7) | ||
| Gaizkin Forced: Trade Undying Ooze to ??? |
Doomed | (H-8/9) | ||
| Gieremund Timed: 10-15 min. |
Hound | (F-6) | ||
| Granite Borer Forced: Trade Withered Cocoon to ??? |
Wamouracampa | (K-10) | ||
| Ironclad Cleaver Timed: 10-15 min. |
Iron Giant | (G-9) | ||
| Itzpapalotl Forced: Examine ??? with |
Wamoura | (K-10) | ||
| Kampe Forced: Trade Gory Pincer to ??? |
Scorpion | (F-10) | ||
| Kharon Forced: Trade Bone Chips to ??? |
Skeleton | (F-7) | ||
| Maahes Forced: Trade Coeurl Round to ??? |
Coeurl | (J-9) | ||
| Mielikki Forced: Trade Great Root to ??? |
Treant | (K-8) | ||
| Nightshade Forced: Trade Withered Bud to ??? |
Mandragora | (K-8) | ||
| Pallid Percy Forced: Trade Blanched Silver to ??? |
Worm | (J-7) | ||
| Smok Forced: Examine ??? with |
Wyrm | (E-9) | ||
| Svarbhanu Forced: Trade Cracked Dragonscale to ??? |
Dragon | (E-9) | ||
| Tejas Timed: 20 min. with 5 spawns |
Avatar | (Roaming) | ||
| Titlacauan Forced: Examine ??? with |
Corse | (F-7) | ||
| Tunga Timed: 10-15 min. |
Chigoe | (K-9/10) | ||
| Ulhuadshi Forced: Examine ??? with |
Sandworm | (J-7) | ||
| Warbler Timed: 10-15 min. |
Gnat | (E-7) | ||
| Wherwetrice Forced: Trade Mangled Cockatrice Skin to ??? |
Cockatrice | (I-8) | ||
| Whiro Timed: 10-15 min. |
Eft | (K-8/9) | ||
| Yaanei Time of Day: 15:00 |
Caturae | (J-8/9) | ||
| At'euvhi Forced: Resting with |
Euvhi | (Roaming) | ||
| Es'euvhi Forced: Resting with |
Euvhi | (Roaming) | ||
| Lusca Forced: Resting with |
Xzomit | (Roaming) | ||
| ||||