Dynamis - Divergence, introduced in the November 10th 2017 update [1] is the Content Level 149 versions of original Dynamis areas.
Divergence is true to the original versions of Dynamis before the May 2011 update[2] completely revamped the event.
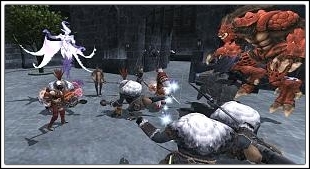
Various high level Replica statues, summoned monsters, and NMs once again roam the dream world as groups of players die en masse.
A player may enter once every 60 hours (Earth Time). The 60 hour lockout begins the minute the player is entered into Dynamis-Divergence when the Key Item Empty hourglass is exhausted.
Aurix is able to tell when the player may reenter again when selecting to "Ask about time limits with Dynamis (D)" when talking to him.
You may also check the exact time you are able to reenter by clicking any entrance to Dynamis [D].
To enter a zone, interact with the corresponding Enigmatic Footprints #1.
One-fifth of the time exceeding 60 hours since your last Dynamis - Divergence attempt will be stored within the Empty Hourglass key item. That is, the Hourglass will charge at a rate of 1 second for every 5 real-world seconds that elapse.
The upper limit for the accumulated time is 216,000 seconds (60 hours), and cannot be exceeded.
Players may choose to use this additional time by selecting any Dynamis - Divergence entrance and toggling the selection Switch Empty Hourglass use state. to ON.
If the amount of charge accumulated on your Empty Hourglass is greater than or equal to the time remaining before you may re-enter Dynamis - Divergence, you may re-enter immediately.
The remaining charge will remain on the Empty Hourglass to use later.
Time Limit
The initial time limit is 60 minutes (Earth time) and may be extended up to 120 minutes.
Each statue killed provides a 1 minute time extension.
The zone's mid-boss grants a 30 minute time extension when defeated and the zone's Mega Boss provides a 2nd 30 minute time extension when defeated minus the number of statues killed for each respective wave.
The total amount of time extended per wave cannot exceed 30 minutes. The time extensions only apply to wave 1 and 2. Wave 3 does not have a time extension.
Players may leave at any time before time expires by using the Black Hourglass temporary item received upon zoning in.
Currencies
Currency may be traded, bazaared, or sold on the auction house (under misc 3.).
Between 1 and 4 cards may drop per monster. With the corresponding weekly zone bonus, the maximum increases to 5.
Aurix will only begin dealing with +2 and +3 Relic 119 upgrades, as well as synthesis materials, after you have visited Dynamis - Divergenceat least once.
To upgrade Relic +2, you must simply visit the corresponding armor zone with the job you wish to unlock upgrading of the specific piece of armor for.
Body upgrades +2 requires visiting all four zones with the job.
To upgrade Relic +3, you must defeat the corresponding zone's mid-boss (statue) with the job you wish to unlock upgrading of the specific piece of armor for.
Alternatively, as of the November 2021 Version Update, players can defeat 100 squadron enemies to unlock the ability to upgrade that area's Relic +3 slot on the job that the player defeated the enemies on. This is an alternate method to earn Relic +3 armor instead of defeating the Mid-Bosses in each zone.
Body upgrades +3 requires completing either the four mid-boss kills or 100 enemy defeats in all four zones with a given job. Completion of this objective will be rewarded with a job shard KI.
Basics
There exists party/alliance hate. When a party member stands too close to the puller, that member is also on the hate-list.
Monsters aggro do not have any delay after killing their intended target and will immediately target the next person on the hate list even if that person generated no enmity directly. It is important to keep your distance from allies if unintended aggro occurs.
Enemies are either true sight or true sound based on their typical family aggression.
Orcs, Yagudos and Goblins are true sight, but do not aggro by sound while Quadavs and Volte mobs are true sound, but do not aggro by sight.
Any summoned pets (SMN, DRG, or BST) will immediately disappear once their master is defeated.
Monster Levels:
Wave1 - Fodder mobs: 127, Leaders: 129, Boss: 132
Wave2 - Fodder mobs: 134, Leaders: 137, Boss: 139
Wave3 - Fodder mobs: 142, Leaders: 146, Boss: 149
Weekly Zone Bonus
Once per week (Earth Time) a specific zone will see a drop rate bonus to each wave's respective currency, both cards and medals.
This also means medals may very rarely drop from normal monsters in either wave, but the rate seems to be comparable to a proc and drop in the old Dynamis.
The bonus resets after the Conquest Tally on Sundays (JP Midnight)
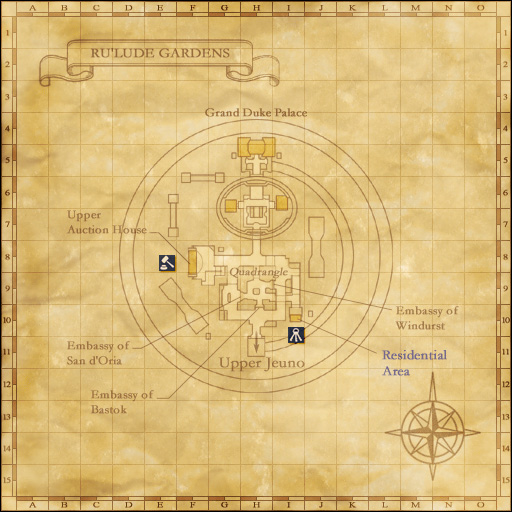
Speak with Aurix in Ru'Lude Gardens to find out which zone currently has the bonus.
When attempting to enter a bonus zone, you will receive a system message about treasure caskets being active.
The Zone Bonus rotation order is: Bastok >> Windurst >> Jeuno >> San d'Oria >> Bastok, etc.
Monthly Adventurer Campaigns
There are two type of campaigns that may run any given month.
Statue Crusher Campaign
When this Monthly Adventurer Campaign is active, all players in the instance receive extra loot when any type of statue is defeated.
All shard drops depend on the zone you are in (Bodies are all zones), and you only obtain shards for the current job you are playing.
3rd Wave: This campaign does not offer any benefit during Wave 3.
Enemies with "Squadron" in their name will count for double when defeated.
In addition, for each monster with "Squadron" in its name that you defeat, it will count as double toward the requirements for upgrading your relic armor to item level 119+3.
Note: This was added in the January 2026 campaign as a reward for reaching 150% goal for Vana’Bout in December. This is a permanent change going forward.
Geomancy
All Notorious Monsters in Divergence have a -75% resistance to all Geomancy effects.
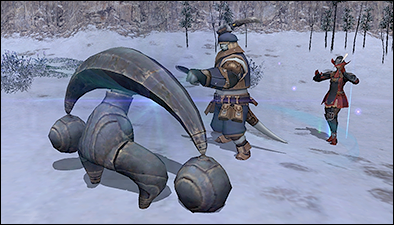
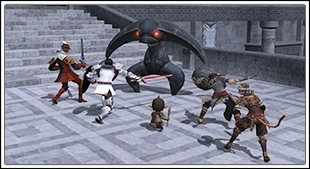
Statues
All statues are true sight and link with each other, but may be deaggroed by running far enough away while all other monsters will not deaggro, likely tracking by scent.
Each statue has a fixed spawn number which may vary between as low as 1 and up to as many as 6.
Note: If a statue is one shotted (commonly from a well geared Corsair via Leaden Salute), this will cause it to die with no adds being able to spawn from it. This is a good way to cut down on time if you are trying to get to Wave 3 as fast as possible.
Statues have different color eyes and, as of the November 2019 Update[3], differing nameplate icons which determine the following effects of both the statue and spawned monsters:
Spawns higher level Orc NMs. These NMs will have access to Orcish Counterstance. Orcish Counterstance: Grants a potent Counter effect against melee attacks.
+30% /// based physical/magical attacks and spells -95% /// based physical/magical attacks and spells
Green
+30% /// based physical/magical attacks and spells -95% /// based physical/magical attacks and spells
Red
Spawns higher level Quadav NMs. These NMs will have access to Wrath of Gu'Dha. Wrath of Gu'Dha: AoE move which inflicts knockback and a super gravity effect on players. Absorbable by shadows.
+50% damage taken. AoEs will deal -99% damage to secondary targets.
Green
+20% damage taken. Resist the effects of all Enfeebling Magic including Sleep and Lullaby.
Red
Spawns higher level Goblin NMs. These NMs will have access to Goblin Dice. Goblin Dice: Varies between 12 different results based on the roll. All players nearby will have their abilities restored on a roll of a 2. Remaining dice values vary from AoE physical or magical damage, various enfeebles, dispel, TP reset, or completely restoring the NM's HP.
All Zones
Colorless
NOTE: Lacks any nameplate icon.
Takes the place of any random statue in the zone. Only one may be up in the zone at a time.
When aggroed, the Goblin NM Aurix will spawn in addition to that statue's normal spawns.
When this statue is defeated, another random remaining statue is picked to become the new colorless in which "Aurix" will spawn from again.
This process stops after "Aurix" is defeated. There is one "Aurix" per wave.
If Aurix is not damaged and left alone, he will run away over time. It seems to be 2-3 minutes before he runs away.
If Aurix runs away and respawns from another colorless statue, he will have his previous HP remaining from the last despawn.
After the zone mid-boss is defeated, all previous enemies and statues in the zone will despawn.
New statues will appear in their place, which will spawn stronger enemies and NMs of a different title.
These enemies will be the same job variants as the ones before them.
These are significantly stronger than their normal counterparts with higher defense, attack, and HP.
After the zone mega boss is defeated, all previous enemies and statues in the zone will despawn.
New stationary Elemental "Circle" Fetters will appear in their place, which are guarded by several "Volte" Hydra Corp fomor mobs. Engaging/acting upon the circle will spawn a "Disjoined ???" mob in place.
In addition, "Aurix" may spawn from a circle in a similar fashion to the colorless eye statues of the prior waves.
These enemies will be the same job variants as the ones before them but have access to all weapon skills of the weapon type they have equipped in addition to their respective job combination 1 hr abilities.
These are significantly stronger than the "wave" 2 monsters with higher defense, evasion, attack, and HP.
Unique to wave 3, there is always 1 Hydra Corps Fomor that is significantly stronger than the other 3 that are alongside it. Generally, each group are in sets of 4. The "Leader" of the pack is signified by carrying a blue colored "DREAM" weapon associated with its job. These "Leaders" have substantially higher attack, defense, evasion and HP than the normal "Volte" mobs.
Due to player demand, as of the November 2025 update, shared instances of Dynamis - Divergence were added, wherein players can tackle the content up to the end of Wave 2 solo or in small groups alongside others.
Entry Requirements
To enter a zone, interact with the corresponding Enigmatic Footprints #2.
Primary entry requirements for shared areas are the same as those of occupied areas, however parties are no longer required to be in groups of 3 or more.
You can enter the content once per Earth day.
You can re-enter the content at 12:00 AM JST.
Entry into the shared areas is separate from entry into the occupied areas. A full Empty Hourglass key item is not required to enter the shared area.
Although entry is made via a different set of Enigmatic Footprints, the position you arrive at inside of Dynamis - Divergence will be the same as the original instance for Wave 1.
If the shared instance has reached Wave 2, players will arrive at a different location that is safe from potential aggro from newly-spawned Statues.
All enemy placement, type, and levels are the same as that of the Occupied instance. There has been no change to the difficulty of the content.
As of the December 2025 update, area of effect damage inflicted on monsters outside of the main target has been reduced.
This does not apply to pet-type monsters.
Schedule
You can access each area every two hours on a rotating basis.
You cannot enter the area if it hasn't been created yet.
Time Limit
The time limit is 60 minutes (Earth time) from the moment the area is created.
You will be forced to exit the content once 60 minutes (Earth time) has elapsed since the area's creation.
You are unable to enter an area five minutes before its time limit is reached.
Upon any player(s) defeating the Wave 2 Mega Boss, the instance will end and all players will be forced to exit regardless of time remaining.
You can select "Check area status" in the menu to confirm the current wave and how many monsters remain within the shared area.
Currencies
Within the shared area, enemies will drop that Wave's associated cards or medals.
Treasure will only drop to the party which claims and defeats the enemy, it is not shared amongst the participants in the zone.
Reinforcement Points will only be allocated to the party which claims credit for the kill, points are not shared amongst the participants in the zone.
Reforging
The requirements and processing for Reforging are the same as those from the occupied instance. Players must either defeat 100 foes within the associated zone, or defeat the Wave 1 boss.
Simply being in the zone while another group or party defeats foes or the Wave 1 boss does not grant credit. In order to gain credit, players must be in the party which defeats the foe. If another group defeats the Wave 1 boss, others will not unlock the ability to Reforge to +3.
Resolved Status
Participants in the shared area will receive the Resolved status effect upon entry.
Resolved prevents all Experience Point and Exemplar Point loss upon defeat.
Subcategories
This category has the following 10 subcategories, out of 10 total.
 Diabolos Heart, Diamond, Spade, or Club.
 100 Byne Bill,
  M. Silverpiece, or
  L. Jadeshell to the ???.
 Black Hourglass temporary item received upon zoning in.


 proc and drop in the old Dynamis.
 true sight and link with each other, but may be deaggroed by running far enough away while all other monsters will not deaggro, likely tracking by scent.
 Blue
Blue
 magical damage taken.
 physical damage taken.
 Green
Green
 Red
Red
 Grants a potent Counter effect against melee attacks.

 /
/  /
/  /
/  based physical/magical attacks and spells
 /
/  /
/  /
/  based physical/magical attacks and spells

 ranged and
 abilities restored on a roll of a 2.


 .
.
