The Voracious Resurgence | |
| Prime Weapons • Ultimate Weapons • Ultimate Augments • Abjurations iL119 • JSE Necks • Divergence Augments • Escutcheons | |
| Reforged Armor Artifact: +1 • iL109 • iL119/+2/+3 Relic: +1/+2 • iL109 • iL119/+2/+3 Empyrean: +1/+2 • iL109 • iL119/+2/+3 |
Guides • Crafting • Trusts • Apex Monsters |
Category:High-Tier Mission Battlefields: Difference between revisions
m (→Rewards) |
Egagropila (talk | contribs) (Added entry location for Legacy of the Lost) |
||
| (89 intermediate revisions by 12 users not shown) | |||
| Line 1: | Line 1: | ||
{{disambiguation|:Category:Battlefields{{!}}Battlefields <sup>(BCNMs, etc)</sup>}} |
|||
{{Category Page Header |
{{Category Page Header |
||
|ToC=y |
|ToC=y |
||
| Line 5: | Line 6: | ||
|Image Size=425 |
|Image Size=425 |
||
|Image Link= |
|Image Link= |
||
|Intro Text='''High-Tier Mission Battlefields''' first |
|Intro Text='''High-Tier Mission Battlefields''' were first introduced into the game in the December 2013 Version Update.<br /> |
||
These battlefields bring back nostalgic enemies that have newfound strength to challenge even the most experienced veteran players. In order to challenge these foes, a key item is required by each party member to enter the battlefield. |
These battlefields bring back nostalgic enemies that have newfound strength to challenge even the most experienced veteran players. In order to challenge these foes, a key item is required by each party member to enter the battlefield. Key items require certain missions and quests to be completed before they are able to be purchased with [[Merit Points]]. |
||
It is highly suggested that you communicate with your party members to verify that everyone has purchased the appropriate key item required for the fight you are entering.<br /> |
It is highly suggested that you communicate with your party members to verify that everyone has purchased the appropriate key item required for the fight you are entering.<br /> |
||
There is no warning if a party member is unable to enter the battlefield. If one player forgets to purchase the item, and the other party members enter, the player has a chance to purchase the key item as long as the other party members do not engage. |
There is no warning if a party member is unable to enter the battlefield. If one player forgets to purchase the item, and the other party members enter, the player has a chance to run back to town in order to purchase the key item as long as the other party members do not engage. |
||
}} |
}} |
||
== Key Item Sales == |
== Key Item Sales == |
||
| Line 15: | Line 16: | ||
*Must be level 95 or higher |
*Must be level 95 or higher |
||
*Must have completed the lower level version of the battlefield |
*Must have completed the lower level version of the battlefield |
||
**{{color|red|Note}}: '''''More precise requirements can be found on each of the Phantom Gem key item pages.''''' |
**{{color|red|Note}}: '''''More precise eligibility requirements for each battlefield can be found on each of the Phantom Gem key item pages.''''' |
||
{| |
{| |
||
|- |
|- |
||
| Line 27: | Line 29: | ||
== Difficulty == |
== Difficulty == |
||
Initially, players are only able to choose '''Very Easy''', '''Easy''' or '''Normal''' difficulties while |
Initially, players are only able to choose '''Very Easy''', '''Easy''' or '''Normal''' difficulties while entering into a battlefield for the first time.<br /> |
||
After winning your first battle on these difficulties, you are then able to choose '''Difficult''' or '''Very Difficult''' the next time you enter the fight. |
After winning your first battle on these difficulties, you are then able to choose '''Difficult''' or '''Very Difficult''' the next time you enter the fight. |
||
*Note that if a fellow party member has already initialized the fight, the battlefield will still be set to the difficulty chosen by the first party member to enter regardless of what you choose. This includes whether or not you have a higher difficulty unlocked or not. |
*Note that if a fellow party member has already initialized the fight, the battlefield will still be set to the difficulty chosen by the first party member to enter regardless of what you choose. This includes whether or not you have a higher difficulty unlocked or not. |
||
===Titles=== |
|||
Unique [[Title]]s are rewarded to players when they triumph over a battlefield on '''Very Difficult'''. These titles are listed below with the other battlefield information. |
|||
== Rewards == |
== Rewards == |
||
[[:Category:Reforged Armor|Reforged Armor]] [[File:Rem's Tale Ch.1 icon.png|22px|link=]] [[Rem's Tale]] chapters and [[Item Level]] upgrade materials for [[Relic Weapons|'''R'''elic Weapons]] ([[File:Pluton icon.png|22px|link=]] [[Pluton]]s), [[Empyrean Weapons|'''E'''mpyrean Weapons]] ([[File:Riftborn Boulder icon.png|22px|link=]] [[Riftborn Boulder]]s), and [[Mythic Weapons|'''M'''ythic Weapons]] ([[File:Beitetsu icon.png|22px|link=]] [[Beitetsu]]) are distributed to each party member's ''personal'' inventory. |
[[:Category:Reforged Armor|Reforged Armor]] [[File:Rem's Tale Ch.1 icon.png|22px|link=]] [[Rem's Tale]] chapters and [[Item Level]] upgrade materials for [[Relic Weapons|'''R'''elic Weapons]] ([[File:Pluton icon.png|22px|link=]] [[Pluton]]s), [[Empyrean Weapons|'''E'''mpyrean Weapons]] ([[File:Riftborn Boulder icon.png|22px|link=]] [[Riftborn Boulder]]s), and [[Mythic Weapons|'''M'''ythic Weapons]] ([[File:Beitetsu icon.png|22px|link=]] [[Beitetsu]]) are distributed to each party member's ''personal'' inventory. |
||
*The number of these items received is based on the difficulty of the fight, see below. |
|||
See the table below as an outline for [[Rem's Tale]] Chapters and R/E/M Upgrade items ([[Pluton]], [[Riftborn Boulder]], [[Beitetsu]]) that distribute into personal inventories upon winning a battlefield. |
See the table below as an outline for [[Rem's Tale]] Chapters and R/E/M Upgrade items ([[Pluton]], [[Riftborn Boulder]], [[Beitetsu]]) that distribute into personal inventories upon winning a battlefield. |
||
*The type of Rem's Tales obtained from each battlefield is outlined in the battlefield section of this page below. These are denoted with the prefix "Direct Drop" to signify that each player who took part in the battlefields receives their own chapters. |
|||
*As well as personal reward distribution, chapters also appear in the party's treasure pool along with unique weapons and equipment. These items can be received by any party member. |
|||
*As well as personal reward distribution, other chapters also appear in the party's treasure pool along with unique weapons and equipment. These items can be received by any party member. Any chapter may appear (Ch.6 thru Ch.10), not only the BCNM exclusive chapter. |
|||
**The only exception to this chapter drop rule are the single fight Ark Angel HTMBs. These fights only drop a specific chapter in both player's personal pools and party treasure pools. {{Verification}} |
|||
===All battlefields '''''except''''' ★Divine Might=== |
===All battlefields '''''except''''' ★Divine Might=== |
||
{| class="Standardwide R1-White |
{| class="Standardwide R1-White overflow-visible htmb" style="width: 100%; max-width: 800px; text-align: center;" |
||
|- BGCOLOR="#4b4d4f" |
|- BGCOLOR="#4b4d4f" |
||
! width=25% align="center" | Difficulty |
! width=25% align="center" | Difficulty |
||
| Line 73: | Line 79: | ||
===★Divine Might Only=== |
===★Divine Might Only=== |
||
{| class="Standardwide R1-White |
{| class="Standardwide R1-White overflow-visible htmb" style="width: 100%; max-width: 800px; text-align: center;" |
||
|- BGCOLOR="#4b4d4f" |
|- BGCOLOR="#4b4d4f" |
||
! width=25% align="center" | Difficulty |
! width=25% align="center" | Difficulty |
||
| Line 108: | Line 114: | ||
===Other Rewards=== |
===Other Rewards=== |
||
Drop rates for unique {{Rare}}/{{Ex}} rewards obtained as well as other rewards (E.g. Scrolls and upgrade materials) through these battles increase with the BCNM difficulty setting. |
|||
*At Very Easy, Easy, and Normal difficulties, the drop rate for unique {{Rare}}/{{Ex}} items should be ''very roughly'' around 10% before Treasure Hunter. There is no data to support this drop rate, however. |
|||
*At Difficult and Very Difficult an item is guaranteed to drop while at normal the chances are much lower. |
|||
*At Difficult and Very Difficult, one item is guaranteed to drop. A second item has a very high probability. |
|||
**Treasure Hunter will have a noticeable impact on drops for Very Easy - Normal while having no effect for Difficult and Very Difficult. |
|||
*[[Treasure Hunter]] will have a noticeable impact on drops for Very Easy, Easy, and Normal while having no effect for Difficult and Very Difficult. |
|||
***There is no real data for it, but for Normal difficulty the unique {{Rare}}/{{Ex}} item drop rate should be ''very roughly'' around 10% before Treasure Hunter. Then much lower for Easy and abysmal for Very Easy. |
|||
*Below Normal, drops are significantly rarer. Expect to go through dozens of fights with no rare/ex drops below Normal difficulty, especially without Treasure Hunter. |
**Below Normal, drops are significantly rarer. Expect to go through dozens of fights with no rare/ex drops below Normal difficulty, especially without Treasure Hunter. |
||
*New High-Tier Mission BCNMs do '''not''' follow these rules. {{Rare}}/{{Ex}} drops are not guaranteed on Difficult or Very Difficult. |
|||
:*The following BCNMs are considered "new": '''[[A Stygian Pact II]]''' ([[Odin Prime]]), '''[[Champion of the Dawn II]]''' ([[Cait Sith Prime]]), '''[[Divine Interference II]] ''' ([[Alexander Prime]]), '''[[Maiden of the Dusk II]] ''' ([[Lilith]]), '''[[The Wyrm God II]] ''' ([[Shinryu]]). |
|||
===Monthly Adventurer Campaigns=== |
===Monthly Adventurer Campaigns=== |
||
| Line 125: | Line 133: | ||
===Rise of the Zilart=== |
===Rise of the Zilart=== |
||
{| class="Standardwide R1-White overflow-visible htmb" style="width: 100%; max-width: 1600px;" BGCOLOR="#efeeee" cellpadding="1" |
|||
|- BGCOLOR="#4b4d4f" |
|- BGCOLOR="#4b4d4f" |
||
! width=20% | Name |
! width=20% | Name |
||
! width=30% | Battlefield |
! width=30% | Battlefield Details |
||
! width=20% nowrap | |
! width=20% nowrap | Unique Materials |
||
! width=15% | Weapons |
! width=15% | Weapons |
||
! width=15% nowrap | Armor |
! width=15% nowrap | Armor |
||
|- style="border-top: 1px solid #efeeee;" |
|- style="border-top: 1px solid #efeeee;" |
||
! colspan=" |
! colspan="5" BGCOLOR="#8C3D0C" cellpadding="0" height=2px| |
||
|- style="border-bottom: 1px solid #ffffff;" |
|- style="border-bottom: 1px solid #ffffff;" |
||
| |
| style="text-align: center;" | <span id=ShadowLordBattle>'''★The Shadow Lord Battle'''</span> |
||
[[File: |
[[File:shadowlordb.jpg|center|link=Shadow Lord]] |
||
<small>'''Opponent Details''':</small> [[Shadow Lord]] |
|||
| |
|||
{| style="background: #F9F9F9; border: 1px solid #AAAAAA" width="100%" |
|||
| |
| |
||
{| class="htmb-details" style="border: 1px solid #AAAAAA; width: 100%; max-width: 1600px; " |
|||
| |
|||
:'''Direct Drop''': [[Rem's Tale Ch.7]] |
|||
:'''Entry KI''': [[Shadow Lord phantom gem]] |
|||
::<small>'''Merit Cost''': 10</small> |
|||
::<small>'''Limit''': 6 Players, 30 Min</small> |
|||
::<small>'''Title''': ''Brilliance Manifest''</small> |
|||
:'''[[Home Point]]:''' [[Valdeaunia]] > [[Castle Zvahl Keep]] (#1) |
|||
<hr> |
|||
:'''[[:Category:High-Tier_Mission_Battlefields/ShadowLordBattle|Testimonials]]''' |
|||
|} |
|||
| style="border-right: 1px solid #ffffff; vertical-align: top; padding-top: 20px;" | |
|||
*{{tooltip|text='''[[Exalted Log]]'''|tooltip=[[File:Exalted Log description.png]]}} |
|||
*{{tooltip|text='''[[Maliyakaleya Coral]]'''|tooltip=[[File:Maliya. Coral description.png]]}} |
|||
*{{tooltip|text='''[[Hepatizon Ore]]'''|tooltip=[[File:Hepatizon Ore description.png]]}} |
|||
<hr> |
|||
:'''Special Event Drops:''' |
|||
*{{tooltip|text='''[[Shadow Lord Statue]]'''|tooltip=[[File:S. Lord Statue description.png]]}} |
|||
*{{tooltip|text='''[[Shadow Lord Statue II]]'''|tooltip=[[File:S. Lord Statue II description.png]]}} |
|||
*{{tooltip|text='''[[Shadow Lord Statue III]]'''|tooltip=[[File:S. Lord Statue III description.png]]}} |
|||
*{{tooltip|text='''[[Shadow Lord Tunes]]'''|tooltip=[[File:Shadow Lord Tunes description.png]]}} |
|||
*{{tooltip|text='''[[Lament]]'''|tooltip=[[File:Lament description.png]]}} |
|||
*{{tooltip|text='''[[Nihility]]'''|tooltip=[[File:Nihility description.png]]}} |
|||
| style="border-right: 1px solid #ffffff; vertical-align: top; padding-top: 20px;" | |
|||
*{{tooltip|text='''[[Lightreaver]]'''|tooltip=[[File:Lightreaver description.png]]}} |
|||
| style="vertical-align: top; padding-top: 20px;" | |
|||
*{{tooltip|text='''[[Onimusha-no-Kote]]'''|tooltip=[[File:Onimusha-no-Kote description.png]]}} |
|||
*{{tooltip|text='''[[Dread Jupon]]'''|tooltip=[[File:Dread Jupon description.png]]}} |
|||
*{{tooltip|text='''[[Perdition Slops]]'''|tooltip=[[File:Perdition Slops description.png]]}} |
|||
*{{tooltip|text='''[[Trepidity Mantle]]'''|tooltip=[[File:Trepidity Mantle description.png]]}} |
|||
|- style="border-bottom: 1px solid #ffffff;" |
|||
| style="text-align: center" | <span id=ReturnDelkfutt>'''★Return to Delkfutt's Tower'''</span> |
|||
[[File:DT.jpg|center|link=Kam'lanaut]] |
|||
<small>'''Opponent Details''':</small> [[Kam'lanaut]] |
|||
| |
|||
{| class="htmb-details" style="border: 1px solid #AAAAAA; width: 100%; max-width: 1600px; " |
|||
| |
|||
:'''Direct Drop''': [[Rem's Tale Ch.6]] |
|||
:'''Entry KI''': [[Stellar Fulcrum phantom gem]] |
|||
::<small>'''Merit Cost''': 10</small> |
|||
::<small>'''Limit''': 6 Players, 30 Min</small> |
|||
::<small>'''Title''': ''Quieter of Ancient Thoughts''</small> |
|||
:'''[[Home Point]]:''' [[Qufim]] > [[Upper Delkfutt's Tower]] (#1) |
|||
<hr> |
|||
:'''[[:Category:High-Tier_Mission_Battlefields/ReturnDelkfutt|Testimonials]]''' |
|||
|} |
|||
| style="border-right: 1px solid #ffffff; vertical-align: top; padding-top: 20px;" | |
|||
*{{tooltip|text='''[[Exalted Log]]'''|tooltip=[[File:Exalted Log description.png]]}} |
|||
*{{tooltip|text='''[[Hepatizon Ore]]'''|tooltip=[[File:Hepatizon Ore description.png]]}} |
|||
*{{tooltip|text='''[[Wyrm Blood]]'''|tooltip=[[File:Wyrm Blood description.png]]}} |
|||
<hr> |
|||
:'''Special Event Drops:''' |
|||
*{{tooltip|text='''[[Kam'lanaut's Sword]]'''|tooltip=[[File:Kam'lanaut's Sword description.png]]}} |
|||
*{{tooltip|text='''[[Kam'lanaut's Shield]]'''|tooltip=[[File:Kam'lanaut's Shield description.png]]}} |
|||
*{{tooltip|text='''[[Sheet of Jeuno tunes|Jeuno Tunes]]'''|tooltip=[[File:Sheet of Jeuno tunes.jpg]]}} |
|||
| style="border-right: 1px solid #ffffff; vertical-align: top; padding-top: 20px;" | |
|||
*{{tooltip|text='''[[Mes'yohi Sword]]'''|tooltip=[[File:Mes'yohi Sword description.png]]}} |
|||
*{{tooltip|text='''[[Mes'yohi Rod]]'''|tooltip=[[File:Mes'yohi Rod description.png]]}} |
|||
*{{tooltip|text='''[[Seraphicaller]]'''|tooltip=[[File:Seraphicaller description.png]]}} |
|||
*{{tooltip|text='''[[Divinator]]'''|tooltip=[[File:Divinator description.png]]}} |
|||
*{{tooltip|text='''[[Divinator II]]'''|tooltip=[[File:Divinator II description.png]]}} |
|||
| style="vertical-align: top; padding-top: 20px;" | |
|||
*{{tooltip|text='''[[Mes'yohi Haubergeon]]'''|tooltip=[[File:Mes. Haubergeon description.png]]}} |
|||
*{{tooltip|text='''[[Mes'yohi Slacks]]'''|tooltip=[[File:Mes'yohi Slacks description.png]]}} |
|||
|- style="border-bottom: 1px solid #ffffff;" |
|||
| style="text-align: center" | <span id=AAHM>'''★Ark Angels (1)'''</span> |
|||
[[File:AA-HM.jpg|center|link=Ark Angel HM]] |
|||
<small>'''Opponent Details''':</small> [[Ark Angel HM]] |
|||
| |
|||
{| class="htmb-details" style="border: 1px solid #AAAAAA; width: 100%; max-width: 1600px; " |
|||
| |
|||
:'''Direct Drop''': [[Rem's Tale Ch.6]] |
|||
:'''Entry KI''': [[Phantom Gem of Apathy]] |
:'''Entry KI''': [[Phantom Gem of Apathy]] |
||
:'''Merit Cost''': 15 |
::<small>'''Merit Cost''': 15</small> |
||
::<small>'''Limit''': 6 Players, 30 Min</small> |
|||
::Level Cap: Uncapped |
|||
::<small>'''Title''': ''Ark Hume Humiliator''</small> |
|||
::Time Limit: 30 Min |
|||
::Max People: 6 |
|||
:'''[[Home Point]]:''' [[Tu'Lia]] > [[Ru'Aun Gardens]] (#1) |
:'''[[Home Point]]:''' [[Tu'Lia]] > [[Ru'Aun Gardens]] (#1) |
||
<hr> |
<hr> |
||
:'''[[:Category:High-Tier_Mission_Battlefields/AAHM|Testimonials]]''' |
:'''[[:Category:High-Tier_Mission_Battlefields/AAHM|Testimonials]]''' |
||
|} |
|} |
||
| style="border-right: 1px solid #ffffff;" | |
| style="border-right: 1px solid #ffffff; vertical-align: top; padding-top: 20px;" | |
||
*{{tooltip|text='''[[Buried Vestige]]'''|tooltip=[[File:Buried Vestige description.png]]}} |
|||
*:;[[Rem's Tale Ch.6]] |
|||
*{{tooltip|text='''[[Maliyakaleya Coral]]'''|tooltip=[[File:Maliya. Coral description.png]]}} |
|||
:::[[Reforged Armor|RF]] [[:Category:Head|Head]] Slot Upgrade Material |
|||
| style="border-right: 1px solid #ffffff; vertical-align: top; padding-top: 20px;" | |
|||
*{{tooltip|text='''[[Castigation]]'''|tooltip=[[File:Castigation description.png]]}} |
|||
*:;[[Maliyakaleya Coral]] |
|||
*{{tooltip|text='''[[Anahera Saber]]'''|tooltip=[[File:Anahera Saber description.png]]}} |
|||
:::Crafted into [[Maliyakaleya Orb]] |
|||
| style="vertical-align: top; padding-top: 20px;" | |
|||
:::[[:Category:Reforged_Artifact_Armor_+1|AF1 IL 119]] [[:Category:Head|Head]] Slot Upgrade Material |
|||
*{{tooltip|text='''[[Lithelimb Cap]]'''|tooltip=[[File:Lithelimb Cap description.png]]}} |
|||
| style="border-right: 1px solid #ffffff;" | |
|||
*{{tooltip|text='''[[Bloodrain Strap]]'''|tooltip=[[File:Bloodrain Strap description.png]]}} |
|||
*:;[[Castigation]] |
|||
*{{tooltip|text='''[[Manabyss Pigaches]]'''|tooltip=[[File:Manabyss Pigaches description.png]]}} |
|||
*:;[[Anahera Saber]] |
|||
| nowrap | |
|||
*:;[[Lithelimb Cap]] |
|||
*:;[[Bloodrain Strap]] |
|||
*:;[[Manabyss Pigaches]] |
|||
|- style="border-bottom: 1px solid #ffffff;" |
|- style="border-bottom: 1px solid #ffffff;" |
||
| |
| style="text-align: center" | <span id=AATT>'''★Ark Angels (2)'''</span> |
||
[[File:AA-TT.jpg |
[[File:AA-TT.jpg|center|link=Ark Angel TT]] |
||
<small>'''Opponent Details''':</small> [[Ark Angel TT]] |
|||
| |
|||
| |
|||
{| style="background: #F9F9F9; border: 1px solid #AAAAAA" width="100%" |
|||
{| class="htmb-details" style="border: 1px solid #AAAAAA; width: 100%; max-width: 1600px; " |
|||
| |
| |
||
:'''Direct Drop''': [[Rem's Tale Ch.10]] |
|||
:'''Entry KI''': [[Phantom Gem of Cowardice]] |
:'''Entry KI''': [[Phantom Gem of Cowardice]] |
||
:'''Merit Cost''': 15 |
::<small>'''Merit Cost''': 15</small> |
||
::<small>'''Limit''': 6 Players, 30 Min</small> |
|||
::Level Cap: Uncapped |
|||
::<small>'''Title''': ''Ark Tarutaru Trouncer''</small> |
|||
::Time Limit: 30 Min |
|||
::Max People: 6 |
|||
:'''[[Home Point]]:''' [[Tu'Lia]] > [[Ru'Aun Gardens]] (#2) |
:'''[[Home Point]]:''' [[Tu'Lia]] > [[Ru'Aun Gardens]] (#2) |
||
<hr> |
<hr> |
||
:'''[[:Category:High-Tier_Mission_Battlefields/AATT|Testimonials]]''' |
:'''[[:Category:High-Tier_Mission_Battlefields/AATT|Testimonials]]''' |
||
|} |
|} |
||
| style="border-right: 1px solid #ffffff;" | |
| style="border-right: 1px solid #ffffff; vertical-align: top; padding-top: 20px;" | |
||
*{{tooltip|text='''[[Buried Vestige]]'''|tooltip=[[File:Buried Vestige description.png]]}} |
|||
*:;[[Rem's Tale Ch.10]] |
|||
*{{tooltip|text='''[[Hepatizon Ore]]'''|tooltip=[[File:Hepatizon Ore description.png]]}} |
|||
:::[[Reforged Armor|RF]] [[:Category:Feet|Feet]] Slot Upgrade Material |
|||
| style="border-right: 1px solid #ffffff; vertical-align: top; padding-top: 20px;" | |
|||
*{{tooltip|text='''[[Anahera Scythe]]'''|tooltip=[[File:Anahera Scythe description.png]]}} |
|||
*:;[[Hepatizon Ore]] |
|||
*{{tooltip|text='''[[Venabulum]]'''|tooltip=[[File:Venabulum description.png]]}} |
|||
:::Crafted into [[Hepatizon Ingot]] |
|||
| style="vertical-align: top; padding-top: 20px;" | |
|||
:::[[:Category:Reforged_Artifact_Armor_+1|AF1 IL 119]] [[:Category:Feet|Feet]] Slot Upgrade Material |
|||
*{{tooltip|text='''[[Theurgist's Slacks]]'''|tooltip=[[File:Theurgist's Slacks description.png]]}} |
|||
| style="border-right: 1px solid #ffffff;" | |
|||
*{{tooltip|text='''[[Scamp's Sollerets]]'''|tooltip=[[File:Scamp's Sollerets description.png]]}} |
|||
*:;[[Anahera Scythe]] |
|||
*{{tooltip|text='''[[Fravashi Mantle]]'''|tooltip=[[File:Fravashi Mantle description.png]]}} |
|||
*:;[[Venabulum]] |
|||
| |
|||
*:;[[Theurgist's Slacks]] |
|||
*:;[[Scamp's Sollerets]] |
|||
*:;[[Fravashi Mantle]] |
|||
|- style="border-bottom: 1px solid #ffffff;" |
|- style="border-bottom: 1px solid #ffffff;" |
||
| |
| style="text-align: center" | <span id=AAMR>'''★Ark Angels (3)'''</span> |
||
[[File:AA-MR.jpg |
[[File:AA-MR.jpg|center|link=Ark Angel MR]] |
||
<small>'''Opponent Details''':</small> [[Ark Angel MR]] |
|||
| |
|||
| |
|||
{| style="background: #F9F9F9; border: 1px solid #AAAAAA" width="100%" |
|||
{| class="htmb-details" style="border: 1px solid #AAAAAA; width: 100%; max-width: 1600px; " |
|||
| |
| |
||
:'''Direct Drop''': [[Rem's Tale Ch.8]] |
|||
:'''Entry KI''': [[Phantom Gem of Envy]] |
:'''Entry KI''': [[Phantom Gem of Envy]] |
||
:'''Merit Cost''': 15 |
::<small>'''Merit Cost''': 15</small> |
||
::<small>'''Limit''': 6 Players, 30 Min</small> |
|||
::Level Cap: Uncapped |
|||
::<small>'''Title''': ''Ark Mithra Maligner''</small> |
|||
::Time Limit: 30 Min |
|||
::Max People: 6 |
|||
:'''[[Home Point]]:''' [[Tu'Lia]] > [[Ru'Aun Gardens]] (#3) |
:'''[[Home Point]]:''' [[Tu'Lia]] > [[Ru'Aun Gardens]] (#3) |
||
<hr> |
<hr> |
||
:'''[[:Category:High-Tier_Mission_Battlefields/AAMR|Testimonials]]''' |
:'''[[:Category:High-Tier_Mission_Battlefields/AAMR|Testimonials]]''' |
||
|} |
|} |
||
| style="border-right: 1px solid #ffffff;" | |
| style="border-right: 1px solid #ffffff; vertical-align: top; padding-top: 20px;" | |
||
*{{tooltip|text='''[[Buried Vestige]]'''|tooltip=[[File:Buried Vestige description.png]]}} |
|||
*:;[[Rem's Tale Ch.8]] |
|||
*{{tooltip|text='''[[Beryllium Ore]]'''|tooltip=[[File:Beryllium Ore description.png]]}} |
|||
:::[[Reforged Armor|RF]] [[:Category:Hands|Hands]] Slot Upgrade Material |
|||
| style="border-right: 1px solid #ffffff; vertical-align: top; padding-top: 20px;" | |
|||
*{{tooltip|text='''[[Raimitsukane]]'''|tooltip=[[File:Raimitsukane description.png]]}} |
|||
*:;[[Beryllium Ore]] |
|||
*{{tooltip|text='''[[Anahera Tabar]]'''|tooltip=[[File:Anahera Tabar description.png]]}} |
|||
:::Crafted into [[Beryllium Ingot]] |
|||
| style="vertical-align: top; padding-top: 20px;" | |
|||
:::[[:Category:Reforged_Artifact_Armor_+1|AF1 IL 119]] [[:Category:Hands|Hands]] Slot Upgrade Material |
|||
*{{tooltip|text='''[[Regimen Mittens]]'''|tooltip=[[File:Regimen Mittens description.png]]}} |
|||
| style="border-right: 1px solid #ffffff;" | |
|||
*{{tooltip|text='''[[Felistris Mask]]'''|tooltip=[[File:Felistris Mask description.png]]}} |
|||
*:;[[Raimitsukane]] |
|||
*{{tooltip|text='''[[Sekhmet Corset]]'''|tooltip=[[File:Sekhmet Corset description.png]]}} |
|||
*:;[[Anahera Tabar]] |
|||
| |
|||
*:;[[Regimen Mittens]] |
|||
*:;[[Felistris Mask]] |
|||
*:;[[Sekhmet Corset]] |
|||
|- style="border-bottom: 1px solid #ffffff;" |
|- style="border-bottom: 1px solid #ffffff;" |
||
| |
| style="text-align: center" | <span id=AAEV>'''★Ark Angels (4)'''</span> |
||
[[File:AA-EV.jpg |
[[File:AA-EV.jpg|center|link=Ark Angel EV]] |
||
<small>'''Opponent Details''':</small> [[Ark Angel EV]] |
|||
| |
|||
| |
|||
{| style="background: #F9F9F9; border: 1px solid #AAAAAA" width="100%" |
|||
{| class="htmb-details" style="border: 1px solid #AAAAAA; width: 100%; max-width: 1600px; " |
|||
| |
| |
||
:'''Direct Drop''': [[Rem's Tale Ch.7]] |
|||
:'''Entry KI''': [[Phantom Gem of Arrogance]] |
:'''Entry KI''': [[Phantom Gem of Arrogance]] |
||
:'''Merit Cost''': 15 |
::<small>'''Merit Cost''': 15</small> |
||
::<small>'''Limit''': 6 Players, 30 Min</small> |
|||
::Level Cap: Uncapped |
|||
::<small>'''Title''': ''Ark Elvaan Eviscerator''</small> |
|||
::Time Limit: 30 Min |
|||
::Max People: 6 |
|||
:'''[[Home Point]]:''' [[Tu'Lia]] > [[Ru'Aun Gardens]] (#4) |
:'''[[Home Point]]:''' [[Tu'Lia]] > [[Ru'Aun Gardens]] (#4) |
||
<hr> |
<hr> |
||
:'''[[:Category:High-Tier_Mission_Battlefields/AAEV|Testimonials]]''' |
:'''[[:Category:High-Tier_Mission_Battlefields/AAEV|Testimonials]]''' |
||
|} |
|} |
||
| style="border-right: 1px solid #ffffff;" | |
| style="border-right: 1px solid #ffffff; vertical-align: top; padding-top: 20px;" | |
||
*{{tooltip|text='''[[Buried Vestige]]'''|tooltip=[[File:Buried Vestige description.png]]}} |
|||
*:;[[Rem's Tale Ch.7]] |
|||
*{{tooltip|text='''[[Exalted Log]]'''|tooltip=[[File:Exalted Log description.png]]}} |
|||
:::[[Reforged Armor|RF]] [[:Category:Body|Body]] Slot Upgrade Material |
|||
| style="border-right: 1px solid #ffffff; vertical-align: top; padding-top: 20px;" | |
|||
*{{tooltip|text='''[[Anahera Sword]]'''|tooltip=[[File:Anahera Sword description.png]]}} |
|||
*:;[[Exalted Log]] |
|||
*{{tooltip|text='''[[Cagliostro's Rod]]'''|tooltip=[[File:Cagliostro's Rod description.png]]}} |
|||
:::Crafted into [[Exalted Lumber]] |
|||
| style="vertical-align: top; padding-top: 20px;" | |
|||
:::[[:Category:Reforged_Artifact_Armor_+1|AF1 IL 119]] [[:Category:Body|Body]] Slot Upgrade Material |
|||
*{{tooltip|text='''[[Osmium Cuisses]]'''|tooltip=[[File:Osmium Cuisses description.png]]}} |
|||
| style="border-right: 1px solid #ffffff;" | |
|||
*{{tooltip|text='''[[Patricius Ring]]'''|tooltip=[[File:Patricius Ring description.png]]}} |
|||
*:;[[Anahera Sword]] |
|||
*{{tooltip|text='''[[Dynasty Mitts]]'''|tooltip=[[File:Dynasty Mitts description.png]]}} |
|||
*:;[[Cagliostro's Rod]] |
|||
| |
|||
*:;[[Osmium Cuisses]] |
|||
*:;[[Patricius Ring]] |
|||
*:;[[Dynasty Mitts]] |
|||
|- style="border-bottom: 1px solid #ffffff;" |
|- style="border-bottom: 1px solid #ffffff;" |
||
| |
| style="text-align: center" | <span id=AAGK>'''★Ark Angels (5)'''</span> |
||
[[File:AA-GK.jpg |
[[File:AA-GK.jpg|center|link=Ark Angel GK]] |
||
<small>'''Opponent Details''':</small> [[Ark Angel GK]] |
|||
| |
|||
| |
|||
{| style="background: #F9F9F9; border: 1px solid #AAAAAA" width="100%" |
|||
{| class="htmb-details" style="border: 1px solid #AAAAAA; width: 100%; max-width: 1600px; " |
|||
| |
| |
||
:'''Direct Drop''': [[Rem's Tale Ch.9]] |
|||
:'''Entry KI''': [[Phantom Gem of Rage]] |
:'''Entry KI''': [[Phantom Gem of Rage]] |
||
:'''Merit Cost''': 15 |
::<small>'''Merit Cost''': 15</small> |
||
::<small>'''Limit''': 6 Players, 30 Min</small> |
|||
::Level Cap: Uncapped |
|||
::<small>'''Title''': ''Ark Galka Gouger''</small> |
|||
::Time Limit: 30 Min |
|||
::Max People: 6 |
|||
:'''[[Home Point]]:''' [[Tu'Lia]] > [[Ru'Aun Gardens]] (#5) |
:'''[[Home Point]]:''' [[Tu'Lia]] > [[Ru'Aun Gardens]] (#5) |
||
<hr> |
<hr> |
||
:'''[[:Category:High-Tier_Mission_Battlefields/AAGK|Testimonials]]''' |
:'''[[:Category:High-Tier_Mission_Battlefields/AAGK|Testimonials]]''' |
||
|} |
|} |
||
| style="border-right: 1px solid #ffffff;" | |
| style="border-right: 1px solid #ffffff; vertical-align: top; padding-top: 20px;" | |
||
*{{tooltip|text='''[[Buried Vestige]]'''|tooltip=[[File:Buried Vestige description.png]]}} |
|||
*:;[[Rem's Tale Ch.9]] |
|||
*{{tooltip|text='''[[Sif's Lock]]'''|tooltip=[[File:Sif's Lock description.png]]}} |
|||
:::[[Reforged Armor|RF]] [[:Category:Legs|Legs]] Slot Upgrade Material |
|||
| style="border-right: 1px solid #ffffff; vertical-align: top; padding-top: 20px;" | |
|||
*{{tooltip|text='''[[Tunglmyrkvi]]'''|tooltip=[[File:Tunglmyrkvi description.png]]}} |
|||
*:;[[Sif's Lock]] |
|||
*{{tooltip|text='''[[Anahera Blade]]'''|tooltip=[[File:Anahera Blade description.png]]}} |
|||
:::Crafted into [[Sif's Macrame]] |
|||
| style="vertical-align: top; padding-top: 20px;" | |
|||
:::[[:Category:Reforged_Artifact_Armor_+1|AF1 IL 119]] [[:Category:Legs|Legs]] Slot Upgrade Material |
|||
*{{tooltip|text='''[[Agitator's Collar]]'''|tooltip=[[File:Agitator's Collar description.png]]}} |
|||
| style="border-right: 1px solid #ffffff;" | |
|||
*{{tooltip|text='''[[Lurid Mitts]]'''|tooltip=[[File:Lurid Mitts description.png]]}} |
|||
*:;[[Tunglmyrkvi]] |
|||
*{{tooltip|text='''[[Daihanshi Habaki]]'''|tooltip=[[File:Daihanshi Habaki description.png]]}} |
|||
*:;[[Anahera Blade]] |
|||
| |
|||
*:;[[Agitator's Collar]] |
|||
*:;[[Lurid Mitts]] |
|||
*:;[[Daihanshi Habaki]] |
|||
|- style="border-bottom: 1px solid #ffffff;" |
|- style="border-bottom: 1px solid #ffffff;" |
||
| |
| style="text-align: center" | <span id=DivineMight>'''★Divine Might'''</span> |
||
[[File:DM.jpg |
[[File:DM.jpg|center|link=Divine Might II]] |
||
<small>'''Opponent Details''':</small> [[Divine Might II]] |
|||
| |
|||
| |
|||
{| style="background: #F9F9F9; border: 1px solid #AAAAAA" width="100%" |
|||
{| class="htmb-details" style="border: 1px solid #AAAAAA; width: 100%; max-width: 1600px; " |
|||
| |
| |
||
:'''Direct Drop''': Rem's Tale Ch.6-10 |
|||
:'''Entry KI''': [[Pentacide Perpetrator Phantom Gem]] |
:'''Entry KI''': [[Pentacide Perpetrator Phantom Gem]] |
||
::<small>'''Merit Cost''': 20</small> |
|||
::'''Note: To gain access to this key item,<br>you have to defeat all the individual<br>Ark Angel II fights at least once on<br>Normal difficulty or above.''' |
|||
::<small>'''Limit''': 18 Players, 30 Min</small> |
|||
:'''Merit Cost''': 20 |
|||
::<small>'''Title''': ''Pentarch Pacifier''</small> |
|||
::Level Cap: Uncapped |
|||
::Time Limit: 30 Min |
|||
::Max People: 18 |
|||
:'''[[Home Point]]:''' [[Tu'Lia]] > [[Ru'Aun Gardens]] (Any) |
:'''[[Home Point]]:''' [[Tu'Lia]] > [[Ru'Aun Gardens]] (Any) |
||
<hr> |
<hr> |
||
:'''[[:Category:High-Tier_Mission_Battlefields/DivineMight|Testimonials]]''' |
:'''[[:Category:High-Tier_Mission_Battlefields/DivineMight|Testimonials]]''' |
||
|} |
|} |
||
| style="border-right: 1px solid #ffffff;" | |
| style="border-right: 1px solid #ffffff; vertical-align: top; padding-top: 20px;" | |
||
*{{tooltip|text='''[[Buried Vestige]]'''|tooltip=[[File:Buried Vestige description.png]]}} |
|||
*:;All Rem's Tale Ch 6-10 |
|||
*{{tooltip|text='''[[Maliyakaleya Coral]]'''|tooltip=[[File:Maliya. Coral description.png]]}} |
|||
*{{tooltip|text='''[[Hepatizon Ore]]'''|tooltip=[[File:Hepatizon Ore description.png]]}} |
|||
*:;Every crafting material that<br>drops from the single fights<br> also has the potential to drop<br> from the same unique Ark Angel<br> in [[Divine Might II]] |
|||
*{{tooltip|text='''[[Beryllium Ore]]'''|tooltip=[[File:Beryllium Ore description.png]]}} |
|||
| style="border-right: 1px solid #ffffff;" | |
|||
*{{tooltip|text='''[[Exalted Log]]'''|tooltip=[[File:Exalted Log description.png]]}} |
|||
*:;[[Seraphicaller]] |
|||
*{{tooltip|text='''[[Sif's Lock]]'''|tooltip=[[File:Sif's Lock description.png]]}} |
|||
| style="border-right: 1px solid #ffffff; vertical-align: top; padding-top: 20px;" | |
|||
*:;[[Divinator]] |
|||
*{{tooltip|text='''[[Seraphicaller]]'''|tooltip=[[File:Seraphicaller description.png]]}} |
|||
| |
|||
*{{tooltip|text='''[[Divinator]]'''|tooltip=[[File:Divinator description.png]]}} |
|||
*:;[[Lentus Grip]] |
|||
*{{tooltip|text='''[[Divinator II]]'''|tooltip=[[File:Divinator II description.png]]}} |
|||
| style="vertical-align: top; padding-top: 20px;" | |
|||
*:;[[Kyujutsugi]] |
|||
*{{tooltip|text='''[[Lentus Grip]]'''|tooltip=[[File:Lentus Grip description.png]]}} |
|||
*{{tooltip|text='''[[Kyujutsugi]]'''|tooltip=[[File:Kyujutsugi description.png]]}} |
|||
*:;[[Crematio Earring]]<br /><sup>''(TT Only)''</sup> |
|||
*{{tooltip|text='''[[Crematio Earring]]'''<sup>''(TT Only)''</sup>|tooltip=[[File:Crematio Earring description.png]]}} |
|||
* |
*{{tooltip|text='''[[Trux Earring]]'''<sup>''(HM Only)''</sup>|tooltip=[[File:Trux Earring description.png]]}} |
||
*{{tooltip|text='''[[Tripudio Earring]]'''<sup>''(GK Only)''</sup>|tooltip=[[File:Tripudio Earring description.png]]}} |
|||
* |
*{{tooltip|text='''[[Sanare Earring]]'''<sup>''(EV Only)''</sup>|tooltip=[[File:Sanare Earring description.png]]}} |
||
*{{tooltip|text='''[[Gelai Earring]]'''<sup>''(MR Only)''</sup>|tooltip=[[File:Gelai Earring description.png]]}} |
|||
*:;[[Sanare Earring]]<br /><sup>''(EV Only)''</sup> |
|||
*:;[[Gelai Earring]]<br /><sup>''(MR Only)''</sup> |
|||
|- style="border-bottom: 1px solid #ffffff;" |
|- style="border-bottom: 1px solid #ffffff;" |
||
| |
| style="text-align: center" | <span id=CelestialNexus>'''★The Celestial Nexus'''</span> |
||
[[File: |
[[File:CN.jpg|center|link=Eald'narche]] |
||
<small>'''Opponent Details''':</small> [[Eald'narche]] |
|||
| |
|||
{| style="background: #F9F9F9; border: 1px solid #AAAAAA" width="100%" |
|||
| |
| |
||
{| class="htmb-details" style="border: 1px solid #AAAAAA; width: 100%; max-width: 1600px; " |
|||
:'''Entry KI''': [[Stellar Fulcrum phantom gem]] |
|||
:'''Merit Cost''': 10 |
|||
::Level Cap: Uncapped |
|||
::Time Limit: 30 Min |
|||
::Max People: 6 |
|||
:'''[[Home Point]]:''' [[Qufim]] > [[Upper Delkfutt's Tower]] (#1) |
|||
<hr> |
|||
:'''[[:Category:High-Tier_Mission_Battlefields/ReturnDelkfutt|Testimonials]]''' |
|||
|} |
|||
| style="border-right: 1px solid #ffffff;" | |
|||
*:;[[Rem's Tale Ch.6]] |
|||
:::[[Reforged Armor|RF]] [[:Category:Head|Head]] Slot Upgrade Material |
|||
*:;All [[:Category:Reforged_Artifact_Armor_+1|AF1 IL 119]] Upgrade Synthesis Materials |
|||
*:;[[Wyrm Blood]] |
|||
| style="border-right: 1px solid #ffffff;" | |
|||
*:;[[Mes'yohi Sword]] |
|||
*:;[[Mes'yohi Rod]] |
|||
*:;[[Seraphicaller]] |
|||
*:;[[Divinator]] |
|||
| |
|||
*:;[[Mes'yohi Haubergeon]] |
|||
*:;[[Mes'yohi Slacks]] |
|||
|- style="border-bottom: 1px solid #ffffff;" |
|||
| align="center" | <span id=CelestialNexus>'''★The Celestial Nexus'''</span> |
|||
[[File:CN.jpg|frame|center|link=Eald'narche|[[Eald'narche]]]] |
|||
| |
|||
{| style="background: #F9F9F9; border: 1px solid #AAAAAA" width="100%" |
|||
| |
| |
||
:'''Direct Drop''': [[Rem's Tale Ch.7]] |
|||
:'''Entry KI''': [[Celestial Nexus phantom gem]] |
:'''Entry KI''': [[Celestial Nexus phantom gem]] |
||
:'''Merit Cost''': 10 |
::<small>'''Merit Cost''': 10</small> |
||
::<small>'''Limit''': 6 Players, 30 Min</small> |
|||
::Level Cap: Uncapped |
|||
::<small>'''Title''': ''Dream Distiller''</small> |
|||
::Time Limit: 30 Min |
|||
::Max People: 6 |
|||
:'''[[Home Point]]:''' [[Tu'Lia]] > [[The Shrine of Ru'Avitau]] (#1) |
:'''[[Home Point]]:''' [[Tu'Lia]] > [[The Shrine of Ru'Avitau]] (#1) |
||
<hr> |
<hr> |
||
:'''[[:Category:High-Tier_Mission_Battlefields/CelestialNexus|Testimonials]]''' |
:'''[[:Category:High-Tier_Mission_Battlefields/CelestialNexus|Testimonials]]''' |
||
|} |
|} |
||
| style="border-right: 1px solid #ffffff;" | |
| style="border-right: 1px solid #ffffff; vertical-align: top; padding-top: 20px;" | |
||
*{{tooltip|text='''[[Maliyakaleya Coral]]'''|tooltip=[[File:Maliya. Coral description.png]]}} |
|||
*:;[[Rem's Tale Ch.7]] |
|||
*{{tooltip|text='''[[Beryllium Ore]]'''|tooltip=[[File:Beryllium Ore description.png]]}} |
|||
:::[[Reforged Armor|RF]] [[:Category:Body|Body]] Slot Upgrade Material |
|||
*{{tooltip|text='''[[Sif's Lock]]'''|tooltip=[[File:Sif's Lock description.png]]}} |
|||
*{{tooltip|text='''[[Wyrm Blood]]'''|tooltip=[[File:Wyrm Blood description.png]]}} |
|||
*:;All [[:Category:Reforged_Artifact_Armor_+1|AF1 IL 119]] Upgrade Synthesis Materials |
|||
| style="border-right: 1px solid #ffffff; vertical-align: top; padding-top: 20px;" | |
|||
*{{tooltip|text='''[[Vanir Knife]]'''|tooltip=[[File:Vanir Knife description.png]]}} |
|||
*:;[[Wyrm Blood]] |
|||
*{{tooltip|text='''[[Vanir Gun]]'''|tooltip=[[File:Vanir Gun description.png]]}} |
|||
| style="border-right: 1px solid #ffffff;" | |
|||
*{{tooltip|text='''[[Seraphicaller]]'''|tooltip=[[File:Seraphicaller description.png]]}} |
|||
*:;[[Vanir Knife]] |
|||
*{{tooltip|text='''[[Divinator]]'''|tooltip=[[File:Divinator description.png]]}} |
|||
*{{tooltip|text='''[[Divinator II]]'''|tooltip=[[File:Divinator II description.png]]}} |
|||
*:;[[Vanir Gun]] |
|||
| style="vertical-align: top; padding-top: 20px;" | |
|||
*{{tooltip|text='''[[Vanir Cotehardie]]'''|tooltip=[[File:Vanir Cotehardie description.png]]}} |
|||
*:;[[Seraphicaller]] |
|||
*{{tooltip|text='''[[Vanir Battery]]'''|tooltip=[[File:Vanir Battery description.png]]}} |
|||
*{{tooltip|text='''[[Vanir Boots]]'''|tooltip=[[File:Vanir Boots description.png]]}} |
|||
*:;[[Divinator]] |
|||
| |
|||
*:;[[Vanir Cotehardie]] |
|||
*:;[[Vanir Battery]] |
|||
*:;[[Vanir Boots]] |
|||
|- style="border-bottom: 1px solid #ffffff;" |
|||
| align="center" | <span id=ShadowLordBattle>'''★The Shadow Lord Battle'''</span> |
|||
[[File:shadowlordb.jpg|frame|center|link=Shadow Lord|[[Shadow Lord]]]] |
|||
| |
|||
{| style="background: #F9F9F9; border: 1px solid #AAAAAA" width="100%" |
|||
| |
|||
:'''Entry KI''': [[Shadow Lord phantom gem]] |
|||
:'''Merit Cost''': 10 |
|||
::Level Cap: Uncapped |
|||
::Time Limit: 30 Min |
|||
::Max People: 6 |
|||
:'''[[Home Point]]:''' [[Valdeaunia]] > [[Castle Zvahl Keep]] (#1) |
|||
<hr> |
|||
:'''[[:Category:High-Tier_Mission_Battlefields/ShadowLordBattle|Testimonials]]''' |
|||
|} |
|||
| style="border-right: 1px solid #ffffff;" | |
|||
*:;[[Rem's Tale Ch.7]] |
|||
:::[[Reforged Armor|RF]] [[:Category:Body|Body]] Slot Upgrade Material |
|||
*:;All [[:Category:Reforged_Artifact_Armor_+1|AF1 IL 119]] Upgrade Synthesis Materials |
|||
| style="border-right: 1px solid #ffffff;" | |
|||
*:;[[Lightreaver]] |
|||
'''During Collaboration Event:''' |
|||
*:;[[Shadow Lord Tunes]] |
|||
'''[[My Little Shadow Lord]] Event:''' |
|||
*:;[[Shadow Lord Statue]] |
|||
*:;[[Shadow Lord Statue II]] |
|||
*:;[[Shadow Lord Statue III]] |
|||
| |
|||
*:;[[Onimusha-no-Kote]] |
|||
*:;[[Dread Jupon]] |
|||
*:;[[Perdition Slops]] |
|||
*:;[[Trepidity Mantle]] |
|||
|} |
|} |
||
===Chains of Promathia=== |
===Chains of Promathia=== |
||
{| class="Standardwide R1-White overflow-visible htmb" style="width: 100%; max-width: 1600px;" BGCOLOR="#efeeee" cellpadding="1" |
|||
{| class="Standardwide R1-White" text-align: center;" BGCOLOR="#efeeee" width="90%" cellpadding="1" |
|||
|- BGCOLOR="#4b4d4f" |
|- BGCOLOR="#4b4d4f" |
||
! width=20% | Name |
! width=20% | Name |
||
! width=30% | Battlefield |
! width=30% | Battlefield Details |
||
! width=20% nowrap | |
! width=20% nowrap | Unique Materials |
||
! width=15% | Weapons |
! width=15% | Weapons |
||
! width=15% nowrap | Armor |
! width=15% nowrap | Armor |
||
|- style="border-top: 1px solid #efeeee;" |
|- style="border-top: 1px solid #efeeee;" |
||
! colspan=" |
! colspan="5" BGCOLOR="#B9DDE8" cellpadding="0" height=2px| |
||
|- style="border-bottom: 1px solid #ffffff;" |
|- style="border-bottom: 1px solid #ffffff;" |
||
| |
| style="text-align: center;" | <span id=TheSavage>'''★The Savage'''</span> |
||
[[File:ouryub.jpg |
<div style="margin: auto; max-width: 400px;" class="img-scaler">[[File:ouryub.jpg|link=Ouryu]]</div> |
||
<small>'''Opponent Details''':</small> [[Ouryu]] |
|||
| |
| |
||
{| |
{| class="htmb-details" style="border: 1px solid #AAAAAA; width: 100%; max-width: 1600px; " |
||
| |
| |
||
:'''Direct Drop''': [[Rem's Tale Ch.8]] |
|||
:'''Entry KI''': [[Savage's phantom gem]] |
:'''Entry KI''': [[Savage's phantom gem]] |
||
:'''Merit Cost''': 10 |
::<small>'''Merit Cost''': 10</small> |
||
::<small>'''Limit''': 6 Players, 30 Min</small> |
|||
::Level Cap: Uncapped |
|||
::<small>'''Title''': ''Ouryu Obfuscator''</small> |
|||
::Time Limit: 30 Min |
|||
::Max People: 6 |
|||
:'''[[Home Point]]:''' [[Tavnazian Archipelago|Tavnazian Arch.]] > [[Riverne - Site B01|Riv. - Site #B01]] (#1) |
:'''[[Home Point]]:''' [[Tavnazian Archipelago|Tavnazian Arch.]] > [[Riverne - Site B01|Riv. - Site #B01]] (#1) |
||
<hr> |
<hr> |
||
:'''[[:Category:High-Tier_Mission_Battlefields/TheSavage|Testimonials]]''' |
:'''[[:Category:High-Tier_Mission_Battlefields/TheSavage|Testimonials]]''' |
||
|} |
|} |
||
| style="border-right: 1px solid #ffffff;"| |
| style="border-right: 1px solid #ffffff; vertical-align: top; padding-top: 20px;" | |
||
*{{tooltip|text='''[[Maliyakaleya Coral]]'''|tooltip=[[File:Maliyakaleya Coral description.png]]}} |
|||
*:;[[Rem's Tale Ch.8]] |
|||
*{{tooltip|text='''[[Exalted Log]]'''|tooltip=[[File:Exalted Log description.png]]}} |
|||
:::[[Reforged Armor|RF]] [[:Category:Hands|Hands]] Slot Upgrade Material |
|||
*{{tooltip|text='''[[Wyrm Blood]]'''|tooltip=[[File:Wyrm Blood description.png]]}} |
|||
| style="border-right: 1px solid #ffffff; vertical-align: top; padding-top: 20px;" | |
|||
*:;All [[:Category:Reforged_Artifact_Armor_+1|AF1 IL 119]] Upgrade Synthesis Materials |
|||
*{{tooltip|text='''[[Seraphicaller]]'''|tooltip=[[File:Seraphicaller description.png]]}} |
|||
*{{tooltip|text='''[[Divinator]]'''|tooltip=[[File:Divinator description.png]]}} |
|||
*:;[[Wyrm Blood]] |
|||
*{{tooltip|text='''[[Divinator II]]'''|tooltip=[[File:Divinator II description.png]]}} |
|||
| style="border-right: 1px solid #ffffff;"| |
|||
| style="vertical-align: top; padding-top: 20px;" | |
|||
*:;[[Seraphicaller]] |
|||
*{{tooltip|text='''[[Herald's Gaiters]]'''|tooltip=[[File:Herald's Gaiters description.png]]}} |
|||
*{{tooltip|text='''[[Hegira Wristbands]]'''|tooltip=[[File:Hegira Wristbands description.png]]}} |
|||
*:;[[Divinator]] |
|||
*{{tooltip|text='''[[Ischemia Chasuble]]'''|tooltip=[[File:Ischemia Chasu. description.png]]}} |
|||
| |
|||
*{{tooltip|text='''[[Scuffler's Cosciales]]'''|tooltip=[[File:Scuff. Cosciales description.png]]}} |
|||
*:;[[Herald's Gaiters]] |
|||
*{{tooltip|text='''[[Metalsinger Belt]]'''|tooltip=[[File:Metalsinger Belt description.png]]}} |
|||
*{{tooltip|text='''[[Domesticator's Earring]]'''|tooltip=[[File:Domes. Earring description.png]]}} |
|||
*:;[[Hegira Wristbands]] |
|||
*:;[[Ischemia Chasuble]] |
|||
*:;[[Scuffler's Cosciales]] |
|||
*:;[[Metalsinger Belt]] |
|||
*:;[[Domesticator's Earring]] |
|||
|- style="border-bottom: 1px solid #ffffff;" |
|||
| align="center" | <span id=WarriorPath>'''★The Warrior's Path'''</span> |
|||
[[File:tenzenb.jpg|frame|center|link=Tenzen|[[Tenzen]]]] |
|||
| |
|||
{| style="background: #F9F9F9; border: 1px solid #AAAAAA" width="100%" |
|||
| |
|||
:'''Entry KI''': [[Warrior's Path phantom gem]] |
|||
:'''Merit Cost''': 10 |
|||
::Level Cap: Uncapped |
|||
::Time Limit: 30 Min |
|||
::Max People: 6 |
|||
:'''[[Home Point]]:''' [[Tavnazia]] > [[Tavnazian Safehold]] (#2) |
|||
<hr> |
|||
:'''[[:Category:High-Tier_Mission_Battlefields/WarriorPath|Testimonials]]''' |
|||
|} |
|||
| style="border-right: 1px solid #ffffff;"| |
|||
*:;[[Rem's Tale Ch.9]] |
|||
:::[[Reforged Armor|RF]] [[:Category:Legs|Legs]] Slot Upgrade Material |
|||
*:;All [[:Category:Reforged_Artifact_Armor_+1|AF1 IL 119]] Upgrade Synthesis Materials |
|||
*:;[[Scarletite Ingot]] |
|||
| style="border-right: 1px solid #ffffff;"| |
|||
*:;[[Ginsen]] |
|||
*:;[[Hangaku-no-Yumi]] |
|||
*:;[[Seraphicaller]] |
|||
*:;[[Divinator]] |
|||
| |
|||
*:;[[Sukeroku Hachimaki]] |
|||
*:;[[Battlecast Gaiters]] |
|||
*:;[[Mizukage-no-Kubikazari]] |
|||
|- style="border-bottom: 1px solid #ffffff;" |
|- style="border-bottom: 1px solid #ffffff;" |
||
| |
| style="text-align: center;" | <span id=HeadWind>'''★Head Wind'''</span> |
||
<div style="margin: auto; max-width: 400px;" class="img-scaler">[[File:headwindb.jpg|link=]]</div> |
|||
[[File:headwindb.jpg|frame|center|link=|[[Shikaree X]], [[Shikaree Y]], and [[Shikaree Z]]]] |
|||
<small>'''Opponent Details''':</small><br /> |
|||
[[Shikaree X]], [[Shikaree Y]], and [[Shikaree Z]] |
|||
| |
| |
||
{| |
{| class="htmb-details" style="border: 1px solid #AAAAAA; width: 100%; max-width: 1600px; " |
||
| |
| |
||
:'''Direct Drop''': [[Rem's Tale Ch.8]], [[Rem's Tale Ch.9|Ch.9]], [[Rem's Tale Ch.10|Ch.10]] |
|||
:'''Entry KI''': [[Head Wind phantom gem]] |
:'''Entry KI''': [[Head Wind phantom gem]] |
||
:'''Merit Cost''': 10 |
::<small>'''Merit Cost''': 10</small> |
||
::<small>'''Limit''': 6 Players, 30 Min</small> |
|||
::Level Cap: Uncapped |
|||
::<small>'''Title''': ''Sin Purger''</small> |
|||
::Time Limit: 30 Min |
|||
::Max People: 6 |
|||
:'''[[Home Point]]:''' [[Aragoneu]] > [[Attohwa Chasm]] (#1) |
:'''[[Home Point]]:''' [[Aragoneu]] > [[Attohwa Chasm]] (#1) |
||
<hr> |
<hr> |
||
:'''[[:Category:High-Tier_Mission_Battlefields/HeadWind|Testimonials]]''' |
:'''[[:Category:High-Tier_Mission_Battlefields/HeadWind|Testimonials]]''' |
||
|} |
|} |
||
| style="border-right: 1px solid #ffffff;"| |
| style="border-right: 1px solid #ffffff; vertical-align: top; padding-top: 20px;" | |
||
*{{tooltip|text='''[[Maliyakaleya Coral]]'''|tooltip=[[File:Maliyakaleya Coral description.png]]}} |
|||
*:;[[Rem's Tale Ch.8]] |
|||
*{{tooltip|text='''[[Hepatizon Ore]]'''|tooltip=[[File:Hepatizon Ore description.png]]}} |
|||
:::[[Reforged Armor|RF]] [[:Category:Hands|Hands]] Slot Upgrade Material |
|||
*{{tooltip|text='''[[Beryllium Ore]]'''|tooltip=[[File:Beryllium Ore description.png]]}} |
|||
*{{tooltip|text='''[[Exalted Log]]'''|tooltip=[[File:Exalted Log description.png]]}} |
|||
*:;All [[:Category:Reforged_Artifact_Armor_+1|AF1 IL 119]] Upgrade Synthesis Materials |
|||
*{{tooltip|text='''[[Sif's Lock]]'''|tooltip=[[File:Sif's Lock description.png]]}} |
|||
| style="border-right: 1px solid #ffffff;"| |
|||
| style="border-right: 1px solid #ffffff; vertical-align: top; padding-top: 20px;" | |
|||
*:;[[Nilgal Pole]] |
|||
*{{tooltip|text='''[[Nilgal Pole]]'''|tooltip=[[File:Nilgal Pole description.png]]}} |
|||
*{{tooltip|text='''[[Chidori]]'''|tooltip=[[File:Chidori description.png]]}} |
|||
*:;[[Chidori]] |
|||
| style="vertical-align: top; padding-top: 20px;" | |
|||
| |
|||
*{{tooltip|text='''[[Shetal Stone]]'''|tooltip=[[File:Shetal Stone description.png]]}} |
|||
*:;[[Shetal Stone]] |
|||
*{{tooltip|text='''[[Baghere Salade]]'''|tooltip=[[File:Baghere Salade description.png]]}} |
|||
*{{tooltip|text='''[[Durgai Leggings]]'''|tooltip=[[File:Durgai Leggings description.png]]}} |
|||
*:;[[Baghere Salade]] |
|||
*:;[[Durgai Leggings]] |
|||
|- style="border-bottom: 1px solid #ffffff;" |
|- style="border-bottom: 1px solid #ffffff;" |
||
| |
| style="text-align: center;" | <span id=OneToBeFeared>'''★One to be Feared'''</span> |
||
[[File:onetobefearedb.jpg |
<div style="margin: auto; max-width: 400px;" class="img-scaler">[[File:onetobefearedb.jpg|link=]]</div> |
||
<small>'''Opponent Details''':</small> [[Omega]] & [[Ultima]] |
|||
| |
| |
||
{| |
{| class="htmb-details" style="border: 1px solid #AAAAAA; width: 100%; max-width: 1600px; " |
||
| |
| |
||
:'''Direct Drop''': [[Rem's Tale Ch.10]] |
|||
:'''Entry KI''': [[Feared One phantom gem]] |
:'''Entry KI''': [[Feared One phantom gem]] |
||
:'''Merit Cost''': 10 |
::<small>'''Merit Cost''': 10</small> |
||
::<small>'''Limit''': 6 Players, 30 Min</small> |
|||
::Level Cap: Uncapped |
|||
::<small>'''Title''': ''Conquerer of Fear''</small> |
|||
::Time Limit: 30 Min |
|||
::Max People: 6 |
|||
:'''[[Home Point]]:''' [[Tavnazia]] > [[Tavnazian Safehold]] (#2) |
:'''[[Home Point]]:''' [[Tavnazia]] > [[Tavnazian Safehold]] (#2) |
||
<hr> |
<hr> |
||
:'''[[:Category:High-Tier_Mission_Battlefields/OneToBeFeared|Testimonials]]''' |
:'''[[:Category:High-Tier_Mission_Battlefields/OneToBeFeared|Testimonials]]''' |
||
|} |
|} |
||
| style="border-right: 1px solid #ffffff;"| |
| style="border-right: 1px solid #ffffff; vertical-align: top; padding-top: 20px;" | |
||
*{{tooltip|text='''[[Maliyakaleya Coral]]'''|tooltip=[[File:Maliyakaleya Coral description.png]]}} |
|||
*:;[[Rem's Tale Ch.10]] |
|||
*{{tooltip|text='''[[Hepatizon Ore]]'''|tooltip=[[File:Hepatizon Ore description.png]]}} |
|||
:::[[Reforged Armor|RF]] [[:Category:Feet|Feet]] Slot Upgrade Material |
|||
*{{tooltip|text='''[[Beryllium Ore]]'''|tooltip=[[File:Beryllium Ore description.png]]}} |
|||
*{{tooltip|text='''[[Exalted Log]]'''|tooltip=[[File:Exalted Log description.png]]}} |
|||
*:;All [[:Category:Reforged_Artifact_Armor_+1|AF1 IL 119]] Upgrade Synthesis Materials |
|||
*{{tooltip|text='''[[Sif's Lock]]'''|tooltip=[[File:Sif's Lock description.png]]}} |
|||
| style="border-right: 1px solid #ffffff;"| |
|||
| style="border-right: 1px solid #ffffff; vertical-align: top; padding-top: 20px;" | |
|||
*:;[[Denouements]] |
|||
*{{tooltip|text='''[[Denouements]]'''|tooltip=[[File:Denouements description.png]]}} |
|||
*{{tooltip|text='''[[Culminus]]'''|tooltip=[[File:Culminus description.png]]}} |
|||
*:;[[Culminus]] |
|||
| style="vertical-align: top; padding-top: 20px;" | |
|||
*{{tooltip|text='''[[Terminal Helm]]'''|tooltip=[[File:Terminal Helm description.png]]}} |
|||
*{{tooltip|text='''[[Terminal Plate]]'''|tooltip=[[File:Terminal Plate description.png]]}} |
|||
*{{tooltip|text='''[[Cessance Earring]]'''|tooltip=[[File:Cessance Earring description.png]]}} |
|||
*{{tooltip|text='''[[Consummation Torque]]'''|tooltip=[[File:Consumm. Torque description.png]]}} |
|||
|- style="border-bottom: 1px solid #ffffff;" |
|||
| style="text-align: center;" | <span id=WarriorPath>'''★The Warrior's Path'''</span> |
|||
<div style="margin: auto; max-width: 400px;" class="img-scaler">[[File:tenzenb.jpg|link=Tenzen]]</div> |
|||
<small>'''Opponent Details''':</small> [[Tenzen]] |
|||
| |
| |
||
{| class="htmb-details" style="border: 1px solid #AAAAAA; width: 100%; max-width: 1600px; " |
|||
*:;[[Terminal Helm]] |
|||
| |
|||
:'''Direct Drop''': [[Rem's Tale Ch.9]] |
|||
*:;[[Terminal Plate]] |
|||
:'''Entry KI''': [[Warrior's Path phantom gem]] |
|||
::<small>'''Merit Cost''': 10</small> |
|||
*:;[[Cessance Earring]] |
|||
::<small>'''Limit''': 6 Players, 30 Min</small> |
|||
::<small>'''Title''': ''Unwavering Blaze''</small> |
|||
*:;[[Consummation Torque]] |
|||
:'''[[Home Point]]:''' [[Tavnazia]] > [[Tavnazian Safehold]] (#2) |
|||
<hr> |
|||
:'''[[:Category:High-Tier_Mission_Battlefields/WarriorPath|Testimonials]]''' |
|||
|} |
|||
| style="border-right: 1px solid #ffffff; vertical-align: top; padding-top: 20px;" | |
|||
*{{tooltip|text='''[[Hepatizon Ore]]'''|tooltip=[[File:Hepatizon Ore description.png]]}} |
|||
*{{tooltip|text='''[[Beryllium Ore]]'''|tooltip=[[File:Beryllium Ore description.png]]}} |
|||
*{{tooltip|text='''[[Sif's Lock]]'''|tooltip=[[File:Sif's Lock description.png]]}} |
|||
*{{tooltip|text='''[[Scarletite Ingot]]'''|tooltip=[[File:Scarletite Ingot description.png]]}} |
|||
| style="border-right: 1px solid #ffffff; vertical-align: top; padding-top: 20px;" | |
|||
*{{tooltip|text='''[[Ginsen]]'''|tooltip=[[File:Ginsen description.png]]}} |
|||
*{{tooltip|text='''[[Hangaku-no-Yumi]]'''|tooltip=[[File:Hangaku-no-Yumi description.png]]}} |
|||
*{{tooltip|text='''[[Seraphicaller]]'''|tooltip=[[File:Seraphicaller description.png]]}} |
|||
*{{tooltip|text='''[[Divinator]]'''|tooltip=[[File:Divinator description.png]]}} |
|||
*{{tooltip|text='''[[Divinator II]]'''|tooltip=[[File:Divinator II description.png]]}} |
|||
| style="vertical-align: top; padding-top: 20px;" | |
|||
*{{tooltip|text='''[[Sukeroku Hachimaki]]'''|tooltip=[[File:Sukeroku Hachi. description.png]]}} |
|||
*{{tooltip|text='''[[Battlecast Gaiters]]'''|tooltip=[[File:Battlecast Gaiters description.png]]}} |
|||
*{{tooltip|text='''[[Mizukage-no-Kubikazari]]'''|tooltip=[[File:Mizu. Kubikazari description.png]]}} |
|||
|- style="border-bottom: 1px solid #ffffff;" |
|- style="border-bottom: 1px solid #ffffff;" |
||
| |
| style="text-align: center;" | <span id=Dawn>'''★Dawn'''</span> |
||
[[File:dawnb.jpg |
<div style="margin: auto; max-width: 400px;" class="img-scaler">[[File:dawnb.jpg|link=Promathia]]</div> |
||
<small>'''Opponent Details''':</small> [[Promathia]] |
|||
| |
| |
||
{| |
{| class="htmb-details" style="border: 1px solid #AAAAAA; width: 100%; max-width: 1600px; " |
||
| |
| |
||
:'''Direct Drop''': [[Rem's Tale Ch.9]] |
|||
:'''Entry KI''': [[Dawn phantom gem]] |
:'''Entry KI''': [[Dawn phantom gem]] |
||
:'''Merit Cost''': 10 |
::<small>'''Merit Cost''': 10</small> |
||
::<small>'''Limit''': 6 Players, 30 Min</small> |
|||
::Level Cap: Uncapped |
|||
::<small>'''Title''': ''Dawn's Delight''</small> |
|||
::Time Limit: 30 Min |
|||
:'''[[Home Point]]:''' [[Lumoria]] > [[The Garden of Ru'Hmet]] (#1) (Take the elevator down.) |
|||
::Max People: 6 |
|||
:'''[[Home Point]]:''' [[Lumoria]] > [[The Garden of Ru'Hmet]] (#1) |
|||
<hr> |
<hr> |
||
:'''[[:Category:High-Tier_Mission_Battlefields/Dawn|Testimonials]]''' |
:'''[[:Category:High-Tier_Mission_Battlefields/Dawn|Testimonials]]''' |
||
|} |
|} |
||
| style="border-right: 1px solid #ffffff;"| |
| style="border-right: 1px solid #ffffff; vertical-align: top; padding-top: 20px;" | |
||
*{{tooltip|text='''[[Maliyakaleya Coral]]'''|tooltip=[[File:Maliyakaleya Coral description.png]]}} |
|||
*:;[[Rem's Tale Ch.9]] |
|||
*{{tooltip|text='''[[Hepatizon Ore]]'''|tooltip=[[File:Hepatizon Ore description.png]]}} |
|||
:::[[Reforged Armor|RF]] [[:Category:Legs|Legs]] Slot Upgrade Material |
|||
*{{tooltip|text='''[[Beryllium Ore]]'''|tooltip=[[File:Beryllium Ore description.png]]}} |
|||
*{{tooltip|text='''[[Exalted Log]]'''|tooltip=[[File:Exalted Log description.png]]}} |
|||
*:;All [[:Category:Reforged_Artifact_Armor_+1|AF1 IL 119]] Upgrade Synthesis Materials |
|||
*{{tooltip|text='''[[Sif's Lock]]'''|tooltip=[[File:Sif's Lock description.png]]}} |
|||
| style="border-right: 1px solid #ffffff;"| |
|||
| style="border-right: 1px solid #ffffff; vertical-align: top; padding-top: 20px;" | |
|||
*:;[[Fettering Blade]] |
|||
*{{tooltip|text='''[[Fettering Blade]]'''|tooltip=[[File:Fettering Blade description.png]]}} |
|||
*{{tooltip|text='''[[Venery Bow]]'''|tooltip=[[File:Venery Bow description.png]]}} |
|||
*:;[[Venery Bow]] |
|||
| style="vertical-align: top; padding-top: 20px;" | |
|||
| |
|||
*{{tooltip|text='''[[Gyve Doublet]]'''|tooltip=[[File:Gyve Doublet description.png]]}} |
|||
*:;[[Gyve Doublet]] |
|||
*{{tooltip|text='''[[Gyve Trousers]]'''|tooltip=[[File:Gyve Trousers description.png]]}} |
|||
*{{tooltip|text='''[[Laic Mantle]]'''|tooltip=[[File:Laic Mantle description.png]]}} |
|||
*:;[[Gyve Trousers]] |
|||
*{{tooltip|text='''[[Latria Sash]]'''|tooltip=[[File:Latria Sash description.png]]}} |
|||
*:;[[Laic Mantle]] |
|||
*:;[[Latria Belt]] |
|||
|} |
|} |
||
===Treasures of Aht Urghan=== |
===Treasures of Aht Urghan=== |
||
{| class="Standardwide R1-White overflow-visible htmb" style="width: 100%; max-width: 1600px;" BGCOLOR="#efeeee" cellpadding="1" |
|||
{| class="Standardwide R1-White" text-align: center;" BGCOLOR="#efeeee" width="90%" cellpadding="1" |
|||
|- BGCOLOR="#4b4d4f" |
|- BGCOLOR="#4b4d4f" |
||
! width=20% | Name |
! width=20% | Name |
||
! width=30% | Battlefield |
! width=30% | Battlefield Details |
||
! width=20% nowrap | |
! width=20% nowrap | Unique Materials |
||
! width=15% | Weapons |
! width=15% | Weapons |
||
! width=15% nowrap | Armor |
! width=15% nowrap | Armor |
||
|- style="border-top: 1px solid #efeeee;" |
|- style="border-top: 1px solid #efeeee;" |
||
! colspan=" |
! colspan="5" BGCOLOR="#E5C87E" cellpadding="0" height=2px| |
||
|- style="border-bottom: 1px solid #ffffff;" |
|- style="border-bottom: 1px solid #ffffff;" |
||
| |
| style="text-align: center;" | <span id=PuppetInPeril>'''★Puppet in Peril'''</span> |
||
[[File:puppetperil.jpg |
[[File:puppetperil.jpg|center|link=Lancelord Gaheel Ja]] |
||
<small>'''Opponent Details''':</small> [[Lancelord Gaheel Ja]] |
|||
| |
| |
||
{| |
{| class="htmb-details" style="border: 1px solid #AAAAAA; width: 100%; max-width: 1600px; " |
||
| |
| |
||
:'''Direct Drop''': [[Rem's Tale Ch.10]] |
|||
:'''Entry KI''': [[Puppet in Peril phantom gem]] |
:'''Entry KI''': [[Puppet in Peril phantom gem]] |
||
:'''Merit Cost''': 10 |
::<small>'''Merit Cost''': 10</small> |
||
::<small>'''Limit''': 6 Players, 30 Min</small> |
|||
::Level Cap: Uncapped |
|||
::<small>'''Title''': ''Lancelord Divester''</small> |
|||
::Time Limit: 30 Min |
|||
::Max People: 6 |
|||
:'''[[Home Point]]:''' [[West Aht Urhgan|W. Aht Urhgan]] > [[Bhaflau Thickets]] (#1) |
:'''[[Home Point]]:''' [[West Aht Urhgan|W. Aht Urhgan]] > [[Bhaflau Thickets]] (#1) |
||
<hr> |
<hr> |
||
:'''[[:Category:High-Tier_Mission_Battlefields/PuppetInPeril|Testimonials]]''' |
:'''[[:Category:High-Tier_Mission_Battlefields/PuppetInPeril|Testimonials]]''' |
||
|} |
|} |
||
| style="border-right: 1px solid #ffffff;"| |
| style="border-right: 1px solid #ffffff; vertical-align: top; padding-top: 20px;" | |
||
*{{tooltip|text='''[[Maliyakaleya Coral]]'''|tooltip=[[File:Maliyakaleya Coral description.png]]}} |
|||
*:;[[Rem's Tale Ch.10]] |
|||
*{{tooltip|text='''[[Exalted Log]]'''|tooltip=[[File:Exalted Log description.png]]}} |
|||
:::[[Reforged Armor|RF]] [[:Category:Feet|Feet]] Slot Upgrade Material |
|||
*{{tooltip|text='''[[Sif's Lock]]'''|tooltip=[[File:Sif's Lock description.png]]}} |
|||
| style="border-right: 1px solid #ffffff; vertical-align: top; padding-top: 20px;" | |
|||
*:;All [[:Category:Reforged_Artifact_Armor_+1|AF1 IL 119]] Upgrade Synthesis Materials |
|||
*{{tooltip|text='''[[Bestas Bane]]'''|tooltip=[[File:Bestas Bane description.png]]}} |
|||
| style="border-right: 1px solid #ffffff;"| |
|||
*{{tooltip|text='''[[Seraphicaller]]'''|tooltip=[[File:Seraphicaller description.png]]}} |
|||
*:;[[Bestas Bane]] |
|||
*{{tooltip|text='''[[Divinator]]'''|tooltip=[[File:Divinator description.png]]}} |
|||
*{{tooltip|text='''[[Divinator II]]'''|tooltip=[[File:Divinator II description.png]]}} |
|||
*:;[[Seraphicaller]] |
|||
| style="vertical-align: top; padding-top: 20px;" | |
|||
*{{tooltip|text='''[[Savas Jawshan]]'''|tooltip=[[File:Savas Jawshan description.png]]}} |
|||
*:;[[Divinator]] |
|||
*{{tooltip|text='''[[Sifahir Slacks]]'''|tooltip=[[File:Sifahir Slacks description.png]]}} |
|||
| |
|||
*{{tooltip|text='''[[Sahip Helm]]'''|tooltip=[[File:Sahip Helm description.png]]}} |
|||
*:;[[Savas Jawshan]] |
|||
*{{tooltip|text='''[[Pratik Earring]]'''|tooltip=[[File:Pratik Earring description.png]]}} |
|||
*:;[[Sifahir Slacks]] |
|||
*:;[[Sahip Helm]] |
|||
*:;[[Pratik Earring]] |
|||
|- style="border-bottom: 1px solid #ffffff;" |
|- style="border-bottom: 1px solid #ffffff;" |
||
| |
| style="text-align: center;" | <span id=LegacyOfTheLost>'''★Legacy of the Lost'''</span> |
||
[[File:legacylost.jpg |
[[File:legacylost.jpg|center|link=Gessho (monster)]] |
||
<small>'''Opponent Details''':</small> [[Gessho (monster)|Gessho]] |
|||
| |
| |
||
{| |
{| class="htmb-details" style="border: 1px solid #AAAAAA; width: 100%; max-width: 1600px; " |
||
| |
| |
||
:'''Direct Drop''': [[Rem's Tale Ch.6]] |
|||
:'''Entry KI''': [[Legacy phantom gem]] |
:'''Entry KI''': [[Legacy phantom gem]] |
||
:'''Merit Cost''': 10 |
::<small>'''Merit Cost''': 10</small> |
||
::<small>'''Limit''': 6 Players, 30 Min</small> |
|||
::Level Cap: Uncapped |
|||
::<small>'''Title''': ''Gessho Pinioner''</small> |
|||
::Time Limit: 30 Min |
|||
::Max People: 6 |
|||
:'''[[Home Point]]:''' [[Arrapago Islands|Arrapago Is.]] > [[Caedarva Mire]] (#1) |
:'''[[Home Point]]:''' [[Arrapago Islands|Arrapago Is.]] > [[Caedarva Mire]] (#1) |
||
::Enter at '''Rock Slab''' in [[Talacca Cove]], (F-6) |
|||
<hr> |
<hr> |
||
:'''[[:Category:High-Tier_Mission_Battlefields/LegacyOfTheLost|Testimonials]]''' |
:'''[[:Category:High-Tier_Mission_Battlefields/LegacyOfTheLost|Testimonials]]''' |
||
|} |
|} |
||
| style="border-right: 1px solid #ffffff;"| |
| style="border-right: 1px solid #ffffff; vertical-align: top; padding-top: 20px;" | |
||
*{{tooltip|text='''[[Hepatizon Ore]]'''|tooltip=[[File:Hepatizon Ore description.png]]}} |
|||
*:;[[Rem's Tale Ch.6]] |
|||
*{{tooltip|text='''[[Beryllium Ore]]'''|tooltip=[[File:Beryllium Ore description.png]]}} |
|||
:::[[Reforged Armor|RF]] [[:Category:Head|Head]] Slot Upgrade Material |
|||
*{{tooltip|text='''[[Scarletite Ingot]]'''|tooltip=[[File:Scarletite Ingot description.png]]}} |
|||
| style="border-right: 1px solid #ffffff; vertical-align: top; padding-top: 20px;" | |
|||
*:;All [[:Category:Reforged_Artifact_Armor_+1|AF1 IL 119]] Upgrade Synthesis Materials |
|||
*{{tooltip|text='''[[Seraphicaller]]'''|tooltip=[[File:Seraphicaller description.png]]}} |
|||
*{{tooltip|text='''[[Divinator]]'''|tooltip=[[File:Divinator description.png]]}} |
|||
*:;[[Scarletite Ingot]] |
|||
*{{tooltip|text='''[[Divinator II]]'''|tooltip=[[File:Divinator II description.png]]}} |
|||
| style="border-right: 1px solid #ffffff;"| |
|||
| style="vertical-align: top; padding-top: 20px;" | |
|||
*:;[[Seraphicaller]] |
|||
*{{tooltip|text='''[[Ptica Headgear]]'''|tooltip=[[File:Ptica Headgear description.png]]}} |
|||
*{{tooltip|text='''[[Karmesin Vest]]'''|tooltip=[[File:Karmesin Vest description.png]]}} |
|||
*{{tooltip|text='''[[Kandza Crackows]]'''|tooltip=[[File:Kandza Crackows description.png]]}} |
|||
*{{tooltip|text='''[[Tengu-no-Hane]]'''|tooltip=[[File:Tengu-no-Hane description.png]]}} |
|||
*{{tooltip|text='''[[Tengu-no-Obi]]'''|tooltip=[[File:Tengu-no-Obi description.png]]}} |
|||
|} |
|||
===Wings of the Goddess=== |
|||
*:;[[Divinator]] |
|||
{| class="Standardwide R1-White overflow-visible htmb" style="width: 100%; max-width: 1600px;" BGCOLOR="#efeeee" cellpadding="1" |
|||
|- BGCOLOR="#4b4d4f" |
|||
! width=20% | Name |
|||
! width=30% | Battlefield Details |
|||
! width=20% nowrap | Unique Materials |
|||
! width=15% | Weapons |
|||
! width=15% nowrap | Armor |
|||
|- style="border-top: 1px solid #efeeee;" |
|||
! colspan="5" BGCOLOR="#E3F9FF" cellpadding="0" height=2px| |
|||
|- style="border-bottom: 1px solid #ffffff;" |
|||
| style="text-align: center;" | <span id=LadyLilith>'''★Maiden of the Dusk'''</span> |
|||
[[File:LadyLilithHTMB.jpg|center|link=Lilith]] |
|||
<small>'''Opponent Details''':</small> [[Lilith]] |
|||
| |
| |
||
{| class="htmb-details" style="border: 1px solid #AAAAAA; width: 100%; max-width: 1600px; " |
|||
*:;[[Ptica Headgear]] |
|||
| |
|||
:'''Direct Drop''': [[Rem's Tale Ch.6]],[[Rem's Tale Ch.7|Ch.7]],[[Rem's Tale Ch.8|Ch.8]],[[Rem's Tale Ch.9|Ch.9]],[[Rem's Tale Ch.10|Ch.10]] |
|||
*:;[[Karmesin Vest]] |
|||
:'''Entry KI''': [[Maiden phantom gem]] |
|||
::<small>'''Merit Cost''': 10</small> |
|||
::<small>'''Limit''': 6 Players, 30 Min</small> |
|||
::<small>'''Title''': ''Lilith Liquidator''</small> |
|||
:'''[[Home Point]]:''' [[Zulkheim]] > [[Selbina]] (#1) |
|||
::Enter at '''Veridical Conflux''', (H-7) |
|||
<hr> |
|||
:'''[[:Category:High-Tier_Mission_Battlefields/MaidenOfTheDusk|Testimonials]]''' |
|||
|} |
|||
| style="border-right: 1px solid #ffffff; vertical-align: top; padding-top: 20px;" | |
|||
*None |
|||
| style="border-right: 1px solid #ffffff; vertical-align: top; padding-top: 20px;" | |
|||
*{{tooltip|text='''[[Daybreak]]'''|tooltip=[[File:Daybreak description.png]]}} |
|||
*{{tooltip|text='''[[Malignance Pole]]'''|tooltip=[[File:Malignance Pole description.png]]}} |
|||
*{{tooltip|text='''[[Malignance Sword]]'''|tooltip=[[File:Malignance Sword description.png]]}} |
|||
| style="vertical-align: top; padding-top: 20px;" | |
|||
*{{tooltip|text='''[[Malignance Chapeau]]'''|tooltip=[[File:Malignance Chapeau description.png]]}} |
|||
*{{tooltip|text='''[[Malignance Tabard]]'''|tooltip=[[File:Malignance Tabard description.png]]}} |
|||
*{{tooltip|text='''[[Malignance Gloves]]'''|tooltip=[[File:Malignance Gloves description.png]]}} |
|||
*{{tooltip|text='''[[Malignance Tights]]'''|tooltip=[[File:Malignance Tights description.png]]}} |
|||
*{{tooltip|text='''[[Malignance Boots]]'''|tooltip=[[File:Malignance Boots description.png]]}} |
|||
*{{tooltip|text='''[[Malignance Earring]]'''|tooltip=[[File:Malignance Earring description.png]]}} |
|||
|- |
|||
| colspan=5 align=center | '''A note on drops''' |
|||
An added gimmick was implemented in this battlefield compared to the other new battlefields, such as [[Champion of the Dawn II]], because of the higher amount of gear that is obtainable from this BCNM.<br /> |
|||
For Normal, Difficult and Very Difficult, another equipment drop slot opens in the treasure pool for every one of the spitewardens that are killed during the battle.<br /> |
|||
Opening armor slots in the treasure pool '''does not''' guarantee a piece of armor will drop, but the overall chance of a drops increases. See the [https://forum.square-enix.com/ffxi/threads/55939-Maiden-of-the-Dusk-High-Tier-Battlefield?p=619901#post619901 official forum post] for further details. |
|||
|} |
|||
===Abyssea=== |
|||
*:;[[Kandza Crackows]] |
|||
{| class="Standardwide R1-White overflow-visible htmb" style="width: 100%; max-width: 1600px;" BGCOLOR="#efeeee" cellpadding="1" |
|||
|- BGCOLOR="#4b4d4f" |
|||
*:;[[Tengu-no-Hane]] |
|||
! width=20% | Name |
|||
! width=30% | Battlefield Details |
|||
*:;[[Tengu-no-Obi]] |
|||
! width=20% nowrap | Unique Materials |
|||
! width=15% | Weapons |
|||
! width=15% nowrap | Armor |
|||
|- style="border-top: 1px solid #efeeee;" |
|||
! colspan="5" BGCOLOR="#ffdddd " cellpadding="0" height=2px| |
|||
|- style="border-bottom: 1px solid #ffffff;" |
|||
| style="text-align: center;" | <span id=WyrmGod>'''★The Wyrm God'''</span> |
|||
[[File:The Wyrm God HTMB.jpg|center|link=Shinryu]] |
|||
<small>'''Opponent Details''':</small> [[Shinryu]] |
|||
| |
|||
{| class="htmb-details" style="border: 1px solid #AAAAAA; width: 100%; max-width: 1600px; " |
|||
| |
|||
:'''Direct Drop''': [[Rem's Tale Ch.6]],[[Rem's Tale Ch.7|Ch.7]],[[Rem's Tale Ch.8|Ch.8]],[[Rem's Tale Ch.9|Ch.9]],[[Rem's Tale Ch.10|Ch.10]] |
|||
:'''Entry KI''': [[Wyrm God phantom gem]] |
|||
::<small>'''Merit Cost''': 30</small> |
|||
::<small>'''Limit''': 6 Players, 30 Min</small> |
|||
::<small>'''Title''': ''Draconic Interloper''</small> |
|||
:'''[[Home Point]]:''' [[Qufim Island]] > [[Qufim Island]] (#1) |
|||
::Enter at '''Transcendental Radiance''', (F-7) |
|||
<hr> |
|||
:'''[[:Category:High-Tier_Mission_Battlefields/TheWyrmGod|Testimonials]]''' |
|||
|} |
|||
| style="border-right: 1px solid #ffffff; vertical-align: top; padding-top: 20px;" | |
|||
*None |
|||
| style="border-right: 1px solid #ffffff; vertical-align: top; padding-top: 20px;" | |
|||
*{{tooltip|text='''[[Crepuscular Knife]]'''|tooltip=[[File:Crepuscular Knife description.png]]}} |
|||
*{{tooltip|text='''[[Crepuscular Pebble]]'''|tooltip=[[File:Crepuscular Pebble description.png]]}} |
|||
*{{tooltip|text='''[[Crepuscular Scythe]]'''|tooltip=[[File:Crepuscular Scythe description.png]]}} |
|||
| style="vertical-align: top; padding-top: 20px;" | |
|||
*{{tooltip|text='''[[Crepuscular Helm]]'''|tooltip=[[File:Crepuscular Helm description.png]]}} |
|||
*{{tooltip|text='''[[Crepuscular Cloak]]'''|tooltip=[[File:Crepuscular Cloak description.png]]}} |
|||
*{{tooltip|text='''[[Crepuscular Mail]]'''|tooltip=[[File:Crepuscular Mail description.png]]}} |
|||
*{{tooltip|text='''[[Crepuscular Ring]]'''|tooltip=[[File:Crepuscular Ring description.png]]}} |
|||
*{{tooltip|text='''[[Crepuscular Earring]]'''|tooltip=[[File:Crep. Earring description.png]]}} |
|||
|} |
|} |
||
===Avatar Prime Fights=== |
===Avatar Prime Fights=== |
||
{| class="Standardwide R1-White overflow-visible htmb" style="width: 100%; max-width: 1600px;" BGCOLOR="#efeeee" cellpadding="1" |
|||
{| class="Standardwide R1-White" text-align: center;" BGCOLOR="#efeeee" width="90%" cellpadding="1" |
|||
|- BGCOLOR="#4b4d4f" |
|- BGCOLOR="#4b4d4f" |
||
! width=20% | Name |
! width=20% | Name |
||
! width=30% | Battlefield |
! width=30% | Battlefield Details |
||
! width=20% nowrap | |
! width=20% nowrap | Unique Materials |
||
! width=15% | Weapons |
! width=15% | Weapons |
||
! width=15% nowrap | Armor |
! width=15% nowrap | Armor |
||
|- style="border-top: 1px solid #efeeee;" |
|- style="border-top: 1px solid #efeeee;" |
||
! colspan=" |
! colspan="5" cellpadding="0" height=2px | <div style="{{linear-gradient|left|#000, #ffdddd 15%, #ddffdd 50%, #ddddff 85%, #fff}}"> </div> |
||
|- style="border-bottom: 1px solid #ffffff;" |
|- style="border-bottom: 1px solid #ffffff;" |
||
| |
| style="text-align: center;" | <span id=TrialByFire>'''★Trial by Fire'''</span> |
||
[[File: |
[[File:Ifrit Prime.jpg|center|link=Ifrit Prime]] |
||
<small>'''Opponent Details''':</small> [[Ifrit Prime]] |
|||
| |
| |
||
{| |
{| class="htmb-details" style="border: 1px solid #AAAAAA; width: 100%; max-width: 1600px; " |
||
| |
| |
||
:'''Direct Drop''': [[Rem's Tale Ch.9]] |
|||
:'''Entry KI''': [[Avatar phantom gem]] |
:'''Entry KI''': [[Avatar phantom gem]] |
||
:'''Merit Cost''': 10 |
::<small>'''Merit Cost''': 10</small> |
||
::<small>'''Limit''': 6 Players, 30 Min</small> |
|||
::Level Cap: Uncapped |
|||
::<small>'''Title''': ''Blaze Marshaller''</small> |
|||
::Time Limit: 30 Min |
|||
:'''[[Home Point]]:''' [[Elshimo Uplands|Elshimo Up.]] > [[Ifrit's Cauldron]] (#1) |
|||
::Max People: 6 |
|||
:'''[[Home Point]]:''' [[Vollbow]] > [[Cape Teriggan]] (#1) |
|||
<hr> |
<hr> |
||
:'''[[:Category:High-Tier_Mission_Battlefields/ |
:'''[[:Category:High-Tier_Mission_Battlefields/TrialByFire|Testimonials]]''' |
||
|} |
|} |
||
| style="border-right: 1px solid #ffffff;"| |
| style="border-right: 1px solid #ffffff; vertical-align: top; padding-top: 20px;" | |
||
*{{tooltip|text='''[[Maliyakaleya Coral]]'''|tooltip=[[File:Maliyakaleya Coral description.png]]}} |
|||
*:;[[Rem's Tale Ch.6]] |
|||
*{{tooltip|text='''[[Hepatizon Ore]]'''|tooltip=[[File:Hepatizon Ore description.png]]}} |
|||
:::[[Reforged Armor|RF]] [[:Category:Head|Head]] Slot Upgrade Material |
|||
*{{tooltip|text='''[[Beryllium Ore]]'''|tooltip=[[File:Beryllium Ore description.png]]}} |
|||
*{{tooltip|text='''[[Exalted Log]]'''|tooltip=[[File:Exalted Log description.png]]}} |
|||
*:;All [[:Category:Reforged_Artifact_Armor_+1|AF1 IL 119]] Upgrade Synthesis Materials |
|||
*{{tooltip|text='''[[Sif's Lock]]'''|tooltip=[[File:Sif's Lock description.png]]}} |
|||
| style="border-right: 1px solid #ffffff;"| |
|||
| style="border-right: 1px solid #ffffff; vertical-align: top; padding-top: 20px;" | |
|||
*:;[[Levante Dagger]] |
|||
*{{tooltip|text='''[[Perfervid Sword]]'''|tooltip=[[File:Perfervid Sword description.png]]}} |
|||
*{{tooltip|text='''[[Atakigiri]]'''|tooltip=[[File:Atakigiri description.png]]}} |
|||
*:;[[Tramontane Axe]] |
|||
| style="vertical-align: top; padding-top: 20px;" | |
|||
| |
|||
*{{tooltip|text='''[[Coalrake Sabots]]'''|tooltip=[[File:Coalrake Sabots description.png]]}} |
|||
*:;[[Lebeche Ring]] |
|||
*{{tooltip|text='''[[Annealed Mantle]]'''|tooltip=[[File:Annealed Mantle description.png]]}} |
|||
*{{tooltip|text='''[[Immolation Grip]]'''|tooltip=[[File:Immolation Grip description.png]]}} |
|||
*:;[[Ponente Sash]] |
|||
*:;[[Ostro Greaves]] |
|||
|- style="border-bottom: 1px solid #ffffff;" |
|- style="border-bottom: 1px solid #ffffff;" |
||
| |
| style="text-align: center;" | <span id=TrialByIce>'''★Trial by Ice'''</span> |
||
[[File: |
[[File:Shiva Prime.jpg|center|link=Shiva Prime]] |
||
<small>'''Opponent Details''':</small> [[Shiva Prime]] |
|||
| |
| |
||
{| |
{| class="htmb-details" style="border: 1px solid #AAAAAA; width: 100%; max-width: 1600px; " |
||
| |
| |
||
:'''Direct Drop''': [[Rem's Tale Ch.10]] |
|||
:'''Entry KI''': [[Avatar phantom gem]] |
:'''Entry KI''': [[Avatar phantom gem]] |
||
:'''Merit Cost''': 10 |
::<small>'''Merit Cost''': 10</small> |
||
::<small>'''Limit''': 6 Players, 30 Min</small> |
|||
::Level Cap: Uncapped |
|||
::<small>'''Title''': ''Penitentes Blaster''</small> |
|||
::Time Limit: 30 Min |
|||
:'''[[Home Point]]:''' [[Fauregandi]] > [[Fei'Yin]] (#2) |
|||
::Max People: 6 |
|||
:'''[[Home Point]]:''' [[Li'Telor]] > [[The Boyahda Tree]] (#1) |
|||
<hr> |
<hr> |
||
:'''[[:Category:High-Tier_Mission_Battlefields/ |
:'''[[:Category:High-Tier_Mission_Battlefields/TrialByIce|Testimonials]]''' |
||
|} |
|} |
||
| style="border-right: 1px solid #ffffff;"| |
| style="border-right: 1px solid #ffffff; vertical-align: top; padding-top: 20px;" | |
||
*{{tooltip|text='''[[Maliyakaleya Coral]]'''|tooltip=[[File:Maliyakaleya Coral description.png]]}} |
|||
*:;[[Rem's Tale Ch.7]] |
|||
*{{tooltip|text='''[[Hepatizon Ore]]'''|tooltip=[[File:Hepatizon Ore description.png]]}} |
|||
:::[[Reforged Armor|RF]] [[:Category:Body|Body]] Slot Upgrade Material |
|||
*{{tooltip|text='''[[Beryllium Ore]]'''|tooltip=[[File:Beryllium Ore description.png]]}} |
|||
*{{tooltip|text='''[[Exalted Log]]'''|tooltip=[[File:Exalted Log description.png]]}} |
|||
*:;All [[:Category:Reforged_Artifact_Armor_+1|AF1 IL 119]] Upgrade Synthesis Materials |
|||
*{{tooltip|text='''[[Sif's Lock]]'''|tooltip=[[File:Sif's Lock description.png]]}} |
|||
| style="border-right: 1px solid #ffffff;"| |
|||
| style="border-right: 1px solid #ffffff; vertical-align: top; padding-top: 20px;" | |
|||
*:;[[Staccato Staff]] |
|||
*{{tooltip|text='''[[Calved Claws]]'''|tooltip=[[File:Calved Claws description.png]]}} |
|||
*{{tooltip|text='''[[Frazil Staff]]'''|tooltip=[[File:Frazil Staff description.png]]}} |
|||
*:;[[Donar Gun]] |
|||
| style="vertical-align: top; padding-top: 20px;" | |
|||
| |
|||
*{{tooltip|text='''[[Rimeice Earring]]'''|tooltip=[[File:Rimeice Earring description.png]]}} |
|||
*:;[[Voltsurge Torque]] |
|||
*{{tooltip|text='''[[Nilas Gloves]]'''|tooltip=[[File:Nilas Gloves description.png]]}} |
|||
*{{tooltip|text='''[[Floestone]]'''|tooltip=[[File:Floestone description.png]]}} |
|||
*:;[[Ukko Sash]] |
|||
*:;[[Brontes Cuisses]] |
|||
|- style="border-bottom: 1px solid #ffffff;" |
|- style="border-bottom: 1px solid #ffffff;" |
||
| |
| style="text-align: center;" | <span id=TrialByWind>'''★Trial by Wind'''</span> |
||
[[File: |
[[File:Garuda Prime.jpg|center|link=Garuda Prime]] |
||
<small>'''Opponent Details''':</small> [[Garuda Prime]] |
|||
| |
| |
||
{| |
{| class="htmb-details" style="border: 1px solid #AAAAAA; width: 100%; max-width: 1600px; " |
||
| |
| |
||
:'''Direct Drop''': [[Rem's Tale Ch.6]] |
|||
:'''Entry KI''': [[Avatar phantom gem]] |
:'''Entry KI''': [[Avatar phantom gem]] |
||
:'''Merit Cost''': 10 |
::<small>'''Merit Cost''': 10</small> |
||
::<small>'''Limit''': 6 Players, 30 Min</small> |
|||
::Level Cap: Uncapped |
|||
::<small>'''Title''': ''Sirocco Tamer''</small> |
|||
::Time Limit: 30 Min |
|||
:'''[[Home Point]]:''' [[Vollbow]] > [[Cape Teriggan]] (#1) |
|||
::Max People: 6 |
|||
:'''[[Home Point]]:''' [[Kuzotz]] > [[Quicksand Caves]] (#2) |
|||
<hr> |
<hr> |
||
:'''[[:Category:High-Tier_Mission_Battlefields/ |
:'''[[:Category:High-Tier_Mission_Battlefields/TrialByWind|Testimonials]]''' |
||
|} |
|} |
||
| style="border-right: 1px solid #ffffff;"| |
| style="border-right: 1px solid #ffffff; vertical-align: top; padding-top: 20px;" | |
||
*{{tooltip|text='''[[Maliyakaleya Coral]]'''|tooltip=[[File:Maliyakaleya Coral description.png]]}} |
|||
*:;[[Rem's Tale Ch.8]] |
|||
*{{tooltip|text='''[[Hepatizon Ore]]'''|tooltip=[[File:Hepatizon Ore description.png]]}} |
|||
:::[[Reforged Armor|RF]] [[:Category:Hands|Hands]] Slot Upgrade Material |
|||
*{{tooltip|text='''[[Beryllium Ore]]'''|tooltip=[[File:Beryllium Ore description.png]]}} |
|||
*{{tooltip|text='''[[Exalted Log]]'''|tooltip=[[File:Exalted Log description.png]]}} |
|||
*:;All [[:Category:Reforged_Artifact_Armor_+1|AF1 IL 119]] Upgrade Synthesis Materials |
|||
*{{tooltip|text='''[[Sif's Lock]]'''|tooltip=[[File:Sif's Lock description.png]]}} |
|||
| style="border-right: 1px solid #ffffff;"| |
|||
| style="border-right: 1px solid #ffffff; vertical-align: top; padding-top: 20px;" | |
|||
*:;[[Mafic Cudgel]] |
|||
*{{tooltip|text='''[[Levante Dagger]]'''|tooltip=[[File:Levante Dagger description.png]]}} |
|||
*{{tooltip|text='''[[Tramontane Axe]]'''|tooltip=[[File:Tramontane Axe description.png]]}} |
|||
*:;[[Foreshock Sword]] |
|||
| style="vertical-align: top; padding-top: 20px;" | |
|||
*{{tooltip|text='''[[Lebeche Ring]]'''|tooltip=[[File:Lebeche Ring description.png]]}} |
|||
*:;[[Togakushi Shuriken]] |
|||
*{{tooltip|text='''[[Ponente Sash]]'''|tooltip=[[File:Ponente Sash description.png]]}} |
|||
| |
|||
*{{tooltip|text='''[[Ostro Greaves]]'''|tooltip=[[File:Ostro Greaves description.png]]}} |
|||
*:;[[Supershear Ring]] |
|||
*:;[[Plumose Sachet]] |
|||
|- style="border-bottom: 1px solid #ffffff;" |
|- style="border-bottom: 1px solid #ffffff;" |
||
| |
| style="text-align: center;" | <span id=TrialByEarth>'''★Trial by Earth'''</span> |
||
[[File: |
[[File:Titan Prime.jpg|center|link=Titan Prime]] |
||
<small>'''Opponent Details''':</small> [[Titan Prime]] |
|||
| |
| |
||
{| |
{| class="htmb-details" style="border: 1px solid #AAAAAA; width: 100%; max-width: 1600px; " |
||
| |
| |
||
:'''Direct Drop''': [[Rem's Tale Ch.8]] |
|||
:'''Entry KI''': [[Avatar phantom gem]] |
:'''Entry KI''': [[Avatar phantom gem]] |
||
:'''Merit Cost''': 10 |
::<small>'''Merit Cost''': 10</small> |
||
::<small>'''Limit''': 6 Players, 30 Min</small> |
|||
::Level Cap: Uncapped |
|||
::<small>'''Title''': ''Lithosphere Annihilator''</small> |
|||
::Time Limit: 30 Min |
|||
:'''[[Home Point]]:''' [[Kuzotz]] > [[Quicksand Caves]] (#2) |
|||
::Max People: 6 |
|||
:'''[[Home Point]]:''' [[Elshimo Uplands|Elshimo Up.]] > [[Ifrit's Cauldron]] (#1) |
|||
<hr> |
<hr> |
||
:'''[[:Category:High-Tier_Mission_Battlefields/ |
:'''[[:Category:High-Tier_Mission_Battlefields/TrialByEarth|Testimonials]]''' |
||
|} |
|} |
||
| style="border-right: 1px solid #ffffff;"| |
| style="border-right: 1px solid #ffffff; vertical-align: top; padding-top: 20px;" | |
||
*{{tooltip|text='''[[Maliyakaleya Coral]]'''|tooltip=[[File:Maliyakaleya Coral description.png]]}} |
|||
*:;[[Rem's Tale Ch.9]] |
|||
*{{tooltip|text='''[[Hepatizon Ore]]'''|tooltip=[[File:Hepatizon Ore description.png]]}} |
|||
:::[[Reforged Armor|RF]] [[:Category:Legs|Legs]] Slot Upgrade Material |
|||
*{{tooltip|text='''[[Beryllium Ore]]'''|tooltip=[[File:Beryllium Ore description.png]]}} |
|||
*{{tooltip|text='''[[Exalted Log]]'''|tooltip=[[File:Exalted Log description.png]]}} |
|||
*:;All [[:Category:Reforged_Artifact_Armor_+1|AF1 IL 119]] Upgrade Synthesis Materials |
|||
*{{tooltip|text='''[[Sif's Lock]]'''|tooltip=[[File:Sif's Lock description.png]]}} |
|||
| style="border-right: 1px solid #ffffff;"| |
|||
| style="border-right: 1px solid #ffffff; vertical-align: top; padding-top: 20px;" | |
|||
*:;[[Perfervid Sword]] |
|||
*{{tooltip|text='''[[Mafic Cudgel]]'''|tooltip=[[File:Mafic Cudgel description.png]]}} |
|||
*{{tooltip|text='''[[Foreshock Sword]]'''|tooltip=[[File:Foreshock Sword description.png]]}} |
|||
*:;[[Atakigiri]] |
|||
*{{tooltip|text='''[[Togakushi Shuriken]]'''|tooltip=[[File:Togakushi Shuriken description.png]]}} |
|||
| |
|||
| style="vertical-align: top; padding-top: 20px;" | |
|||
*:;[[Coalrake Sabots]] |
|||
*{{tooltip|text='''[[Supershear Ring]]'''|tooltip=[[File:Supershear Ring description.png]]}} |
|||
*{{tooltip|text='''[[Plumose Sachet]]'''|tooltip=[[File:Plumose Sachet description.png]]}} |
|||
*:;[[Annealed Mantle]] |
|||
*:;[[Immolation Grip]] |
|||
|- style="border-bottom: 1px solid #ffffff;" |
|- style="border-bottom: 1px solid #ffffff;" |
||
| |
| style="text-align: center;" | <span id=TrialByLightning>'''★Trial by Lightning'''</span> |
||
[[File: |
[[File:Ramuh Prime.jpg|center|link=Ramuh Prime]] |
||
<small>'''Opponent Details''':</small> [[Ramuh Prime]] |
|||
| |
| |
||
{| |
{| class="htmb-details" style="border: 1px solid #AAAAAA; width: 100%; max-width: 1600px; " |
||
| |
| |
||
:'''Direct Drop''': [[Rem's Tale Ch.7]] |
|||
:'''Entry KI''': [[Avatar phantom gem]] |
:'''Entry KI''': [[Avatar phantom gem]] |
||
:'''Merit Cost''': 10 |
::<small>'''Merit Cost''': 10</small> |
||
::<small>'''Limit''': 6 Players, 30 Min</small> |
|||
::Level Cap: Uncapped |
|||
::<small>'''Title''': ''Fulmination Disruptor''</small> |
|||
::Time Limit: 30 Min |
|||
:'''[[Home Point]]:''' [[Li'Telor]] > [[The Boyahda Tree]] (#1) |
|||
::Max People: 6 |
|||
:'''[[Home Point]]:''' [[Elshimo Uplands|Elshimo Up.]] > [[Den of Rancor]] (#2) |
|||
<hr> |
<hr> |
||
:'''[[:Category:High-Tier_Mission_Battlefields/ |
:'''[[:Category:High-Tier_Mission_Battlefields/TrialByLightning|Testimonials]]''' |
||
|} |
|} |
||
| style="border-right: 1px solid #ffffff;"| |
| style="border-right: 1px solid #ffffff; vertical-align: top; padding-top: 20px;" | |
||
*{{tooltip|text='''[[Maliyakaleya Coral]]'''|tooltip=[[File:Maliyakaleya Coral description.png]]}} |
|||
*:;[[Rem's Tale Ch.9]] |
|||
*{{tooltip|text='''[[Hepatizon Ore]]'''|tooltip=[[File:Hepatizon Ore description.png]]}} |
|||
:::[[Reforged Armor|RF]] [[:Category:Legs|Legs]] Slot Upgrade Material |
|||
*{{tooltip|text='''[[Beryllium Ore]]'''|tooltip=[[File:Beryllium Ore description.png]]}} |
|||
*{{tooltip|text='''[[Exalted Log]]'''|tooltip=[[File:Exalted Log description.png]]}} |
|||
*:;All [[:Category:Reforged_Artifact_Armor_+1|AF1 IL 119]] Upgrade Synthesis Materials |
|||
*{{tooltip|text='''[[Sif's Lock]]'''|tooltip=[[File:Sif's Lock description.png]]}} |
|||
| style="border-right: 1px solid #ffffff;"| |
|||
| style="border-right: 1px solid #ffffff; vertical-align: top; padding-top: 20px;" | |
|||
*:;[[Pelagos Lance]] |
|||
*{{tooltip|text='''[[Staccato Staff]]'''|tooltip=[[File:Staccato Staff description.png]]}} |
|||
*{{tooltip|text='''[[Donar Gun]]'''|tooltip=[[File:Donar Gun description.png]]}} |
|||
*:;[[Vadose Rod]] |
|||
| style="vertical-align: top; padding-top: 20px;" | |
|||
*{{tooltip|text='''[[Voltsurge Torque]]'''|tooltip=[[File:Voltsurge Torque description.png]]}} |
|||
*:;[[Phreatic Axe]] |
|||
*{{tooltip|text='''[[Ukko Sash]]'''|tooltip=[[File:Ukko Sash description.png]]}} |
|||
| |
|||
*{{tooltip|text='''[[Brontes Cuisses]]'''|tooltip=[[File:Brontes Cuisses description.png]]}} |
|||
*:;[[Benthos Grip]] |
|||
*:;[[Neritic Earring]] |
|||
|- style="border-bottom: 1px solid #ffffff;" |
|- style="border-bottom: 1px solid #ffffff;" |
||
| |
| style="text-align: center;" | <span id=TrialByWater>'''★Trial by Water'''</span> |
||
[[File: |
[[File:Leviathan Prime.jpg|center|link=Leviathan Prime]] |
||
<small>'''Opponent Details''':</small> [[Leviathan Prime]] |
|||
| |
| |
||
{| |
{| class="htmb-details" style="border: 1px solid #AAAAAA; width: 100%; max-width: 1600px; " |
||
| |
| |
||
:'''Direct Drop''': [[Rem's Tale Ch.9]] |
|||
:'''Entry KI''': [[Avatar phantom gem]] |
:'''Entry KI''': [[Avatar phantom gem]] |
||
:'''Merit Cost''': 10 |
::<small>'''Merit Cost''': 10</small> |
||
::<small>'''Limit''': 6 Players, 30 Min</small> |
|||
::Level Cap: Uncapped |
|||
::<small>'''Title''': ''Bore Repulsor''</small> |
|||
::Time Limit: 30 Min |
|||
:'''[[Home Point]]:''' [[Elshimo Uplands|Elshimo Up.]] > [[Den of Rancor]] (#2) |
|||
::Max People: 6 |
|||
:'''[[Home Point]]:''' [[Fauregandi]] > [[Fei'Yin]] (#2) |
|||
<hr> |
<hr> |
||
:'''[[:Category:High-Tier_Mission_Battlefields/ |
:'''[[:Category:High-Tier_Mission_Battlefields/TrialByWater|Testimonials]]''' |
||
|} |
|} |
||
| style="border-right: 1px solid #ffffff;"| |
| style="border-right: 1px solid #ffffff; vertical-align: top; padding-top: 20px;" | |
||
*{{tooltip|text='''[[Maliyakaleya Coral]]'''|tooltip=[[File:Maliyakaleya Coral description.png]]}} |
|||
*:;[[Rem's Tale Ch.10]] |
|||
*{{tooltip|text='''[[Hepatizon Ore]]'''|tooltip=[[File:Hepatizon Ore description.png]]}} |
|||
:::[[Reforged Armor|RF]] [[:Category:Feet|Feet]] Slot Upgrade Material |
|||
*{{tooltip|text='''[[Beryllium Ore]]'''|tooltip=[[File:Beryllium Ore description.png]]}} |
|||
*{{tooltip|text='''[[Exalted Log]]'''|tooltip=[[File:Exalted Log description.png]]}} |
|||
*:;All [[:Category:Reforged_Artifact_Armor_+1|AF1 IL 119]] Upgrade Synthesis Materials |
|||
*{{tooltip|text='''[[Sif's Lock]]'''|tooltip=[[File:Sif's Lock description.png]]}} |
|||
| style="border-right: 1px solid #ffffff;"| |
|||
| style="border-right: 1px solid #ffffff; vertical-align: top; padding-top: 20px;" | |
|||
*:;[[Calved Claws]] |
|||
*{{tooltip|text='''[[Pelagos Lance]]'''|tooltip=[[File:Pelagos Lance description.png]]}} |
|||
*{{tooltip|text='''[[Vadose Rod]]'''|tooltip=[[File:Vadose Rod description.png]]}} |
|||
*:;[[Frazil Staff]] |
|||
*{{tooltip|text='''[[Phreatic Axe]]'''|tooltip=[[File:Phreatic Axe description.png]]}} |
|||
| |
|||
| style="vertical-align: top; padding-top: 20px;" | |
|||
*:;[[Rimeice Earring]] |
|||
*{{tooltip|text='''[[Benthos Grip]]'''|tooltip=[[File:Benthos Grip description.png]]}} |
|||
*{{tooltip|text='''[[Neritic Earring]]'''|tooltip=[[File:Neritic Earring description.png]]}} |
|||
*:;[[Nilas Gloves]] |
|||
*:;[[Floestone]] |
|||
|- style="border-bottom: 1px solid #ffffff;" |
|- style="border-bottom: 1px solid #ffffff;" |
||
| |
| style="text-align: center;" | <span id=MoonlitPath>'''★The Moonlit Path'''</span> |
||
[[File:Fenrir Prime HL.jpg |
[[File:Fenrir Prime HL.jpg|center|link=Fenrir Prime]] |
||
<small>'''Opponent Details''':</small> [[Fenrir Prime]] |
|||
| |
| |
||
{| |
{| class="htmb-details" style="border: 1px solid #AAAAAA; width: 100%; max-width: 1600px; " |
||
| |
| |
||
:'''Direct Drop''': [[Rem's Tale Ch.6]] |
|||
:'''Entry KI''': [[Moonlit Path phantom gem]] |
:'''Entry KI''': [[Moonlit Path phantom gem]] |
||
:'''Merit Cost''': 10 |
::<small>'''Merit Cost''': 10</small> |
||
::<small>'''Limit''': 6 Players, 30 Min</small> |
|||
::Level Cap: Uncapped |
|||
::<small>'''Title''': ''Lupine Liquidator''</small> |
|||
::Time Limit: 30 Min |
|||
::Max People: 6 |
|||
:'''[[Home Point]]:''' [[Sarutabaruta]] > [[Toraimarai Canal]] (#1) |
:'''[[Home Point]]:''' [[Sarutabaruta]] > [[Toraimarai Canal]] (#1) |
||
<hr> |
<hr> |
||
:'''[[:Category:High-Tier_Mission_Battlefields/MoonlitPath|Testimonials]]''' |
:'''[[:Category:High-Tier_Mission_Battlefields/MoonlitPath|Testimonials]]''' |
||
|} |
|} |
||
| style="border-right: 1px solid #ffffff;"| |
| style="border-right: 1px solid #ffffff; vertical-align: top; padding-top: 20px;" | |
||
*{{tooltip|text='''[[Maliyakaleya Coral]]'''|tooltip=[[File:Maliyakaleya Coral description.png]]}} |
|||
*:;[[Rem's Tale Ch.6]] |
|||
*{{tooltip|text='''[[Hepatizon Ore]]'''|tooltip=[[File:Hepatizon Ore description.png]]}} |
|||
:::[[Reforged Armor|RF]] [[:Category:Head|Head]] Slot Upgrade Material |
|||
*{{tooltip|text='''[[Beryllium Ore]]'''|tooltip=[[File:Beryllium Ore description.png]]}} |
|||
*{{tooltip|text='''[[Exalted Log]]'''|tooltip=[[File:Exalted Log description.png]]}} |
|||
*:;All [[:Category:Reforged_Artifact_Armor_+1|AF1 IL 119]] Upgrade Synthesis Materials |
|||
*{{tooltip|text='''[[Sif's Lock]]'''|tooltip=[[File:Sif's Lock description.png]]}} |
|||
| style="border-right: 1px solid #ffffff;"| |
|||
| style="border-right: 1px solid #ffffff; vertical-align: top; padding-top: 20px;" | |
|||
*:;[[Capitoline Strap]] |
|||
*{{tooltip|text='''[[Medeina Kilij]]'''|tooltip=[[File:Medeina Kilij description.png]]}} |
|||
| style="vertical-align: top; padding-top: 20px;" | |
|||
*:;[[Medeina Kiliji]] |
|||
*{{tooltip|text='''[[Capitoline Strap]]'''|tooltip=[[File:Capitoline Strap description.png]]}} |
|||
| |
|||
* |
*{{tooltip|text='''[[Vrikodara Jupon]]'''|tooltip=[[File:Vrikodara Jupon description.png]]}} |
||
*{{tooltip|text='''[[Ma'iitsoh Haube]]'''|tooltip=[[File:Ma'iitsoh Haube description.png]]}} |
|||
*{{tooltip|text='''[[Lupine Cape]]'''|tooltip=[[File:Lupine Cape description.png]]}} |
|||
*:;[[Ma'iitsoh Haube]] |
|||
*:;[[Lupine Cape]] |
|||
|- style="border-bottom: 1px solid #ffffff;" |
|- style="border-bottom: 1px solid #ffffff;" |
||
| |
| style="text-align: center;" | <span id=WakingTheBeast>'''★Waking the Beast'''</span> |
||
[[File:Carbuncle Prime HL.jpg |
[[File:Carbuncle Prime HL.jpg|center|link=Carbuncle Prime]] |
||
<small>'''Opponent Details''':</small> [[Carbuncle Prime]] |
|||
| |
| |
||
{| |
{| class="htmb-details" style="border: 1px solid #AAAAAA; width: 100%; max-width: 1600px; " |
||
| |
| |
||
:'''Direct Drop''': [[Rem's Tale Ch.7]] |
|||
:'''Entry KI''': [[Waking the Beast phantom gem]] |
:'''Entry KI''': [[Waking the Beast phantom gem]] |
||
:'''Merit Cost''': 10 |
::<small>'''Merit Cost''': 10</small> |
||
::<small>'''Limit''': 6 Players, 30 Min</small> |
|||
::Level Cap: Uncapped |
|||
::<small>'''Title''': ''Ruby Repulser''</small> |
|||
::Time Limit: 30 Min |
|||
::Max People: 6 |
|||
:'''[[Home Point]]:''' [[Sarutabaruta]] > [[Toraimarai Canal]] (#1) |
:'''[[Home Point]]:''' [[Sarutabaruta]] > [[Toraimarai Canal]] (#1) |
||
<hr> |
<hr> |
||
:'''[[:Category:High-Tier_Mission_Battlefields/WakingTheBeast|Testimonials]]''' |
:'''[[:Category:High-Tier_Mission_Battlefields/WakingTheBeast|Testimonials]]''' |
||
|} |
|} |
||
| style="border-right: 1px solid #ffffff;"| |
| style="border-right: 1px solid #ffffff; vertical-align: top; padding-top: 20px;" | |
||
*{{tooltip|text='''[[Maliyakaleya Coral]]'''|tooltip=[[File:Maliyakaleya Coral description.png]]}} |
|||
*:;[[Rem's Tale Ch.7]] |
|||
*{{tooltip|text='''[[Hepatizon Ore]]'''|tooltip=[[File:Hepatizon Ore description.png]]}} |
|||
:::[[Reforged Armor|RF]] [[:Category:Body|Body]] Slot Upgrade Material |
|||
*{{tooltip|text='''[[Beryllium Ore]]'''|tooltip=[[File:Beryllium Ore description.png]]}} |
|||
*{{tooltip|text='''[[Exalted Log]]'''|tooltip=[[File:Exalted Log description.png]]}} |
|||
*:;All [[:Category:Reforged_Artifact_Armor_+1|AF1 IL 119]] Upgrade Synthesis Materials |
|||
*{{tooltip|text='''[[Sif's Lock]]'''|tooltip=[[File:Sif's Lock description.png]]}} |
|||
| style="border-right: 1px solid #ffffff;"| |
|||
| style="border-right: 1px solid #ffffff; vertical-align: top; padding-top: 20px;" | |
|||
*:;[[Marquetry Staff]] |
|||
*{{tooltip|text='''[[Marquetry Staff]]'''|tooltip=[[File:Marquetry Staff description.png]]}} |
|||
| |
|||
| style="vertical-align: top; padding-top: 20px;" | |
|||
*:;[[Engraved Belt]] |
|||
*{{tooltip|text='''[[Engraved Belt]]'''|tooltip=[[File:Engraved Belt description.png]]}} |
|||
* |
*{{tooltip|text='''[[Lapidary Tunic]]'''|tooltip=[[File:Lapidary Tunic description.png]]}} |
||
*{{tooltip|text='''[[Satlada Necklace]]'''|tooltip=[[File:Satlada Necklace description.png]]}} |
|||
*{{tooltip|text='''[[Diamantaire Sollerets]]'''|tooltip=[[File:Diama. Sollerets description.png]]}} |
|||
*:;[[Satlada Necklace]] |
|||
*:;[[Diamantaire Sollerets]] |
|||
|- style="border-bottom: 1px solid #ffffff;" |
|- style="border-bottom: 1px solid #ffffff;" |
||
| |
| style="text-align: center;" | <span id=WakingDreams>'''★Waking Dreams'''</span> |
||
[[File:Diabolos Prime.jpg |
[[File:Diabolos Prime.jpg|center|link=Diabolos Prime]] |
||
<small>'''Opponent Details''':</small> [[Diabolos Prime]] |
|||
| |
| |
||
{| |
{| class="htmb-details" style="border: 1px solid #AAAAAA; width: 100%; max-width: 1600px; " |
||
| |
| |
||
:'''Direct Drop''': [[Rem's Tale Ch.8]] |
|||
:'''Entry KI''': [[Waking Dreams phantom gem]] |
:'''Entry KI''': [[Waking Dreams phantom gem]] |
||
:'''Merit Cost''': 10 |
::<small>'''Merit Cost''': 10</small> |
||
::<small>'''Limit''': 6 Players, 30 Min</small> |
|||
::Level Cap: Uncapped |
|||
::<small>'''Title''': ''Devil's Demise''</small> |
|||
::Time Limit: 30 Min |
|||
::Max People: 6 |
|||
:'''[[Home Point]]:''' [[Fauregandi]] > [[Pso'Xja]] (#1) |
:'''[[Home Point]]:''' [[Fauregandi]] > [[Pso'Xja]] (#1) |
||
<hr> |
<hr> |
||
:'''[[:Category:High-Tier_Mission_Battlefields/WakingDreams|Testimonials]]''' |
:'''[[:Category:High-Tier_Mission_Battlefields/WakingDreams|Testimonials]]''' |
||
|} |
|} |
||
| style="border-right: 1px solid #ffffff;"| |
| style="border-right: 1px solid #ffffff; vertical-align: top; padding-top: 20px;" | |
||
*{{tooltip|text='''[[Maliyakaleya Coral]]'''|tooltip=[[File:Maliyakaleya Coral description.png]]}} |
|||
*:;[[Rem's Tale Ch.8]] |
|||
*{{tooltip|text='''[[Hepatizon Ore]]'''|tooltip=[[File:Hepatizon Ore description.png]]}} |
|||
:::[[Reforged Armor|RF]] [[:Category:Hands|Hands]] Slot Upgrade Material |
|||
*{{tooltip|text='''[[Beryllium Ore]]'''|tooltip=[[File:Beryllium Ore description.png]]}} |
|||
*{{tooltip|text='''[[Exalted Log]]'''|tooltip=[[File:Exalted Log description.png]]}} |
|||
*:;All [[:Category:Reforged_Artifact_Armor_+1|AF1 IL 119]] Upgrade Synthesis Materials |
|||
*{{tooltip|text='''[[Sif's Lock]]'''|tooltip=[[File:Sif's Lock description.png]]}} |
|||
| style="border-right: 1px solid #ffffff;"| |
|||
| style="border-right: 1px solid #ffffff; vertical-align: top; padding-top: 20px;" | |
|||
*:;[[Shuhansadamune]] |
|||
*{{tooltip|text='''[[Shuhansadamune]]'''|tooltip=[[File:Shuhansadamune description.png]]}} |
|||
| style="vertical-align: top; padding-top: 20px;" | |
|||
*{{tooltip|text='''[[Darkside Earring]]'''|tooltip=[[File:Darkside Earring description.png]]}} |
|||
*{{tooltip|text='''[[Pernicious Ring]]'''|tooltip=[[File:Pernicious Ring description.png]]}} |
|||
*{{tooltip|text='''[[Chozoron Coselete]]'''|tooltip=[[File:Chozor. Coselete description.png]]}} |
|||
*{{tooltip|text='''[[Loagaeth Cuffs]]'''|tooltip=[[File:Loagaeth Cuffs description.png]]}} |
|||
|- style="border-bottom: 1px solid #ffffff;" |
|||
| style="text-align: center;" | <span id=DivineInterference>'''★Divine Interference'''</span> |
|||
[[File:Alexander Prime.jpg|center|link=Alexander Prime]] |
|||
<small>'''Opponent Details''':</small> [[Alexander Prime]] |
|||
| |
| |
||
{| class="htmb-details" style="border: 1px solid #AAAAAA; width: 100%; max-width: 1600px; " |
|||
*:;[[Darkside Earring]] |
|||
| |
|||
:'''Direct Drop''': [[Rem's Tale Ch.6]],[[Rem's Tale Ch.7|Ch.7]],[[Rem's Tale Ch.8|Ch.8]],[[Rem's Tale Ch.9|Ch.9]],[[Rem's Tale Ch.10|Ch.10]] |
|||
*:;[[Pernicious Ring]] |
|||
:'''Entry KI''': [[Divine phantom gem]] |
|||
::<small>'''Merit Cost''': 10</small> |
|||
*:;[[Chozoron Coselete]] |
|||
::<small>'''Limit''': 6 Players, 30 Min</small> |
|||
::<small>'''Title''': ''Alexander Annihilator''</small> |
|||
*:;[[Loagaeth Cuffs]] |
|||
:'''[[Home Point]]:''' [[Zulkheim]] > [[Selbina]] (#1) |
|||
::Enter at '''Veridical Conflux''', (H-7) |
|||
<hr> |
|||
:'''[[:Category:High-Tier_Mission_Battlefields/DivineInterference|Testimonials]]''' |
|||
|} |
|||
| style="border-right: 1px solid #ffffff; vertical-align: top; padding-top: 20px;" | |
|||
*None |
|||
| style="border-right: 1px solid #ffffff; vertical-align: top; padding-top: 20px;" | |
|||
*{{tooltip|text='''[[Sacro Bulwark]]'''|tooltip=[[File:Sacro Bulwark description.png]]}} |
|||
| style="vertical-align: top; padding-top: 20px;" | |
|||
*{{tooltip|text='''[[Sacro Breastplate]]'''|tooltip=[[File:Sacro Breastplate description.png]]}} |
|||
*{{tooltip|text='''[[Sacro Gorget]]'''|tooltip=[[File:Sacro Gorget description.png]]}} |
|||
*{{tooltip|text='''[[Sacro Cord]]'''|tooltip=[[File:Sacro Cord description.png]]}} |
|||
*{{tooltip|text='''[[Sacro Mantle]]'''|tooltip=[[File:Sacro Mantle description.png]]}} |
|||
|- style="border-bottom: 1px solid #ffffff;" |
|||
| style="text-align: center;" | <span id=StygianPact>'''★A Stygian Pact'''</span> |
|||
[[File:Odin Prime.jpg|center|link=Odin Prime]] |
|||
<small>'''Opponent Details''':</small> [[Odin Prime]] |
|||
| |
|||
{| class="htmb-details" style="border: 1px solid #AAAAAA; width: 100%; max-width: 1600px; " |
|||
| |
|||
:'''Direct Drop''': [[Rem's Tale Ch.6]],[[Rem's Tale Ch.7|Ch.7]],[[Rem's Tale Ch.8|Ch.8]],[[Rem's Tale Ch.9|Ch.9]],[[Rem's Tale Ch.10|Ch.10]] |
|||
:'''Entry KI''': [[Stygian Pact phantom gem]] |
|||
::<small>'''Merit Cost''': 10</small> |
|||
::<small>'''Limit''': 6 Players, 30 Min</small> |
|||
::<small>'''Title''': ''Dread Purger''</small> |
|||
:'''[[Home Point]]:''' [[Zulkheim]] > [[Selbina]] (#1) |
|||
::Enter at '''Veridical Conflux''', (H-7) |
|||
<hr> |
|||
:'''[[:Category:High-Tier_Mission_Battlefields/StygianPact|Testimonials]]''' |
|||
|} |
|||
| style="border-right: 1px solid #ffffff; vertical-align: top; padding-top: 20px;" | |
|||
*None |
|||
| style="border-right: 1px solid #ffffff; vertical-align: top; padding-top: 20px;" | |
|||
*{{tooltip|text='''[[Geirrothr]]'''|tooltip=[[File:Geirrothr description.png]]}} |
|||
*{{tooltip|text='''[[Zantetsuken]]'''|tooltip=[[File:Zantetsuken description.png]]}} |
|||
*{{tooltip|text='''[[Zantetsuken X]]'''|tooltip=[[File:Zantetsuken X description.png]]}} |
|||
| style="vertical-align: top; padding-top: 20px;" | |
|||
*{{tooltip|text='''[[Hjarrandi Helm]]'''|tooltip=[[File:Hjarrandi Helm description.png]]}} |
|||
*{{tooltip|text='''[[Hjarrandi Breastplate]]'''|tooltip=[[File:Hjarrandi Breast. description.png]]}} |
|||
*{{tooltip|text='''[[Freke Ring]]'''|tooltip=[[File:Freke Ring description.png]]}} |
|||
*{{tooltip|text='''[[Gere Ring]]'''|tooltip=[[File:Gere Ring description.png]]}} |
|||
|- style="border-bottom: 1px solid #ffffff;" |
|||
| style="text-align: center;" | <span id=ChampionOfTheDawn>'''★Champion of the Dawn'''</span> |
|||
[[File:Cait Sith Prime.jpg|center|link=Cait Sith Prime]] |
|||
<small>'''Opponent Details''':</small> [[Cait Sith Prime]] |
|||
| |
|||
{| class="htmb-details" style="border: 1px solid #AAAAAA; width: 100%; max-width: 1600px; " |
|||
| |
|||
:'''Direct Drop''': [[Rem's Tale Ch.6]],[[Rem's Tale Ch.7|Ch.7]],[[Rem's Tale Ch.8|Ch.8]],[[Rem's Tale Ch.9|Ch.9]],[[Rem's Tale Ch.10|Ch.10]] |
|||
:'''Entry KI''': [[Champion phantom gem]] |
|||
::<small>'''Merit Cost''': 10</small> |
|||
::<small>'''Limit''': 6 Players, 30 Min</small> |
|||
::<small>'''Title''': ''Sidhe Smasher''</small> |
|||
:'''[[Home Point]]:''' [[Zulkheim]] > [[Selbina]] (#1) |
|||
::Enter at '''Veridical Conflux''', (H-7) |
|||
<hr> |
|||
:'''[[:Category:High-Tier_Mission_Battlefields/ChampionOfTheDawn|Testimonials]]''' |
|||
|} |
|||
| style="border-right: 1px solid #ffffff; vertical-align: top; padding-top: 20px;" | |
|||
*None |
|||
| style="border-right: 1px solid #ffffff; vertical-align: top; padding-top: 20px;" | |
|||
*{{tooltip|text='''[[Cath Palug Hammer]]'''|tooltip=[[File:C. Palug Hammer description.png]]}} |
|||
*{{tooltip|text='''[[Cath Palug Stone]]'''|tooltip=[[File:C. Palug Stone description.png]]}} |
|||
| style="vertical-align: top; padding-top: 20px;" | |
|||
*{{tooltip|text='''[[Cath Palug Crown]]'''|tooltip=[[File:C. Palug Crown description.png]]}} |
|||
*{{tooltip|text='''[[Cath Palug Ring]]'''|tooltip=[[File:C. Palug Ring description.png]]}} |
|||
*{{tooltip|text='''[[Cath Palug Earring]]'''|tooltip=[[File:C. Palug Earring description.png]]}} |
|||
|} |
|} |
||
Latest revision as of 02:19, 4 March 2024
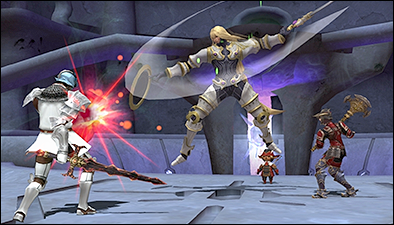
|
Key Item Sales
The following three NPCs sell the key items to enter the battlefields, one in each nation. Before you are allowed to buy the key item to enter the high level battlefield, you must meet the following requirements.
- Must be level 95 or higher
- Must have completed the lower level version of the battlefield
- Note: More precise eligibility requirements for each battlefield can be found on each of the Phantom Gem key item pages.
| Trisvain in Northern San d'Oria (J-7)
|
Raving Opossum in Port Bastok (J-11)
|
Mimble-Pimble in Port Windurst (L-5)
|


Difficulty
Initially, players are only able to choose Very Easy, Easy or Normal difficulties while entering into a battlefield for the first time.
After winning your first battle on these difficulties, you are then able to choose Difficult or Very Difficult the next time you enter the fight.
- Note that if a fellow party member has already initialized the fight, the battlefield will still be set to the difficulty chosen by the first party member to enter regardless of what you choose. This includes whether or not you have a higher difficulty unlocked or not.
Titles
Unique Titles are rewarded to players when they triumph over a battlefield on Very Difficult. These titles are listed below with the other battlefield information.
Rewards
Reforged Armor ![]() Rem's Tale chapters and Item Level upgrade materials for Relic Weapons (
Rem's Tale chapters and Item Level upgrade materials for Relic Weapons (![]() Plutons), Empyrean Weapons (
Plutons), Empyrean Weapons (![]() Riftborn Boulders), and Mythic Weapons (
Riftborn Boulders), and Mythic Weapons (![]() Beitetsu) are distributed to each party member's personal inventory.
Beitetsu) are distributed to each party member's personal inventory.
See the table below as an outline for Rem's Tale Chapters and R/E/M Upgrade items (Pluton, Riftborn Boulder, Beitetsu) that distribute into personal inventories upon winning a battlefield.
- The type of Rem's Tales obtained from each battlefield is outlined in the battlefield section of this page below. These are denoted with the prefix "Direct Drop" to signify that each player who took part in the battlefields receives their own chapters.
- As well as personal reward distribution, other chapters also appear in the party's treasure pool along with unique weapons and equipment. These items can be received by any party member. Any chapter may appear (Ch.6 thru Ch.10), not only the BCNM exclusive chapter.
- The only exception to this chapter drop rule are the single fight Ark Angel HTMBs. These fights only drop a specific chapter in both player's personal pools and party treasure pools.

- The only exception to this chapter drop rule are the single fight Ark Angel HTMBs. These fights only drop a specific chapter in both player's personal pools and party treasure pools.
All battlefields except ★Divine Might
| Difficulty | Content Level | Rem's Tale Chapters | R/E/M Upgrade Items |
|---|---|---|---|
| Very Easy | 113 | 1 | 0 |
| Easy | 116 | 1 | 1 |
| Normal | 119 | 2 | 1 |
| Difficult | Over 119 | 3 | 2 |
| Very Difficult | Over 119 | 4 | 2 |
★Divine Might Only
| Difficulty | Content Level | Rem's Tale Chapters | R/E/M Upgrade Items |
|---|---|---|---|
| Very Easy | 113 | 2 | 0 |
| Easy | 116 | 2 | 2 |
| Normal | 119 | 4 | 2 |
| Difficult | Over 119 | 6 | 4 |
| Very Difficult | Over 119 | 8 | 4 |
Other Rewards
Drop rates for unique ![]() /
/![]() rewards obtained as well as other rewards (E.g. Scrolls and upgrade materials) through these battles increase with the BCNM difficulty setting.
rewards obtained as well as other rewards (E.g. Scrolls and upgrade materials) through these battles increase with the BCNM difficulty setting.
- At Very Easy, Easy, and Normal difficulties, the drop rate for unique
 /
/ items should be very roughly around 10% before Treasure Hunter. There is no data to support this drop rate, however.
 - At Difficult and Very Difficult, one item is guaranteed to drop. A second item has a very high probability.
- Treasure Hunter will have a noticeable impact on drops for Very Easy, Easy, and Normal while having no effect for Difficult and Very Difficult.
- Below Normal, drops are significantly rarer. Expect to go through dozens of fights with no rare/ex drops below Normal difficulty, especially without Treasure Hunter.
- New High-Tier Mission BCNMs do not follow these rules. / drops are not guaranteed on Difficult or Very Difficult.
- The following BCNMs are considered "new": A Stygian Pact II (Odin Prime), Champion of the Dawn II (Cait Sith Prime), Divine Interference II (Alexander Prime), Maiden of the Dusk II (Lilith), The Wyrm God II (Shinryu).
Monthly Adventurer Campaigns
There is one type of campaign that may run any given month.
High-Tier Mission Battlefield Campaign
- When this Monthly Adventurer Campaign is active, certain ★High-Tier Mission Battlefields drop additional Plutons, Beitetsu, and Riftborn Boulders.
- Affected HTMB include: All individual Ark Angels / Divine Might II / Return to Delkfutt's Tower II / The Celestial Nexus II / The Savage II / The Warrior's Path II / Puppet in Peril II / Legacy of the Lost II / The Shadow Lord Battle II / Head Wind II / One to be Feared II / Dawn II / Trial by Fire II / Trial by Ice II / Trial by Wind II / Trial by Earth II / Trial by Lightning II / Trial by Water II / The Moonlit Path II / Waking the Beast II / Waking Dreams II
- An additional personal drop is added during this campaign, and players have the chance at obtaining the following items after succeeding in certain HTMB:
- Note: Higher quality items will drop more frequently on higher difficulties.
Battlefields
Below is a full list of all High-Tier Mission Battlefields in the game, as well as potential drops from each.
Rise of the Zilart
| Name | Battlefield Details | Unique Materials | Weapons | Armor | |
|---|---|---|---|---|---|
★The Shadow Lord Battle
 Opponent Details: Shadow Lord |
|
|
|||
★Return to Delkfutt's Tower
 Opponent Details: Kam'lanaut |
|
|
|||
★Ark Angels (1)
 Opponent Details: Ark Angel HM |
|
||||
★Ark Angels (2)
 Opponent Details: Ark Angel TT |
|
||||
★Ark Angels (3)
 Opponent Details: Ark Angel MR |
|
||||
★Ark Angels (4)
 Opponent Details: Ark Angel EV |
|
||||
★Ark Angels (5)
 Opponent Details: Ark Angel GK |
|
||||
★Divine Might
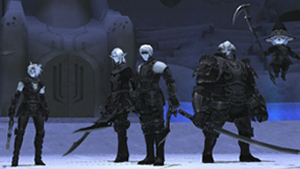 Opponent Details: Divine Might II |
|
| |||
★The Celestial Nexus
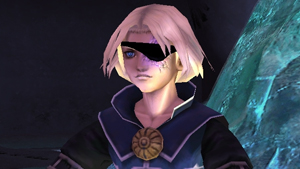 Opponent Details: Eald'narche |
|
||||


Chains of Promathia
| Name | Battlefield Details | Unique Materials | Weapons | Armor | |
|---|---|---|---|---|---|
★The Savage
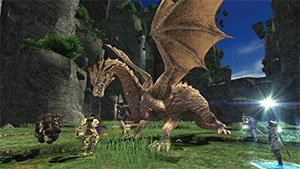 Opponent Details: Ouryu |
|
||||
★Head Wind
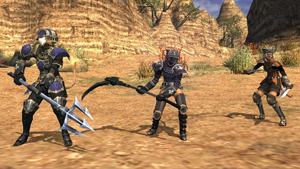 Opponent Details: |
|
||||
★One to be Feared
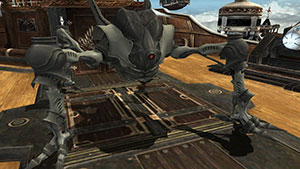 |
|
||||
★The Warrior's Path
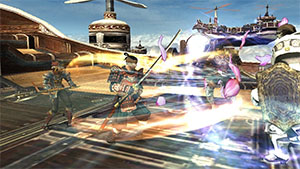 Opponent Details: Tenzen |
|
||||
★Dawn
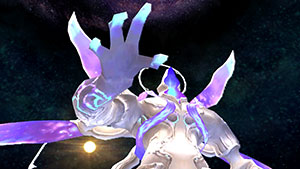 Opponent Details: Promathia |
|
||||


Treasures of Aht Urghan
| Name | Battlefield Details | Unique Materials | Weapons | Armor | |
|---|---|---|---|---|---|
★Puppet in Peril
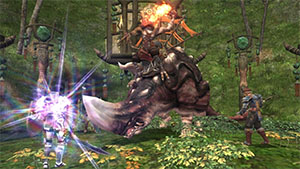 Opponent Details: Lancelord Gaheel Ja |
|
||||
★Legacy of the Lost
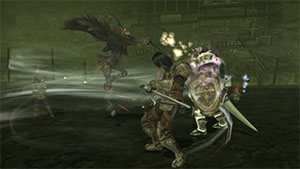 Opponent Details: Gessho |
|
||||


Wings of the Goddess
| Name | Battlefield Details | Unique Materials | Weapons | Armor | |
|---|---|---|---|---|---|
★Maiden of the Dusk
 Opponent Details: Lilith |
|
|
|||
| A note on drops
An added gimmick was implemented in this battlefield compared to the other new battlefields, such as Champion of the Dawn II, because of the higher amount of gear that is obtainable from this BCNM. | |||||


Abyssea
| Name | Battlefield Details | Unique Materials | Weapons | Armor | |
|---|---|---|---|---|---|
★The Wyrm God
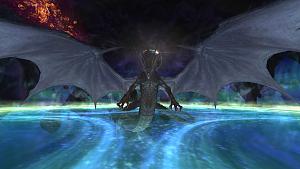 Opponent Details: Shinryu |
|
|
|||


Avatar Prime Fights
| Name | Battlefield Details | Unique Materials | Weapons | Armor | |
|---|---|---|---|---|---|
★Trial by Fire
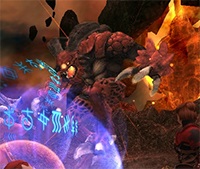 Opponent Details: Ifrit Prime |
|
||||
★Trial by Ice
 Opponent Details: Shiva Prime |
|
||||
★Trial by Wind
 Opponent Details: Garuda Prime |
|
||||
★Trial by Earth
 Opponent Details: Titan Prime |
|
||||
★Trial by Lightning
 Opponent Details: Ramuh Prime |
|
||||
★Trial by Water
 Opponent Details: Leviathan Prime |
|
||||
★The Moonlit Path
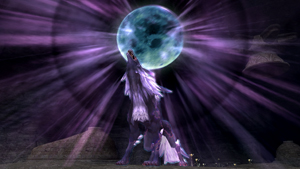 Opponent Details: Fenrir Prime |
|
||||
★Waking the Beast
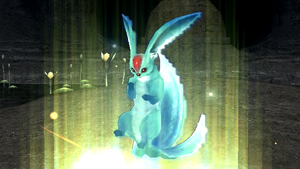 Opponent Details: Carbuncle Prime |
|
||||
★Waking Dreams
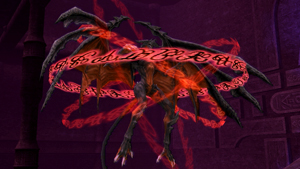 Opponent Details: Diabolos Prime |
|
||||
★Divine Interference
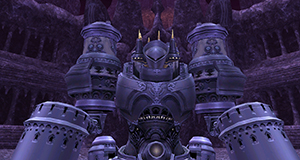 Opponent Details: Alexander Prime |
|
|
|||
★A Stygian Pact
 Opponent Details: Odin Prime |
|
|
|||
★Champion of the Dawn
 Opponent Details: Cait Sith Prime |
|
|
|||


Subcategories
This category has the following 30 subcategories, out of 30 total.
H
- High-Tier Mission Battlefields/AAEV
- High-Tier Mission Battlefields/AAGK
- High-Tier Mission Battlefields/AAHM
- High-Tier Mission Battlefields/AAMR
- High-Tier Mission Battlefields/AATT
- High-Tier Mission Battlefields/CelestialNexus
- High-Tier Mission Battlefields/ChampionOfTheDawn
- High-Tier Mission Battlefields/Dawn
- High-Tier Mission Battlefields/DivineInterference
- High-Tier Mission Battlefields/DivineMight
- High-Tier Mission Battlefields/HeadWind
- High-Tier Mission Battlefields/LegacyOfTheLost
- High-Tier Mission Battlefields/MaidenOfTheDusk
- High-Tier Mission Battlefields/MoonlitPath
- High-Tier Mission Battlefields/OneToBeFeared
- High-Tier Mission Battlefields/PuppetInPeril
- High-Tier Mission Battlefields/ReturnDelkfutt
- High-Tier Mission Battlefields/ShadowLordBattle
- High-Tier Mission Battlefields/StygianPact
- High-Tier Mission Battlefields/TheSavage
- High-Tier Mission Battlefields/TheWyrmGod
- High-Tier Mission Battlefields/TrialByEarth
- High-Tier Mission Battlefields/TrialByFire
- High-Tier Mission Battlefields/TrialByIce
- High-Tier Mission Battlefields/TrialByLightning
- High-Tier Mission Battlefields/TrialByWater
- High-Tier Mission Battlefields/TrialByWind
- High-Tier Mission Battlefields/WakingDreams
- High-Tier Mission Battlefields/WakingTheBeast
- High-Tier Mission Battlefields/WarriorPath
Pages in category "High-Tier Mission Battlefields"
The following 25 pages are in this category, out of 25 total.
