The Voracious Resurgence | |
| Prime Weapons • Ultimate Weapons • Ultimate Augments • Abjurations iL119 • JSE Necks • Divergence Augments • Escutcheons | |
| Reforged Armor Artifact: +1 • iL109 • iL119/+2/+3 Relic: +1/+2 • iL109 • iL119/+2/+3 Empyrean: +1/+2 • iL109 • iL119/+2/+3 |
Guides • Crafting • Trusts • Apex Monsters |
Category:Dynamis: Difference between revisions
(→Zones) |
Arkevorkhat (talk | contribs) m (→Original Zones: fix typo (odious times -> odious items)) |
||
| (37 intermediate revisions by 7 users not shown) | |||
| Line 1: | Line 1: | ||
{{disambiguation|Dynamis - Divergence}} |
{{disambiguation|Dynamis - Divergence}} |
||
{{Category Page Header |
|||
{|align=right |
|||
|ToC= y |
|||
|valign=top| __TOC__ |
|||
|Float=left |
|||
|} |
|||
|Image=Dynamis 1.png |
|||
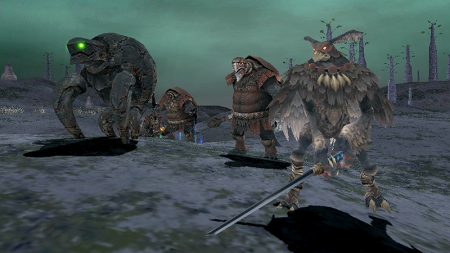
'''Dynamis''' is a series of zones set in an alternate universe version of [[Vana'diel]]; created [[Diabolos|of Nightmares]], set in [[weather|perpetual Darkness]]. |
|||
|Image Size=450 |
|||
|Image Link= |
|||
|Intro Text='''Dynamis''' is a series of zones set in an alternate universe version of [[Vana'diel]]; created [[Diabolos|of Nightmares]], set in [[weather|perpetual Darkness]]. |
|||
It is the source of [[Relic Armor]], [[Relic Weapons]], and all of the various items required to upgrade those to their final stages |
It is the source of [[Relic Armor]], [[Relic Weapons]], and all of the various items required to upgrade those to their final stages. |
||
Dynamis is composed of three types of areas: the original 6 [[Rise of the Zilart]] zones, 4 "Dreamworld" zones introduced with the [[Chains of Promathia]] expansion, and "Divergent" zones introduced after [[Rhapsodies of Vana'diel]] was finalized. |
|||
}} |
|||
===Entry Requirements=== |
===Entry Requirements=== |
||
====Original Areas==== |
====Original Areas==== |
||
| Line 12: | Line 18: | ||
**Zone into Xarcabard for a cutscene. |
**Zone into Xarcabard for a cutscene. |
||
**Examine any ''Trail Markings'' in any of the three starter cities or Jeuno to receive another cutscene and the Key Item [[Vial of Shrouded Sand]]. |
**Examine any ''Trail Markings'' in any of the three starter cities or Jeuno to receive another cutscene and the Key Item [[Vial of Shrouded Sand]]. |
||
***[[Bastok Mines]] (K-8), [[Southern San d'Oria]] (L-6), [[Windurst Walls]] (C-12), or [[Ru'Lude Gardens]] (I-9) |
|||
***The Goblin NPCs near the entrances in [[Haggleblix|Beadeaux]] (E-7), [[Antiqix|Castle Oztroja]] (F-8), and [[Lootblox|Davoi]] (J-7) will now do business with you. |
|||
**The Goblin NPCs near the entrances in [[Haggleblix|Beadeaux]] (E-7), [[Antiqix|Castle Oztroja]] (F-8), and [[Lootblox|Davoi]] (J-7) will now do business with you. |
|||
**Purchase the permanent Key Item [[Prismatic hourglass]] for 50,000 gil from one of the above Goblin NPCs in the Beastmen strongholds. |
|||
***Trade 50,000 gil to one of the above Goblin NPCs in the Beastmen strongholds to purchase the permanent Key Item [[Prismatic hourglass]]. |
|||
***<sup>[[File:Timeless Hrglass. icon.png|20px|link=]]</sup>[[Timeless Hrglass.|Timeless Hourglasses]] and <sup>[[File:Perpetual Hrglass. icon.png|20px|link=]]</sup>[[Perpetual Hrglass.|Perpetual Hourglasses]] are no longer relevant, purchasable, or usable. |
***<sup>[[File:Timeless Hrglass. icon.png|20px|link=]]</sup>[[Timeless Hrglass.|Timeless Hourglasses]] and <sup>[[File:Perpetual Hrglass. icon.png|20px|link=]]</sup>[[Perpetual Hrglass.|Perpetual Hourglasses]] are no longer relevant, purchasable, or usable. |
||
***Should you still possess one, you may trade it to one of the Goblin NPCs in the Beastmen strongholds for a refund. |
|||
*With both '''Vial''' and '''Hourglass''' Key Items, you may enter any of the original city zones ([[Dynamis - Bastok|Bastok]], [[Dynamis - Jeuno|Jeuno]], [[Dynamis - San d'Oria|San d'Oria]], and [[Dynamis - Windurst|Windurst]]) once per day (Resetting at Midnight in Japan). |
*With both '''Vial''' and '''Hourglass''' Key Items, you may enter any of the original city zones ([[Dynamis - Bastok|Bastok]], [[Dynamis - Jeuno|Jeuno]], [[Dynamis - San d'Oria|San d'Oria]], and [[Dynamis - Windurst|Windurst]]) once per day (Resetting at Midnight in Japan). |
||
**Unlimited entry is granted if the player possesses the [["Rhapsody in Azure"]] reward from [[Rhapsodies of Vana'diel]] mission progression. |
**Unlimited entry is granted if the player possesses the [["Rhapsody in Azure"]] reward from [[Rhapsodies of Vana'diel]] mission progression. |
||
| Line 25: | Line 32: | ||
===="Dreamworld" Areas==== |
===="Dreamworld" Areas==== |
||
* |
*Completed [[Promathia Mission 3-5]] |
||
*Be in possession of the '''Vial''' and '''Hourglass''' Key Items as above. |
*Be in possession of the '''Vial''' and '''Hourglass''' Key Items as above. |
||
*With both '''Vial''' and '''Hourglass''' Key Items, you may enter any of the first three zones ([[Dynamis - Buburimu|Buburimu]], [[Dynamis - Qufim|Qufim]], and [[Dynamis - Valkurm|Valkurm]]) once per day (Resetting at Midnight in Japan). |
*With both '''Vial''' and '''Hourglass''' Key Items, you may enter any of the first three zones ([[Dynamis - Buburimu|Buburimu]], [[Dynamis - Qufim|Qufim]], and [[Dynamis - Valkurm|Valkurm]]) once per day (Resetting at Midnight in Japan). |
||
**Unlimited entry is granted if the player possesses the [["Rhapsody in Azure"]] reward from [[Rhapsodies of Vana'diel]] mission progression. |
**Unlimited entry is granted if the player possesses the [["Rhapsody in Azure"]] reward from [[Rhapsodies of Vana'diel]] mission progression. |
||
**Further Dynamis zones are unlocked by defeating the Zone Boss for each of these beginning zones. |
**Further Dynamis zones are unlocked by defeating the Zone Boss for each of these beginning zones. |
||
*To enter a zone, interact with the corresponding '' |
*To enter a zone, interact with the corresponding ''Hieroglyphics''. |
||
**Parties must be between '''1''' and '''18''' players. |
**Parties must be between '''1''' and '''18''' players. |
||
***Every party member must have the [[Prismatic hourglass]] key item. |
***Every party member must have the [[Prismatic hourglass]] key item. |
||
** [[Trusts]] may be called |
** [[Trusts]] may be called |
||
===="Divergence" Areas==== |
|||
{{Category:Dynamis - Divergence |
|||
|transcludesection=Entry Requirements |
|||
}} |
|||
===Time Limit=== |
===Time Limit=== |
||
* The initial time limit is 60 minutes (Earth time). |
* The initial time limit is 60 minutes (Earth time). |
||
* Time may be extended by killing 5 specific statues (they check as "Impossible to Gauge") that will give the player the following key items: |
* Time may be extended by killing 5 specific statues (they check as "Impossible to Gauge") that will give the player the following key items: |
||
**[[Crimson granules of time]] |
**{{KI}}[[Crimson granules of time]] |
||
**[[Azure granules of time]] |
**{{KI}}[[Azure granules of time]] |
||
**[[Amber granules of time]] |
**{{KI}}[[Amber granules of time]] |
||
**[[Alabaster granules of time]] |
**{{KI}}[[Alabaster granules of time]] |
||
**[[Obsidian granules of time]] |
**{{KI}}[[Obsidian granules of time]] |
||
***These key items will vanish when you leave the zone. |
***These key items will vanish when you leave the zone. |
||
::''''' |
::'''''You cannot get a time extension from the same statue twice in the same run.''''' |
||
===Monthly Adventurer Campaigns=== |
|||
There is one type of campaign that may run any given month. |
|||
{{Category:Adventurer_Campaigns |
|||
|transcludesection=Dynamis |
|||
}} |
|||
===Currencies=== |
===Currencies=== |
||
*<sup>[[File:O. Bronzepiece icon.png| |
*<sup>[[File:O. Bronzepiece icon.png|22px|link=]]</sup>[[O. Bronzepiece|Ordelle Bronzepieces]] |
||
**Dropped by [[Orcish Vanguard]], [[Goblin Vanguard]], [[Hydra Vanguard]], [[Kindred Vanguard]], and appropriate [[Nightmare Monsters]]. |
**Dropped by [[Orcish Vanguard]], [[Goblin Vanguard]], [[Hydra Vanguard]], [[Kindred Vanguard]], and appropriate [[Nightmare Monsters]]. |
||
*<sup>[[File:M. Silverpiece icon.png| |
*<sup>[[File:M. Silverpiece icon.png|22px|link=]]</sup>[[M. Silverpiece|Montiont Silverpieces]] |
||
**All Notorious Monsters in Dynamis (freespawning, lottery, or forced pop) have approximately a 5% chance of dropping one that does not appear to be affected by the [[proc]] system. |
**All Notorious Monsters in Dynamis (freespawning, lottery, or forced pop) have approximately a 5% chance of dropping one that does not appear to be affected by the [[proc]] system. |
||
*<sup>[[File:1 Byne Bill icon.png| |
*<sup>[[File:1 Byne Bill icon.png|22px|link=]]</sup>[[1 Byne Bill]]s |
||
**Dropped by [[Quadav Vanguard]], [[Goblin Vanguard]], [[Hydra Vanguard]], [[Kindred Vanguard]], and appropriate [[Nightmare Monsters]]. |
**Dropped by [[Quadav Vanguard]], [[Goblin Vanguard]], [[Hydra Vanguard]], [[Kindred Vanguard]], and appropriate [[Nightmare Monsters]]. |
||
*<sup>[[File:100 Byne Bill icon.png| |
*<sup>[[File:100 Byne Bill icon.png|22px|link=]]</sup>[[100 Byne Bill]]s |
||
**All Notorious Monsters in Dynamis (freespawning, lottery, or forced pop) have approximately a 5% chance of dropping one that does not appear to be affected by the [[proc]] system. |
**All Notorious Monsters in Dynamis (freespawning, lottery, or forced pop) have approximately a 5% chance of dropping one that does not appear to be affected by the [[proc]] system. |
||
*<sup>[[File:T. Whiteshell icon.png| |
*<sup>[[File:T. Whiteshell icon.png|22px|link=]]</sup>[[T. Whiteshell|Tukuku Whiteshells]] |
||
**Dropped by [[Yagudo Vanguard]], [[Goblin Vanguard]], [[Hydra Vanguard]], [[Kindred Vanguard]], and appropriate [[Nightmare Monsters]]. |
**Dropped by [[Yagudo Vanguard]], [[Goblin Vanguard]], [[Hydra Vanguard]], [[Kindred Vanguard]], and appropriate [[Nightmare Monsters]]. |
||
*<sup>[[File:L. Jadeshell icon.png| |
*<sup>[[File:L. Jadeshell icon.png|22px|link=]]</sup>[[L. Jadeshell|Lungo-Nango Jadeshells]] |
||
**All Notorious Monsters in Dynamis (freespawning, lottery, or forced pop) have approximately a 5% chance of dropping one that does not appear to be affected by the [[proc]] system. |
**All Notorious Monsters in Dynamis (freespawning, lottery, or forced pop) have approximately a 5% chance of dropping one that does not appear to be affected by the [[proc]] system. |
||
==Basics== |
==Basics== |
||
===Original Zones=== |
===Original Zones=== |
||
There are two types of mobs that vary in rough level and drops spread throughout the zones. The first is lower level (~75-80), while the other is a higher level population (~90-97). All drop currency and [[Relic Armor]] pieces, however the lower level mobs drop the pop items for Attestation and Fragment NMs (like [[Deluder's Fortune]] and [[Ornate Goad]]; with the higher level mobs dropping the pop items for the Fiendish Tome Notorious Monsters as well as Attestation NMs (like [[Odious Quipu]]). Most free-roaming and lottery pop NMs may drop Odious |
There are two types of mobs that vary in rough level and drops spread throughout the zones. The first is lower level (~75-80), while the other is a higher level population (~90-97). All drop currency and [[Relic Armor]] pieces, however the lower level mobs drop the pop items for Attestation and Fragment NMs (like [[Deluder's Fortune]] and [[Ornate Goad]]); with the higher level mobs dropping the pop items for the Fiendish Tome Notorious Monsters as well as Attestation NMs (like [[Odious Quipu]]). Most free-roaming and lottery pop NMs may drop Odious items that pop the Zone Boss.<br /> |
||
Collecting all the Fiendish Tome Chapters for a given area allows for the player to pop a HQ version of the Zone Boss which can drop many high-end items.<br /> |
Collecting all the Fiendish Tome Chapters for a given area allows for the player to pop a HQ version of the Zone Boss which can drop many high-end items.<br /> |
||
Typically, three of the Time Extension statue NMs will be found among the lower level populations, while the final two will be surrounded by the higher level mobs. |
Typically, three of the Time Extension statue NMs will be found among the lower level populations, while the final two will be surrounded by the higher level mobs. |
||
==Zones== |
==Zones== |
||
{| |
{| width="100%" |
||
|align="center"| |
|||
| |
|||
{|class="Standard C-Highlight R1-White" style="text-align: center;" BGCOLOR="efeeee" |
{|class="Standard C-Highlight R1-White" style="text-align: center;" BGCOLOR="efeeee" |
||
|- BGCOLOR="#4b4d4f" |
|- BGCOLOR="#4b4d4f" |
||
| Line 87: | Line 96: | ||
! height=1px| |
! height=1px| |
||
|} |
|} |
||
[[File:DySandOria-Icon.jpg|link |
[[File:DySandOria-Icon.jpg|link=Dynamis - San d'Oria]] |
||
''Trail Markings'' - [[Southern San d'Oria]] (M-5) |
''Trail Markings'' - [[Southern San d'Oria]] (M-5) |
||
{|style="text-align: center;" |
{|style="text-align: center;" |
||
| Line 99: | Line 108: | ||
! height=1px| |
! height=1px| |
||
|} |
|} |
||
[[File:DyWindurst-Icon.jpg|link |
[[File:DyWindurst-Icon.jpg|link=Dynamis - Windurst]] |
||
''Trail Markings'' - [[Windurst Walls]] (C-12) |
''Trail Markings'' - [[Windurst Walls]] (C-12) |
||
{|style="text-align: center;" |
{|style="text-align: center;" |
||
| Line 111: | Line 120: | ||
! height=1px| |
! height=1px| |
||
|} |
|} |
||
[[File:DyBastok-Icon.jpg|link |
[[File:DyBastok-Icon.jpg|link=Dynamis - Bastok]] |
||
''Trail Markings'' - [[Bastok Mines]] (K-8) |
''Trail Markings'' - [[Bastok Mines]] (K-8) |
||
{|style="text-align: center;" |
{|style="text-align: center;" |
||
| Line 123: | Line 132: | ||
! height=1px| |
! height=1px| |
||
|} |
|} |
||
[[File:DyJeuno-Icon.jpg|link |
[[File:DyJeuno-Icon.jpg|link=Dynamis - Jeuno]] |
||
''Trail Markings'' - [[Ru'Lude Gardens]] (I-9) |
''Trail Markings'' - [[Ru'Lude Gardens]] (I-9) |
||
{|style="text-align: center;" |
{|style="text-align: center;" |
||
| Line 136: | Line 145: | ||
! height=1px| |
! height=1px| |
||
|} |
|} |
||
[[File:DyBeaucedine-Icon.jpg|link |
[[File:DyBeaucedine-Icon.jpg|link=Dynamis - Beaucedine]]<br /> |
||
''Trail Markings'' - [[Beaucedine Glacier]] (F-11) |
''Trail Markings'' - [[Beaucedine Glacier]] (F-11) |
||
{|style="text-align: center;" |
{|style="text-align: center;" |
||
| Line 149: | Line 158: | ||
! height=1px| |
! height=1px| |
||
|} |
|} |
||
[[File:DyXarcabard-Icon.jpg|link |
[[File:DyXarcabard-Icon.jpg|link=Dynamis - Xarcabard]]<br /> |
||
''Trail Markings'' - [[Xarcabard]] (J-9) |
''Trail Markings'' - [[Xarcabard]] (J-9) |
||
{|style="text-align: center;" |
{|style="text-align: center;" |
||
| Line 158: | Line 167: | ||
|- |
|- |
||
|align="center"| |
|align="center"| |
||
{|class="Standard C-Highlight R1-White" style="text-align: center;" BGCOLOR="efeeee" |
{|class="Standard C-Highlight R1-White" style="text-align: center;" BGCOLOR="efeeee"|- BGCOLOR="#4b4d4f" |
||
|- BGCOLOR="#4b4d4f" |
|||
! colspan="100%"| <big>"Dreamworld" Dynamis</big> |
! colspan="100%"| <big>"Dreamworld" Dynamis</big> |
||
|-BGCOLOR="#b12fb1" |
|-BGCOLOR="#b12fb1" |
||
| Line 171: | Line 179: | ||
! height=1px| |
! height=1px| |
||
|} |
|} |
||
[[File:DyValkurm-Icon.jpg|link |
[[File:DyValkurm-Icon.jpg|link=Dynamis - Valkurm]] |
||
'' |
''Hieroglyphics'' - [[Valkurm Dunes]] (G-7) |
||
{|style="text-align: center;" |
{|style="text-align: center;" |
||
|[[Dynamis - Valkurm sliver]]<br /><span style="font-size:160%;">⇘</span> |
|[[Dynamis - Valkurm sliver]]<br /><span style="font-size:160%;">⇘</span> |
||
| Line 183: | Line 191: | ||
! height=1px| |
! height=1px| |
||
|} |
|} |
||
[[File:DyBuburimu-Icon.jpg|link |
[[File:DyBuburimu-Icon.jpg|link=Dynamis - Buburimu]] |
||
'' |
''Hieroglyphics'' - [[Buburimu Peninsula]] (I-9) |
||
{|style="text-align: center;" |
{|style="text-align: center;" |
||
|[[Dynamis - Buburimu sliver]]<br /><span style="font-size:170%;">⇓</span> |
|[[Dynamis - Buburimu sliver]]<br /><span style="font-size:170%;">⇓</span> |
||
| Line 195: | Line 203: | ||
! height=1px| |
! height=1px| |
||
|} |
|} |
||
[[File:DyQufim-Icon.jpg|link |
[[File:DyQufim-Icon.jpg|link=Dynamis - Qufim]] |
||
'' |
''Hieroglyphics'' - [[Qufim Island]] (H-7) |
||
{|style="text-align: center;" |
{|style="text-align: center;" |
||
|[[Dynamis - Qufim sliver]]<br /><span style="font-size:160%;">⇙</span> |
|[[Dynamis - Qufim sliver]]<br /><span style="font-size:160%;">⇙</span> |
||
|} |
|} |
||
|- BGCOLOR="#efeeee" |
|||
|- |
|||
|align="center" colspan="3"| |
|align="center" colspan="3"| |
||
{|class="Standard C-Highlight R1-White" style="max-width: 170px;" BGCOLOR="efeeee" |
{|class="Standard C-Highlight R1-White" style="max-width: 170px;" BGCOLOR="efeeee" |
||
| Line 208: | Line 216: | ||
! height=1px| |
! height=1px| |
||
|} |
|} |
||
[[File:DyTavnazia-Icon.jpg|link |
[[File:DyTavnazia-Icon.jpg|link=Dynamis - Tavnazia]]<br /> |
||
'' |
''Hieroglyphics'' - [[Tavnazian Safehold]] (H-9) |
||
{|style="text-align: center;" |
{|style="text-align: center;" |
||
|[[Dynamis - Tavnazia sliver]] |
|[[Dynamis - Tavnazia sliver]] |
||
|} |
|} |
||
|- |
|||
|} |
|} |
||
|- |
|- |
||
|align="center"| |
|||
| |
|||
{|class="Standard C-Highlight R1-White" style="text-align: center;" BGCOLOR="efeeee" |
{|class="Standard C-Highlight R1-White" style="text-align: center;" BGCOLOR="efeeee" |
||
|- BGCOLOR="#4b4d4f" |
|- BGCOLOR="#4b4d4f" |
||
! colspan="100%"| <big> |
! colspan="100%"| <big>Dynamis - Divergence</big> |
||
|-BGCOLOR="#b12fb1" |
|-BGCOLOR="#b12fb1" |
||
! colspan="100%" height=1px| |
! colspan="100%" height=1px| |
||
|- BGCOLOR="#efeeee" |
|- BGCOLOR="#efeeee" |
||
|align="center"| |
|align="center"| |
||
{|class="Standard C-Highlight R1-White" style="max-width: |
{|class="Standard C-Highlight R1-White" style="max-width: 170px;" BGCOLOR="efeeee" |
||
|- BGCOLOR="#4b4d4f" |
|- BGCOLOR="#4b4d4f" |
||
![[Dynamis - San d'Oria (D)]] |
![[Dynamis - San d'Oria (D)]] |
||
| Line 230: | Line 237: | ||
! height=1px| |
! height=1px| |
||
|} |
|} |
||
[[File:DD- |
[[File:DD-San d'Oria-Icon.jpg|link=Dynamis - San d'Oria (D)]] |
||
'' |
''Trail Markings'' - [[Southern San d'Oria]] (K-10) |
||
{|style="text-align: center;" |
|||
|[[Elvaan Mask of Light]] |
|||
|} |
|||
|align="center"| |
|align="center"| |
||
{|class="Standard C-Highlight R1-White" style="max-width: 170px;" BGCOLOR="efeeee" |
{|class="Standard C-Highlight R1-White" style="max-width: 170px;" BGCOLOR="efeeee" |
||
|- BGCOLOR="#4b4d4f" |
|- BGCOLOR="#4b4d4f" |
||
![[Dynamis - Bastok (D)]] |
|||
!TBA |
|||
|-BGCOLOR="#b12fb1" |
|-BGCOLOR="#b12fb1" |
||
! height=1px| |
! height=1px| |
||
|} |
|} |
||
[[File: |
[[File:DD-Bastok-Icon.jpg|link=Dynamis - Bastok (D)]] |
||
''Trail Markings'' - [[Bastok Mines]] (I-9) |
|||
''Enigmatic Footprints'' - |
|||
{|style="text-align: center;" |
|||
|[[Galka Mask of Light]] |
|||
|} |
|||
|align="center"| |
|align="center"| |
||
{|class="Standard C-Highlight R1-White" style="max-width: 170px;" BGCOLOR="efeeee" |
{|class="Standard C-Highlight R1-White" style="max-width: 170px;" BGCOLOR="efeeee" |
||
|- BGCOLOR="#4b4d4f" |
|- BGCOLOR="#4b4d4f" |
||
![[Dynamis - Windurst (D)]] |
|||
!Dynamis-Divergence Bastok (Coming soon in December 2017 version update) |
|||
|-BGCOLOR="#b12fb1" |
|-BGCOLOR="#b12fb1" |
||
! height=1px| |
! height=1px| |
||
|} |
|} |
||
[[File: |
[[File:DD-Windurst-Icon.jpg|link=Dynamis - Windurst (D)]] |
||
''Trail Markings'' - [[Windurst Walls]] (H-7) |
|||
''Enigmatic Footprints'' - |
|||
{|style="text-align: center;" |
|||
|[[Tarutaru Mask of Light]] |
|||
|} |
|||
|align="center"| |
|align="center"| |
||
{|class="Standard C-Highlight R1-White" style="max-width: 170px;" BGCOLOR="efeeee" |
{|class="Standard C-Highlight R1-White" style="max-width: 170px;" BGCOLOR="efeeee" |
||
|- BGCOLOR="#4b4d4f" |
|- BGCOLOR="#4b4d4f" |
||
![[Dynamis - Jeuno (D)]] |
|||
!TBA |
|||
|-BGCOLOR="#b12fb1" |
|-BGCOLOR="#b12fb1" |
||
! height=1px| |
! height=1px| |
||
|} |
|} |
||
[[File: |
[[File:DD-Jeuno-Icon.jpg|link=Dynamis - Jeuno (D)]] |
||
''Trail Markings'' - [[Ru'Lude Gardens]] (F-9) |
|||
''Enigmatic Footprints'' - |
|||
{|style="text-align: center;" |
|||
|- |
|||
|[[Mithra Mask of Light]] |
|||
|colspan="4" align="center"| |
|||
{|class="Standard C-Highlight R1-White" style="max-width: 170px;" BGCOLOR="efeeee" |
|||
|- BGCOLOR="#4b4d4f" |
|||
!TBA |
|||
|-BGCOLOR="#b12fb1" |
|||
! height=1px| |
|||
|} |
|} |
||
[[File:DyBeaucedine-Icon.jpg|link=Dynamis - Beaucedine|alt=Dynamis - Beaucedine]]<br /> |
|||
''Enigmatic Footprints'' - |
|||
|- |
|- |
||
|} |
|} |
||
| Line 284: | Line 293: | ||
|valign="top"| |
|valign="top"| |
||
===Time Extension-Proc relationship=== |
===Time Extension-Proc relationship=== |
||
{|class="Standard R-Highlight R1-White" style="text-align: center;" BGCOLOR="efeeee" |
{|class="Standard R-Highlight-Purple R1-White" style="text-align: center;" BGCOLOR="efeeee" |
||
|- BGCOLOR="#4b4d4f" |
|- BGCOLOR="#4b4d4f" |
||
! # |
! # |
||
| Line 328: | Line 337: | ||
===Beastman Job-Proc Relationship=== |
===Beastman Job-Proc Relationship=== |
||
{|class="Standard R-Highlight R1-White" style="text-align: center;" BGCOLOR="efeeee" |
{|class="Standard R-Highlight-Purple R1-White" style="text-align: center;" BGCOLOR="efeeee" |
||
|- BGCOLOR="#4b4d4f" |
|- BGCOLOR="#4b4d4f" |
||
! Monster Job |
! Monster Job |
||
| Line 351: | Line 360: | ||
:'''''(Beastman Job-Proc Rates assumes 5 Time Extensions acquired)''''' |
:'''''(Beastman Job-Proc Rates assumes 5 Time Extensions acquired)''''' |
||
|} |
|} |
||
=== Special Proc System Notes for "Dreamworld" zones === |
|||
{| |
|||
<hr> |
|||
| |
|||
Just as in the original Dynamis zones, "Dreamworld" Dynamis zones have beastmen ([[:Category:Hydra Vanguard|Hydra Vanguard]], [[:Category:Kindred Vanguard|Kindred Vanguard]], [[:Category:Goblin Vanguard|Goblin Vanguard]], [[:Category:Orcish Vanguard|Orcish Vanguard]], [[:Category:Yagudo Vanguard|Yagudo Vanguard]], and [[:Category:Quadav Vanguard|Quadav Vanguard]]) that follow the same proccing rules as their original Dynamis zone counterparts above. Proc color also varies with number of Time Extensions in the same manner as original Dynamis zones; however, [[:Category:Nightmare Monsters|Nightmare monsters]] and [[Notorious Monster]]s obey slightly different proc rules. |
|||
Nightmare monsters (barring [[Nightmare Taurus]]) proc to a certain type of action at a certain time based on the type of currency they drop.<br />Any action of the appropriate type (repeated or not) has an equal chance to proc as long as it is the appropriate hour. Unlike the above system, where the proc is based on job, the appropriate proc changes based on the time of day and type of currency that a monster drops.<br />The proc type '''''<u>can</u>''''' change ''while'' fighting it.<br />The relation for each monster type is shown in the table to the left. It should be noted that "WS" also includes Automaton JAs as above and "MA" below also includes Blood Pacts. Also, [[Area of Effect]] [[Weapon Skill]]s and [[:Category:Spells|Spells]] have a dramatically reduced proc rate on monsters other than their immediate target in the "Dreamworld" Dynamis zones. |
|||
For [[Notorious Monster]]s and [[Nightmare Taurus|Nightmare Tauri]], there appears to be a chance that any action (MA, JA, or WS) will cause a proc and they can drop any type of currency. |
|||
====[[File:White!!.png|link=]] White Procs==== |
|||
If the procing character has locked their subjob upon entry to a "Dreamworld" Dynamis zone, there is a ~1% chance that any proc you get will be white instead of the relevant color based on your number of Time Extensions. As seen in the above table, White Procs appear to force a 100-piece of currency to drop 100% of the time.<br /> |
|||
Other players in the party may have sub job '''enabled''' and be on the hate list and a white proc ''<u>will</u>'' still occur, but the person who made the proc '''''<u>must</u>''''' have their sub job restricted.<br />White Procs have only been witnessed on Nightmare monsters, but it is likely possible that they can occur on any Beastmen and Notorious Monsters in "Dreamworld" Dynamis zones as well. |
|||
{|align=center |
|||
| valign=top colspan="2" style="text-align:center;"| |
|||
===Nightmare Monster-Time-Proc Relationship=== |
===Nightmare Monster-Time-Proc Relationship=== |
||
{|class="Standard R-Highlight R1-White" style="text-align: center;" BGCOLOR="efeeee" |
|||
|- |
|||
| valign=top| |
|||
{|class="Standard R-Highlight-Purple R1-White" style="text-align: center;" BGCOLOR="efeeee" |
|||
|- BGCOLOR="#4b4d4f" |
|- BGCOLOR="#4b4d4f" |
||
! Zone |
! Zone |
||
| Line 366: | Line 391: | ||
! colspan="100%" height=1px| |
! colspan="100%" height=1px| |
||
|- BGCOLOR="#efeeee" |
|- BGCOLOR="#efeeee" |
||
| rowspan=3 | [[Dynamis - Buburimu|Buburimu]] |
| BGCOLOR="#e8e8e8" rowspan=3 | [[Dynamis - Buburimu|Buburimu]] |
||
|[[Nightmare Crab|Crab]]<br />[[Nightmare Dhalmel|Dhalmel]]<br />[[Nightmare Scorpion|Scorpion]] |
|||
| |
|||
{|width="100%" |
|||
|[[Nightmare Crab|Crab]] |
|||
|- |
|||
| [[Nightmare Dhalmel|Dhalmel]] |
|||
|- |
|||
| [[Nightmare Scorpion|Scorpion]] |
|||
|} |
|||
| WS |
| WS |
||
| Ma |
| Ma |
||
| JA |
| JA |
||
|<sup>[[File:T. Whiteshell icon.png|20px|link=]]</sup> |
| [[T. Whiteshell|Shells]]<br /><sup>[[File:T. Whiteshell icon.png|20px|link=]]</sup> |
||
|- |
|- |
||
|[[Nightmare Crawler|Crawler]]<br />[[Nightmare Raven|Raven]]<br />[[Nightmare Uragnite|Uragnite]] |
|||
| |
|||
{|width="100%" |
|||
| [[Nightmare Crawler|Crawler]] |
|||
|- |
|||
| [[Nightmare Raven|Raven]] |
|||
|- |
|||
| [[Nightmare Uragnite|Uragnite]] |
|||
|} |
|||
| JA |
| JA |
||
| WS |
| WS |
||
| Ma |
| Ma |
||
| <sup>[[File:1 Byne Bill icon.png|20px|link=]]</sup> |
| [[1 Byne Bill|Bynes]]<br /><sup>[[File:1 Byne Bill icon.png|20px|link=]]</sup> |
||
|- |
|- |
||
|[[Nightmare Bunny|Bunny]]<br />[[Nightmare Eft|Eft]]<br />[[Nightmare Mandragora|Mandragora]] |
|||
| |
|||
{|width="100%" |
|||
| [[Nightmare Bunny|Bunny]] |
|||
|- |
|||
| [[Nightmare Eft|Eft]] |
|||
|- |
|||
| [[Nightmare Mandragora|Mandragora]] |
|||
|} |
|||
| Ma |
| Ma |
||
| JA |
| JA |
||
| WS |
| WS |
||
| <sup>[[File:O. Bronzepiece icon.png|20px|link=]]</sup> |
| [[O. Bronzepiece|Bronze]]<br /><sup>[[File:O. Bronzepiece icon.png|20px|link=]]</sup> |
||
|-BGCOLOR="#b12fb1" |
|-BGCOLOR="#b12fb1" |
||
! colspan="100%" height=1px| |
! colspan="100%" height=1px| |
||
|- BGCOLOR="#efeeee" |
|- BGCOLOR="#efeeee" |
||
| rowspan=3 | [[Dynamis - Valkurm|Valkurm]] |
| BGCOLOR="#e8e8e8" rowspan=3 | [[Dynamis - Valkurm|Valkurm]] |
||
|[[Nightmare Goobbue|Goobbue]]<br />[[Nightmare Manticore|Manticore]]<br />[[Nightmare Treant|Treant]] |
|||
| |
|||
{|width="100%" |
|||
| [[Nightmare Goobbue|Goobbue]] |
|||
|- |
|||
| [[Nightmare Manticore|Manticore]] |
|||
|- |
|||
| [[Nightmare Treant|Treant]] |
|||
|} |
|||
| WS |
| WS |
||
| Ma |
| Ma |
||
| JA |
| JA |
||
| <sup>[[File:T. Whiteshell icon.png|20px|link=]]</sup> |
| [[T. Whiteshell|Shells]]<br /><sup>[[File:T. Whiteshell icon.png|20px|link=]]</sup> |
||
|- |
|- |
||
|[[Nightmare Fly|Fly]]<br />[[Nightmare Flytrap|Flytrap]]<br />[[Nightmare Funguar|Funguar]] |
|||
| |
|||
{|width="100%" |
|||
| [[Nightmare Fly|Fly]] |
|||
|- |
|||
| [[Nightmare Flytrap|Flytrap]] |
|||
|- |
|||
| [[Nightmare Funguar|Funguar]] |
|||
|} |
|||
| JA |
| JA |
||
| WS |
| WS |
||
| Ma |
| Ma |
||
| <sup>[[File:1 Byne Bill icon.png|20px|link=]]</sup> |
| [[1 Byne Bill|Bynes]]<br /><sup>[[File:1 Byne Bill icon.png|20px|link=]]</sup> |
||
|- |
|- |
||
|[[Nightmare Hippogryph|Hippogryph]]<br />[[Nightmare Sabotender|Sabotender]]<br />[[Nightmare Sheep|Sheep]] |
|||
| |
|||
{|width="100%" |
|||
| [[Nightmare Hippogryph|Hippogryph]] |
|||
|- |
|||
| [[Nightmare Sabotender|Sabotender]] |
|||
|- |
|||
| [[Nightmare Sheep|Sheep]] |
|||
|} |
|||
| Ma |
| Ma |
||
| JA |
| JA |
||
| WS |
| WS |
||
| <sup>[[File:O. Bronzepiece icon.png|20px|link=]]</sup> |
| [[O. Bronzepiece|Bronze]]<br /><sup>[[File:O. Bronzepiece icon.png|20px|link=]]</sup> |
||
|- |
|||
|} |
|||
|valign=top| |
|||
{|class="Standard R-Highlight-Purple R1-White" style="text-align: center;" BGCOLOR="efeeee" |
|||
|- BGCOLOR="#4b4d4f" |
|||
! Zone |
|||
! Type |
|||
! 0:00~8:00 |
|||
! 8:00~16:00 |
|||
! 16:00~0:00 |
|||
! Currency |
|||
|-BGCOLOR="#b12fb1" |
|-BGCOLOR="#b12fb1" |
||
! colspan="100%" height=1px| |
! colspan="100%" height=1px| |
||
|- BGCOLOR="#efeeee" |
|- BGCOLOR="#efeeee" |
||
| rowspan=3 | [[Dynamis - Qufim|Qufim]] |
| BGCOLOR="#e8e8e8" rowspan=3 | [[Dynamis - Qufim|Qufim]] |
||
|[[Nightmare Diremite|Diremite]]<br />[[Nightmare Raptor|Raptor]]<br />[[Nightmare Tiger|Tiger]] |
|||
| |
|||
{|width="100%" |
|||
|[[Nightmare Diremite|Diremite]] |
|||
|- |
|||
| [[Nightmare Raptor|Raptor]] |
|||
|- |
|||
| [[Nightmare Tiger|Tiger]] |
|||
|} |
|||
| WS |
| WS |
||
| Ma |
| Ma |
||
| JA |
| JA |
||
| <sup>[[File:T. Whiteshell icon.png|20px|link=]]</sup> |
| [[T. Whiteshell|Shells]]<br /><sup>[[File:T. Whiteshell icon.png|20px|link=]]</sup> |
||
|- |
|- |
||
|[[Nightmare Gaylas|Gaylas]]<br />[[Nightmare Kraken|Kraken]]<br />[[Nightmare Roc|Roc]] |
|||
| |
|||
{|width="100%" |
|||
| [[Nightmare Gaylas|Gaylas]] |
|||
|- |
|||
| [[Nightmare Kraken|Kraken]] |
|||
|- |
|||
| [[Nightmare Roc|Roc]] |
|||
|} |
|||
| JA |
| JA |
||
| WS |
| WS |
||
| Ma |
| Ma |
||
| <sup>[[File:1 Byne Bill icon.png|20px|link=]]</sup> |
| [[1 Byne Bill|Bynes]]<br /><sup>[[File:1 Byne Bill icon.png|20px|link=]]</sup> |
||
|- |
|- |
||
|[[Nightmare Snoll|Snoll]]<br />[[Nightmare Stirge|Stirge]]<br />[[Nightmare Weapon|Weapon]] |
|||
| |
|||
{|width="100%" |
|||
| [[Nightmare Snoll|Snoll]] |
|||
|- |
|||
| [[Nightmare Stirge|Stirge]] |
|||
|- |
|||
| [[Nightmare Weapon|Weapon]] |
|||
|} |
|||
| Ma |
| Ma |
||
| JA |
| JA |
||
| WS |
| WS |
||
| <sup>[[File:O. Bronzepiece icon.png|20px|link=]]</sup> |
| [[O. Bronzepiece|Bronze]]<br /><sup>[[File:O. Bronzepiece icon.png|20px|link=]]</sup> |
||
|-BGCOLOR="#b12fb1" |
|-BGCOLOR="#b12fb1" |
||
! colspan="100%" height=1px| |
! colspan="100%" height=1px| |
||
|- BGCOLOR="#efeeee" |
|- BGCOLOR="#efeeee" |
||
| rowspan=3 | [[Dynamis - Tavnazia|Tavnazia]] |
| BGCOLOR="#e8e8e8" rowspan=3 | [[Dynamis - Tavnazia|Tavnazia]] |
||
|[[Nightmare Leech|Leech]]<br />[[Nightmare Worm|Worm]] |
|||
| |
|||
{|width="100%" |
|||
|[[Nightmare Leech|Leech]] |
|||
|- |
|||
| [[Nightmare Worm|Worm]] |
|||
|} |
|||
| WS |
| WS |
||
| Ma |
| Ma |
||
| JA |
| JA |
||
| <sup>[[File:T. Whiteshell icon.png|20px|link=]]</sup> |
| [[T. Whiteshell|Shells]]<br /><sup>[[File:T. Whiteshell icon.png|20px|link=]]</sup> |
||
|- |
|- |
||
|[[Nightmare Bugard|Bugard]]<br />[[Nightmare Hornet|Hornet]] |
|||
| |
|||
{|width="100%" |
|||
|[[Nightmare Bugard|Bugard]] |
|||
|- |
|||
| [[Nightmare Hornet|Hornet]] |
|||
|} |
|||
| JA |
| JA |
||
| WS |
| WS |
||
| Ma |
| Ma |
||
| <sup>[[File:1 Byne Bill icon.png|20px|link=]]</sup> |
| [[1 Byne Bill|Bynes]]<br /><sup>[[File:1 Byne Bill icon.png|20px|link=]]</sup> |
||
|- |
|- |
||
|[[Nightmare Cluster|Cluster]]<br />[[Nightmare Makara|Makara]] |
|||
| |
|||
{|width="100%" |
|||
|[[Nightmare Cluster|Cluster]] |
|||
|- |
|||
| [[Nightmare Makara|Makara]] |
|||
|} |
|||
| Ma |
| Ma |
||
| JA |
| JA |
||
| WS |
| WS |
||
| <sup>[[File:O. Bronzepiece icon.png|20px|link=]]</sup> |
| [[O. Bronzepiece|Bronze]]<br /><sup>[[File:O. Bronzepiece icon.png|20px|link=]]</sup> |
||
|- |
|- |
||
|} |
|} |
||
|valign="top"| |
|||
=== Special Proc System Notes for "Dreamworld" zones === |
|||
<hr> |
|||
Just as in the original Dynamis zones, "Dreamworld" Dynamis zones have beastmen ([[:Category:Hydra Vanguard|Hydra Vanguard]], [[:Category:Kindred Vanguard|Kindred Vanguard]], [[:Category:Goblin Vanguard|Goblin Vanguard]], [[:Category:Orcish Vanguard|Orcish Vanguard]], [[:Category:Yagudo Vanguard|Yagudo Vanguard]], and [[:Category:Quadav Vanguard|Quadav Vanguard]]) that follow the same proccing rules as their original Dynamis zone counterparts above. Proc color also varies with number of Time Extensions in the same manner as original Dynamis zones; however, [[:Category:Nightmare Monsters|Nightmare monsters]] and [[Notorious Monster]]s obey slightly different proc rules. |
|||
Nightmare monsters (barring [[Nightmare Taurus]]) proc to a certain type of action at a certain time based on the type of currency they drop.<br />Any action of the appropriate type (repeated or not) has an equal chance to proc as long as it is the appropriate hour. Unlike the above system, where the proc is based on job, the appropriate proc changes based on the time of day and type of currency that a monster drops.<br />The proc type '''''<u>can</u>''''' change ''while'' fighting it.<br />The relation for each monster type is shown in the table to the left. It should be noted that "WS" also includes Automaton JAs as above and "MA" below also includes Blood Pacts. Also, [[Area of Effect]] [[Weapon Skill]]s and [[:Category:Spells|Spells]] have a dramatically reduced proc rate on monsters other than their immediate target in the "Dreamworld" Dynamis zones. |
|||
For [[Notorious Monster]]s and [[Nightmare Taurus|Nightmare Tauri]], there appears to be a chance that any action (MA, JA, or WS) will cause a proc and they can drop any type of currency. |
|||
====White Procs==== |
|||
If the procing character has locked their subjob upon entry to a "Dreamworld" Dynamis zone, there is a ~1% chance that any proc you get will be white instead of the relevant color based on your number of Time Extensions. As seen in the above table, White Procs appear to force a 100-piece of currency to drop 100% of the time. Other players in the party may have sub job '''enabled''' and be on the hate list and a white proc ''<u>will</u>'' still occur, but the person who made the proc '''''<u>must</u>''''' have their sub job restricted.<br />White Procs have only been witnessed on Nightmare monsters, but it is likely possible that they can occur on any Beastmen and Notorious Monsters in "Dreamworld" Dynamis zones as well. |
|||
|} |
|} |
||
Latest revision as of 06:59, 21 April 2024
|
Entry Requirements
Original Areas
- Be level 65+
- Have Rank 6 or higher in one of the nation's missions
- Zone into Xarcabard for a cutscene.
- Examine any Trail Markings in any of the three starter cities or Jeuno to receive another cutscene and the Key Item Vial of Shrouded Sand.
- Bastok Mines (K-8), Southern San d'Oria (L-6), Windurst Walls (C-12), or Ru'Lude Gardens (I-9)
- The Goblin NPCs near the entrances in Beadeaux (E-7), Castle Oztroja (F-8), and Davoi (J-7) will now do business with you.
- Trade 50,000 gil to one of the above Goblin NPCs in the Beastmen strongholds to purchase the permanent Key Item Prismatic hourglass.
 Timeless Hourglasses and
  Perpetual Hourglasses are no longer relevant, purchasable, or usable.
- Should you still possess one, you may trade it to one of the Goblin NPCs in the Beastmen strongholds for a refund.
- With both Vial and Hourglass Key Items, you may enter any of the original city zones (Bastok, Jeuno, San d'Oria, and Windurst) once per day (Resetting at Midnight in Japan).
- Unlimited entry is granted if the player possesses the "Rhapsody in Azure" reward from Rhapsodies of Vana'diel mission progression.
- Further Dynamis zones are unlocked by defeating the Zone Boss for each of these beginning zones.
- To enter a zone, interact with the corresponding Trail Markings.
- Parties must be between 1 and 18 players.
- Every party member must have the Prismatic hourglass key item.
- Trusts may be called
- Parties must be between 1 and 18 players.
"Dreamworld" Areas
- Completed Promathia Mission 3-5
- Be in possession of the Vial and Hourglass Key Items as above.
- With both Vial and Hourglass Key Items, you may enter any of the first three zones (Buburimu, Qufim, and Valkurm) once per day (Resetting at Midnight in Japan).
- Unlimited entry is granted if the player possesses the "Rhapsody in Azure" reward from Rhapsodies of Vana'diel mission progression.
- Further Dynamis zones are unlocked by defeating the Zone Boss for each of these beginning zones.
- To enter a zone, interact with the corresponding Hieroglyphics.
- Parties must be between 1 and 18 players.
- Every party member must have the Prismatic hourglass key item.
- Trusts may be called
- Parties must be between 1 and 18 players.
Time Limit
- The initial time limit is 60 minutes (Earth time).
- Time may be extended by killing 5 specific statues (they check as "Impossible to Gauge") that will give the player the following key items:
 Crimson granules of time
- Azure granules of time
- Amber granules of time
- Alabaster granules of time
- Obsidian granules of time
- These key items will vanish when you leave the zone.
- You cannot get a time extension from the same statue twice in the same run.
Monthly Adventurer Campaigns
There is one type of campaign that may run any given month.
Dynamis Granules of Time Campaign
- When this Monthly Adventurer Campaign is active, time extensions are all available upon entry to Dynamis.
- All time extensions in a zone are automatically given to a player every time they zone into any Dynamis area.
- Note: Divergence areas are not part of this campaign, only the level 75 era zones are.
- All time extensions in a zone are automatically given to a player every time they zone into any Dynamis area.
Currencies
 Ordelle Bronzepieces
- Dropped by Orcish Vanguard, Goblin Vanguard, Hydra Vanguard, Kindred Vanguard, and appropriate Nightmare Monsters.
 Montiont Silverpieces
- All Notorious Monsters in Dynamis (freespawning, lottery, or forced pop) have approximately a 5% chance of dropping one that does not appear to be affected by the proc system.
 1 Byne Bills
- Dropped by Quadav Vanguard, Goblin Vanguard, Hydra Vanguard, Kindred Vanguard, and appropriate Nightmare Monsters.
 100 Byne Bills
- All Notorious Monsters in Dynamis (freespawning, lottery, or forced pop) have approximately a 5% chance of dropping one that does not appear to be affected by the proc system.
 Tukuku Whiteshells
- Dropped by Yagudo Vanguard, Goblin Vanguard, Hydra Vanguard, Kindred Vanguard, and appropriate Nightmare Monsters.
 Lungo-Nango Jadeshells
- All Notorious Monsters in Dynamis (freespawning, lottery, or forced pop) have approximately a 5% chance of dropping one that does not appear to be affected by the proc system.
Basics
Original Zones
There are two types of mobs that vary in rough level and drops spread throughout the zones. The first is lower level (~75-80), while the other is a higher level population (~90-97). All drop currency and Relic Armor pieces, however the lower level mobs drop the pop items for Attestation and Fragment NMs (like Deluder's Fortune and Ornate Goad); with the higher level mobs dropping the pop items for the Fiendish Tome Notorious Monsters as well as Attestation NMs (like Odious Quipu). Most free-roaming and lottery pop NMs may drop Odious items that pop the Zone Boss.
Collecting all the Fiendish Tome Chapters for a given area allows for the player to pop a HQ version of the Zone Boss which can drop many high-end items.
Typically, three of the Time Extension statue NMs will be found among the lower level populations, while the final two will be surrounded by the higher level mobs.
Zones
Dynamis Proc System
Since the May 2011 update[1], Dynamis monsters have enjoyed the integration of a proc system similar to the one in Abyssea. Players that manage to Proc monsters enjoy higher currency and item drop rates, both from normal and Notorious Monsters.
Unlike Abyssea or Voidwatch, where it is possible to proc the same monster multiple times, Dynamis monsters can only be procced once.
In situations with a variable number of Time Extensions in the same party, a proc of any color removes the ability of other colors to Proc. So someone with three Time Extensions can ![]() Blue Proc and no one will be able to
Blue Proc and no one will be able to ![]() Red Proc. The higher the level of the proc increases drop rate of currency, as shown below, but seem to have no effect at all on the Relic Armor nor 100-piece drop rate. Procing a monster forces one coin to drop 100% of the time, with a potential maximum of 4.
Red Proc. The higher the level of the proc increases drop rate of currency, as shown below, but seem to have no effect at all on the Relic Armor nor 100-piece drop rate. Procing a monster forces one coin to drop 100% of the time, with a potential maximum of 4.
With Treasure Hunter on every procced monster, you can expect approximately 1.7 coins per kill on average. Without Treasure Hunter, you can expect about 1.25 coins per kill on average. Without a proc, the coin drop rate is very low (~10%![]() ) and the maximum observed is 2 coins
) and the maximum observed is 2 coins![]() .
.
There is no evidence that any spell, job ability, or weapon skill is more likely to proc than any other spell, job ability, or weapon skill. There's simply a certain chance of any offensive action procing that increases with the number of Time Extensions you have received. As long as you're using the correct type of action, you have the same chance to proc, unless the action is resisted, misses, or has "no effect" (except for Dispel and Magic Finale which can proc on "no effect" messages, but not "resists").
Time Extension-Proc relationship
*This is 1% of your procs, not a 1% base rate. |
Beastman Job-Proc Relationship
*This only applies abilities that target the enemy, like Blaster, Flaming Crush, and Strobe.
|
Special Proc System Notes for "Dreamworld" zones
Just as in the original Dynamis zones, "Dreamworld" Dynamis zones have beastmen (Hydra Vanguard, Kindred Vanguard, Goblin Vanguard, Orcish Vanguard, Yagudo Vanguard, and Quadav Vanguard) that follow the same proccing rules as their original Dynamis zone counterparts above. Proc color also varies with number of Time Extensions in the same manner as original Dynamis zones; however, Nightmare monsters and Notorious Monsters obey slightly different proc rules.
Nightmare monsters (barring Nightmare Taurus) proc to a certain type of action at a certain time based on the type of currency they drop.
Any action of the appropriate type (repeated or not) has an equal chance to proc as long as it is the appropriate hour. Unlike the above system, where the proc is based on job, the appropriate proc changes based on the time of day and type of currency that a monster drops.
The proc type can change while fighting it.
The relation for each monster type is shown in the table to the left. It should be noted that "WS" also includes Automaton JAs as above and "MA" below also includes Blood Pacts. Also, Area of Effect Weapon Skills and Spells have a dramatically reduced proc rate on monsters other than their immediate target in the "Dreamworld" Dynamis zones.
For Notorious Monsters and Nightmare Tauri, there appears to be a chance that any action (MA, JA, or WS) will cause a proc and they can drop any type of currency.
 White Procs
If the procing character has locked their subjob upon entry to a "Dreamworld" Dynamis zone, there is a ~1% chance that any proc you get will be white instead of the relevant color based on your number of Time Extensions. As seen in the above table, White Procs appear to force a 100-piece of currency to drop 100% of the time.
Other players in the party may have sub job enabled and be on the hate list and a white proc will still occur, but the person who made the proc must have their sub job restricted.
White Procs have only been witnessed on Nightmare monsters, but it is likely possible that they can occur on any Beastmen and Notorious Monsters in "Dreamworld" Dynamis zones as well.
Nightmare Monster-Time-Proc Relationship | |||||||||||||||||||||||||||||||||||||||||||||||||||||||||||||||||||||||||||||||||
|
| ||||||||||||||||||||||||||||||||||||||||||||||||||||||||||||||||||||||||||||||||
References
Subcategories
This category has the following 11 subcategories, out of 11 total.
Pages in category "Dynamis"
The following 29 pages are in this category, out of 29 total.
