The Voracious Resurgence | |
| Prime Weapons • Ultimate Weapons • Ultimate Augments • Abjurations iL119 • JSE Necks • Divergence Augments • Escutcheons | |
| Reforged Armor Artifact: +1 • iL109 • iL119/+2/+3/+4 Relic: +1/+2 • iL109 • iL119/+2/+3/+4 Empyrean: +1/+2 • iL109 • iL119/+2/+3 |
Guides • Crafting • Trusts • Apex Monsters |
Category:Delve
|
Getting Started
Eligibility Requirements
In order to participate in Delve Fractures, players must satisfy the following:
- Seekers of Adoulin expansion pack installed and registered
- 3-18 alliance members at level 95 or above
- Alliance leader must possess a Yantric planchette key item
- Yantric planchette key item is obtained by trading the corresponding zone's rock to the Anomaly Expert in Eastern Adoulin. See her page for more details.
Field battles have no requirement other than access to the areas (Seekers of Adoulin installed and registered).
There are two general progression routes for Delve, depending on how experienced your group is. More information on the various items required is located in the Progression section.
- For a less experienced group, defeating NMs in the field areas until Yggzi Beads are obtained prior to entering a fracture, then utilizing the Yggzi Beads to remove the NMs from the fracture can result in an easier time once inside the fracture since fewer NMs will need to be defeated within the time limit before taking on the boss.
- For a more experienced and better geared group, it is possible to skip directly to the fracture and defeat all five NMs and the boss in one 45 minute run.
Delve Areas
Field-based delve battles take place in outdoor areas which correspond with the locations of the seven Naakuals. Event-related items involved in each area are distinguished with the color corresponding with the element of that area's Naakual. Delve Fractures take place in Cirdas Caverns (U) and Yorcia Weald (U), and are entered at Veils located in each field area. All players in the alliance and anywhere in the entry field zone will be taken into the Fracture instance upon entry.
Cirdas Caverns (U)
- Morimar Basalt Fields: Alizarin - Veil: (I-5) nearest to Bivouac #2.
- Foret de Hennetiel: Zaffre - Veil: (E-7) nearest to Bivouac #4, must cross a fallen Reive tree.
- Ceizak Battlegrounds: Celadon - Veil: (H-8) nearest to Bivouac #1
Yorcia Weald (U)
- Yorcia Weald: Russet - Veil: (J-7) Head North from the Frontier Station.
- Marjami Ravine: Phlox - Veil: (M-9) Head South from the Frontier Station.
- Kamihr Drifts: Aster - Veil: (H-11) Head South from Bivouac #2.
Content Level
Notorious monsters in Delve are grouped into three distinct content levels, based on the monster's tier. The content level of notorious monsters is the same both inside and outside of the Fracture areas (bosses only appear within the Fractures).
- Content Level 11: Tier I, II, and III notorious monsters
- Content Level 14: Tier IV and V notorious monsters
- Content Level 20: Fracture bosses
Progression
Each area is considered a separate path and has progression independent from the others consisting of a series of NM battles in the Field and/or a series of identical NM battles culminating in a boss battle in a section of Cirdas Caverns (U) or Yorcia Weald (U) known as a Fracture.
There are two levels of combat in Delve: Notorious Monster Combat (which is further divided into two tiers) and Boss Combat. In order to progress to Boss Combat, a group must defeat all five unique notorious monsters inside the a Fracture during a single entry, or use beads obtained from defeating the notorious monsters in the field to remove up to three corresponding monster from the fracture, then defeat the remaining notorious monsters.
Each of the 30 notorious monsters and six bosses has at least one unique characteristic which can (and sometimes must) be exploited resulting in a faster and/or easier win (reference individual NM pages for details). The notorious monsters are divided into two difficulty tiers: NMs I, II, and III make up the lower difficulty tier (Content Level 11) while NMs IV and V make up the higher difficulty tier (Content Level 14) in each area.
Each area and tier has a corresponding key item which is automatically obtained after defeating any one of the associated NMs and allows the holder to use Mweya Plasm to purchase any equipment item which the associated NMs can drop.


Field NM Combat
Field NM Combat is an entirely skippable portion to Delve content which can be utilized by less experienced groups to take on certain NMs in a less hostile environment, and potentially obtain a bead which allows that NM to be skipped inside the Fracture. More experienced groups may skip directly to the Fracture and defeat all five NMs and the boss in one run.
Yggrete Shards can be used to spawn Notorious Monsters in the field area outside the Fracture. Shards are relatively common and can be obtained by defeating normal monsters or completing Colonization and Lair Reives in the corresponding field area. See individual shard pages linked in the table above for more specific information on obtaining. After being spawned, the notorious monster must be defeated within 20 minutes or it will disappear. Please note that you DO receive the key item even if you are dead when the enemy is defeated.
The primary reason for defeating NMs in the field is to obtain their corresponding Yggzi Bead items specific to each NM. The drop rate of beads is 100%.
By combining a Bead with a Yantric Planchette, that particular monster will be removed from the Fracture area, reducing the number of notorious monsters which need to be defeated. This can be done up to three times for one Fracture attempt, leaving only two remaining notorious monsters to be defeated within the fracture before the boss monster can be attempted.
Fractures
Maps
| Fracture Maps |
|---|
|


Entering the Fracture
Upon defeating any normal monster in the field areas in which Veils are present, players may receive Yggrete Rocks (R) which correspond to that location. After a player has met certain requirements (listed below), they can trade Yggrete Rocks to the Anomaly Expert outside the Celennia Wexworth Memorial Library in Eastern Adoulin at (G-10) to receive a Yantric Planchette key item utilized to pass through the Veil corresponding to the traded rock and into a Fracture.
Cirdas Caverns (U)
- Players must obtain any one of the following before trading an Alizarin, Celadon, or Zaffre Yggrete Rock for the corresponding Yantric Planchette:
Yorcia Weald (U)
- To trade a Phlox, Aster, or Russet Yggrete Rock for the corresponding planchette, players must obtain any one of the following:
- And have defeated all of the following:
After receiving the Planchette, players can then trade Yggzi Beads from the corresponding area to enhance the Planchette and remove the Notorious Monsters from which the beads were obtained from the Fracture NM Combat phase (up to three beads may be used per planchette to remove three notorious monsters from the five normally present).
Only the leader of an alliance needs to posses the planchette key item, all other members can enter as long as they fulfill the level requirement (95+). After obtaining the planchette (and adding beads, if desired), Fractures can be entered at the three veil locations. There are no restrictions on re-entry other than obtaining a new planchette.
Note that occasionally upon entering the fracture, a message will be received that states "You hear a subtle mumbling sound." When this occurs, one or more of the notorious monsters in the Fracture will trigger the message "You feel a tense pressure gripping the air..." upon aggression. When this notorious monster is defeated it will yield an extra Airlixir +1 (or an extra Airlixir +2, if it is the zone boss).
Fracture Battles
After entering a fracture, the group will have 45 minutes to accomplish their goals. The Fracture is composed of three sections which are progressively deeper inside Cirdas Caverns (U) or Yorcia Weald (U). Progression occurs as time elapses or as NMs are removed from the fracture (by defeat or by beads utilized on the Planchette).
- First Section: NMs I, II, III
- Second Section: NMs IV, V (Accessible after NMs I, II, and III are gone from the fracture or after 15 minutes have elapsed)
- Boss Section: Boss monster (Accessible only after all NMs I, II, III, IV, and V are gone from the fracture)
Field NMs and Fracture NMs themselves are identical; however, the drops available are different. Field NMs have a chance to drop Yggzi Beads while Fracture NMs do not; however, obtaining one of the available unique equipment drops is guaranteed from Fracture NMs and a rare occurrence in the field. Airlixirs and associated key items are guaranteed in either case. The NMs inside the fracture are scattered among a large number of normal monsters which respawn on a regular timer:
- Morimar Fracture: Fugacious Lizard, Fugacious Eft, Fugacious Bugard, Fugacious Wivre
- Foret Fracture: Fugacious Crab, Fugacious Kraken, Fugacious Toad
- Ceizak Fracture: Fugacious Eruca, Fugacious Beetle, Fugacious Diremite, Fugacious Luckybug
- Yorcia Fracture:
- Marjami Fracture:
- Kamihr Fracture:
Within each Fracture, every three minutes a zone message will warn players of a unique buffing effect that all monsters in the zone (including NMs) will receive for 30 seconds. These buffing effects will no longer occur once the boss section is opened.
- Morimar Fracture: Significant attack bonus
- Foret Fracture: Ice Spikes effect
- Ceizak Fracture: Significant evasion bonus
- Yorcia Fracture:
- Marjami Fracture:
- Kamihr Fracture:
All monsters defeated in the Fracture yield Mweya Plasm. NMs and boss monsters have a cumulative multiplier (defeating more than one NM in a Fracture multiplies its normal plasm yield by the number defeated):
- Normal Monsters: 50 plasm each
- NMs I, II, III: 500 plasm each (× multiplier)
- NMs IV, V: 750 plasm each (× multiplier)
- Boss: 10,000 plasm (× multiplier)
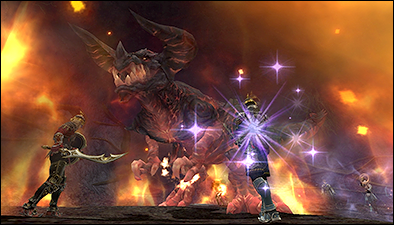
Boss Battles
Once all notorious monsters within a fracture have been removed either by utilizing Yggzi Beads or defeating them, the boss chamber will become accessible. The boss monsters are extremely difficult versions of the Naakuals found in Wildskeeper Reives and their rewards are some of the most powerful armor, weapons, and accessories in the game, along with materials used in crafting and obtaining others. If one is successfully defeated, the Fracture will be completed and the time remaining will be set to five minutes to allow for loot distribution.
Rewards
See also: Delve Rewards
The reward structure in Delve is unique in that all equipment can be obtained in two ways: either a direct drop from notorious monsters/bosses or purchased with Mweya Plasm which can be collected in various ways as long as a notorious monster which can drop the item has been defeated at least once. Additionally, the primary (non-boss) sets of Delve armor can be diversified and upgraded in stages through a set augmentation system by utilizing Airlixirs, also obtained through Delve.
Equipment
Each individual notorious monster in Delve has two or more assigned equipment drops which will be divided depending on the monster tier. Within a fracture, one equipment drop is guaranteed. Outside the fracture, drops are not guaranteed.
- Tier I~III NMs Available Drops: 1-2 upgradable armor pieces, 1 accessory
- Tier IV/V NMs Available Drops: 2-3 upgradable weapons, 1-2 accessories
- Boss Monsters Available Drops: 2-3 weapons, 2 armor pieces, 2 accessories, 2 synthesis materials
NM armor and weapons are upgraded through mezzotinting and applying Airlixirs. Boss armor and weapons cannot be upgraded as they are far more powerful and difficult to acquire than the upgradable pieces and are obtained with their full potential unlocked.
See Delve Rewards for complete information on obtaining equipment.
Airlixirs
There are three varieties of Airlixirs, which have increasingly potent effects on upgrading armor via Mezzotinting towards a higher rank in the armor augmentation process: Airlixir, Airlixir +1, and Airlixir +2.
Upgradable armor and weapons can be "mezzotinted" with Airlixirs by Benjamien at the Inventors' Coalition.
Airlixirs can be obtained as direct drops from both field and fracture NMs (6-7 NQ or +1 per NM defeated), bosses (3-4 +1 or +2 per boss defeated) and occasionally from normal monsters within fracture (0-1 NQ per monster defeated).
Airlixirs can also be purchased for Mweya Plasm (see below) after any one yggzi key item has been obtained:
 Airlixir: 500 corpuscles
 Airlixir +1: 2,500 corpuscles
 Airlixir +2: 100,000 corpuscles
Mweya Plasm
Plasm plays a key role in obtaining Delve Rewards or forging an Ergon Weapon.
Acquisition
Corpuscles of Mweya Plasm can be obtained in three ways:
- Using Yggrete Shard or Yggzi Bead items as an expendable item will instantly reward Mweya Plasm to the player who used it:
- In Delve I Areas (Ceizak Battlegrounds (Celadon), Morimar Basalt Fields (Alizarin), Foret de Hennetiel (Zaffre)):
- Yggrete Shard I/II/III: 100 corpuscles
- Yggrete Shard IV/V: 150 corpuscles
- Yggzi Bead I/II/III: 1,000 corpuscles
- Yggzi Bead IV/V: 1,500 corpuscles
- In Delve II Areas (Marjami Ravine (Phlox), Yorcia Weald (Russet), Kamihr Drifts (Aster)):
- Yggrete Shard I/II/III: 150 corpuscles
- Yggrete Shard IV/V: 200 corpuscles
- Yggzi Bead I/II/III: 1,500 corpuscles
- Yggzi Bead IV/V: 2,000 corpuscles
- In Delve I Areas (Ceizak Battlegrounds (Celadon), Morimar Basalt Fields (Alizarin), Foret de Hennetiel (Zaffre)):
- Defeating normal monsters inside the Fracture:
- Each defeated monster yields 50 plasm to each player in the alliance.
- Defeating Field and Fracture NMs:
- Notorious monsters yield 500 (I/II/III) or 750 (IV/V) corpuscles of plasm to each player in the alliance at the time of defeat.
- Note that inside the fracture there is a cumulative bonus to defeating more than one NM.
- Plasm obtained from each NM defeated past the first will be multiplied by the number of defeated NMs (x2, x3, x4, or x5).
- Defeating Bosses:
- Bosses yield 10,000 corpuscles of plasm to each player in the alliance, times the NM multiplier bonus (30,000 plasm minimum, 60,000 maximum).
Exchange
Mweya Plasm can be exchanged at the NPC Forri-Porri near the Inventors' Coalition in Western Adoulin (only present if the Emblem edification is installed on the Inventors' Coalition). The items available for exchange will depend on which NMs have been defeated - acquiring key items from defeating the NMs (either in the field or in the Fracture) and bosses unlocks the ability to purchase the equipment they are associated with. Note that ammunition and certain accessories are available only from plasm exchange, not as NM drops.
Monthly Adventurer Campaigns
There are two types of campaigns that may run any given month.
Delve Campaign
- When this Monthly Adventurer Campaign is active, Delve will receive the following adjustments for the duration of the campaign:
- Players will earn double the usual amount of Mweya Plasm from defeating Delve monsters.
- Twice the usual amount of Mweya Plasm will drop when clearing Delve.
- Note: This campaign was only run twice, and has been replaced with the Delve Campaign - PLUS! below. It is unlikely that this campaign will run again, as the only difference are Airlixir drops.
Delve Campaign - PLUS!
- When this Monthly Adventurer Campaign is active, Delve will receive the following adjustments for the duration of the campaign:
- Players will earn double the usual amount of Mweya Plasm from defeating Delve monsters.
- Twice the usual amount of Mweya Plasm will drop when clearing Delve.
- Monsters may drop Airlixir +1s and Airlixir +2s when vanquished.
- Overall, it is possible to obtain 180,000+ Plasm for one run upon clearing an entire Delve zone during this campaign.
Pages in category "Delve"
The following 73 pages are in this category, out of 73 total.
